Graco 300-08-81 Assembly Instructions
Graco 300-08-81 - Sarah Dressing Table Manual
 |
View all Graco 300-08-81 manuals
Add to My Manuals
Save this manual to your list of manuals |
Graco 300-08-81 manual content summary:
- Graco 300-08-81 | Assembly Instructions - Page 1
to help you quickly assemble your product. Before you begin we recommend that you follow the steps below: 1. Please read the instructions thoroughly 2. Identify all parts and hardware, and 3. You will need the following tools: Philips Head screw driver Flat head screw driver Hammer Pliers - Graco 300-08-81 | Assembly Instructions - Page 2
Furniture Care Instructions Room Climate Control Wood, when first cut contains more than 50 any fine wood product. The Ideal Environment for Fine Furniture Fine wood furniture will have fewer problems when its environment is controlled at a temperature between 65 and 75 degrees and a relative - Graco 300-08-81 | Assembly Instructions - Page 3
STOP IF YOU EXPERIENCE ANY ISSUES WITH THIS PRODUCT BEFORE YOU RETURN THIS TO THE RETAILER PLEASE FOLLOW PROCEDURES ON THE REVERSE SIDE OF THIS FORM. BULLETIN NO. A-PAP00-00 3 - Graco 300-08-81 | Assembly Instructions - Page 4
help with your purchase please contact us at any time. Procedures to follow should you have any questions: For best and most timely service please contact us by e-mail at [email protected] Please provide the following information in your e-mail. 1. Your Name 2. Address 3. Phone number 4. Place - Graco 300-08-81 | Assembly Instructions - Page 5
ALWAYS KEEP CHILD WITHIN ARM'S REACH. . THIS PRODUCT NOT TO BE USED AS A CHANGING TABLE UNLESS EQUIPPED WITH CHANGING PAD AS DESCRIBED BELOW. . READ ALL INSTRUCTIONS BEFORE USE OF THE CHANGING TABLE OR THE CHANGING PAD. . DO NOT USE THIS DRESSING/CHANGING TABLE OR CHANGING PAD IF THERE ARE ANY LOOSE - Graco 300-08-81 | Assembly Instructions - Page 6
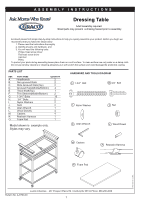
A S S E M B L Y I N S T R U C T I O N S (continued) Dressing Table Assembly Step 1 B Attach the two non-grooved rails(B) C to the top left and right positions on B one of the headboards(A) using wood dowels & 1-3/4″ Bolts(G). G A C Attach the two wide grooved L rails(C) to the middle - Graco 300-08-81 | Assembly Instructions - Page 7
A S S E M B L Y I N S T R U C T I O N S (continued) Step 3 Attach the other headboard(A) to the rails using 1-3/4″ Bolts(G) and Wood Dowels(L). See Figure 3. Model shown is example only. Styles may vary. B C D D Figure 3 B C L A G D G D G G G G K Step 4 Insert the casters (M) as shown in - Graco 300-08-81 | Assembly Instructions - Page 8
A S S E M B L Y I N S T R U C T I O N S (continued) Step 5 Place the Restraint Harness(N) and align the hole on the Harness Strap end to the hole on the thick shelf (E).Attach the Strap to the shelf by inserting an Allen Head bolt (H) through a washer (I),the Strap(N) and the Shelf hole.Secure with
-
 1
1 -
 2
2 -
 3
3 -
 4
4 -
 5
5 -
 6
6 -
 7
7 -
8
 |
 |
ASSEMBLY INSTRUCTIONS
PRINTED IN CHINA
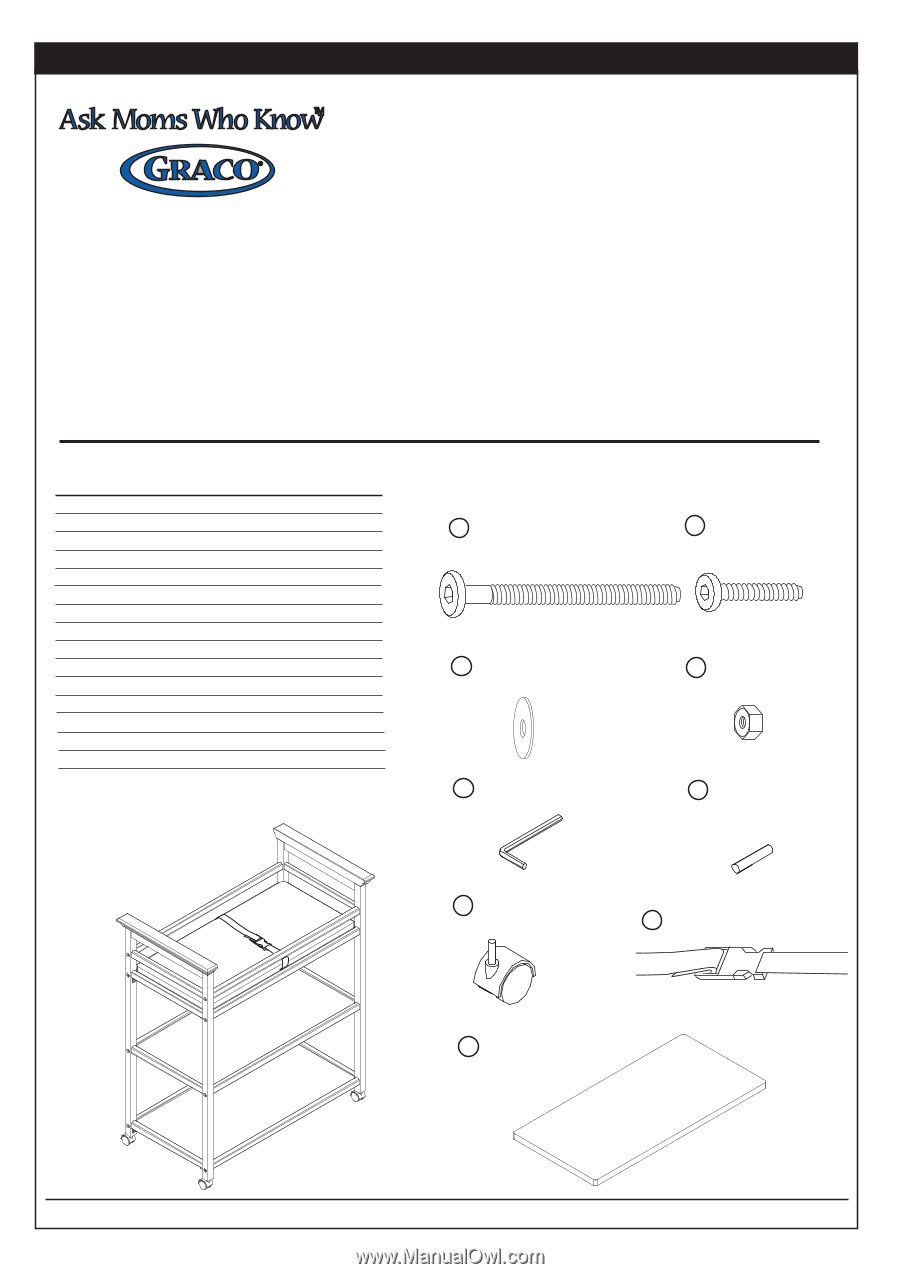
HARDWARE AND TOOLS DIAGRAM
1
LaJobi Industries. - 257 Prospect Plains Rd. Cranbury,NJ 08512-Phone: 888-266-2848
Bulletin No. A-DT00-00
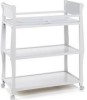
Dressing Table
Adult assembly required.
Small parts may present
a choking hazard prior to assembly.
PARTS LIST
REF.
PART NAME
QUANTITY
A
.
Headboards
2
B
.
Non-grooved Rails
2
C
.
Wide
Grooved Rails(Top)
2
D
.
Grooved Rails(Middle/Bottom)
4
E
.
Thick Shelf(Top)
1
F.
Thin Shelves(Middle/Bottom)
2
G.
1-3/4 " Bolts
16
H.
3/4 " Bolts
2
I.
Nylon Washers
2
J.
Nuts
2
K.
Allen Wrench
1
L.
Wood Dowels
4
M.
Casters
4
N.
Restraint Harness
1
O.
Foam Pad
1
I
H
Enclosed please find simple step-by-step instructions to help you quickly assemble your product. Before you begin we
recommend that you follow the steps below:
1. Please read the instructions thoroughly
2. Identify all parts and hardware, and
3. You will need the following tools:
Philips Head screw driver
Flat head screw driver
Hammer
Pliers.
To protect your parts during assembly please place them on a soft surface. To clean surface use only water on a damp cloth.
Do not use window cleaners or cleaning abrasives as it will scratch the surface and could damage the protective coating.
1-3/4"
Bolt
Nylon Washer
G
Model shown is
example only.
Styles may vary.
Restraint Harness
N
Foam Pad
O
Casters
M
Wood Dowel
Nut
Allen Wrench
3/4"
Bolt
J
K
L