Graco 8C04WCL2 Instruction Manual
Graco 8C04WCL2 - ComfortSport Convertible Car Seat Manual
 |
UPC - 047406092062
View all Graco 8C04WCL2 manuals
Add to My Manuals
Save this manual to your list of manuals |
Graco 8C04WCL2 manual content summary:
- Graco 8C04WCL2 | Instruction Manual - Page 1
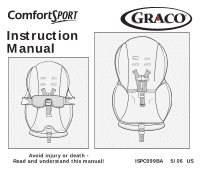
Instruction Manual Avoid injury or death Read and understand this manual! ISPC099BA 5/06 US - Graco 8C04WCL2 | Instruction Manual - Page 2
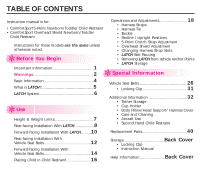
Instruction manual is for: • ComfortSport 5-Point Newborn/Toddler Child Restraint • ComfortSport Overhead Shield Newborn/Toddler Child Restraint Operations and Adjustments 18 • Harness Straps • Harness Tie • Buckle • Recline / Upright Positions Instructions Body Pillow/Head Support/ Harness Cover - Graco 8C04WCL2 | Instruction Manual - Page 3
-0123 in D.C. area) • TTY: (1-800-424-9153), or http://www.NHTSA.gov • Call Graco Children's Products Inc. at 1-800-345-4109 www.gracobaby.com c Safety First Check List 4 Read and understand instruction manual and child restraint labels. 4 Infants less than 20 lbs. (9 kg) must use child restraint - Graco 8C04WCL2 | Instruction Manual - Page 4
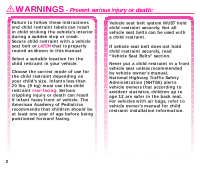
or death: Failure to follow these instructions and child restraint labels can result in child striking the vehicle's interior during a sudden stop or crash. Secure child restraint with a vehicle seat belt or LATCH that is properly routed as shown in this manual. Select a suitable location for the - Graco 8C04WCL2 | Instruction Manual - Page 5
or death. DO NOT use child restraint if it is damaged or missing parts. DO NOT use accessories or parts other than those provided by Graco. Their use could alter the performance of the child restraint. Rear-facing child restraint must be properly leveled: • Too reclined can result in injury or - Graco 8C04WCL2 | Instruction Manual - Page 6
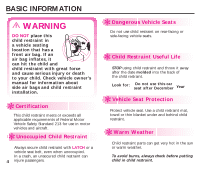
, it can hit the child and child restraint with great force and cause serious injury or death to your child. Check vehicle owner's manual for information about side air bags and child restraint installation. c Certification This child restraint meets or exceeds all applicable requirements of Federal - Graco 8C04WCL2 | Instruction Manual - Page 7
for CH ildren. LATCH System for Vehicles: LATCH in the vehicle consists of a top tether anchor point and two lower anchor points. Some vehicle owner manuals use the term ISOFIX to identify the new child restraint anchorage system. This child restraint with LATCH can also be used in vehicle seating - Graco 8C04WCL2 | Instruction Manual - Page 8
LATCH SYSTEM LATCH System: LATCH consists of a permanently attached lower anchorage belt and a top tether strap (Fig. a). Vehicle ONLY use LATCH in a seating Top Tether position recommended Anchor by vehicle manufacturer. Point Child Restraint Top Tether LATCH is defined as anchorages 280mm - Graco 8C04WCL2 | Instruction Manual - Page 9
or aircraft. According to the American Academy of Pediatrics, these infants may suffer breathing difficulties if improperly reclined in a child restraint. Graco advises that you have your physician or hospital staff evaluate your infant and recommend the proper child restraint or car bed before you - Graco 8C04WCL2 | Instruction Manual - Page 10
belt stays tight and does not slip from the tightened position. If it does not stay tight, try another seating position or contact Customer Service (see back cover). 7 Check level indicator on child restraint. Vehicle must be on level ground and child in child restraint when checking level indicator - Graco 8C04WCL2 | Instruction Manual - Page 11
REAR-FACING INSTALLATION WITH LATCH (continued): Recline position (fig. a) Openings (fig. b) Towels LATCH Recline Position Tether LAPC0110A (fig. f) (fig. c) (fig. d) (fig. e) 9 - Graco 8C04WCL2 | Instruction Manual - Page 12
belt stays tight and does not slip from the tightened position. If it does not stay tight, try another seating position or contact Customer Service (see back cover). 7 Attach tether strap hook (A) to anchor hardware (B) and tighten adjustment belt to remove any slack (fig. f). Belt must lay flat - Graco 8C04WCL2 | Instruction Manual - Page 13
FORWARD-FACING INSTALLATION WITH LATCH (continued): Tether Pull to tighten (A) Lock Position Openings (B) (fig. f) Upright Position (fig. a) LATCH Upright Position (fig. e) (fig. b) (fig. c) (fig. d) 11 - Graco 8C04WCL2 | Instruction Manual - Page 14
REAR-FACING INSTALLATION WITH VEHICLE SEAT BELTS WARNING LATCH belt MUST be stored when using vehicle seat belt to install child restraint. 1 Store LATCH belt by attaching to connectors through forward-facing openings (see page 25, fig. r). • Attach connectors to storage bar on each side (fig. a). - Graco 8C04WCL2 | Instruction Manual - Page 15
REAR-FACING INSTALLATION WITH VEHICLE SEAT BELTS (continued): Storage Bar Openings Tether LATCH (stored) Towels Recline Position Installation with Lap/shoulder belt LAPC0110A (fig. e) Installation with Lap belt only (fig. d) (fig. a) Recline position (fig. b) (fig. c) 13 - Graco 8C04WCL2 | Instruction Manual - Page 16
FORWARD-FACING INSTALLATION WITH VEHICLE SEAT BELTS WARNING LATCH belt MUST be stored when using vehicle seat belt to install child restraint. 5 Pull front to back and left to right to check for secure installation (fig. e). Vehicle lap belt MUST stay tight. If not secure, see "Vehicle Seat Belts" - Graco 8C04WCL2 | Instruction Manual - Page 17
FORWARD-FACING INSTALLATION WITH VEHICLE SEAT BELTS (continued): Tether Openings (fig. a) Lock Position Storage Bar LATCH (stored) Upright Position Installation with Lap/shoulder belt Installation with Lap belt only Pull to tighten (A) (B) (fig. f) Upright Position (fig. b) (fig. c) (fig. d) - Graco 8C04WCL2 | Instruction Manual - Page 18
covers, blankets, cushions, or padding under harness straps or child unless provided by Graco. • Child should be dressed in clothing that does not interfere with buckling the A rolled towel can be used on each side to support small children (fig. b). Be sure towels do not interfere with harness system. Towels - Graco 8C04WCL2 | Instruction Manual - Page 19
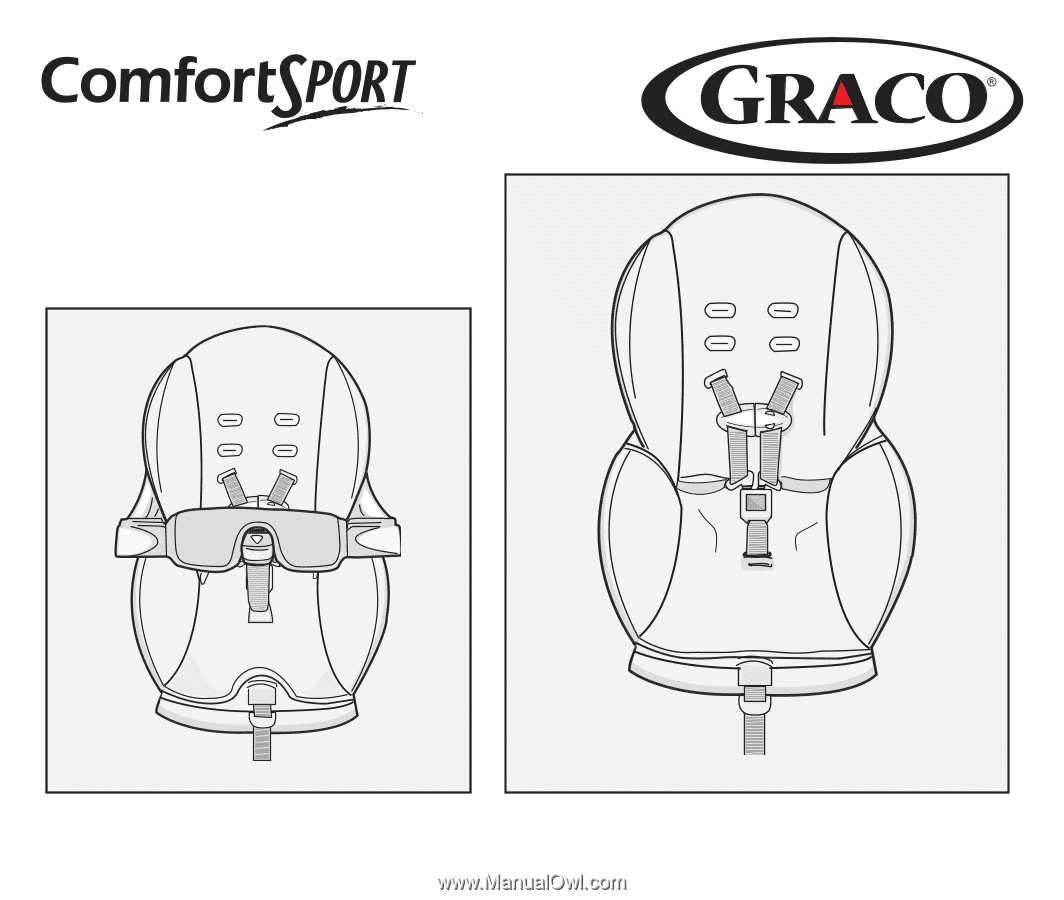
PLACING CHILD IN CHILD RESTRAINT (continued) 5-MPooidnetls OveSrhhMieeoaldddels 3 3 2 2 4 4 (fig. a) (fig. b) 17 - Graco 8C04WCL2 | Instruction Manual - Page 20
OPERATIONS and ADJUSTMENTS 1 Harness Straps (fig. a): • To tighten: Pull lower belt. • To loosen: Pull and hold upper belt tab while pulling shoulder harness straps. 2 Harness Tie: • To open: Press tabs and pull apart. • To close: Snap halves together. Make sure harness tie is locked by pulling out - Graco 8C04WCL2 | Instruction Manual - Page 21
OPERATIONS and ADJUSTMENTS (continued) 5-MPooidnetls 1 2 OveSrhhMieeoaldddels 1 2 3 4 Upper Tab (to loosen) Lower Belt (to tighten) (fig. a) Upright Recline (fig. b) Clip (fig. c) 3 4 (fig. d) 19 - Graco 8C04WCL2 | Instruction Manual - Page 22
OPERATIONS and ADJUSTMENTS (continued) 7 Changing Harness Strap Slots: A Loosen harness straps: Pull and hold upper belt tab. Pull harness straps out. B Remove both shoulder harness strap loops from Splitter Plate on back of child restraint. C Change harness strap slots. Make sure harness straps - Graco 8C04WCL2 | Instruction Manual - Page 23
OPERATIONS and ADJUSTMENTS (continued) 5-MPooidnetls OveSrhhieeoaldddels M Top Loop Bottom Loop (fig. e) Loop Splitter Plate (fig. f) Stand (fig. g) 21 - Graco 8C04WCL2 | Instruction Manual - Page 24
OPERATIONS and ADJUSTMENTS (continued) 8 LATCH Belt Routing: LATCH belt MUST be routed through the proper openings depending on direction of child restraint use. A Remove pad from front of seat area by pulling out 2-button clips on lower front edge of child restraint (fig. h) and 2-button clip in - Graco 8C04WCL2 | Instruction Manual - Page 25
OPERATIONS and ADJUSTMENTS (continued) Route LATCH belt through Rear-facing openings for: • LATCH Rear-facing use. or • LATCH storage with Forward-facing vehicle seat belt use. Pg. 25, fig. q. Route LATCH belt through Forward-facing openings for: • LATCH Forward-facing use. or • LATCH storage with - Graco 8C04WCL2 | Instruction Manual - Page 26
OPERATIONS and ADJUSTMENTS (continued) 9 Removing LATCH from Vehicle Anchor Points: A Tilt metal tab of adjuster to release tension (fig. m). Press down on child restraint compressing vehicle seat cushion to reduce tension on lower anchorage belt. B Press and hold LATCH release hinge. (fig. n). - Graco 8C04WCL2 | Instruction Manual - Page 27
OPERATIONS and ADJUSTMENTS (continued) 10 LATCH storage: • Locate LATCH storage bars under arm rest on sides of child restraint (fig. p). • Fasten LATCH onto storage bar as shown. (fig. q or r) Repeat for other side of seat. LATCH storage bar (fig. p) (fig. q) (fig. r) 25 - Graco 8C04WCL2 | Instruction Manual - Page 28
labels on vehicle seat belt and child restraint. If child restraint is not held securely after following instructions in this manual, vehicle seat belt labels, and vehicle owner's manual: • Move child restraint to another seating location and try again, or • Contact vehicle dealer for possible seat - Graco 8C04WCL2 | Instruction Manual - Page 29
) c Belts Forward of Seat Crease Vehicle seat belts located forward of seat crease may not securely hold child restraint. Check vehicle owner's manual or see vehicle dealer for car seat installation requirements. • If approved for use with child restraint, install child restraint and check for - Graco 8C04WCL2 | Instruction Manual - Page 30
VEHICLE SEAT BELTS (continued) c Lap Belts - Manually Adjustable The locking latch plate on some seat belts may slip and loosen after being buckled on child restraint if positioned at a certain angle. If - Graco 8C04WCL2 | Instruction Manual - Page 31
VEHICLE SEAT BELTS (continued) c Passive Restraint - Lap Belt with Motorized Shoulder Belt DO NOT use with any child restraint. c Passive Restraint - Lap or Shoulder Belt Mounted on Door DO NOT use with any child restraint. Belts will not stay tight while driving. 29 - Graco 8C04WCL2 | Instruction Manual - Page 32
latch plates may be converted into an "automatic locking mode" that will allow use without a locking clip. See vehicle owner's manual and label on vehicle belts for instructions. c Combination Lap/Shoulder Belt with Locking Latch Plate The locking latch plate on some seat belts may slip and loosen - Graco 8C04WCL2 | Instruction Manual - Page 33
VEHICLE SEAT BELTS (continued) c Locking Clip WARNING Avoid serious injury or death: • Failure to use locking clip where required will result in child restraint not being securely held in place. • Remove locking clip from seat belts when not being used with child restraint. • DO NOT use locking - Graco 8C04WCL2 | Instruction Manual - Page 34
ADDITIONAL INFORMATION c Tether Storage DO NOT anchor tether strap to the vehicle when using child restraint rear-facing. Tether hook must be attached to child restraint for rear-facing use or if vehicle is not equipped with tether anchors. For storage of tether hook: • Attach tether hook to back of - Graco 8C04WCL2 | Instruction Manual - Page 35
ADDITIONAL INFORMATION c Cup Holder WARNING Never place sharp or pointed objects in a cupholder. In a crash, these objects could hit your child and cause serious injuries. Available on some models: • Insert the two prongs of the cupholder into the two slots on either the left or right side of the - Graco 8C04WCL2 | Instruction Manual - Page 36
interfere with the harness system or vehicle belt. • Do not allow pillow to bunch under or behind child's body. • This product is designed ONLY for Graco ComfortSport convertible child restraints. 34 - Graco 8C04WCL2 | Instruction Manual - Page 37
harness straps positioned on shoulders and adjusted snugly. • Do not use strap covers, blankets, cushions, or padding under harness straps or child unless provided by Graco. Position Head Support in center of car seat with ends pointing down and snap into belt slots above harness as shown. Head - Graco 8C04WCL2 | Instruction Manual - Page 38
ADDITIONAL INFORMATION (continued) c Head Support (available on some models) WARNING To prevent ejection in sudden stop or crash: • shoulder straps must be threaded through slots and properly positionned on shoulders. - Graco 8C04WCL2 | Instruction Manual - Page 39
ADDITIONAL INFORMATION (continued) c Harness Covers (available on some models) WARNING • Make sure the harness system is properly secured. • Check that harness straps are not twisted. • Make sure that harness covers do not interfere with placement of the chest clip. Harness Covers 37 - Graco 8C04WCL2 | Instruction Manual - Page 40
ADDITIONAL INFORMATION (continued) c Care & Cleaning Removing Seat Pad (all models): Remove both harness strap loops from 1 Splitter Plate on back of child restraint and pull through front of pad. Open harness tie, release tongues from buckle. (see pages 1 18-21) 1 Unhook "J" hooks from - Graco 8C04WCL2 | Instruction Manual - Page 41
a vehicle when using a vehicle seat belt. Buckle: Rinse buckle with warm water. DO NOT use household detergents. Never lubricate buckle. 39 c Second Hand Child Restraint Graco Children's Products Inc. advises against loaning or passing along a child restraint. - Graco 8C04WCL2 | Instruction Manual - Page 42
REPLACEMENT PARTS To purchase parts or accessories in the United States, please contact us at the following: www.gracobaby.com or 1-800-345-4109 40 - Graco 8C04WCL2 | Instruction Manual - Page 43
NOTES 41 - Graco 8C04WCL2 | Instruction Manual - Page 44
's Products 150 Oaklands Blvd. Exton, PA 19341 Attention: Customer Service Department or visit our internet website: www.gracobaby.com 1 Fold instruction manual. 2 Store instruction manual behind this tab. Store locking clip here. Graco Children's Products Inc. A Division of Newell Rubbermaid 150 - Graco 8C04WCL2 | Instruction Manual - Page 45
Manual de instrucciones Evite lesiones o la muerte ¡Lea detenidamente este manual! ISPC099BA 5/06 US - Graco 8C04WCL2 | Instruction Manual - Page 46
TABLA DE CONTENIDO Este manual de instrucciones está indicado para el uso del: • Asiento de seguridad ComfortSport de 5 puntos • para recién nacidos / niños de corta edad • Asiento de seguridad ComfortSport con barra • protectora para recién nacidos / niños de corta edad Las instrucciones para - Graco 8C04WCL2 | Instruction Manual - Page 47
-0123 en la zona de Washington D.C) • TTY: (1-800-424-9153), o http://www.NHTSA.gov • Llame a Graco Children's Products Inc. al 1-800-345-4109 c Lista de control de seguridad 4 Lea detenidamente este manual de instrucciones y las etiquetas del asiento de seguridad. 4 Los niños de peso inferior a 20 - Graco 8C04WCL2 | Instruction Manual - Page 48
o un accidente. Sujete el asiento con un cinturón de seguridad del vehículo o un sistema LATCH que esté bien colocado según las indicaciones de este manual. Elija el lugar adecuado para el asiento de seguridad en su vehículo. Elija el modo de empleo correcto para el asiento de seguridad de - Graco 8C04WCL2 | Instruction Manual - Page 49
de edad viajan más seguros en el asiento trasero. Remítase al manual del propietario del vehículo para obtener información sobre la instalación de aire. NO use accesorios o piezas que no sean los proporcionados por Graco, ya que ello podría alterar el rendimiento del asiento de seguridad. - Graco 8C04WCL2 | Instruction Manual - Page 50
puede golpear al niño y al sistema de seguridad para niños con mucha fuerza y causar lesiones serias o la muerte de su niño.Consulte el manual del propietario del vehículo para obtener información sobre las bolsas de aire laterales y la instalación del sistema de seguridad para niños. c Certificaci - Graco 8C04WCL2 | Instruction Manual - Page 51
niños Sistema LATCH para vehículos: El LATCH del vehículo consta de un punto de anclaje superior y dos puntos de anclaje inferiores. Los manuales del propietario de algunos vehículos emplean el término ISOFIX para definir al nuevo sistema de anclaje para asientos de seguridad para autos. El asiento - Graco 8C04WCL2 | Instruction Manual - Page 52
SISTEMA LATCH El sistema LATCH: El LATCH consta de un cinturón de anclaje inferior permanente y una correa de anclaje superior (Fig. a). Utilice con LATCH ÚNICAMENTE en el asiento recomendado por el fabricante del vehículo. Punto de anclaje superior del vehículo LATCH se define como anclajes de - Graco 8C04WCL2 | Instruction Manual - Page 53
ía de los Estados Unidos), estos niños podrían sufrir dificultades de respiración si son recostados de forma incorrecta en un asiento de seguridad. Graco aconseja que pida a su médico o al personal del hospital que examinen a su niño y que le recomienden un asiento o cama para auto adecuado antes de - Graco 8C04WCL2 | Instruction Manual - Page 54
INSTALACIÓN ORIENTADA HACIA ATRÁS CON LATCH 1 El cinturón LATCH debe pasar por la apertura del asiento de seguridad destinada al modo de orientación trasera. (vea la página 23, fig. k). El cinturón debe mantenerse en posición plana sin torcerse. 2 Coloque el asiento de seguridad en posición - Graco 8C04WCL2 | Instruction Manual - Page 55
INSTALACIÓN ORIENTADA HACIA ATRÁS CON LATCH Posición reclinada (fig. a) Aperturas (fig. b) Toallas LATCH Posición reclinada Anclaje LAPC0110A (fig. f) (fig. c) (fig. d) (fig. e) 9 - Graco 8C04WCL2 | Instruction Manual - Page 56
INSTALACIÓN ORIENTADA HACIA DELANTE CON LATCH 1 El cinturón LATCH debe pasar por la apertura del asiento de seguridad destinada al modo de orientación delantera (vea la página 23, fig. l). El cinturón debe quedar plano y no torcido. 2 Ajuste el asiento de seguridad a la posición vertical (vea fig. - Graco 8C04WCL2 | Instruction Manual - Page 57
INSTALACIÓN ORIENTADA HACIA DELANTE CON LATCH Anclaje Jale para apretar (A) Posición trabada Aperturas (B) (fig. f) Posición vertical (fig. a) LATCH Posición vertical (fig. e) (fig. b) (fig. c) (fig. d) 11 - Graco 8C04WCL2 | Instruction Manual - Page 58
INSTALACIÓN DE ORIENTACION TRASERA CON LOS CINTURONES DE SEGURIDAD DEL VEHÍCULO ADVERTENCIA El cinturón LATCH DEBE almacenarse cuando se utilice el cinturón de seguridad del vehículo para instalar el asiento de seguridad. 1 Almacene el cinturón LATCH conectando los conectores por las aperturas para - Graco 8C04WCL2 | Instruction Manual - Page 59
INSTALACIÓN DE ORIENTACION TRASERA CON LOS CINTURONES DE SEGURIDAD DEL VEHÍCULO Barra de almacenaje Aperturas Anclaje LATCH (almacenar) Instalación con cinturón de seguridad para la cintura solamente Toallas Posición reclinada Instalación con cinturón de seguridad para la cintura / hombro - Graco 8C04WCL2 | Instruction Manual - Page 60
INSTALACIÓN ORIENTADA HACIA DELANTE CON LOS CINTURONES DE SEGURIDAD DEL VEHÍCULO ADVERTENCIA El cinturón LATCH DEBE almacenarse cuando se use el cinturón de seguridad del vehículo para instalar el asiento de seguridad. 1 Almacene el cinturón LATCH conectando los conectores a través de las aperturas - Graco 8C04WCL2 | Instruction Manual - Page 61
INSTALACIÓN ORIENTADA HACIA DELANTE CON LOS CINTURONES DE SEGURIDAD DEL VEHÍCULO Anclaje Aperturas Barra de almacenaje (fig. a) Posición trabada Instalación con cinturón de seguridad para la cintura solamente Jale para apretar LATCH (almacenar) Posición vertical Instalación con cinturón de - Graco 8C04WCL2 | Instruction Manual - Page 62
correas del arnés para que estén apretadas. • No ponga almohadillas, mantas ni cojines debajo de las correas o del niño, a menos que sean proporcionados por Graco. • El niño debe llevar ropa que no estorbe al abrochar el arnés. Compruebe el sistema del arnés: • Orientado hacia atrás - 5 a 30 libras - Graco 8C04WCL2 | Instruction Manual - Page 63
COLOCAR AL NIÑO EN EL ASIENTO DE SEGURIDAD Mod5eplousndtoes Mbaordrealopsroctoenctora 3 3 2 2 4 4 (fig. a) (fig. b) 17 - Graco 8C04WCL2 | Instruction Manual - Page 64
OPERACIONES Y AJUSTES 1 Correas del arnés (fig. a): 4 Posiciones reclinada / vertical (fig. b): • Para apretar: Jale del cinturón inferior. • Para soltar: Jale la lengüeta superior del cinturón y sosténgala al tiempo que jala las correas de los hombros. 2 Cierre del arnés: • Para abrir: Oprima - Graco 8C04WCL2 | Instruction Manual - Page 65
OPERACIONES Y AJUSTES Mod5eplousndtoes 1 2 bMaordraelporsoctoenctora 3 4 Lengüeta superior (para soltar) Cinturón inferior (para apretar) (fig. a) Vertical Reclinada (fig. b) Clip (fig. c) 1 2 3 4 (fig. d) 19 - Graco 8C04WCL2 | Instruction Manual - Page 66
OPERACIONES Y AJUSTES 7 Cambiar las ranuras de las correas del arnés: D Vuelva a conectar los bucles de las correas A Suelte las correas del arnés: del arnés a la placa de unión: Modelos de 5 puntos (fig. e): Jale la lengüeta superior del cinturón y sosténgala al tiempo que jala las correas de - Graco 8C04WCL2 | Instruction Manual - Page 67
OPERACIONES Y AJUSTES Mod5eplousndtoes bMaordraelporsoctoenctora Bucle superior Bucle inferior (fig. e) Bucle Placa de unión Soporte (fig. f) (fig. g) 21 - Graco 8C04WCL2 | Instruction Manual - Page 68
OPERACIONES Y AJUSTES 8 Colocación del cinturón LATCH: El cinturón LATCH DEBE pasar por las aperturas adecuadas según la orientación del asiento. A Quite la almohadilla de la parte delantera del asiento, sacando los clips de dos botones en el borde delantero inferior del asiento (fig. h) y la traba - Graco 8C04WCL2 | Instruction Manual - Page 69
OPERACIONES Y AJUSTES Pase el cinturón LATCH por las aperturas de orientación hacia atrás para: • usar el sistema LATCH orientado hacia atrás. o • Almacenaje LATCH con el uso del cinturón de seguridad del vehículo orientado hacia delante. Pág. 25, fig q. Pase el cinturón LATCH por las aperturas de - Graco 8C04WCL2 | Instruction Manual - Page 70
OPERACIONES Y AJUSTES 9 Retirar el LATCH de los puntos de anclaje del vehículo: A Incline la lengüeta metálica del dispositivo de ajuste para soltar la tensión (fig. m). Oprima el asiento, comprimiendo el cojín del asiento del vehículo para reducir la tensión del cinturón de anclaje inferior. B - Graco 8C04WCL2 | Instruction Manual - Page 71
OPERACIONES Y AJUSTES 10 Almacenaje LATCH: • Ubique las barras de almacenaje LATCH debajo la almohadilla del asiento en el lado del asiento de seguridad infantil (fig. p). • Abroche el sistema LATCH en la barra de almacenaje como se indica. (fig. q o r) Repita para el otro lado del asiento. Barra - Graco 8C04WCL2 | Instruction Manual - Page 72
del cinturón de regazo/hombro que no cambie de longitud. Para lograr la instalación del asiento de seguridad más segura: • Lea la sección del manual del propietario del vehículo referente a la instalación de los asientos de seguridad y el uso de los cinturones de seguridad con los asientos. • Siga - Graco 8C04WCL2 | Instruction Manual - Page 73
del asiento Los cinturones de seguridad del vehículo ubicados delante del pliegue en el asiento quizá no sujeten bien el asiento. Consulte el manual del propietario del vehículo o visite el concesionario del vehículo para informarse sobre los requisitos de instalación de los asientos. • Si queda - Graco 8C04WCL2 | Instruction Manual - Page 74
CINTURONES DE SEGURIDAD DEL VEHÍCULO c Cinturones de regazo ajustables manualmente La placa de cierre en algunos cinturones de seguridad se puede deslizar y soltar tras abrocharla al asiento en ciertos ángulos. En este caso, dé la vuelta a la placa de cierre (fig. a) y vuelva a abrocharla. - Graco 8C04WCL2 | Instruction Manual - Page 75
CINTURONES DE SEGURIDAD DEL VEHÍCULO c Cinturón pasivo - cinturón de regazo con cinturón de hombro motorizado NO SE DEBE usar con ningún asiento. c Cinturón pasivo - cinturón de regazo y hombro montado en la puerta NO SE DEBE usar con ningún asiento. Los cinturones no se mantendrán apretados durante - Graco 8C04WCL2 | Instruction Manual - Page 76
con placas de cierre deslizantes se pueden convertir al "modo de cierre automático" que permitirá utilizarlos sin clip de cierre. Consulte el manual del propietario del vehículo y lea la etiqueta ubicada en los cinturones para ver las instrucciones. c Cinturón combinado de regazo / hombro con una - Graco 8C04WCL2 | Instruction Manual - Page 77
CINTURONES DE SEGURIDAD DEL VEHÍCULO c Clip de cierre ADVERTENCIA Evite lesiones graves o la muerte: • No usar el clip de cierre cuando se requiere impide que el asiento quede bien sujeto. • Quite el clip de cierre de los cinturones de seguridad cuando no lo utilice con el asiento. • NO use el clip - Graco 8C04WCL2 | Instruction Manual - Page 78
INFORMACIÓN ADICIONAL c Almacenaje del anclaje NO conecte la correa de anclaje superior al vehículo al utilizar el asiento orientado hacia atrás. El gancho del anclaje debe conectarse cuando el asiento se usa en orientación trasera o si el vehículo no viene equipado con los anclajes correspondientes - Graco 8C04WCL2 | Instruction Manual - Page 79
INFORMACIÓN ADICIONAL c Apoya vasos ADVERTENCIA Nunca ponga objetos filosos o con punta en el apoya vasos. En un accidente, estos objetos podrían golpear a su niño y causar serias heridas. Disponible en ciertos modelos: • Inserte las dos clavijas del apoya vasos en las dos ranuras del costado - Graco 8C04WCL2 | Instruction Manual - Page 80
la almohada se apretuje debajo o atrás del cuerpo del niño. • Este producto ha sido diseñado SOLAMENTE para los asientos de automóviles convertibles Graco ComfortSport. 34 Empuje la parte de arriba del cojín del cuerpo entre las correas del arnés y póngalo en el asiento exactamente como se indica. - Graco 8C04WCL2 | Instruction Manual - Page 81
ajustadas. • No use cubiertas para las correas, frazadas, cojines o acolchados debajo de las correas del arnés o del niño, a menos que hayan sido provistos por Graco. Coloque el soporte de la cabeza en el centro del asiento para el automóvil con los extremos orientados hacia abajo y trábelo en las - Graco 8C04WCL2 | Instruction Manual - Page 82
INFORMACIÓN ADICIONAL c Soporte de la cabeza (Disponible en algunos modelos) ADVERTENCIA Para prevenir la eyección en un accidente o parada repentina, las correas del hombro deben pasar a través de las ranuras y estar debidamente colocadas sobre los hombros. Destrabe los costados y vuelva a - Graco 8C04WCL2 | Instruction Manual - Page 83
INFORMACIÓN ADICIONAL c Cubiertas del arnés (available on some models) ADVERTENCIA • Asegúrese de que el sistema del arnés esté asegurado correctamente. • Revise que las correas del arnés no estén torcidas. • Asegúrese de que las cubiertas del arnés no interfieran con la colocación del pasador del - Graco 8C04WCL2 | Instruction Manual - Page 84
INFORMACIÓN ADICIONAL c Cuidado y limpieza Retirar la almohadilla (todos los modelos): Retire los dos bucles de las correas del arnés de la 1 placa de unión de la parte trasera del asiento y páselos por la parte delantera de la almohadilla. Desabroche el cierre del arnés, retire las lengüetas - Graco 8C04WCL2 | Instruction Manual - Page 85
que se instala en un vehículo, cuando se usa el cinturón de seguridad del vehículo. c Asiento de seguridad para autos de segunda mano Graco Children's Products Inc. desaconseja prestar o regalar el asiento. 39 - Graco 8C04WCL2 | Instruction Manual - Page 86
PIEZAS DE REPUESTO Para comprar repuestos o accesorios en los Estados Unidos, por favor comuníquese con nosotros en: www.gracobaby.com o 1-800-345-4109 40 - Graco 8C04WCL2 | Instruction Manual - Page 87
NOTAS 41 - Graco 8C04WCL2 | Instruction Manual - Page 88
ón: Departamento de Servicio al Cliente o visítenos en: www.gracobebe.com 1 Doble el manual de instrucciones. 2 Guarde el manual de instrucciones detrás de estas lengüetas. Guarde aquí el clip de cierre. Graco Children's Products Inc. Una división de Newell Rubbermaid 150 Oaklands Blvd. Exton, PA
-
 1
1 -
 2
2 -
 3
3 -
 4
4 -
 5
5 -
 6
6 -
 7
7 -
8
-
9
-
10
-
11
-
12
-
13
-
14
-
15
-
16
-
17
-
18
-
19
-
20
-
21
-
22
-
23
-
24
-
25
-
26
-
27
-
28
-
29
-
30
-
31
-
32
-
33
-
34
-
35
-
36
-
37
-
38
-
39
-
40
-
41
-
42
-
43
-
44
-
45
-
46
-
47
-
48
-
49
-
50
-
51
-
52
-
53
-
54
-
55
-
56
-
57
-
58
-
59
-
60
-
61
-
62
-
63
-
64
-
65
-
66
-
67
-
68
-
69
-
70
-
71
-
72
-
73
-
74
-
75
-
76
-
77
-
78
-
79
-
80
-
81
-
82
-
83
-
84
-
85
-
86
-
87
-
88
 |
 |
Instruction
Manual
ISPC099BA
5/06
US
Avoid injury or death -
Read and understand this manual!