Harbor Freight Tools 62377 User Manual
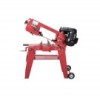
Harbor Freight Tools 62377 - 1 HP 4 in. x 6 Horizontal/Vertical Metal Cutting Band Saw Manual
 |
View all Harbor Freight Tools 62377 manuals
Add to My Manuals
Save this manual to your list of manuals |
Harbor Freight Tools 62377 manual content summary:
- Harbor Freight Tools 62377 | User Manual - Page 1
manual and the receipt in a safe and dry place for future reference. REV 16c Visit our website at: http://www.harborfreight.com Email our technical support slightly from the product described herein. Tools required for assembly and service may not be included. Read this material before using this - Harbor Freight Tools 62377 | User Manual - Page 2
Safety Table of Contents Safetye 3 Specifications 7 Setup 8 Operationa 13 Maintenancei 20 Parts List and Diagram 25 Warranty 28 WARNING SYMBOLS AND DEFINITIONS This is the safety alert symbol. It is used to alert you to potential personal injury hazards. Obey all safety messages that - Harbor Freight Tools 62377 | User Manual - Page 3
at all times. 14. MAINTAIN TOOLS WITH CARE. Keep tools sharp and clean for best and safest performance. Follow instructions for lubricating and changing accessories. 15. DISCONNECT TOOLS before servicing; when changing accessories, such as blades, bits, cutters, and the like. 16. REDUCE THE RISK OF - Harbor Freight Tools 62377 | User Manual - Page 4
qualified electrician or service personnel if the grounding instructions are not completely Warnings For Your Own Safety Read Instruction Manual Before Operating Saw 1. Wear eye guide, blade tension and blade guide bearing before each use to reduce the risk of injury. See Operating Instructions - Harbor Freight Tools 62377 | User Manual - Page 5
located on a flat, level, sturdy surface capable of supporting the weight of the Saw and workpieces. Always "chock" of injury to persons. 24. When servicing use only identical replacement parts. 25. warnings, precautions, and instructions discussed in this instruction manual cannot cover all possible - Harbor Freight Tools 62377 | User Manual - Page 6
a doctor and then have regular medical check‑ups to ensure medical problems are not being caused or worsened from use. Pregnant women or the tool as explained in this manual. If any abnormal vibration occurs, stop use immediately. SAVE THESE INSTRUCTIONS. Setup Operation Maintenance Page 6 For - Harbor Freight Tools 62377 | User Manual - Page 7
Safety Specifications Electrical Rating Motor No Load Speed Blade Speeds Cutting Capacity Throat Depth Angle Cutting Capacity Horizontal Bed Vertical Bed V-Belt Type Blade Size 120VAC / 60 Hz / 6.5 A 1700 RPM 80 FPM / 120 FPM / 200 FPM 4-1/2" Round Stock 4" x 6" Rectangular Stock 4-1/2" 0°- 45° ( - Harbor Freight Tools 62377 | User Manual - Page 8
this section. NOTE: For additional information regarding the parts listed in the following pages, refer to the Assembly Diagram near the end of this manual. Assembly/Mounting To Assemble the Stand 1. Insert the Pull Handle (12) into the two mounting holes located in the upper section of one Stand - Harbor Freight Tools 62377 | User Manual - Page 9
Safety Setup To Attach the Band Saw to the Stand 1. With assistance and an adequate lifting device, carefully set the Band Saw on top of the Stand assembly. Place the motor end of the Saw at the wheeled end of the stand, making sure the upper section of the Stand fits inside the base of the Band - Harbor Freight Tools 62377 | User Manual - Page 10
To Attach the Spindle Pulley and Motor Pulley Safety 1. Slide the Spindle Pulley (99) fully onto the Spindle Shaft (97). Secure the Spindle Pulley to the Spindle Shaft using one Screw (52). Refer to Figure F. 2. Insert the Shaft Key (51) in the slot on the Motor Shaft. Align the slot in the Motor - Harbor Freight Tools 62377 | User Manual - Page 11
Frame and insert the Locking Pin to lock Body Frame into position. Refer to Figure I. Support Plate (127) Body Frame (93) 5. Close the Blade Back Cover and secure with the Screw and Flat Washer. 6. Guide the Saw Blade through the slot in the Vertical Cutting Table (134), and secure the Vertical - Harbor Freight Tools 62377 | User Manual - Page 12
Convert the Band Saw for Horizontal Use 1. Remove the screws (78) holding the Vertical Cutting Table (134) in place. 2. Loosen the Bolt and guide the Vertical Cutting Table Support assembly away from the Saw Blade. Refer to Figure M on page 11. 3. Remove the Screw (113) and Flat Washer (114) to open - Harbor Freight Tools 62377 | User Manual - Page 13
Safety Setup Operating Instructions Read the ENTIRE IMPORTANT SAFETY INFORMATION section at the beginning of this manual including all Frame (93) to its vertical position, and lock the Body Frame in place with the Support Plate (127) and Locking Pin (126). Refer to Figure I on page 11. 2. Open - Harbor Freight Tools 62377 | User Manual - Page 14
Bearing Saw Blade (66) Nut (5) Eccentric Shaft (76) Inner Blade Guide Bearing Axis Pin (69) Bolt (70) Blade Guide Bracket (73) Figure P 1. If a new Saw Blade does not correct the problem, check that the Blade Guide Bracket Seats (67, 74) are clear of the Saw Blade. 2. There should be from - Harbor Freight Tools 62377 | User Manual - Page 15
). 3. Raise the Body Frame to its full vertical position. Turn the Support Plate (127) clockwise until it firmly locks into the Body Frame and insert the Upper Blade Wheel (83). NOTE: If adjustment is necessary, the Blade Guide Bearings should be completely clear of the Saw Blade. Refer to Figure Q - Harbor Freight Tools 62377 | User Manual - Page 16
the Body Frame (93) to its full vertical position. Turn the Support Plate (127) to the right until it firmly locks into the Body to accommodate the depth of the workpiece. Refer to Figure U. 2. The Blade Guide Brackets should be set as close as possible to the workpiece, without interfering with - Harbor Freight Tools 62377 | User Manual - Page 17
Workpiece and Work Area Set Up 1. Designate a work area that is clean and well‑lit. The work area must not allow access by children or pets to prevent distraction and injury. 2. Route the power cord along a safe route to reach the work area without creating a tripping hazard or exposing the power - Harbor Freight Tools 62377 | User Manual - Page 18
Instructions Vertical Position WARNING! Always wear ANSI-approved safety impact eye goggles when operating the Band Saw. 1. Do not plug the Power Cord into an electrical outlet until all necessary adjustments (as previously discussed in this manual (14) Support Plate (127 problems before using. Body - Harbor Freight Tools 62377 | User Manual - Page 19
all necessary adjustments (as previously discussed in this manual) have been made. 2. If needed, convert . Turn off the Band Saw and correct any problems before using. 9. To begin cutting, turn the Frame to its full vertical position. Turn the Support Plate clockwise until it firmly locks into the - Harbor Freight Tools 62377 | User Manual - Page 20
problem service, or repairs not mentioned in this manual must only be performed by a qualified service service technician. 1. Wear heavy-duty work gloves to avoid accidental cuts from the Saw Blade when performing this procedure. 2. Raise the Body Frame to its full vertical position. Turn the Support - Harbor Freight Tools 62377 | User Manual - Page 21
the old Saw Blade off the Upper Blade Wheel (83), Lower Blade Wheel (63), and out of the Blade Guide Assemblies. 6. Place the new Saw Blade between each of the Blade Guide Assemblies and around the Upper Blade Wheel and Lower Blade Wheel. IMPORTANT: The teeth must be pointing downward toward the - Harbor Freight Tools 62377 | User Manual - Page 22
Safety Lubricating the Worm Gear and Worm Shaft The Spindle Shaft (97) and Worm Gear (53) run in an oil bath Gear Box and should not require an oil change more than once a year, unless the oil becomes contaminated or a leak occurs due to improper replacement of the Gear Box Cover. To change oil in - Harbor Freight Tools 62377 | User Manual - Page 23
Troubleshooting Problem or too slowly. 1. Tighten Blade tension. 2. Check manual for correct Blade speed. See page 10. 3. Vise is Guides are poorly aligned. 7. Adjust Blade Guides. Follow all safety precautions whenever diagnosing or servicing the tool. Disconnect power supply before service - Harbor Freight Tools 62377 | User Manual - Page 24
is caught in the workpiece cut. 2. Saw Blade tension is too high. 1. Blade Guides are worn down. 2. Blade Guide Bearings are out of place. 3. Blade Guide Bearing Bracket is loose. Likely Solutions 1. Check manual for recommended Blade type. See page 20 and replace with appropriate Saw Blade. 2. Try - Harbor Freight Tools 62377 | User Manual - Page 25
PARTS LIST AND ASSEMBLY DIAGRAM IN THIS MANUAL AS A REFERENCE TOOL ONLY. NEITHER THE Wheel 32 Adjusting Rod 33 Nut For Rod 34 Rod Support 35 Feed Handle 36 Rod 37 Feed Handle Bracket (A) 66 Saw Blade 67 Upper Blade Guide Bracket Seat 68 Blade Guide Adjusting Knob 69 Axis Pin 70 Bolt - Harbor Freight Tools 62377 | User Manual - Page 26
93 Body Frame 94 Blade Tension Sliding Plate 95 Blade Tension Sliding Guide 96 Set Screw M8 x 20 97 Spindle Shaft 98 Spacer 99 Spindle 123 Chain Ring (A) 124 Chain 125 Chain Ring (B) 126 Locking Pin 127 Support Plate 128 Tool Plate 129 Wheel 130 Wheel Bracket 131 Flat Washer 10 132 - Harbor Freight Tools 62377 | User Manual - Page 27
Safety Setup Assembly Diagram 22 82 23 141 81 142 13 64 83 140 54 139 66 54 91 84 39 85 86 92 22 80 72 79 76 72 77 78 4 3 77 72 76 22 138 67 39 68 69 3 4 5 3 4 70 71 70 69 72 5 4 65 64 63 87 88 89 8 90 7 62 61 60 59 58 54 50 4 49 57 56 55 54 48 53 47 52 46 51 45 6 - Harbor Freight Tools 62377 | User Manual - Page 28
Limited 90 Day Warranty Harbor Freight Tools Co. makes every effort to assure that its products meet high quality and durability standards, and warrants to the original purchaser that this product is free from defects in materials and workmanship for the period of 90 days from the date of purchase.
-
 1
1 -
 2
2 -
 3
3 -
 4
4 -
 5
5 -
 6
6 -
 7
7 -
8
-
9
-
10
-
11
-
12
-
13
-
14
-
15
-
16
-
17
-
18
-
19
-
20
-
21
-
22
-
23
-
24
-
25
-
26
-
27
-
28
 |
 |

Visit our website at: http://www.harborfreight.com
Email our technical support at: [email protected]
Owner’s Manual & Safety Instructions
Save This Manual
Keep this manual for the safety warnings and precautions, assembly,
operating, inspection, maintenance and cleaning procedures.
Write the product’s serial number in the
back of the manual near the assembly diagram (or month and year of purchase if product has no number).
Keep this manual and the receipt in a safe and dry place for future reference.
When unpacking, make sure that the product is intact
and undamaged.
If any parts are missing or broken,
please call 1-888-866-5797 as soon as possible.
Copyright
©
2014 by Harbor Freight Tools
®
.
All rights reserved.
No portion of this manual or any artwork contained herein may be reproduced in
any shape or form without the express written consent of Harbor Freight Tools.
Diagrams within this manual may not be drawn proportionally.
Due to continuing
improvements, actual product may differ slightly from the product described herein.
Tools required for assembly and service may not be included.
Read this material before using this product.
Failure to do so can result in serious injury.
SAVE THIS MANUAL.
REV 16c