Harbor Freight Tools 69480 User Manual
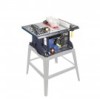
Harbor Freight Tools 69480 - 10 in., 15 Amp Industrial Table Saw Manual
 |
View all Harbor Freight Tools 69480 manuals
Add to My Manuals
Save this manual to your list of manuals |
Harbor Freight Tools 69480 manual content summary:
- Harbor Freight Tools 69480 | User Manual - Page 1
- Harbor Freight Tools 69480 | User Manual - Page 2
SAFETy Table of contents Safety 3 Setup 8 Specifications 10 Operation 14 Maintenance 17 Parts List and Assembly Diagram 20 Warranty 23 WArNING SyMBOLS AND DEFINITIONS This is the safety alert symbol. It is used to alert you to potential personal injury hazards. Obey all safety messages - Harbor Freight Tools 69480 | User Manual - Page 3
at all times. 14. MAINTAIN TOOLS WITH CARE. Keep tools sharp and clean for best and safest performance. Follow instructions for lubricating and changing accessories. 15. DISCONNECT TOOLS before servicing; when changing accessories, such as blades, bits, cutters, and the like. 16. REDUCE THE RISK OF - Harbor Freight Tools 69480 | User Manual - Page 4
cord or plug is necessary, do not connect the equipmentgrounding conductor to a live terminal. 4. Check with a qualified electrician or service personnel if the grounding instructions are not completely understood, or if in doubt as to whether the tool is properly grounded. 5. Use only 3-wire - Harbor Freight Tools 69480 | User Manual - Page 5
Own Safety read Instruction Manual Before Operating Saw - Feeding a workpiece through the saw without using a fence or guided support to guide it. NOT A SAFE METHOD. g. Kerf - The gap made risk of injury to persons. 16. When servicing use only identical replacement parts. OPErATION MAINTENANcE - Harbor Freight Tools 69480 | User Manual - Page 6
et seq.) 26. The warnings, precautions, and instructions discussed in this instruction manual cannot cover all possible conditions and situations that may a doctor and then have regular medical check-ups to ensure medical problems are not being caused or worsened from use. Pregnant women or people - Harbor Freight Tools 69480 | User Manual - Page 7
SAFETy Handle Notch • Must be far enough down the stick to allow a comfortable and firm grip. • Must be deep enough to prevent hand from slipping down the stick. • Do not cut more than halfway into the stick to prevent weakening. • Corners may be rounded to increase comfort. Essential Straight - Harbor Freight Tools 69480 | User Manual - Page 8
refer to the Assembly Diagram near the end of this manual. Mounting Table Saw If mounting onto a metal table stand: 1. Select a table stand which will support the weight of the Table Saw. Follow the table saw stand instructions for assembly. Tighten all connections, making sure the assembled table - Harbor Freight Tools 69480 | User Manual - Page 9
SAFETy Installing Push Stick Brackets 1. Tilt saw on its side to access opening underneath the Housing (12) of the saw. 2. Use ST4.2x14 Screws (4) and Ø4 Flat Washers (3) to attach the Push Stick Clamps (13) and Push Stick Blocks (14) to the side of the Table Saw. See Figure B. Figure B - Harbor Freight Tools 69480 | User Manual - Page 10
SAFETy SETUP Specifications Electrical Rating 120V~ / 60Hz / 15A Motor No Load Speed 4800 RPM Max. Depth Cut 3 IN. @ 90° 2-1/2 IN. @ 45° Arbor 5/8 IN. Functions Work Table 216045 Push Stick Miter Gauge Pawls Blade Guard Fence Switch Fence Handle Lock Knob Height Handle Stand sold - Harbor Freight Tools 69480 | User Manual - Page 11
SAFETy SETUP Installing/changing Blade TO PrEVENT SErIOUS INJUry: Before installing a saw blade, unplug the Table Saw and wear heavy-duty work gloves. Be very careful during blade tightening and loosening to avoid contact with the blade. Guard Lock Button 4. Turn the Lock Knob (53) - Harbor Freight Tools 69480 | User Manual - Page 12
SAFETy SETUP Adjusting riving Knife TO PrEVENT SErIOUS INJUry: Unplug the Table Saw before this procedure. NOTE: The Riving Knife (88) follows the saw blade to keep the kerf (gap) from closing on the saw blade. Reposition the Riving Knife before initial use. Riving Knife (88) Riving Knife (88) - Harbor Freight Tools 69480 | User Manual - Page 13
Attaching Blade Guard TO PrEVENT SErIOUS INJUry: Unplug the Table Saw before this procedure. BLADE GUArD MUST BE INSTALLED BEFOrE USE. Fit Roller into Slot Guard Lock Button SAFETy SETUP OPErATION Figure N 1. Set the Blade Guard on top of the Riving Knife so that the Roller slides into the - Harbor Freight Tools 69480 | User Manual - Page 14
SAFETy SETUP Operating Instructions Read the ENTIrE IMPOrTANT SAFETy INFOrMATION section at the beginning of this manual including all text under subheadings therein before set up or use of this product. TOOL SET UP TO PrEVENT SErIOUS INJUry FrOM AccIDENTAL OPErATION: Turn - Harbor Freight Tools 69480 | User Manual - Page 15
Of cut Fence (121) Fence Handle (110) Graduated Scale Fence Guide (112) Figure U WArNING! Do not attempt to use the fence workpiece and Fence together to the right or left until the left side of the Fence Guide (112) aligns with the desired measurement on the Graduated Scale. c. Lock the Fence - Harbor Freight Tools 69480 | User Manual - Page 16
INSTrUcTIONS Stick or make a push stick as described in the Safety section of this manual. Use a push block (not included) when ripping widths under 2″. Miter After the cut is under way, use the Push Stick to continue guiding the workpiece forward. Just before the cut is completed, move the left - Harbor Freight Tools 69480 | User Manual - Page 17
again in the usual manner. Maintenance and Servicing Procedures not specifically explained in this manual must be performed only by a qualified damaged equipment. If abnormal noise or vibration occurs, have the problem corrected before further use. cleaning, Maintenance, and Lubrication 1. BEFOrE - Harbor Freight Tools 69480 | User Manual - Page 18
SAFETy SETUP Troubleshooting Problem Motor will not start. Possible causes 1. Low voltage. 2. and steel wool. Follow all safety precautions whenever diagnosing or servicing the tool. Disconnect power supply before service. OPErATION MAINTENANcE Page 18 For technical questions, please call - Harbor Freight Tools 69480 | User Manual - Page 19
SAFETy Troubleshooting (continued) Problem Workpiece kicked back from blade. Possible causes 1. Fence out of alignment. service. SETUP OPErATION MAINTENANcE PLEASE rEAD THE FOLLOWING cArEFULLy THE MANUFACTURER AND/OR DISTRIBUTOR HAS PROVIDED THE PARTS LIST AND ASSEMBLY DIAGRAM IN THIS MANUAL - Harbor Freight Tools 69480 | User Manual - Page 20
Ø6 Washer Lock Sleeve Qty Part Description Qty Part Description Qty 1 56 M6 Nut 7 111 Cross Recess Head Screw 1 1 57 M6x30 Bolt 1 112 Fence Guide 1 15 58 Rotary Board 2 113 Ø8 Round Pin 1 16 59 M6 T-Screw 2 114 Ø6 Round Pin 1 1 60 Height Bar 1 115 M6 Lock Handle 1 1 61 - Harbor Freight Tools 69480 | User Manual - Page 21
Assembly Diagram SAFETy SETUP OPErATION MAINTENANcE ITEM 69480 For technical questions, please call 1-888-866-5797. Page 21 - Harbor Freight Tools 69480 | User Manual - Page 22
Assembly Diagram (continued) SAFETy SETUP OPErATION MAINTENANcE Page 22 For technical questions, please call 1-888-866-5797. ITEM 69480 - Harbor Freight Tools 69480 | User Manual - Page 23
SAFETy Limited 90 Day Warranty Harbor Freight Tools Co. makes every effort to assure that its products meet high quality and durability standards, and warrants to the original purchaser that this product is free from defects in materials and workmanship for the period of 90 days from the date of - Harbor Freight Tools 69480 | User Manual - Page 24
3491 Mission Oaks Blvd. • PO Box 6009 • Camarillo, CA 93011 • 1-888-866-5797
-
 1
1 -
 2
2 -
 3
3 -
 4
4 -
 5
5 -
 6
6 -
 7
7 -
8
-
9
-
10
-
11
-
12
-
13
-
14
-
15
-
16
-
17
-
18
-
19
-
20
-
21
-
22
-
23
-
24
 |
 |
