HealthRider L400i English Manual
HealthRider L400i Manual
 |
View all HealthRider L400i manuals
Add to My Manuals
Save this manual to your list of manuals |
HealthRider L400i manual content summary:
- HealthRider L400i | English Manual - Page 1
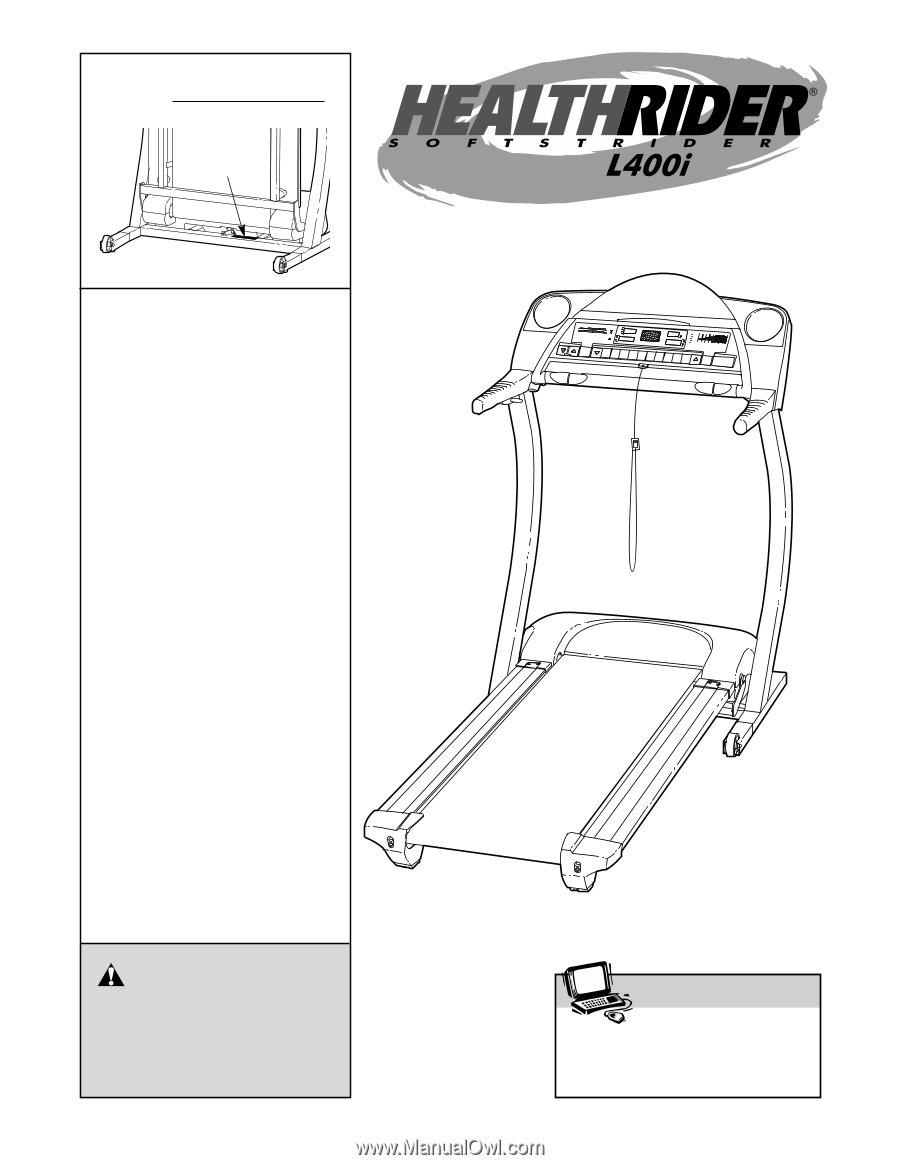
: 1-800-999-3756 Mon.-Fri., 6 a.m.- 6 p.m. MST Patent Pending CAUTION Read all precautions and instructions in this manual before using this equipment. Save this manual for future reference. USER'S MANUAL Visit our website at www.healthrider.com new products, prizes, fitness tips, and much more! - HealthRider L400i | English Manual - Page 2
8 HOW TO FOLD AND MOVE THE TREADMILL 21 TROUBLESHOOTING 23 CONDITIONING GUIDELINES 25 ORDERING REPLACEMENT PARTS Back Cover LIMITED WARRANTY Back Cover Note: An EXPLODED DRAWING and a PART LIST are attached in the center of this manual. HealthRider® is a registered trademark of ICON Health - HealthRider L400i | English Manual - Page 3
45 pounds (20 kg) in order to raise, lower, or move the treadmill. 11. Use only a single-outlet surge suppressor that meets all of the specifications described on page 8. To purchase a surge suppressor, see your local HealthRider dealer or call 1-800-8063651 and order part number 146148. 20. Do - HealthRider L400i | English Manual - Page 4
power cord immediately after use, before cleaning the treadmill, and before performing the main- tenance and adjustment procedures de- scribed in this manual. Never remove the motor hood unless instructed to do so by an authorized service representative. Servicing other than the procedures - HealthRider L400i | English Manual - Page 5
exercising, the unique L400i treadmill can be folded up, requiring less than half the floor space of other treadmills. For your benefit, read this manual carefully before using the treadmill. If you have questions after reading the manual, please call our Customer Service Department toll-free at - HealthRider L400i | English Manual - Page 6
on the pulse sensors, remove them. Insert one of the Extension Legs (55) into the treadmill as shown. Make sure that the Extension Leg is turned so the Base Pad (44) is Base Pad becomes worn and needs to be replaced, use the replacement Base Pad. 64 55 58 35 108 44 35 55 44 35 55 108 44 108 6 - HealthRider L400i | English Manual - Page 7
tightly as possible. 82 64 106 32 105 105 7. Make sure that all parts are properly tightened before you use the treadmill. Keep the included allen wrench in a secure place; the allen wrench is used to adjust the walking belt (see page 24). To protect the floor or carpet from damage, place a mat - HealthRider L400i | English Manual - Page 8
being turned on or off. To decrease the possibility of 2 your treadmill being damaged, always use a surge suppressor with your treadmill (see drawing 1 at the right). To purchase a surge suppressor, see your local HealthRider dealer or call 1-800-806-3651 and order part number 146148 - HealthRider L400i | English Manual - Page 9
on the face of the console, remove it. Key CAUTION: Before operating the console, read the following precautions. • Do not stand on the walking belt when turning on the power. • Always wear the clip (see the drawing above) while operating the treadmill. • Adjust the speed in small increments to - HealthRider L400i | English Manual - Page 10
clip by carefully taking a few steps backward until the key is pulled from the console. If the key is not pulled from the console, adjust the position of the clip as needed. HOW TO USE THE MANUAL MODE 1 Insert the key simplicity, all instructions in this that you use the treadmill, inspect the alignment - HealthRider L400i | English Manual - Page 11
display-When the manual mode or the iFIT.com mode is selected, this display will show the elapsed time and the incline level of the treadmill. The display the key is removed, the console is in the "demo" mode. See page 20 and turn off the demo mode. When you are finished using the treadmill, move - HealthRider L400i | English Manual - Page 12
USE PERSONAL TRAINER PROGRAMS 1 Insert the key fully into the console. See HOW TO TURN ON THE POWER on page 10. 2 Select one of the personal trainer programs. When the key is inserted, the manual show how the speed and incline of the treadmill will change during the programs. The numbers beside - HealthRider L400i | English Manual - Page 13
rate programs. 1 Put on the chest pulse sensor. Refer to the instructions included with the optional chest pulse sensor. 2 Insert the key fully into the console. See HOW TO TURN ON THE POWER on page 10. When you are finished using the treadmill, move the on/off switch near the power cord to the - HealthRider L400i | English Manual - Page 14
PLS will flash in the Calories/Fat Calories/Heart Rate display and the speed and incline of the treadmill may automatically decrease until your pulse is detected. If this occurs, refer to the instructions included with the chest pulse sensor. To stop the program at any time, press the Stop button - HealthRider L400i | English Manual - Page 15
CD player. See pages 15 and 16 for connecting instructions. To use iFIT.com videocassettes, the treadmill must be connected to your VCR. See page 17 for connecting instructions. To use iFIT.com programs directly from our internet site, the treadmill must be connected to your home computer. See page - HealthRider L400i | English Manual - Page 16
HOME STEREO Note: If your stereo has an unused LINE OUT jack, see instruction A below. If the LINE OUT jack is being used, see instruction B. A. Plug one end of the audio cable into the jack on the front of the treadmill near the power cord. Plug the other end of the cable into the - HealthRider L400i | English Manual - Page 17
When the key is inserted, the manual mode will be selected. To use iFIT.com CDs guiding you through your workout. Simply follow your personal trainer's instructions. Note: If the Time/Incline/Segment Time display is flashing, press the Start button or the Speed v button on the console. The treadmill - HealthRider L400i | English Manual - Page 18
, you can manually override the settings use another CD or video program, press the Stop button or remove the key and go to step 1 on page 17. Note: If the speed or incline of the treadmill surface instead of on the console. • Refer to the instructions at the bottom of page 24. 5 Follow your progress - HealthRider L400i | English Manual - Page 19
USE PROGRAMS DIRECTLY FROM OUR WEB SITE 7 Return to the treadmill and stand on the foot pads. Find the clip attached to the key and slide the clip high or too low, you can manually override the settings at any time on-line instructions for using a program. 6 Follow the on-line instructions to start - HealthRider L400i | English Manual - Page 20
, hold down the Stop button while inserting the key into the console. When the information mode is selected, the following information will be shown: The Time/Incline/Segment Time display will show the total number of hours the treadmill has been used. The Distance/Laps display will show the total - HealthRider L400i | English Manual - Page 21
about halfway to the vertical position. 2. Move your right hand to the position shown and hold the treadmill firmly. Using your left hand, pull the latch knob to the left and hold it. Raise the treadmill until the catch is past the latch pin. Slowly release the latch knob. Make sure that the - HealthRider L400i | English Manual - Page 22
HOW TO LOWER THE TREADMILL FOR USE 1. Hold the upper end of the treadmill with your right hand as shown. Using your left hand, pull the latch knob to the left and hold it. Pivot the treadmill down until the frame is past the pin. Slowly release the latch knob. 2. Hold the treadmill firmly with both - HealthRider L400i | English Manual - Page 23
TROUBLESHOOTING Most treadmill problems can be solved by following the instructions below. If further assistance is needed, please call our Customer Service Department toll-free at 1-800-999-3756, Monday through Friday, 6 a.m. until 6 p.m. Mountain Time (excluding holidays). PROBLEM: The power - HealthRider L400i | English Manual - Page 24
in the power cord, insert the key, and run the treadmill for a few minutes. Repeat until the walking belt is properly tightened. b 3"-4" Rear Roller Adjustment Bolts c. If the walking belt still slows when walked on, call our Customer Service Department toll-free. PROBLEM: The walking belt is off - HealthRider L400i | English Manual - Page 25
key to achieving the desired results is to exercise with the proper intensity. The proper intensity level can be found by using your heart rate as a guide the speed and incline of the treadmill until your heart rate is near will help prevent post-exercise problems. EXERCISE FREQUENCY To maintain - HealthRider L400i | English Manual - Page 26
SUGGESTED STRETCHES The correct form for several basic stretches is shown at the right. Move slowly as you stretch-never bounce. 1. Toe Touch Stretch Stand with your knees bent slightly and slowly bend forward from 1 your hips. Allow your back and shoulders to relax as you reach down toward - HealthRider L400i | English Manual - Page 27
NOTES 27 - HealthRider L400i | English Manual - Page 28
DRAWING attached in the center of this manual. Key No. Qty. Description Key No. Qty. Description Key No. Qty. Description 1 1 Motor Hood 30 1 Key/Clip 72 4 Isolator # 1 4" Black Wire, 2F 31 1 Left Foam Grip 73 2 Belt Guide # 1 4" Red Wire, M/F 32 1 Latch Assembly 74 4 Belt Guide Screw # - HealthRider L400i | English Manual - Page 29
36 90 76 79 99 98 97 45 96 57 91 92 33 94 33 93 95 57 92 91 33 1 37 89 9 73 33 74 72 75 76 45 87 2 51 33 88 24 107 25 24 22 18 21 33 20 23 24 24 8 26 3 4 17 15 16 14 3 12 10 5* 6 7 70 75 101 33 78 72 77 11 3 8 13 26 24 27 30 85 38 28 34 82 29 31 109 35 35 - HealthRider L400i | English Manual - Page 30
of the product (HealthRider® L400i treadmill) • The SERIAL NUMBER of the product (see the front cover of this manual) • The KEY NUMBER and DESCRIPTION of not provided by an ICON authorized service center; products used for commercial or rental purposes; or products used as store display models. No
-
 1
1 -
 2
2 -
 3
3 -
 4
4 -
 5
5 -
 6
6 -
 7
7 -
8
-
9
-
10
-
11
-
12
-
13
-
14
-
15
-
16
-
17
-
18
-
19
-
20
-
21
-
22
-
23
-
24
-
25
-
26
-
27
-
28
-
29
-
30
 |
 |
Visit our website at
www.healthrider.com
new products, prizes,
fitness tips, and much more!
Serial
Number
Decal
Model No. HRT07920
Serial No.
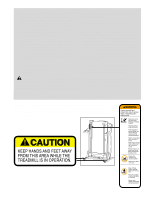
CAUTION
Read all precautions and instruc-
tions in this manual before using
this equipment. Save this manual
for future reference.
QUESTIONS?
If you have questions, or if there
are missing parts, we will guar-
antee complete satisfaction
through direct assistance from
our factory.
TO AVOID UNNECESSARY
DELAYS, PLEASE CALL DIRECT
TO OUR TOLL-FREE CUSTOMER
HOT LINE. The trained techni-
cians on our customer hot line
will provide immediate assis-
tance, free of charge.
CUSTOMER HOT LINE:
1-800-999-3756
Mon.–Fri., 6 a.m.– 6 p.m. MST
USER'S
MANUAL
Patent Pending