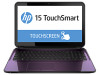
HP 15-d097nr User Guide - Windows 8.1
HP 15-d097nr Manual
 |
View all HP 15-d097nr manuals
Add to My Manuals
Save this manual to your list of manuals |
HP 15-d097nr manual content summary:
- HP 15-d097nr | User Guide - Windows 8.1 - Page 1
User Guide - HP 15-d097nr | User Guide - Windows 8.1 - Page 2
http://www.microsoft.com for details. To obtain the latest information in this guide, contact support. For U.S. support, go to http://www.hp.com/go/contactHP. For worldwide support, go to http://welcome.hp.com/country/us/en/ wwcontact_us.html. Software terms By installing, copying, downloading, or - HP 15-d097nr | User Guide - Windows 8.1 - Page 3
Safety warning notice WARNING! To reduce the possibility of heat-related injuries or of overheating the computer, do not place the computer directly on your lap or obstruct the computer air vents. Use the computer only on a hard, flat surface. Do not allow another hard surface, such as an adjoining - HP 15-d097nr | User Guide - Windows 8.1 - Page 4
iv Safety warning notice - HP 15-d097nr | User Guide - Windows 8.1 - Page 5
Apps Store ...1 Best practices ...1 Fun things to do ...1 More HP resources ...2 2 Getting to know your computer ...4 Finding your hardware and drives and accessing software 20 Using a WLAN ...20 Using an Internet service provider 21 Setting up a WLAN 21 Configuring a wireless router 21 Protecting - HP 15-d097nr | User Guide - Windows 8.1 - Page 6
screen ...33 Using the TouchPad and gestures ...33 Tapping ...34 Scrolling ...35 2-finger pinch zoom ...35 2-finger click ...36 Rotating (select models only 36 Flicking (select models only 37 Edge swipes ...37 Right-edge swipe 37 Left-edge swipe 38 Top-edge swipe 38 Using touch screen gestures - HP 15-d097nr | User Guide - Windows 8.1 - Page 7
Technology (select models only 46 Manually initiating and exiting Sleep 47 Manually initiating and exiting Hibernation (select models only 47 Setting power ...51 Troubleshooting power problems 51 Refreshing your software content with Intel Smart Connect Technology (select models only 52 Shutting - HP 15-d097nr | User Guide - Windows 8.1 - Page 8
passwords ...63 Setting Windows passwords 64 Setting Setup Utility (BIOS) passwords 64 Using the fingerprint reader (select models only 64 Using HP SimplePass (select models only 65 Registering fingerprints 65 Using your registered fingerprint to log on to Windows 65 Using Internet security - HP 15-d097nr | User Guide - Windows 8.1 - Page 9
Using the HP Recovery partition (select models only 73 Using HP Recovery media to recover 74 Changing the computer boot order 74 Removing the HP Recovery partition 74 11 Specifications ...75 Input power ...75 Operating environment ...76 12 Electrostatic Discharge ...77 Index ...78 ix - HP 15-d097nr | User Guide - Windows 8.1 - Page 10
x - HP 15-d097nr | User Guide - Windows 8.1 - Page 11
app. 2. Select HP Picks to view all the available apps. 3. Select the app you want to download, and then follow the on-screen instructions. When the download page 19. ● Take a minute to browse the printed Windows Basics guide to explore the new Windows® features. ● Become familiar with the computer - HP 15-d097nr | User Guide - Windows 8.1 - Page 12
and features ● Overview of using Windows® ● A broad range of how-to information and troubleshooting tips ● Online chat with an HP technician ● Email support ● Support telephone numbers ● HP service center locations ● Proper workstation setup ● Guidelines for posture and work habits that increase - HP 15-d097nr | User Guide - Windows 8.1 - Page 13
warranty information about this computer To access this guide: 1. From the Start screen, type support, and then select the HP Support Assistant app. 2. Select My computer, and then select Warranty and services. - or - Go to http://www.hp.com/go/orderdocuments. *You can find the expressly - HP 15-d097nr | User Guide - Windows 8.1 - Page 14
2 Getting to know your computer Finding your hardware and software information Locating hardware To find out what hardware is installed on your computer: 1. From the Start screen, type control panel, and then select Control Panel. 2. Select System and Security, select System, and then click Device - HP 15-d097nr | User Guide - Windows 8.1 - Page 15
to an optical disc. NOTE: For disc compatibility information, go to the Help and Support web page (see More HP resources on page 2). Follow the web page instructions to select your computer model. Select Support & Drivers, and then select Product Information. Releases the disc tray. Right side 5 - HP 15-d097nr | User Guide - Windows 8.1 - Page 16
Left side Component (1) Security cable slot (2) Power connector (3) AC adapter light (4) Vent (5) External monitor port (6) RJ-45 (network) jack/status lights (7) HDMI port Description Attaches an optional security cable to the computer. NOTE: The security cable is designed to act as - HP 15-d097nr | User Guide - Windows 8.1 - Page 17
or a headset. For additional safety information, refer to the Regulatory, Safety, and Environmental Notices. To access this guide, from the Start screen, type support, and then select the HP Support Assistant app. NOTE: When a device is connected to the jack, the computer speakers are disabled. NOTE - HP 15-d097nr | User Guide - Windows 8.1 - Page 18
webcam is in use. (4) Webcam Records video and captures photographs. Some models allow you to video conference and chat online using streaming video. To use country or region. To access this guide, from the Start screen, type support, and then select the HP Support Assistant app. 8 Chapter 2 - HP 15-d097nr | User Guide - Windows 8.1 - Page 19
: The webcam is in use. (4) Webcam Records video and captures photographs. Some models allow you to video conference and chat online using streaming video. To use the or region. To access this guide, from the Start screen, type support, and then select the HP Support Assistant app. Display 9 - HP 15-d097nr | User Guide - Windows 8.1 - Page 20
TouchPad button (3) Right TouchPad button Description Moves the on-screen pointer and selects or activates items on the screen. NOTE: The TouchPad also supports edge-swipe gestures. For more information, see Edge swipes on page 37. Functions like the left button on an external mouse. Functions - HP 15-d097nr | User Guide - Windows 8.1 - Page 21
sound is on. On: An integrated wireless device, such as a wireless local area network (WLAN) device and/or a Bluetooth® device, is on. NOTE: On some models, the wireless light is amber when all wireless devices are off. Top 11 - HP 15-d097nr | User Guide - Windows 8.1 - Page 22
sound is on. On: An integrated wireless device, such as a wireless local area network (WLAN) device and/or a Bluetooth® device, is on. NOTE: On some models, the wireless light is amber when all wireless devices are off. 12 Chapter 2 Getting to know your computer - HP 15-d097nr | User Guide - Windows 8.1 - Page 23
shutdown procedures are ineffective, press and hold the power button down for at least 5 seconds to turn off the computer. NOTE: For select models, the Intel® Rapid Start Technology feature is enabled at the factory. Rapid Start Technology allows your computer to resume quickly from inactivity. For - HP 15-d097nr | User Guide - Windows 8.1 - Page 24
Keys NOTE: Refer to the image that most closely matches your computer. Component (1) esc key (2) fn key (3) Windows key (4) Action keys Description Displays system information when pressed in combination with the fn key. Executes frequently used system functions when pressed in combination - HP 15-d097nr | User Guide - Windows 8.1 - Page 25
keypad. To alternate between this numeric function and the navigational function (indicated by the directional arrows on the keys), press the num lk key. Top 15 - HP 15-d097nr | User Guide - Windows 8.1 - Page 26
Bottom Component (1) Battery lock and unlock latch Description Locks and unlocks the battery in the battery bay. (2) Battery bay Holds the battery. (3) Vents (5) Enable airflow to cool internal components. NOTE: The computer fan starts up automatically to cool internal components and - HP 15-d097nr | User Guide - Windows 8.1 - Page 27
when you troubleshoot system problems or travel internationally with the computer. IMPORTANT: All labels described in this section will be located in one of 3 places depending on your computer model: Affixed to the bottom of the computer, located in the battery bay, or under the service door. For - HP 15-d097nr | User Guide - Windows 8.1 - Page 28
Component (1) Serial number (2) Product number (3) Warranty period (4) Model number (select models only) (5) Revision number ● Regulatory label(s)-Provide(s) regulatory information about the computer. ● Wireless certification label(s)-Provide(s) information about optional wireless devices and the - HP 15-d097nr | User Guide - Windows 8.1 - Page 29
with a wireless router or a wireless access point. ● HP Mobile Broadband Module (select models only)-A wireless wide area network (WWAN) device that gives website links provided in Help and Support. From the Start screen, type help, and then select Help and Support. Using the wireless controls You - HP 15-d097nr | User Guide - Windows 8.1 - Page 30
, and diagnose and repair network problems. To use operating system controls: help, and then select Help and Support. Sharing data and drives and accessing 4. Click Share and then follow the on-screen instructions. To share drives on the same network: 1. service provider or a public or corporate network - HP 15-d097nr | User Guide - Windows 8.1 - Page 31
a local ISP. The ISP will help set up the modem, install a network cable to connect your wireless router to the modem, and test the Internet service. NOTE: Your ISP will give you a user ID and a password to use for Internet access. Record this information and store it in a safe place. Setting - HP 15-d097nr | User Guide - Windows 8.1 - Page 32
Mobile Broadband (select models only) HP Mobile Broadband enables your computer to use WWANs to access the Internet from more places and over larger areas than it can by using WLANs. Using HP Mobile Broadband requires a network service provider (called a mobile network operator), which in most cases - HP 15-d097nr | User Guide - Windows 8.1 - Page 33
(CDMA) telecommunications standard. ● LTE (Long Term Evolution), which provides access to networks supporting LTE technology. You might need the HP Mobile Broadband Module IMEI and/or MEID number to activate mobile broadband service.The serial number is printed on a label located on the bottom of - HP 15-d097nr | User Guide - Windows 8.1 - Page 34
2. Plug the other end of the network cable into a network wall jack (2) or router. NOTE: If the network cable contains noise suppression circuitry (3), which prevents interference from TV and radio reception, orient the circuitry end of the cable toward the computer. 24 Chapter 3 Connecting to a - HP 15-d097nr | User Guide - Windows 8.1 - Page 35
4 Enjoying entertainment features Use your HP computer as an entertainment hub to socialize via the webcam microphone Description On: The webcam is in use. Records video and captures photographs. Some models allow you to video conference and chat online using streaming video. From the Start screen, - HP 15-d097nr | User Guide - Windows 8.1 - Page 36
Help and Support web page (see More HP resources on page 2). Follow the web page instructions to select your computer model. Select Support & Drivers, and Environmental Notices. To access this guide, from the Start screen, type support, and then select the HP Support Assistant app. NOTE: When a - HP 15-d097nr | User Guide - Windows 8.1 - Page 37
to an optical disc. NOTE: For disc compatibility information, go to the Help and Support web page (see More HP resources on page 2). Follow the web page instructions to select your computer model. Select Support & Drivers, and then select Product Information. Connects an optional USB device, such as - HP 15-d097nr | User Guide - Windows 8.1 - Page 38
access this guide, from the Start screen, type support, and then select the HP Support Assistant app that records video and captures photographs. Some models may allow you to video conference and chat your computer, follow the device manufacturer's instructions. To connect high-definition speakers to - HP 15-d097nr | User Guide - Windows 8.1 - Page 39
To connect wireless headphones to your computer, follow the device manufacturer's instructions. WARNING! To reduce the risk of personal injury, lower the Environmental Notices. To access this guide, from the Start screen, type support, and then select the HP Support Assistant app. Testing your audio - HP 15-d097nr | User Guide - Windows 8.1 - Page 40
Be sure that the external device is connected to the correct port on the computer, using the correct cable. Check the device manufacturer's instructions. Connecting video devices by using a VGA cable To see the computer screen image on an external VGA monitor or projected for a presentation, connect - HP 15-d097nr | User Guide - Windows 8.1 - Page 41
-definition TV or monitor, connect the high-definition device according to the following instructions. 1. Connect one end of the HDMI cable to the HDMI port on the . Setting up HDMI audio HDMI is the only video interface that supports high-definition video and audio. After you connect an HDMI TV - HP 15-d097nr | User Guide - Windows 8.1 - Page 42
Discovering and connecting to Miracast-compatible wireless displays (select models only) To discover and connect to Miracast-compatible wireless the Start screen, tap Devices, tap Project, and then follow the on- screen instructions. - or - Point to the upper-right or lower-right corner of the - HP 15-d097nr | User Guide - Windows 8.1 - Page 43
computer. Review the Windows Basics guide included with your computer. The guide provides information about common tasks using the TouchPad, touch screen, or the keyboard. Select computer models have mouse. NOTE: TouchPad gestures are not supported in all apps. Using the TouchPad and gestures 33 - HP 15-d097nr | User Guide - Windows 8.1 - Page 44
Tapping To make an on-screen selection, use the tap function on the TouchPad. ● Point to an item on the screen, and then tap one finger on the TouchPad zone to make a selection. Double-tap an item to open it. 34 Chapter 5 Navigating the screen - HP 15-d097nr | User Guide - Windows 8.1 - Page 45
Scrolling Scrolling is useful for moving up, down, or sideways on a page or image. ● Place two fingers slightly apart on the TouchPad zone and then drag them up, down, left, or right. 2-finger pinch zoom 2-finger pinch zoom allows you to zoom out or in on images or text. ● Zoom out by placing two - HP 15-d097nr | User Guide - Windows 8.1 - Page 46
-click with the mouse. ● Place two fingers on the TouchPad zone and press down to open the options menu for the selected object. Rotating (select models only) Rotating allows you to turn items such as photos. ● Point to an object, and then anchor the forefinger of your left hand in the - HP 15-d097nr | User Guide - Windows 8.1 - Page 47
Flicking (select models only) Flicking allows you to navigate through screens or quickly scroll through documents. ● Place three fingers on the TouchPad zone and flick your fingers in a - HP 15-d097nr | User Guide - Windows 8.1 - Page 48
Left-edge swipe The left-edge swipe accesses your recently opened apps so that you can switch between them quickly. ● Gently swipe your finger from the left edge of the TouchPad. Top-edge swipe The top-edge swipe displays app command options that allow you to customize apps. IMPORTANT: When an app - HP 15-d097nr | User Guide - Windows 8.1 - Page 49
Using touch screen gestures (select models only) A touch screen computer allows you to control items on the screen directly with your fingers. TIP: On touch screen computers . ● To drag, press and hold an object, and then drag the object to move it. Using touch screen gestures (select models only) 39 - HP 15-d097nr | User Guide - Windows 8.1 - Page 50
Tapping To make an on-screen selection, use the tap function. ● Use one finger to tap an object on the screen to make a selection. Double-tap an item to open it. Scrolling Scrolling is useful for moving the pointer up, down, left, or right on a page or image. ● Place two fingers on the screen and - HP 15-d097nr | User Guide - Windows 8.1 - Page 51
screen and then moving your fingers together. ● Zoom in by placing two fingers together on the screen and then moving your fingers apart. Rotating (select models only) Rotating allows you to turn items such as photos. ● Anchor the forefinger of your left hand on the object you want to rotate. Using - HP 15-d097nr | User Guide - Windows 8.1 - Page 52
Edge swipes With edge swipes you can perform tasks such as changing settings and finding or using apps. Right-edge swipe The right-edge swipe reveals the charms, which let you search, share, start apps, access devices, or change settings. ● Gently swipe your finger inward from the right edge of the - HP 15-d097nr | User Guide - Windows 8.1 - Page 53
Top-edge swipe and bottom-edge swipe The top-edge swipe or bottom-edge swipe displays app command options that allow you to customize apps. IMPORTANT: When an app is open, the top-edge gesture varies depending on the app. ▲ Gently swipe your finger from the top edge or the bottom edge to reveal the - HP 15-d097nr | User Guide - Windows 8.1 - Page 54
HP PC Hardware Diagnostics (UEFI) on page 68 for instructions on opening Setup Utility (BIOS), and then follow the instructions Support also provides automated troubleshooting tools and access to support. . For commonly used shortcuts, use the Windows Basics guide. Using the hot keys A hot key is a - HP 15-d097nr | User Guide - Windows 8.1 - Page 55
press the second key of the combination. Using the integrated numeric keypad The computer includes an integrated numeric keypad, and it also supports an optional external numeric keypad or an optional external keyboard that includes a numeric keypad. For more details about the integrated numeric - HP 15-d097nr | User Guide - Windows 8.1 - Page 56
important to monitor and conserve the battery charge. Your computer supports an optimal power plan to manage how your computer uses and You can manually initiate Hibernation. See Manually initiating and exiting Sleep on page 47 and Manually initiating and exiting Hibernation (select models only) on - HP 15-d097nr | User Guide - Windows 8.1 - Page 57
the computer will return to the screen. Manually initiating and exiting Hibernation (select models only) You can enable user-initiated Hibernation click Create or change your user account password, and then follow the onscreen instructions. If you do not need to create or change a user account - HP 15-d097nr | User Guide - Windows 8.1 - Page 58
battery, or if the battery is no longer holding a charge, run Battery Check in Help and Support. To access battery information, from the Start screen, type support, select the HP Support Assistant app, and then select Battery and performance. If Battery Check indicates that your battery should be - HP 15-d097nr | User Guide - Windows 8.1 - Page 59
is no longer holding a charge, run Battery Check in HP Support Assistant. To access battery information, from the Start screen, type support, select the HP Support Assistant app, and then select Battery and performance. HP Support Assistant provides the following tools and information about the - HP 15-d097nr | User Guide - Windows 8.1 - Page 60
critical battery level, the following behavior occurs: ● The battery light (select models only) indicates a low or critical battery level. - or - ● The device. ● Connect an optional power adapter purchased as an accessory from HP. Resolving a low battery level when no power source is available Save - HP 15-d097nr | User Guide - Windows 8.1 - Page 61
guide, from the Start screen, type support, and then select the HP Support Assistant app. Replacing a user-replaceable battery Battery Check in HP Support The power meter icon on the Windows desktop changes appearance. Troubleshooting power problems Test the AC adapter if the computer exhibits any of - HP 15-d097nr | User Guide - Windows 8.1 - Page 62
support for information about obtaining a replacement AC power adapter. Refreshing your software content with Intel Smart Connect Technology (select models access to your updated information. ▲ To enable this feature or manually adjust the settings, from the Start screen, type smart, and then - HP 15-d097nr | User Guide - Windows 8.1 - Page 63
. ● Power Saving mode-Applications assigned to this mode run on the lower-performance GPU to conserve battery power. Using Hybrid Graphics (select models only) The Hybrid Graphics feature allows an application to run in either High Performance mode or Power Saving mode, based on the application - HP 15-d097nr | User Guide - Windows 8.1 - Page 64
Using AMD Dual Graphics (select models only) The AMD Dual Graphics feature allows the AMD accelerated processing unit (APU) and the discrete AMD graphics card to work together. When AMD Dual - HP 15-d097nr | User Guide - Windows 8.1 - Page 65
updating your programs and drivers, instructions for cleaning your computer, may take more than an hour to complete. HP recommends defragmenting your hard drive at least once a a monthly schedule, but you can defragment your computer manually at any time. To run Disk Defragmenter: 1. Connect - HP 15-d097nr | User Guide - Windows 8.1 - Page 66
up disk space. 2. Follow the on-screen instructions. Adding or replacing memory modules Adding memory can the model. The memory module slots are located on the bottom of the computer under the service door. a memory module may result in various system problems. WARNING! To reduce the risk of electric - HP 15-d097nr | User Guide - Windows 8.1 - Page 67
by completing the following steps:. a. With the battery bay toward you, remove the service door screw (1). b. Slide the service door toward the front of the computer (2), and then lift up and remove the service door (3). 7. If you are replacing a memory module, remove the existing memory module - HP 15-d097nr | User Guide - Windows 8.1 - Page 68
b. Grasp the edge of the memory module (2), and then gently pull the module out of the memory module slot. CAUTION: To prevent damage to the memory module, hold the memory module by the edges only. Do not touch the components on the memory module. NOTE: To protect a memory module after removal, - HP 15-d097nr | User Guide - Windows 8.1 - Page 69
door by completing the following steps: a. Align the tabs on the service door with the notches on the computer (1), and slide the service door down until it snaps into place (2). b. Insert and tighten the service door screw (3) to hold the service door in place. 10. Replace the battery. 11. Turn the - HP 15-d097nr | User Guide - Windows 8.1 - Page 70
Updating programs and drivers HP recommends that you update your programs and drivers on a be getting the most out of your equipment. Go to http://www.hp.com/support to download the latest versions of HP programs and drivers. In addition, register to receive automatic update notifications when - HP 15-d097nr | User Guide - Windows 8.1 - Page 71
Cleaning the sides or cover To clean the sides or cover, use a soft microfiber cloth or chamois moistened with one of the cleaning solutions listed previously or use an acceptable disposable wipe. NOTE: When cleaning the cover of the computer, use a circular motion to aid in removing dirt and debris - HP 15-d097nr | User Guide - Windows 8.1 - Page 72
and in hazardous locations. If you are uncertain of the policy that applies to the use of a particular device, ask for authorization to use your computer before you turn it on. ● If you are traveling internationally, follow these suggestions: ◦ Check the computer-related customs regulations for each - HP 15-d097nr | User Guide - Windows 8.1 - Page 73
by the Windows operating system, HP applications, the non-Windows Setup . Additional passwords can be set in Windows or in the HP Setup Utility (BIOS) that is preinstalled on your computer. You numbers. ● Before you send your computer for service, back up your files, delete confidential files, - HP 15-d097nr | User Guide - Windows 8.1 - Page 74
keys to select Security, and then follow the on-screen instructions. Your changes take effect when the computer restarts. Using the fingerprint reader (select models only) Integrated fingerprint readers are available on select computer models. In order to use the fingerprint reader, you must set - HP 15-d097nr | User Guide - Windows 8.1 - Page 75
Using HP SimplePass (select models only) HP SimplePass provides an easy-to-use interface to . ● Access websites and other programs that require a logon. ● Set up a single sign-on service that allows you to use a registered fingerprint to create credentials for any application that requires a user - HP 15-d097nr | User Guide - Windows 8.1 - Page 76
follow the on-screen instructions. Installing HP and third-party software updates HP recommends that you regularly the latest versions, go to http://www.hp.com/support. At this location, you can also register to their products to correct security problems and improve functionality of the software - HP 15-d097nr | User Guide - Windows 8.1 - Page 77
Backing up your software applications and information Regularly back up your software applications and information to protect them from being permanently lost or damaged through a virus attack or a software or hardware failure. For more information, see Backing up, restoring, and recovering on page - HP 15-d097nr | User Guide - Windows 8.1 - Page 78
of the BIOS may be available on the HP website. Most BIOS updates on the HP website are packaged in compressed files called SoftPaqs. Some download packages contain a file named Readme.txt, which contains information regarding installing and troubleshooting the file. Determining the BIOS version To - HP 15-d097nr | User Guide - Windows 8.1 - Page 79
any device, cable, or cord. 1. From the Start screen, type hp support assistant, and then select the HP Support Assistant app. 2. Click Updates and tune-ups, and then click Check for HP updates now. 3. Follow the on-screen instructions. 4. At the download area, follow these steps: a. Identify the - HP 15-d097nr | User Guide - Windows 8.1 - Page 80
NOTE: Instructions for downloading HP PC Hardware Diagnostics (UEFI) are provided in English only. 1. Go to http://www.hp.com. 2. Click Support & Drivers, and then click the Drivers & Downloads tab. 3. Enter the product name in the text box, and then click Go. 4. Select your computer model, and - HP 15-d097nr | User Guide - Windows 8.1 - Page 81
points and create backups of personal information. For more information and steps, see Help and Support. From the Start screen, type help, and then select Help and Support. Creating HP Recovery media HP Recovery Manager is a software program that offers a way to create recovery media after you - HP 15-d097nr | User Guide - Windows 8.1 - Page 82
contact information from the HP website. Go to http://www.hp.com/support, select your country or region, and follow the on-screen instructions. If you use see Help and Support. From the Start screen, type help, and then select Help and Support. ● If you need to correct a problem with a preinstalled - HP 15-d097nr | User Guide - Windows 8.1 - Page 83
.hp.com/support, select your country or region, and follow the on-screen instructions. IMPORTANT: HP Recovery Manager does not automatically provide backups of your personal data. Before beginning recovery, back up any personal data you wish to retain. Using the HP Recovery partition (select models - HP 15-d097nr | User Guide - Windows 8.1 - Page 84
(select models only). 1. Press f11 while the computer boots. - or - Press and hold f11 as you press the power button. 2. Choose your keyboard layout. 3. Select Troubleshoot from the boot options menu. 4. Select Recovery Manager, and then follow the on-screen instructions. Using HP Recovery media - HP 15-d097nr | User Guide - Windows 8.1 - Page 85
be powered from a standalone DC power source, it should be powered only with an AC adapter or a DC power source supplied and approved by HP for use with this computer. The computer can operate on DC power within the following specifications. Operating voltage and current varies by platform. Input - HP 15-d097nr | User Guide - Windows 8.1 - Page 86
Nonoperating Relative humidity (noncondensing) Operating Nonoperating Maximum altitude (unpressurized) Operating Nonoperating Metric 5°C to 35°C -20°C to 60°C 10% to 90% 5% to 95% -15 m to 3,048 m -15 m to 12,192 m U.S. 41°F to 95°F -4°F to 140°F 10% to 90% 5% to 95% -50 ft to 10,000 ft -50 ft to - HP 15-d097nr | User Guide - Windows 8.1 - Page 87
electronic components. To prevent damage to the computer, damage to a drive, or loss of information, observe these precautions: ● If removal or installation instructions direct you to unplug the computer, first be sure that it is properly grounded, and then remove the cover. ● Keep components in - HP 15-d097nr | User Guide - Windows 8.1 - Page 88
keys decrease screen brightness 44 Help and Support 44 identifying 14, 15 increase screen brightness 44 next track or section HP and third-party software updates, installing 66 HP PC Hardware Diagnostics (UEFI) downloading 70 using 69 HP Recovery Manager correcting boot problems 74 starting 73 HP - HP 15-d097nr | User Guide - Windows 8.1 - Page 89
14, 15 esc 14, 15 fn 14, 15 num lk 15 Windows 14, 15 L labels Bluetooth 18 regulatory 18 serial number 17 service 17 wireless HP Recovery Manager 73 media 74 options 72 starting 73 supported discs 71 system 73 USB flash drive 74 using HP Recovery media 72 recovery media creating 71 creating using HP - HP 15-d097nr | User Guide - Windows 8.1 - Page 90
service labels 66 speakers connecting 28 identifying 26, 27 storing a battery 50 supported discs recovery 71 system recovery 73 system restore point creating 71 72 system restore point 71 Windows key, identifying 14, 15 Windows passwords 64 Wireless Assistant software 19 wireless button 19 wireless
-
 1
1 -
 2
2 -
 3
3 -
 4
4 -
 5
5 -
 6
6 -
 7
7 -
8
-
9
-
10
-
11
-
12
-
13
-
14
-
15
-
16
-
17
-
18
-
19
-
20
-
21
-
22
-
23
-
24
-
25
-
26
-
27
-
28
-
29
-
30
-
31
-
32
-
33
-
34
-
35
-
36
-
37
-
38
-
39
-
40
-
41
-
42
-
43
-
44
-
45
-
46
-
47
-
48
-
49
-
50
-
51
-
52
-
53
-
54
-
55
-
56
-
57
-
58
-
59
-
60
-
61
-
62
-
63
-
64
-
65
-
66
-
67
-
68
-
69
-
70
-
71
-
72
-
73
-
74
-
75
-
76
-
77
-
78
-
79
-
80
-
81
-
82
-
83
-
84
-
85
-
86
-
87
-
88
-
89
-
90
 |
 |

User Guide