HP 2000-2b20CA User Guide - Windows 7
HP 2000-2b20CA Manual
 |
View all HP 2000-2b20CA manuals
Add to My Manuals
Save this manual to your list of manuals |
HP 2000-2b20CA manual content summary:
- HP 2000-2b20CA | User Guide - Windows 7 - Page 1
User Guide - HP 2000-2b20CA | User Guide - Windows 7 - Page 2
Bluetooth is services. Nothing herein should be construed as constituting an additional warranty. HP shall not be liable for technical or editorial errors or omissions contained herein. Second Edition: April 2013 First Edition: April 2012 Document Part Number: 681034-002 Product notice This guide - HP 2000-2b20CA | User Guide - Windows 7 - Page 3
the computer, do not place the computer directly on your lap or obstruct the computer air vents. Use the computer only on a hard, flat surface. Do not allow another hard surface, such as an adjoining optional printer, or a soft surface, such as pillows or rugs or clothing, to block airflow. Also, do - HP 2000-2b20CA | User Guide - Windows 7 - Page 4
iv Safety warning notice - HP 2000-2b20CA | User Guide - Windows 7 - Page 5
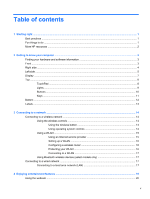
Table of contents 1 Starting right ...1 Best practices ...1 Fun things to do ...1 More HP resources ...2 2 Getting to know service provider 15 Setting up a WLAN 16 Configuring a wireless router 16 Protecting your WLAN 16 Connecting to a WLAN 17 Using Bluetooth wireless devices (select models - HP 2000-2b20CA | User Guide - Windows 7 - Page 6
the keyboard and pointing battery power ...35 Removing a user-replaceable battery 35 Finding battery information 36 Conserving battery power 36 Identifying low battery levels 36 Storing a user-replaceable battery 36 Disposing of a user-replaceable battery 37 Replacing a user-replaceable battery - HP 2000-2b20CA | User Guide - Windows 7 - Page 7
Handling drives ...45 Replacing a hard drive ...45 Using Disk Defragmenter 48 Using Disk Cleanup ...48 Adding or replacing memory modules 49 Updating programs and drivers ...51 Cleaning your computer ...51 Cleaning the display, sides, and cover 52 Cleaning the TouchPad and keyboard 52 Traveling - HP 2000-2b20CA | User Guide - Windows 7 - Page 8
using HP Recovery partition (select models only 66 Recovering using the recovery media 66 Changing the computer boot order 66 12 Specifications ...68 Input power ...68 Operating environment ...68 13 Troubleshooting and support ...69 Troubleshooting ...70 Disc drive problems ...70 Wireless - HP 2000-2b20CA | User Guide - Windows 7 - Page 9
when external power is available ....... 73 Resolving a low battery level when no power source is available .... 73 Resolving a low battery level when the computer cannot exit Hibernation 74 Troubleshooting an AC adapter 74 Contacting support ...75 14 Electrostatic Discharge ...76 Index ...77 ix - HP 2000-2b20CA | User Guide - Windows 7 - Page 10
x - HP 2000-2b20CA | User Guide - Windows 7 - Page 11
HP resources. Best practices To protect your smart investment, after you set up and register the computer, we recommend the following steps: ● If you haven't already done so, connect to a wired or wireless ● Back up your hard drive by creating recovery discs or a recovery flash drive. See Backing up, - HP 2000-2b20CA | User Guide - Windows 7 - Page 12
Setup Instructions ● Overview of computer setup and features. Help and Support ● A broad range of how-to information and troubleshooting tips. To access Help and Support, select Start > Help and Support. For more details, go to http://www.hp.com/ support. Safety & Comfort Guide ● Proper - HP 2000-2b20CA | User Guide - Windows 7 - Page 13
software information ▲ Select Start > Computer. A list displays all the devices installed in your computer, including optical drives, solid-state drives (SSD), or a secondary hard drive. To find out what software is included on your computer, select Start > All Programs. Front Component Speakers - HP 2000-2b20CA | User Guide - Windows 7 - Page 14
select models, the optical drive also writes to an optical disc. ● Green: The optical drive is being accessed. ● Off: The optical drive is ● White: The AC adapter is connected and the battery is charged. ● Amber: The AC adapter is connected and the battery is charging. ● Off: The computer is using - HP 2000-2b20CA | User Guide - Windows 7 - Page 15
Left side Component (1) (2) External monitor port Vent (3) RJ-45 (network) jack (4) HDMI port (5) USB 2.0 port (6) Audio-in (microphone) jack (7) Audio-out (headphone) jack (8) Digital Media Slot Description Connects an external VGA monitor or projector. Enables airflow to cool - HP 2000-2b20CA | User Guide - Windows 7 - Page 16
light Power light Description ● Blinking white: The hard drive is being accessed. ● White: The computer is on. ● Blinking white: The computer is in the Sleep state, which is an energy-saving mode. The computer - HP 2000-2b20CA | User Guide - Windows 7 - Page 17
. (2) WLAN antennas (2)* Send and receive wireless signals to communicate with wireless local area networks (WLANs). (3) Internal microphone keep the areas immediately around the antennas free from obstructions. For wireless regulatory notices, see the section of the Regulatory, Safety, and - HP 2000-2b20CA | User Guide - Windows 7 - Page 18
Description Turns the TouchPad on or off. ● On: The TouchPad is off. ● Off: The TouchPad is on. Moves the on-screen pointer and selects or activates items on the screen. Functions like the left button on an external mouse. Functions like the right button on an external mouse. 8 Chapter 2 Getting to - HP 2000-2b20CA | User Guide - Windows 7 - Page 19
. ● Off: The computer is off or in Hibernation. Hibernation is an energy-saving mode that uses the least amount of power. ● White: An integrated wireless device, such as a wireless local area network (WLAN) device and/or a Bluetooth® device, is on. ● Amber: All wireless devices are off. Top 9 - HP 2000-2b20CA | User Guide - Windows 7 - Page 20
Buttons Component Power button Description ● When the computer is off, press the button to turn on the computer. ● When the computer is on, press the button briefly to initiate Sleep. ● When the computer is in the Sleep state, press the button briefly to exit Sleep. ● When the computer is in - HP 2000-2b20CA | User Guide - Windows 7 - Page 21
Keys Component (1) esc key (2) fn key (3) Windows logo key (4) Action keys (5) Windows applications key Description Displays system information when pressed in combination with the fn key. Displays system information when pressed in combination with the esc key. Displays the Windows Start - HP 2000-2b20CA | User Guide - Windows 7 - Page 22
and off during routine operation. Releases the battery from the battery bay. Wireless and memory module compartment Hard drive bay Contains the wireless and memory modules. CAUTION: To prevent an unresponsive system, replace the wireless module only with a wireless module authorized for use in the - HP 2000-2b20CA | User Guide - Windows 7 - Page 23
(5) Model description (select models only) Have this information available when you contact support. The service label is affixed to the bottom of the computer. ● Microsoft® Certificate of Authenticity-Contains the Windows Product Key. You may need the Product Key to update or troubleshoot the - HP 2000-2b20CA | User Guide - Windows 7 - Page 24
links provided in Help and Support. Using the wireless controls You can control the wireless devices in your computer using these features: ● Wireless button, wireless switch, or wireless key (referred to in this chapter as the wireless button) ● HP Connection Manager software ● Operating system - HP 2000-2b20CA | User Guide - Windows 7 - Page 25
information, select Start > Help and Support. Using a WLAN With a WLAN device, you can access a wireless local area network (WLAN), which is up the modem, install a network cable to connect your wireless computer to the modem, and test the Internet service. NOTE: Your ISP will give you a user ID and - HP 2000-2b20CA | User Guide - Windows 7 - Page 26
service purchased from an Internet service provider ● A wireless router (2) (purchased separately) ● A wireless computer (3) NOTE: Some modems have a built-in wireless ISP. Configuring a wireless router For help in new wireless computer to wireless network . Wireless radio wireless encryption. Wireless - HP 2000-2b20CA | User Guide - Windows 7 - Page 27
allowing you to manually search for and connect Bluetooth wireless devices (select models only) A Bluetooth device provides short-range wireless communications that replace the physical cable connections that traditionally link electronic devices such as the following: ● Computers (desktop, notebook - HP 2000-2b20CA | User Guide - Windows 7 - Page 28
Connecting to a LAN requires an 8-pin, RJ-45 network cable. To connect the network cable, follow these steps: 1. Plug the network cable into the network jack (1) on the computer. 2. Plug the other end of the network cable into a network wall jack (2) or router. NOTE: If the network cable contains - HP 2000-2b20CA | User Guide - Windows 7 - Page 29
USB devices. NOTE: For details about different types of USB ports, see Using a USB device on page 39. Reads an optical disc. NOTE: On select models, the optical drive also writes to an optical disc. Produce sound. 19 - HP 2000-2b20CA | User Guide - Windows 7 - Page 30
details about using the webcam, select Start > Help and Support. Using audio On your HP computer, you can play music CDs, download and listen or on a docking station. To connect wireless speakers to your computer, follow the device manufacturer's instructions. To connect high-definition speakers to - HP 2000-2b20CA | User Guide - Windows 7 - Page 31
the microphone jack on the computer. For best results when recording, speak directly into the > Hardware and Sound > Sound. Using video Your HP computer is a powerful video device that enables you to instructions if you have questions. Connecting a VGA monitor or projector To see the computer screen - HP 2000-2b20CA | User Guide - Windows 7 - Page 32
press f4, the display state changes. Connecting an HDMI TV or monitor To see the computer screen image on a high-definition TV or monitor, connect the high-definition device according to the following instructions. To connect an HDMI device to your computer, you need an HDMI cable, sold separately - HP 2000-2b20CA | User Guide - Windows 7 - Page 33
computer and external device. ● External device only: View the screen image on the external device only. Each time you press f4, the display state changes. Configuring audio settings (with HDMI TV) HDMI is the only video interface that supports high-definition video and audio. After you connect an - HP 2000-2b20CA | User Guide - Windows 7 - Page 34
Managing your audio and video files CyberLink PowerDVD (select models only) helps you manage and edit your photo and video collections. ▲ To start CyberLink PowerDVD, select Start > All Programs > Music, Photos and Videos, and then - HP 2000-2b20CA | User Guide - Windows 7 - Page 35
and pointing devices Your computer allows easy on-screen navigation with a keyboard and pointing device. Select models also have action keys or hot key shortcuts that enable you to do common tasks. The TouchPad enables you to perform on-screen functions similar to those done by an external mouse - HP 2000-2b20CA | User Guide - Windows 7 - Page 36
keyboard that includes this key, use the alt gr+4 key combination. Region-specific keyboards instructions on opening Setup Utility (BIOS), and then follow the instructions at the bottom of the screen Support also provides automated troubleshooting tools and access to support. f2 Decreases the screen - HP 2000-2b20CA | User Guide - Windows 7 - Page 37
key. f11 Mutes or restores speaker sound. f12 Turns the wireless feature on or off. NOTE: A wireless network must be set up before a wireless connection is possible. Using the hot keys To use a hot off. ● Off: The TouchPad is on. Moves the on-screen pointer and selects or activates items on the - HP 2000-2b20CA | User Guide - Windows 7 - Page 38
off or on, quickly double-tap the TouchPad on/off button. The TouchPad light is off when the TouchPad is on. 28 Chapter 5 Using the keyboard and pointing devices - HP 2000-2b20CA | User Guide - Windows 7 - Page 39
Navigating To move the on-screen pointer, slide one finger across the TouchPad in the direction you want the pointer to go. Selecting Use the left and right TouchPad buttons as you would use the corresponding buttons on an external mouse. Using the TouchPad 29 - HP 2000-2b20CA | User Guide - Windows 7 - Page 40
TouchPad gestures, place two fingers on the TouchPad at the same time. NOTE: TouchPad gestures are not supported in all programs. To view the demonstration of a gesture: 1. Select Start > Control Panel > Hardware Click Apply, and then click OK. 30 Chapter 5 Using the keyboard and pointing devices - HP 2000-2b20CA | User Guide - Windows 7 - Page 41
Scrolling Scrolling is useful for moving up, down, or sideways on a page or image. To scroll, place two fingers slightly apart on the TouchPad, and then drag them across the TouchPad in an up, down, left, or right motion. NOTE: Scrolling speed is controlled by finger speed. Pinching/Zooming Pinching - HP 2000-2b20CA | User Guide - Windows 7 - Page 42
right forefinger from 3 o'clock to 12 o'clock. NOTE: Rotating is disabled at the factory by default. Flicking Flicking allows you to navigate through screens or quickly scroll through documents. To flick, use three fingers to touch the TouchPad zone in a light, quick flicking motion up, down, left - HP 2000-2b20CA | User Guide - Windows 7 - Page 43
in the Sleep state for an extended period or if the battery reaches a critical battery level while in the Sleep state, the computer initiates Hibernation. In the Hibernation state, your work is saved to a hibernation file on the hard drive and the computer turns off. CAUTION: To reduce the risk of - HP 2000-2b20CA | User Guide - Windows 7 - Page 44
and then follow the onscreen instructions. 5. Click Save changes. the remaining battery charge. ● To display the percentage of remaining battery charge and HP Recommended. Automatically balances performance with energy conservation. ● Power Saver. Saves power by reducing system performance and screen - HP 2000-2b20CA | User Guide - Windows 7 - Page 45
power. Computer battery life varies, depending on power management settings, programs running on the computer, display brightness, external devices connected to the computer, and other factors. Removing a user-replaceable battery Your computer includes a user-replaceable battery. WARNING! To - HP 2000-2b20CA | User Guide - Windows 7 - Page 46
in Power Options. ● Remove the battery from the computer when it is not being used or charged. ● Turn off wireless devices when you are not using them. ● Disconnect unused external devices that are not plugged into an external power source, such as an external hard drive connected to a USB port - HP 2000-2b20CA | User Guide - Windows 7 - Page 47
User Guides. Replacing a user-replaceable battery Battery Check in Help and Support notifies you to replace the battery when an internal cell is not charging properly or when the battery storage capacity has reached a weak condition. If the battery is possibly covered by an HP warranty, instructions - HP 2000-2b20CA | User Guide - Windows 7 - Page 48
the computer under any of the following conditions: ● When you need to replace the battery or access components inside the computer ● When you are connecting an external the computer from external power. ● On models with a user-replaceable battery, remove the battery. 38 Chapter 6 Managing power - HP 2000-2b20CA | User Guide - Windows 7 - Page 49
read or write to a CD, DVD, or (on select models) Bluray Disc (BD), to play and record audio and video. For added capacity or functionality, connect an external drive (purchased separately), such as an optical drive or hard drive, or insert a digital storage card to import information directly from - HP 2000-2b20CA | User Guide - Windows 7 - Page 50
with the device. 2. Click the remove hardware icon in the notification area, at the far right of the taskbar, and then follow the on-screen instructions. 3. Remove the device. Inserting and removing a digital storage card To insert a digital storage card: CAUTION: To reduce the risk of damage to the - HP 2000-2b20CA | User Guide - Windows 7 - Page 51
taskbar. Then follow the on-screen instructions. 3. Press in on the best performance of your optical drive: ● When the battery is the only source of power, be sure the battery is sufficiently charged before writing to media. ● Do not type on the keyboard or move the computer while an optical drive - HP 2000-2b20CA | User Guide - Windows 7 - Page 52
models only). ● Playing most BD movie titles on an external display requires an HDMI digital connection. The computer can support drive. Follow the on-screen instructions to install the update. ● If lines appear on the display when viewing a BD, they may be caused by interference from the wireless - HP 2000-2b20CA | User Guide - Windows 7 - Page 53
box opens. It prompts you to select how you want to use the media content. Removing an optical disc 1. Press the release button (1) on the drive bezel to release the disc tray, and then gently pull out the tray (2) until it stops. Using optical - HP 2000-2b20CA | User Guide - Windows 7 - Page 54
disc in a protective case. If the disc tray does not open normally, see Disc drive problems on page 70. Sharing drives on the network You can access software and data and install applications by sharing drives connected to another computer in your network. NOTE: Some discs, such as DVD movies and - HP 2000-2b20CA | User Guide - Windows 7 - Page 55
your computer by running tools such as Disk Defragmenter and Disk Cleanup and by replacing a hard drive or adding memory. It also provides information about updating your programs and drivers, instructions for cleaning your computer, and tips for traveling with your computer. Improving performance - HP 2000-2b20CA | User Guide - Windows 7 - Page 56
on a flat surface. 5. Remove the battery from the computer. NOTE: To access the hard drive cover screw, you must first remove the wireless and memory module compartment cover. Remove the wireless and memory module compartment cover: ▲ Loosen the wireless and memory module compartment cover screw - HP 2000-2b20CA | User Guide - Windows 7 - Page 57
the hard drive: 1. Loosen the hard drive cover screw (1) (or screws depending on your model), and then lift up (2) and remove the cover (3). 2. Disconnect the hard drive cable (1) from the system board. 3. Lift the hard drive (2) out of the hard drive bay. NOTE: After removing the hard drive from - HP 2000-2b20CA | User Guide - Windows 7 - Page 58
Start > All Programs > Accessories > System Tools > Disk Defragmenter. 3. Follow the on-screen instructions. For additional information, access the Disk Defragmenter software Help. Using Disk Cleanup Disk Cleanup searches the hard drive for unnecessary files that you can safely delete to free up - HP 2000-2b20CA | User Guide - Windows 7 - Page 59
Programs > Accessories > System Tools > Disk Cleanup. 2. Follow the on-screen instructions. Adding or replacing memory modules Adding memory can help improve your computer's performance. Your computer is like your physical work area. The hard drive is the filing cabinet where you store your work and - HP 2000-2b20CA | User Guide - Windows 7 - Page 60
b. Grasp the edge of the memory module (2), and then gently pull the module out of the memory module slot. CAUTION: To prevent damage to the memory module, hold the memory module by the edges only. Do not touch the components on the memory module. To protect a memory module after removal, place it - HP 2000-2b20CA | User Guide - Windows 7 - Page 61
9. Replace the wireless and memory module compartment cover. 10. Replace the battery. 11. Turn the computer right-side up, and then reconnect external power and external devices. 12. Turn on the computer. Updating programs and drivers HP recommends that you update your programs and drivers on a - HP 2000-2b20CA | User Guide - Windows 7 - Page 62
debris on the keyboard surface. Traveling with or shipping your computer If you have to travel with or ship your computer, here are some tips to keep in mind to keep your equipment safe. ● Prepare the computer for traveling or shipping: ◦ Back up your information to an external drive. ◦ Remove all - HP 2000-2b20CA | User Guide - Windows 7 - Page 63
from external power for more than 2 weeks, remove the battery and store it separately. ● If you are shipping the computer or a drive, use suitable protective packaging and label the package "FRAGILE." ● If the computer has a wireless device installed, the use of these devices may be restricted - HP 2000-2b20CA | User Guide - Windows 7 - Page 64
software Firewall software Administrator password Software updates User password Security cable lock Locating your security software HP Security Assistant (select models only) provides a starting location for quick access to a collection of security software applications that are organized - HP 2000-2b20CA | User Guide - Windows 7 - Page 65
can be set in Windows or in the HP Setup Utility (BIOS) that is preinstalled on your service, back up your files, delete confidential files, and then remove all password settings. For additional information about Windows passwords, such as screen-saver passwords, select Start > Help and Support - HP 2000-2b20CA | User Guide - Windows 7 - Page 66
computer. While the "Press the ESC key for Startup Menu" message is displayed in the lower-left corner of the screen, press esc. 2. Use the arrow keys and follow the on-screen instructions. When the Startup Menu is displayed, press f10. 3. Use the arrow keys to select Security, and then follow the - HP 2000-2b20CA | User Guide - Windows 7 - Page 67
link in Help and Support. Installing HP and third-party software updates HP recommends that you regularly update the software and drivers that were originally correct security problems and improve functionality of the software. Securing your wireless network When you set up your wireless network, - HP 2000-2b20CA | User Guide - Windows 7 - Page 68
Backing up your software applications and information Regularly back up your software applications and information to protect them from being permanently lost or damaged through a virus attack or a software or hardware failure. For more information, see Backing up, restoring, and recovering on page - HP 2000-2b20CA | User Guide - Windows 7 - Page 69
as disk drives, display, keyboard, mouse bottom of the screen. NOTE: Use HP website. Most BIOS updates on the HP website are packaged in compressed files called SoftPaqs. Some download packages contain a file named Readme.txt, which contains information regarding installing and troubleshooting - HP 2000-2b20CA | User Guide - Windows 7 - Page 70
or cord. 1. Select Start > Help and Support > Maintain. 2. Follow the on-screen instructions to identify your computer and access the BIOS update hard drive. b. Follow the on-screen instructions to download your selection to the hard drive. Make a note of the path to the location on your hard drive - HP 2000-2b20CA | User Guide - Windows 7 - Page 71
for Startup Menu" message is displayed in the lower-left corner of the screen, press esc. When the Startup Menu is displayed, press f2. 2. Click the diagnostic test you want to run, and then follow the on-screen instructions. NOTE: If you need to stop a diagnostics test while it is running, press - HP 2000-2b20CA | User Guide - Windows 7 - Page 72
up the computer, you should create recovery discs or a recovery flash drive using HP Recovery Manager. You will need these recovery discs or recovery flash drive to perform a system recovery should the hard drive become corrupted. A system recovery reinstalls the original operating system, and then - HP 2000-2b20CA | User Guide - Windows 7 - Page 73
Click Recovery Media Creation. 3. Follow the on-screen instructions to continue. To recover, see Recovering the original system using HP Recovery Manager on page 65. Creating system restore points A system restore point is a snapshot of certain hard drive contents saved by Windows System Restore at - HP 2000-2b20CA | User Guide - Windows 7 - Page 74
screen image is added to the document. 4. Save and print the document. What you need to know ● You can back up your information to an optional external hard drive, a flash drive, a network drive program. ◦ After adding information that is hard to replace, such as pictures, videos, music, project - HP 2000-2b20CA | User Guide - Windows 7 - Page 75
problems. If uninstalling does not fix the problems Follow the on-screen instructions to restore your Support for more information. Recovering the original system using HP Recovery Manager HP HP Recovery Manager to recover your system. ● A system recovery must be performed if the computer hard drive - HP 2000-2b20CA | User Guide - Windows 7 - Page 76
will fail. Recovering using HP Recovery partition (select models only) The HP Recovery partition (select models only), allows you to restore your system without the need for recovery discs or a recovery flash drive. This type of recovery can only be used if the hard drive is still working. To - HP 2000-2b20CA | User Guide - Windows 7 - Page 77
To change the boot order for a recovery flash drive: 1. Insert the flash drive into a USB port. 2. Restart the computer. 3. Press esc while the computer is restarting, and then press f9 for boot options. 4. Select the flash drive from the boot options window. Restore and recovery 67 - HP 2000-2b20CA | User Guide - Windows 7 - Page 78
be powered from a standalone DC power source, it should be powered only with an AC adapter or a DC power source supplied and approved by HP for use with this computer. The computer can operate on DC power within the following specifications. Operating voltage and current varies by platform. Input - HP 2000-2b20CA | User Guide - Windows 7 - Page 79
13 Troubleshooting and support ● Troubleshooting ● Contacting support 69 - HP 2000-2b20CA | User Guide - Windows 7 - Page 80
are included with select computer models only. If wireless networking is not listed in the feature list on the side of the original computer package, you may add wireless networking capability to the computer by purchasing a wireless networking device. 70 Chapter 13 Troubleshooting and support - HP 2000-2b20CA | User Guide - Windows 7 - Page 81
codes that you enter into your computer to identify your computer to the network. ● For a network connected to your personal wireless router, review the router user guide for instructions on setting up the same codes on both the router and the WLAN device. ● For a private network, such as a network - HP 2000-2b20CA | User Guide - Windows 7 - Page 82
wireless router. For details, see the router manufacturer's instructions drivers for your computer from the HP website at http://www.hp.com. If the WLAN device you are using was purchased separately, consult the manufacturer's website for the latest software. 72 Chapter 13 Troubleshooting and support - HP 2000-2b20CA | User Guide - Windows 7 - Page 83
your Internet browser and go to http://www.hp.com/support. 2. Select your country or region. 3. Click the option for software and driver downloads, and then type your computer model number in the search box. 4. Press enter, and then follow the on-screen instructions. NOTE: If the WLAN device you are - HP 2000-2b20CA | User Guide - Windows 7 - Page 84
sufficient power to exit Hibernation, follow these steps: 1. Replace the discharged user-replaceable battery with a charged battery, or connect the AC adapter to the computer and to external power. 2. Exit Hibernation by pressing the power button. Troubleshooting an AC adapter Test the AC adapter if - HP 2000-2b20CA | User Guide - Windows 7 - Page 85
If the information provided in this user guide or in Help and Support does not answer your questions, you can contact support. For U.S. support, go to http://www.hp.com/go/contactHP. For worldwide support, go to http://welcome.hp.com/country/us/en/wwcontact_us.html. Here you can: ● Chat online - HP 2000-2b20CA | User Guide - Windows 7 - Page 86
damage to the computer, damage to a drive, or loss of information, observe these precautions: ● If removal or installation instructions direct you to unplug the computer, static electricity or assistance with component removal or installation, contact support. 76 Chapter 14 Electrostatic Discharge - HP 2000-2b20CA | User Guide - Windows 7 - Page 87
power 36 disposing 37 replacing 37 storing 36 battery bay 12, 13 battery information, finding 36 battery power 35 battery release latch 12 battery temperature 36 best practices 1 BIOS determining version 59 downloading an update 60 updating 59 Bluetooth device 14, 17 Bluetooth label 13 boot order - HP 2000-2b20CA | User Guide - Windows 7 - Page 88
number 13 service 13 wireless certification 13 WLAN 13 latch, battery release 12 lights AC adapter 4 caps lock 9 hard drive 6 optical drive 4 power 6, 9 TouchPad 8, 27 webcam 7, 19 wireless 9 M maintenance Disk Cleanup 48 Disk Defragmenter 48 memory module inserting 50 removing 49 replacing 49 - HP 2000-2b20CA | User Guide - Windows 7 - Page 89
8, 27 TouchPad zone, identifying 8, 27 traveling with the computer 13, 36, 52 troubleshooting AC adapter 74 audio functions 73 disc drive 70 low battery level 73 power management 73 wireless connection 70 Troubleshooting and support 69 turning off the computer 38 U unresponsive system 38 USB cable
-
 1
1 -
 2
2 -
 3
3 -
 4
4 -
 5
5 -
 6
6 -
 7
7 -
8
-
9
-
10
-
11
-
12
-
13
-
14
-
15
-
16
-
17
-
18
-
19
-
20
-
21
-
22
-
23
-
24
-
25
-
26
-
27
-
28
-
29
-
30
-
31
-
32
-
33
-
34
-
35
-
36
-
37
-
38
-
39
-
40
-
41
-
42
-
43
-
44
-
45
-
46
-
47
-
48
-
49
-
50
-
51
-
52
-
53
-
54
-
55
-
56
-
57
-
58
-
59
-
60
-
61
-
62
-
63
-
64
-
65
-
66
-
67
-
68
-
69
-
70
-
71
-
72
-
73
-
74
-
75
-
76
-
77
-
78
-
79
-
80
-
81
-
82
-
83
-
84
-
85
-
86
-
87
-
88
-
89
 |
 |

User Guide