HP 203039-B21 CMC Sensot Kit Installation Instructions
HP 203039-B21 - Console Management Controller Manual
 |
UPC - 720591484798
View all HP 203039-B21 manuals
Add to My Manuals
Save this manual to your list of manuals |
HP 203039-B21 manual content summary:
- HP 203039-B21 | CMC Sensot Kit Installation Instructions - Page 1
Computer Corporation. About This Device These instructions serve as an outline to assist Please refer to the Important Safety Information (guide included with the CMC kit) before installing The installation of options and routine maintenance and service of this product must be performed by - HP 203039-B21 | CMC Sensot Kit Installation Instructions - Page 2
Intrusion Sensor An intrusion sensor consists of two parts: a magnet and an electrical switch. The magnet should be installed on the inside of the rack door and the electrical switch on the rack as shown below. Make sure the magnet and switch align; allow sufficient clearance for the doors to close. - HP 203039-B21 | CMC Sensot Kit Installation Instructions - Page 3
Humidity Sensor Install the humidity sensor as shown below. 9000 series rack 7000 series rack 2 Connecting Sensors to the CMC The sensors connect to the rear of the CMC unit as shown below. i The optional temperature sensor connects to port and the 9 - optional intrusion sensors connect to ports - HP 203039-B21 | CMC Sensot Kit Installation Instructions - Page 4
: To reduce the risk of personal injury resulting from electric shock, do not remove the cover from the Console Management Controller. There are no field-serviceable or userserviceable components. Installation is complete.
-
 1
1 -
 2
2 -
 3
3 -
 4
4
 |
 |

About This Device
These instructions serve as an outline to assist qualified person-
nel with the installation of the optional sensors for the Compaq
Console Management Controller (CMC).
IMPORTANT SAFETY INSTRUCTIONS
SAVE THESE INSTRUCTIONS - This document contains
important instructions for additional sensors to be used with the
CMC Kit, that should be followed during installation.
NOTICE
The information in this publication is subject to change without notice.
COMPAQ COMPUTER CORPORATION SHALL NOT BE LIABLE FOR
TECHNICAL OR EDITORIAL ERRORS OR OMISSIONS CONTAINED HEREIN,
NOR FOR INCIDENTAL OR CONSEQUENTIAL DAMAGES RESULTING FROM
THE FURNISHING, PERFORMANCE, OR USE OF THIS MATERIAL. THIS
INFORMATION IS PROVIDED “AS IS” AND COMPAQ COMPUTER
CORPORATION DISCLAIMS ANY WARRANTIES, EXPRESS, IMPLIED OR
STATUTORY AND EXPRESSLY DISCLAIMS THE IMPLIED WARRANTIES OF
MERCHANTABILITY, FITNESS FOR PARTICULAR PURPOSE, GOOD TITLE
AND AGAINST INFRINGEMENT.
This publication contains information protected by copyright. No part of
this publication may be photocopied or reproduced in any form without
prior written consent from Compaq Computer Corporation.
© 2001 Compaq Computer Corporation
Compaq, Registered U.S. Patent and Trademark Office.
COMPAQ CMC SENSOR KIT
INSTALLATION INSTRUCTIONS
First Edition (March 2001)
Part Number 218259-021
Compaq Computer Corporation
CMC S
ENSOR
K
IT
Printed on recycled paper
Read Instructions Completely Before
Beginning Installation Procedures
Installation Instructions for
CMC Sensor Kit
Important Safety Information
Read Before Installing Product
Please refer to the
Important Safety Information
(guide
included with the CMC kit) before installing this product.
Kit Contents
n
Temperature sensor (1)
n
Intrusion sensor (2 sets)
n
Mechanical shock/vibration sensor (1)
n
Humidity sensor (1)
n
Mounting hardware
o
Screws
o
Humidity sensor mounting bracket
o
Double sided tape
o
Tie wraps
o
Cable management clips
n
Package of sensor cables – assorted lengths
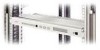
Temperature Sensor
The temperature sensor can be installed on the ceiling of the rack
towards the rear, or near the most temperature-sensitive component
in the rack.
WARNING:
There is a risk of personal injury from electrical shock
and hazardous energy levels. The installation of options and routine
maintenance and service of this product must be performed by
individuals who are knowledgeable about the procedures, precau-
tions, and hazards associated with AC power products.
1
Installing the Sensors
218259- 021
The sensor cables can be routed through the rack and then
attached to the rack by using the stick-on cable management clips
or tie wraps.