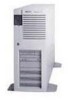
HP D5970A HP Netserver LH 3/LH 3r DIMM Installation Guide
HP D5970A - NetServer - LCII Manual
 |
View all HP D5970A manuals
Add to My Manuals
Save this manual to your list of manuals |
HP D5970A manual content summary:
- HP D5970A | HP Netserver LH 3/LH 3r DIMM Installation Guide - Page 1
HP NetServer LH 3/LH 3r DIMM Installation Guide HP Part Number 5967-2105 Printed in May 1998 - HP D5970A | HP Netserver LH 3/LH 3r DIMM Installation Guide - Page 2
Notice The information contained in this document is subject to change without notice. Hewlett-Packard makes no warranty of any kind with regard to this material, including, but not limited to, the implied warranties of merchantability and fitness for a particular purpose. Hewlett-Packard shall not - HP D5970A | HP Netserver LH 3/LH 3r DIMM Installation Guide - Page 3
Contents Preface v Purpose of This Guide v Contents of This Guide v Intended Audience vi Related Documentation vi 1 Introduction 1 Verifying Contents 1 Prepare for Installation 1 Tools You Need 2 2 Preparation 3 Removing the Cover (NetServer LH 3 3 Removing the Cover (NetServer - HP D5970A | HP Netserver LH 3/LH 3r DIMM Installation Guide - Page 4
HP NetServer LH 3 15 HP NetServer LH 3r 15 5 Warranty and Support 17 HP Repair and Telephone Support 18 iv - HP D5970A | HP Netserver LH 3/LH 3r DIMM Installation Guide - Page 5
D6097A, D6098A, and D6099A, in an HP NetServer LH 3 or LH 3r. Contents of This Guide This guide includes the following topics: • An Introduction, including verifying the contents of the shipping box, and important precautionary warnings • Preparation instructions, such as removing the chassis side - HP D5970A | HP Netserver LH 3/LH 3r DIMM Installation Guide - Page 6
Intended Audience This guide is intended for the person who installs, administers, and troubleshoots network servers. Hewlett-Packard Company assumes you are qualified in the servicing of computer equipment and trained in recognizing hazards in products with hazardous energy levels. Related - HP D5970A | HP Netserver LH 3/LH 3r DIMM Installation Guide - Page 7
WARNING Before removing the cover, always disconnect the power cord and unplug telephone cables. Disconnect the power cord to avoid exposure to high energy levels that may cause burns when parts are shortcircuited by metal objects, such as tools or jewelry. Disconnect telephone cables to avoid - HP D5970A | HP Netserver LH 3/LH 3r DIMM Installation Guide - Page 8
- HP D5970A | HP Netserver LH 3/LH 3r DIMM Installation Guide - Page 9
1 Introduction Verifying Contents The contents of the shipping box include: • One HP qualified DIMM. • The HP NetServer LH 3/LH 3r DIMM Installation Guide. CAUTION To avoid damaging the DIMM with electrostatic discharge, handle the DIMMs in a static-free environment only. Hold the module by its - HP D5970A | HP Netserver LH 3/LH 3r DIMM Installation Guide - Page 10
Tools You Need To install DIMMs, you need an anti-static service kit (3M™ 8501/8502/8503 or equivalent). This kit includes a static-dissipating Installation Instructions 2 - HP D5970A | HP Netserver LH 3/LH 3r DIMM Installation Guide - Page 11
2 Preparation This chapter includes guidelines and instructions for installing DIMMs in the specified sequence on the system board. Removing the Cover (NetServer LH 3) To remove a cover: 1. Turn off the HP NetServer and disconnect the power cord and telephone cord. 2. Unlock the bezel lock with the - HP D5970A | HP Netserver LH 3/LH 3r DIMM Installation Guide - Page 12
Tabs and Slots Thumbscrews Cover 3 Figure 2-1. Removing the Cover (NetServer LH 3) 4 - HP D5970A | HP Netserver LH 3/LH 3r DIMM Installation Guide - Page 13
Removing the Cover (NetServer LH 3r) 1. Turn off the HP NetServer and disconnect all power and telephone cords. 2. Remove the bezel, the bezel hinge, and the screws securing the latch plate to the front-right - HP D5970A | HP Netserver LH 3/LH 3r DIMM Installation Guide - Page 14
Latch Plate Bezel Hinge Bezel Figure 2-2. Sliding Out the NetServer From the Rack 6 - HP D5970A | HP Netserver LH 3/LH 3r DIMM Installation Guide - Page 15
4. Loosen the thumbscrew at the front of cover 2 and pull the cover forward, using the handle on the cover, and then lift it off the chassis (see Figure 2-3). Cover 2 Thumbscrew Figure 2-3. Removing the Cover (NetServer LH 3r) 7 - HP D5970A | HP Netserver LH 3/LH 3r DIMM Installation Guide - Page 16
Removing the System Board (NetServer LH 3r) To remove the system board from the LH 3r: 1. Rotate the system board retaining latches until they point away from the chassis, and the system board has come out of its socket (see Figure 2-4). 2. Slide the system board out of the chassis and place it on a - HP D5970A | HP Netserver LH 3/LH 3r DIMM Installation Guide - Page 17
System Board Retaining Latches Figure 2-4. Removing the System Board (NetServer LH 3r) 9 - HP D5970A | HP Netserver LH 3/LH 3r DIMM Installation Guide - Page 18
Metal support must be OFF work surface; system board must lie flat. System Board Static-dissipating Work Surface Figure 2-5. Orienting the System Board (NetServer LH 3r) 10 - HP D5970A | HP Netserver LH 3/LH 3r DIMM Installation Guide - Page 19
chapter includes guidelines and instructions for installing DIMMs in the specified sequence on the system board. CAUTION Use only DIMMs acquired from HP. Contact HP Customer Support for a list of qualified DIMMs. HP will not warranty or support configurations that use non-HP DIMMs. Installation - HP D5970A | HP Netserver LH 3/LH 3r DIMM Installation Guide - Page 20
• DIMMs may be installed in any quantity and in any DIMM socket on the system board. DIMMs that differ in capacity can be mixed. System Board DIMM Socket 0 DIMM Socket 1 DIMM Socket 2 DIMM Socket 3 Figure 3-1. DIMM Socket Location 12 - HP D5970A | HP Netserver LH 3/LH 3r DIMM Installation Guide - Page 21
Installing DIMMs 1. Remove an HP DIMM from its container, handling the module by its ends; do not touch the pins. Lay it on an anti-static surface. 2. Locate the socket - HP D5970A | HP Netserver LH 3/LH 3r DIMM Installation Guide - Page 22
4. Hold the DIMM at a 90-degree angle to the system board. 5. Insert the DIMM carefully into the socket. The retaining clips will close automatically if it is inserted properly. CAUTION Do not rock the DIMM into place, but apply firm and even pressure directly downward. If the retaining clips do - HP D5970A | HP Netserver LH 3/LH 3r DIMM Installation Guide - Page 23
Cover After installing the memory, replace the cover and bezel. HP NetServer LH 3 1. Insert the tabs inside the cover into to the chassis until it snaps into place. Lock the bezel lock with the key provided. HP NetServer LH 3r 1. Insert the tabs inside the cover into the slots in the chassis and - HP D5970A | HP Netserver LH 3/LH 3r DIMM Installation Guide - Page 24
3. Reinstall the latch plate, bezel hinge, and bezel (see Figure 2-2). 4. Replace all power, telephone, and I/O cables. 16 - HP D5970A | HP Netserver LH 3/LH 3r DIMM Installation Guide - Page 25
Support This HP NetServer accessory is covered by a limited hardware warranty for a period of one year from receipt by the original end-user purchaser. Once installed in an HP installed. This accessory may be serviced through expedited part shipments. In this event, HP will prepay shipping charges, - HP D5970A | HP Netserver LH 3/LH 3r DIMM Installation Guide - Page 26
HP Repair and Telephone Support Refer to the Service and Support chapter of your HP NetServer system documentation for instructions on how to obtain HP repair and telephone support 18
-
 1
1 -
 2
2 -
 3
3 -
 4
4 -
 5
5 -
 6
6 -
 7
7 -
8
-
9
-
10
-
11
-
12
-
13
-
14
-
15
-
16
-
17
-
18
-
19
-
20
-
21
-
22
-
23
-
24
-
25
-
26
 |
 |

HP NetServer LH 3/LH 3r
DIMM Installation Guide
HP Part Number 5967-2105
Printed in May 1998