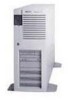
HP D5970A HP Netserver LH 3/LH 3r Processor Upgrade Guide
HP D5970A - NetServer - LCII Manual
 |
View all HP D5970A manuals
Add to My Manuals
Save this manual to your list of manuals |
HP D5970A manual content summary:
- HP D5970A | HP Netserver LH 3/LH 3r Processor Upgrade Guide - Page 1
HP NetServer LH 3/LH 3r Processor Upgrade Installation Guide HP Part Number 5967-2106 Printed in June 1998 - HP D5970A | HP Netserver LH 3/LH 3r Processor Upgrade Guide - Page 2
-Packard shall not be liable for errors contained herein or for incidental or the use or reliability of its software on equipment that is not furnished guide is for the person who installs, administers, and troubleshoots LAN servers. Hewlett-Packard Company assumes you are qualified in the servicing - HP D5970A | HP Netserver LH 3/LH 3r Processor Upgrade Guide - Page 3
Switches 19 Completing the Installation 20 Completing the HP NetServer LH 3 Installation 20 Completing the HP NetServer LH 3r Installation 21 Updating the BIOS 24 2 Warranty and Support 25 Hardware Warranty 25 HP Repair and Telephone Support 25 A Regulatory Information 27 Index ...29 iii - HP D5970A | HP Netserver LH 3/LH 3r Processor Upgrade Guide - Page 4
- HP D5970A | HP Netserver LH 3/LH 3r Processor Upgrade Guide - Page 5
. Installation Overview This guide describes the tools required and the procedure for installing a Pentium II™ processor module into the HP NetServer. The installation procedure includes instructions on how to: • Remove the NetServer bezel and covers • Remove the HP NetServer LH 3r system board - HP D5970A | HP Netserver LH 3/LH 3r Processor Upgrade Guide - Page 6
II processor module • Voltage regulator module (VRM) • HP NetServer LH 3/LH 3r Navigator CD • Processor cooling fan (provided with • Use an anti-static wrist strap and a grounding mat. Read and follow the instructions included with the wrist strap and mat. • Before you remove the accessory from the - HP D5970A | HP Netserver LH 3/LH 3r Processor Upgrade Guide - Page 7
the key for the front lock, if the HP NetServer is locked: • A portable field service grounding kit (3M part number 8505 or equivalent NetServer system board to install this accessory kit. Separate procedures follow for removing the HP NetServer LH 3 bezel and covers and removing the HP NetServer LH - HP D5970A | HP Netserver LH 3/LH 3r Processor Upgrade Guide - Page 8
Chapter 1 Processor Module Installation Removing the HP NetServer LH 3 Covers The bezel and cover 3 must be removed to access the system board. Removing the Bezel The bezel shown in Figure 1-1 is attached to the front of the NetServer chassis with two snap-in connectors at the top front of the - HP D5970A | HP Netserver LH 3/LH 3r Processor Upgrade Guide - Page 9
to access the system board and upgrade the NetServer processor module. CAUTION The NetServer covers are heavy. Support them as you remove them, and allow room to move them away from the NetServer and for storage. Figure 1-2. HP NetServer LH 3 Covers 1. Remove cover 3 by unscrewing the thumbscrew - HP D5970A | HP Netserver LH 3/LH 3r Processor Upgrade Guide - Page 10
Figure 1-3 has three clips that mount onto a hinge assembly, which is secured to the NetServer chassis. 1. Turn off the HP NetServer and disconnect the power cord and telephone cord. 2. To remove the bezel, pull it toward you until it comes free. Figure 1-3. Removing the HP NetServer LH 3r Bezel 6 - HP D5970A | HP Netserver LH 3/LH 3r Processor Upgrade Guide - Page 11
Chapter 1 Processor Module Installation Extending the HP NetServer LH 3r from the Rack Extend the NetServer chassis from the rack to access the cover panels and system board. WARNING Do not unscrew the NetServer until you have extended the anti-tip foot from under the front of the rack. This - HP D5970A | HP Netserver LH 3/LH 3r Processor Upgrade Guide - Page 12
Installation Figure 1-5. Screw and Cover Locations Removing Cover Panels The NetServer has three removable cover panels (see Figure 1-6): • Cover access the system board and upgrade the NetServer processors. CAUTION The NetServer covers are heavy. Support them as you remove them, and allow room - HP D5970A | HP Netserver LH 3/LH 3r Processor Upgrade Guide - Page 13
Chapter 1 Processor Module Installation Figure 1-6. HP NetServer LH 3r Covers 1. Remove cover 2 by unscrewing the thumbscrew, pulling the cover forward, and then slightly lifting it to disengage it. 2. Hold the cover and pull it away from the chassis. 9 - HP D5970A | HP Netserver LH 3/LH 3r Processor Upgrade Guide - Page 14
the processor modules. The system board is secured to the chassis by two retaining latches (see Figure 1-7). System Board Retaining Latches Figure 1-7. HP NetServer LH 3r System Board 1. Lift the retaining latches to release the system board from its socket. 2. Lift the system board out of the - HP D5970A | HP Netserver LH 3/LH 3r Processor Upgrade Guide - Page 15
Chapter 1 Processor Module Installation Place crosspiece off edge of work surface Figure 1-8. Placing the System Board on the Work Surface Proceed to the next section "Installing the Processor Modules." Installing the Processor Modules Familiarize yourself with the components on the system board - HP D5970A | HP Netserver LH 3/LH 3r Processor Upgrade Guide - Page 16
Chapter 1 Processor Module Installation Removing the Terminator Board If your system has one processor, a terminator board is installed in the upper slot. You must remove the terminator board before installing a processor module into this slot. (See Figure 1-10). 1. Squeeze together the two - HP D5970A | HP Netserver LH 3/LH 3r Processor Upgrade Guide - Page 17
Chapter 1 Processor Module Installation Removing the Processor Module If you are upgrading an existing processor module, you must first remove the module from the slot. To remove a processor module: 1. Press in on each processor module release latch until it remains in (see Figure 1-11). If the - HP D5970A | HP Netserver LH 3/LH 3r Processor Upgrade Guide - Page 18
Chapter 1 Processor Module Installation Processor Ejector Level Processor Mounting Bracket Processor Module Release Latch Figure 1-11. Removing the Processor Module 14 - HP D5970A | HP Netserver LH 3/LH 3r Processor Upgrade Guide - Page 19
the edge of the module is ¼-inch below the top of the processor mounting bracket. CAUTION If the NetServer has only one processor module, it must be installed in the primary (lower) processor slot, and a terminator broken due to use of excessive force are not covered by any HP warranty. 15 - HP D5970A | HP Netserver LH 3/LH 3r Processor Upgrade Guide - Page 20
Chapter 1 Processor Module Installation Figure 1-12. Installing a New Processor Module 16 - HP D5970A | HP Netserver LH 3/LH 3r Processor Upgrade Guide - Page 21
VRM except the edge of the main board may result in damage to the VRM. Damage caused by improper installation is not covered by any HP warranty. 3. Verify that the VRM is installed completely in the socket. When the VRM is installed completely, the release latches (see Figure 1-13) at the - HP D5970A | HP Netserver LH 3/LH 3r Processor Upgrade Guide - Page 22
Chapter 1 Release Latches (shown in open position) Processor Module Installation Main VRM Board VRM Socket Do not push here Figure 1-13. Installing a New VRM 18 - HP D5970A | HP Netserver LH 3/LH 3r Processor Upgrade Guide - Page 23
correctly, set them accordingly. NOTE If two processors are installed in the NetServer, both must be the same speed. To set the processor speed switches: speed may result in unreliable or intermittent performance. Data integrity may also be placed at risk if processors are operated at speeds - HP D5970A | HP Netserver LH 3/LH 3r Processor Upgrade Guide - Page 24
, such as hard disk drives and processor modules. Operating the system without all covers in place may result in failure of these components. Separate procedures follow to complete installation for the HP NetServer LH 3 and the HP NetServer LH 3r. Completing the HP NetServer LH 3 Installation To - HP D5970A | HP Netserver LH 3/LH 3r Processor Upgrade Guide - Page 25
Chapter 1 Processor Module Installation Completing the HP NetServer LH 3r Installation To complete the installation: 1. Insert the system board into the plastic guides in the chassis. Hold the retaining latches vertically while inserting the board until it touches its socket on the backplane. - HP D5970A | HP Netserver LH 3/LH 3r Processor Upgrade Guide - Page 26
installed) rack nuts on the left column (refer to Figure 1-7) by means of two screws. Secure the latch plate on the right side of the server to the two previously installed rack nuts on the right column. 2. Attach the latch plate to the front column with two screws into the rack - HP D5970A | HP Netserver LH 3/LH 3r Processor Upgrade Guide - Page 27
Chapter 1 Processor Module Installation 5. Snap the bezel in place so it swings open to access the HP NetServer LH 3r internal mass storage cage. See Figure 1-16. Bezel Figure 1-16. Installing the Front Bezel 6. Confirm that all cables are attached firmly. 7. Power up the - HP D5970A | HP Netserver LH 3/LH 3r Processor Upgrade Guide - Page 28
for the processors installed, and does not need updating for this purpose. If you boot the NetServer Navigator CD-ROM and see this error message, you must update the BIOS. To update the BIOS: 1. Boot the HP NetServer Navigator CD-ROM (if you have not already done so) that came with the processor - HP D5970A | HP Netserver LH 3/LH 3r Processor Upgrade Guide - Page 29
provided with your original HP NetServer system documentation for the warranty limitations, customer responsibilities, and other terms and conditions. HP Repair and Telephone Support Refer to the Service and Support section of your HP NetServer system documentation for instructions on how to obtain - HP D5970A | HP Netserver LH 3/LH 3r Processor Upgrade Guide - Page 30
- HP D5970A | HP Netserver LH 3/LH 3r Processor Upgrade Guide - Page 31
A Regulatory Information For regulatory information pertaining to this HP accessory, please refer to the regulatory section of the user guide for the NetServer in which this accessory is installed. 27 - HP D5970A | HP Netserver LH 3/LH 3r Processor Upgrade Guide - Page 32
- HP D5970A | HP Netserver LH 3/LH 3r Processor Upgrade Guide - Page 33
, 2, 3 VRM installation, 17 VRM release latches, 17 covers LH 3, 5 LH 3r, 8 G getting help, 25 H hardware repair warranty information, 25 help, 25 HP NetServer, 1 I installation overview, 1 L LH 3 bezel, 4 completing installation, 20 covers, 5 LH 3r bezel, 6, 22 completing installation, 21 covers - HP D5970A | HP Netserver LH 3/LH 3r Processor Upgrade Guide - Page 34
Index W Warning anti-tip foot, 7 power and cable disconnect, 3 warranty information hardware, 25 30
-
 1
1 -
 2
2 -
 3
3 -
 4
4 -
 5
5 -
 6
6 -
 7
7 -
8
-
9
-
10
-
11
-
12
-
13
-
14
-
15
-
16
-
17
-
18
-
19
-
20
-
21
-
22
-
23
-
24
-
25
-
26
-
27
-
28
-
29
-
30
-
31
-
32
-
33
-
34
 |
 |

HP NetServer LH 3/LH 3r
Processor Upgrade
Installation Guide
HP Part Number 5967-2106
Printed in June 1998