HP D5970A HP Netserver LH 3000/3000r to LH 6000/6000r Upgrade Guide
HP D5970A - NetServer - LCII Manual
 |
View all HP D5970A manuals
Add to My Manuals
Save this manual to your list of manuals |
HP D5970A manual content summary:
- HP D5970A | HP Netserver LH 3000/3000r to LH 6000/6000r Upgrade Guide - Page 1
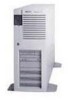
HP NetServer LH 3000/3000r to LH 6000/6000r Upgrade Guide HP Part Number 5969-3953 Printed in November 1999 - HP D5970A | HP Netserver LH 3000/3000r to LH 6000/6000r Upgrade Guide - Page 2
95014 USA © Copyright 1999, Hewlett-Packard Company. Audience Assumptions The guide is for the person who installs, administers, and troubleshoots LAN servers. Hewlett-Packard Company assumes you are qualified in the servicing of computer equipment and trained in recognizing hazards in products with - HP D5970A | HP Netserver LH 3000/3000r to LH 6000/6000r Upgrade Guide - Page 3
New Server 1 Verify NOS Versions Supported by the LH 6000/6000r 1 Accessory Contents 2 Determine Which Accessories You Need 3 Power Supply Upgrade Kit 3 Memory ...3 Processors 4 Returning LH 3000 Components to HP 4 Purpose of This Guide 4 Related Documentation 5 Precautions 5 2 Preparing - HP D5970A | HP Netserver LH 3000/3000r to LH 6000/6000r Upgrade Guide - Page 4
Diskettes 35 Run the Basic System Test 36 Create Support Ticket 37 Use the Error Code Viewer to Review Corrective Actions 38 Use HP DiagTools to Burn in the NetServer 38 Exit HP DiagTools and Take Corrective Action if Necessary 39 Reinstall Your NOS 39 Prepare Your Boot Drive 39 Install - HP D5970A | HP Netserver LH 3000/3000r to LH 6000/6000r Upgrade Guide - Page 5
NetServer LH 3000/3000r. Verify NOS Versions Supported by the LH 6000/6000r Verify which versions of your NOS are supported for the HP NetServer LH 6000/6000r. For a complete list of NOS versions supported for the HP NetServer LH 6000/6000r, see the HP web site: http://www.hp.com/go/netserver 1 - HP D5970A | HP Netserver LH 3000/3000r to LH 6000/6000r Upgrade Guide - Page 6
and follow the instructions included with the HP NetServer LH 6000 (pedestal version) uses the short nameplate ◊ the HP NetServer LH 6000r (for HP rack systems) uses the long, thick nameplate ◊ the HP NetServer LH 6000r (for non-HP number label l HP NetServer LH 3000/3000r to LH 6000/6000r Upgrade - HP D5970A | HP Netserver LH 3000/3000r to LH 6000/6000r Upgrade Guide - Page 7
Use the guidelines described in this section when purchasing additional accessories for your new HP NetServer LH 6000/6000r. Power Supply Upgrade Kit You must order a Power Supply Upgrade Kit, product number D8551A, for the HP NetServer LH 3000/3000r and LH 6000/6000r. WARNING Do not proceed with - HP D5970A | HP Netserver LH 3000/3000r to LH 6000/6000r Upgrade Guide - Page 8
the maximum amount of memory supported by your NOS. Processors Guide This guide describes the steps you need to perform to convert the HP NetServer LH 3000/3000r to the HP NetServer LH 6000/6000r. This guide for the Upgrade," identifies the necessary tools, instructs you to back up your data, and - HP D5970A | HP Netserver LH 3000/3000r to LH 6000/6000r Upgrade Guide - Page 9
steps for reinstalling your NOS if necessary. Related Documentation The following documents describe the HP NetServer LH 3000/3000r and LH 6000/6000r: • HP NetServer Installation Guide • HP NetServer Online Documentation CD-ROM Precautions Follow the procedures listed below to ensure safe handling - HP D5970A | HP Netserver LH 3000/3000r to LH 6000/6000r Upgrade Guide - Page 10
- HP D5970A | HP Netserver LH 3000/3000r to LH 6000/6000r Upgrade Guide - Page 11
. Tools You Need To install this accessory you need an anti-static service kit (3M™ 8501/8502/8503 or equivalent). This kit includes a you will also need some additional tools. Refer to the HP NetServer LH 3000/3000r Installation Guide and your rack documentation for further details. Back Up Your - HP D5970A | HP Netserver LH 3000/3000r to LH 6000/6000r Upgrade Guide - Page 12
under these selections: ∗ Embedded LAN and SCSI Settings ∗ Boot Settings See your NetServer's Installation Guide for more information about the Setup utility. 3. If you are using integrated HP NetRAID, start the HP NetRAID Express Tools utility and write down all configuration details for integrated - HP D5970A | HP Netserver LH 3000/3000r to LH 6000/6000r Upgrade Guide - Page 13
Utilities option. If there are problems with the system, troubleshoot these before continuing with the upgrade . You might want to save the Event Log file before you proceed. Refer to the HP NetServer LH 3000/3000r Installation Guide and the HP - HP D5970A | HP Netserver LH 3000/3000r to LH 6000/6000r Upgrade Guide - Page 14
- HP D5970A | HP Netserver LH 3000/3000r to LH 6000/6000r Upgrade Guide - Page 15
: l Power off the NetServer. l Remove covers and system board. l Remove chassis guide and air baffles. WARNING Do not proceed with this upgrade without first purchasing the appropriate Power Supply Upgrade Kit. The HP NetServer LH 6000/6000r cannot operate without a minimum of three power supplies - HP D5970A | HP Netserver LH 3000/3000r to LH 6000/6000r Upgrade Guide - Page 16
to the chassis when handling components. Ensure the metal of the wrist strap contacts your skin. 1. Remove covers as follows. See the Installation Guide for your NetServer for more complete information. a. If your NetServer is in the pedestal orientation (LH 3000), follow these steps: 1. Unlock and - HP D5970A | HP Netserver LH 3000/3000r to LH 6000/6000r Upgrade Guide - Page 17
Chapter 3 Removing Components from the LH 3000/3000r Retaining Latches Figure 3-1. Remove System Board from NetServer LH 3000 13 - HP D5970A | HP Netserver LH 3000/3000r to LH 6000/6000r Upgrade Guide - Page 18
Chapter 3 Removing Components from the LH 3000/3000r Retaining Latches Figure 3-2. Remove System Board from NetServer LH 3000r 14 - HP D5970A | HP Netserver LH 3000/3000r to LH 6000/6000r Upgrade Guide - Page 19
the thumbscrew holding the chassis guide in place as shown in Figures 3-3 (pedestal version) and 3-4 (rack-mounted version). NOTE You can use a T15 TorxTM driver to help remove this screw if necessary. Remove screw and chassis guide. Figure 3-3. Remove Chassis Guide from the HP NetServer LH 3000 - HP D5970A | HP Netserver LH 3000/3000r to LH 6000/6000r Upgrade Guide - Page 20
Chapter 3 Removing Components from the LH 3000/3000r Remove screw and chassis guide. Figure 3-4. Remove Chassis Guide from the HP NetServer LH 3000r (Rack-mounted Version) 16 - HP D5970A | HP Netserver LH 3000/3000r to LH 6000/6000r Upgrade Guide - Page 21
NetServer LH 3000 (pedestal version), you can see the thumbscrews from the top of the NetServer. See Figure 3-5. ◊ In the HP NetServer LH 3000r (rack-mounted version), you can see the thumbscrews from the right side of the NetServer. See Figure 3-6. NOTE Save these thumbscrews. This - HP D5970A | HP Netserver LH 3000/3000r to LH 6000/6000r Upgrade Guide - Page 22
Chapter 3 Removing Components from the LH 3000/3000r Figure 3-6. Remove Thumbscrews and Air Baffles from the NetServer LH 3000r (rack-mounted version) 18 - HP D5970A | HP Netserver LH 3000/3000r to LH 6000/6000r Upgrade Guide - Page 23
4 Installing LH 6000/6000r Components This chapter explains the following steps to install the new HP NetServer LH 6000/6000r components: l Install DIMMs in the new system board. l Install processors in the new system board. l Install new system board. l Install third - HP D5970A | HP Netserver LH 3000/3000r to LH 6000/6000r Upgrade Guide - Page 24
Chapter 4 1A 2A 3A 4A 1B 2B 3B 4B Installing LH 6000/6000r Components Figure 4-1. DIMM Sockets on LH 6000/6000r System Board 2. Locate the socket in which you will install the DIMM, and spread the two retaining clips outward (see Figure 4-2). 3. Hold the DIMM at a 90-degree angle to the system - HP D5970A | HP Netserver LH 3000/3000r to LH 6000/6000r Upgrade Guide - Page 25
Chapter 4 Installing LH 6000/6000r Components 5. Press the DIMM into the socket. The retaining clips close automatically if it is inserted properly. See Figure 4-3. CAUTION Do not rock the DIMM into place, but apply firm and even pressure directly downward. If the retaining clips do not close, - HP D5970A | HP Netserver LH 3000/3000r to LH 6000/6000r Upgrade Guide - Page 26
ascending slot order. l All processor modules must have the same clock speed and cache size. l Two VRMs are preinstalled on the system board which support the two processors shipped with this upgrade kit. l For each additional processor that you install, you must install one VRM. You must add VRMs - HP D5970A | HP Netserver LH 3000/3000r to LH 6000/6000r Upgrade Guide - Page 27
5 1 CAUTION Figure 4-5. VRM Socket Numbers Do not remove the processor from its bag until you are ready to install it. Make sure the bag remains sealed. Before you remove a processor from the anti-static container, touch a grounded, unpainted metal surface on the HP NetServer to discharge static - HP D5970A | HP Netserver LH 3000/3000r to LH 6000/6000r Upgrade Guide - Page 28
Chapter 4 Installing LH 6000/6000r Components 1. Loosen the thumbscrew and open the access cover to processor slots 1, 2, and 3. Processor slots 1 and 2 are empty, and slot 3 contains a terminator. Thumbscrew Cover for Processor Slots 1, 2, and 3 Figure 4-6. Open Cover for Processor Slots 1, 2, - HP D5970A | HP Netserver LH 3000/3000r to LH 6000/6000r Upgrade Guide - Page 29
Chapter 4 Installing LH 6000/6000r Components Figure 4-7. Open Processor Module Retaining Latches 4. Press the processor module into the slot until it is fully seated. 5. Rotate the retaining latches into the flat, closed position. 6. If you are adding more than two processors, be sure to install - HP D5970A | HP Netserver LH 3000/3000r to LH 6000/6000r Upgrade Guide - Page 30
the ends of the sockets are closed. 9. Check that your configuration switches are set correctly for your processors. See the Technical Reference Card for the HP NetServer LH 6000/6000r. 26 - HP D5970A | HP Netserver LH 3000/3000r to LH 6000/6000r Upgrade Guide - Page 31
you have finished installing processors and DIMMs, you are ready to install the new system board. 1. Carefully reinsert the system board assembly into its guides. See Figures 4-9 and 4-10 for the correct orientation. 2. Rotate the blue latches to the flat, locked position to seat the system board - HP D5970A | HP Netserver LH 3000/3000r to LH 6000/6000r Upgrade Guide - Page 32
Chapter 4 Installing LH 6000/6000r Components Figure 4-10. Install New System Board in Rack Orientation Install Third Power Supply The HP NetServer LH 6000/6000r requires three power supplies. The third power supply comes as part of the Power Supply Upgrade Kit. NOTE The Power Supply - HP D5970A | HP Netserver LH 3000/3000r to LH 6000/6000r Upgrade Guide - Page 33
Chapter 4 Installing LH 6000/6000r Components Install the third power supply as follows: 1. From the back of the NetServer, loosen the thumbscrews and remove a filler panel from the power supply bay. See Figure 4-11. NOTE You can install the third power supply in either of the open power supply - HP D5970A | HP Netserver LH 3000/3000r to LH 6000/6000r Upgrade Guide - Page 34
Components 2. Set the new power supply module in the open bay. See Figure 4-12. CAUTION When lifting a power supply module, be prepared to support its weight. Hold the power supply module with two hands. 3. Push in the power supply module, seat it firmly, and tighten the thumbscrews. Figure - HP D5970A | HP Netserver LH 3000/3000r to LH 6000/6000r Upgrade Guide - Page 35
upgrade kit and snap it into place. ◊ For a NetServer mounted in an HP systems rack, locate the long, thick nameplate. Bend the nameplate slightly and insert with this upgrade kit. 5. Apply the label just below the serial number on the back of the chassis. Replace NetServer Covers 1. Remove the old - HP D5970A | HP Netserver LH 3000/3000r to LH 6000/6000r Upgrade Guide - Page 36
- HP D5970A | HP Netserver LH 3000/3000r to LH 6000/6000r Upgrade Guide - Page 37
CD-ROM that shipped with the new processor modules, or a later version for this model NetServer. To update your NetServer's firmware: 1. Insert the HP NetServer Navigator CD-ROM that came with this upgrade kit. 2. Turn on power to your NetServer. After the NetServer starts, you will see a message - HP D5970A | HP Netserver LH 3000/3000r to LH 6000/6000r Upgrade Guide - Page 38
-ROM is still inserted and turn on power to the HP NetServer. 2. Check the LEDs on each power supply. When a power supply is operating correctly, its LED glows steady green. 3. Start the Setup utility by following the onscreen instructions that appear after the first few startup messages. After the - HP D5970A | HP Netserver LH 3000/3000r to LH 6000/6000r Upgrade Guide - Page 39
two DiagTools diskettes. l Run the Basic System Test. l Create a Support Ticket to view your test results, or print them and keep a instructions on the screen to create both HP DiagTools diskettes. 5. Label the diskettes HP DiagTools Diskette #1 and HP DiagTools Diskette #2. 6. Remove the HP - HP D5970A | HP Netserver LH 3000/3000r to LH 6000/6000r Upgrade Guide - Page 40
. 2. Press F2 and follow the instructions on the screen to begin Configuration Detection. HP DiagTools scans the NetServer and identifies all Support Ticket and can be tested using the Advanced System tests. HP DiagTools is not designed to handle hot swapping. If you hot swap any components while HP - HP D5970A | HP Netserver LH 3000/3000r to LH 6000/6000r Upgrade Guide - Page 41
your tests failed, view or print your results by following the instructions in the section "Create a Support Ticket" then look up the error codes by following the instructions in the section "Error Code Viewer." Create Support Ticket The Support Ticket lets you save the results to a file so you can - HP D5970A | HP Netserver LH 3000/3000r to LH 6000/6000r Upgrade Guide - Page 42
instructions on the screen. 3. Insert HP DiagTools Diskette #2, when prompted, and press F2. The Advanced System Tests menu appears. After various tests are initialized, the System Test submenu appears. NOTE Use the keyboard with the Advanced System Tests menus. The mouse is supported - HP D5970A | HP Netserver LH 3000/3000r to LH 6000/6000r Upgrade Guide - Page 43
to take corrective action, be sure to power down the NetServer before you remove covers. 4. If you need to contact an HP customer support representative, save your Support Ticket diskette. Reinstall Your NOS It is essential that you reinstall your NOS. Reinstalling your NOS ensures that you get all - HP D5970A | HP Netserver LH 3000/3000r to LH 6000/6000r Upgrade Guide - Page 44
5 Updating Firmware NOTE If you have any problems with your boot drive during NOS installation, it your boot drive is on a NetRAID logical drive, you should reinitialize the logical drive using the HP NetRAID Express Tools utility: 1. Restart your NetServer. 2. Press when you see the - HP D5970A | HP Netserver LH 3000/3000r to LH 6000/6000r Upgrade Guide - Page 45
and restart the NetServer. 2. Open the Readme File from the HP NetServer Navigator menu to find up-to-date configuration information. For instructions on opening this file, see your NetServer's Installation Guide. 3. From the HP NetServer Navigator Main Menu, select Configuration Assistant. 4. Use - HP D5970A | HP Netserver LH 3000/3000r to LH 6000/6000r Upgrade Guide - Page 46
- HP D5970A | HP Netserver LH 3000/3000r to LH 6000/6000r Upgrade Guide - Page 47
applies to components purchased as accessories. If your component was factory installed as part of an HP NetServer model, refer to the HP NetServer Warranty and Service/Support Booklet provided with your NetServer documentation for the warranty limitations, customer responsibilities, and other terms - HP D5970A | HP Netserver LH 3000/3000r to LH 6000/6000r Upgrade Guide - Page 48
Chapter 6 Warranty and Support HP Repair and Telephone Support Refer to the HP NetServer Warranty and Service/Support Booklet supplied with your HP NetServer documentation for instructions on how to obtain HP repair and telephone support. 44 - HP D5970A | HP Netserver LH 3000/3000r to LH 6000/6000r Upgrade Guide - Page 49
7 Regulatory Information For regulatory information pertaining to this HP accessory, please refer to the regulatory section of your NetServer's Installation Guide. 45 - HP D5970A | HP Netserver LH 3000/3000r to LH 6000/6000r Upgrade Guide - Page 50
- HP D5970A | HP Netserver LH 3000/3000r to LH 6000/6000r Upgrade Guide - Page 51
, 39 verify supported versions, 1 P power supply installing, 28 power supply upgrade kit, 3 processors guidelines, 4 R recycling components, 4 regulatory information, 45 related documentation, 5 remove filler panel LH 3000, 29 S saving configuration settings, 7 serial number, 1 service calling for - HP D5970A | HP Netserver LH 3000/3000r to LH 6000/6000r Upgrade Guide - Page 52
Index W warranty hardware accessories limited, 43 Warranty information for hardware, 43 48
-
 1
1 -
 2
2 -
 3
3 -
 4
4 -
 5
5 -
 6
6 -
 7
7 -
8
-
9
-
10
-
11
-
12
-
13
-
14
-
15
-
16
-
17
-
18
-
19
-
20
-
21
-
22
-
23
-
24
-
25
-
26
-
27
-
28
-
29
-
30
-
31
-
32
-
33
-
34
-
35
-
36
-
37
-
38
-
39
-
40
-
41
-
42
-
43
-
44
-
45
-
46
-
47
-
48
-
49
-
50
-
51
-
52
 |
 |

HP NetServer
LH 3000/3000r to
LH 6000/6000r
Upgrade Guide
HP Part Number 5969-3953
Printed in November 1999