HP D5970A HP Netserver LXr 8000 for Compaq 4000/7000 Racks
HP D5970A - NetServer - LCII Manual
 |
View all HP D5970A manuals
Add to My Manuals
Save this manual to your list of manuals |
HP D5970A manual content summary:
- HP D5970A | HP Netserver LXr 8000 for Compaq 4000/7000 Racks - Page 1
HP NetServer LXr 8000 Installation Guide for Compaq® 4000/7000 Racks HP Part Number 5967-6631 Printed in October 1998 - HP D5970A | HP Netserver LXr 8000 for Compaq 4000/7000 Racks - Page 2
Packard shall not be liable for errors contained herein or for incidental or use or reliability of its software on equipment that is not furnished guide is for the person who installs, administers, and troubleshoots network servers. Hewlett-Packard Company assumes you are qualified in the servicing - HP D5970A | HP Netserver LXr 8000 for Compaq 4000/7000 Racks - Page 3
1 Introduction...1 HP NetServer LXr 8000 - Compaq Rack Precautions 4 2 Overview...5 3 Installation...7 Preparation ...7 Marking the Installation Holes 7 Installing the Rack Nuts 8 Mounting the Slides 9 Installing the NetServer 11 4 Warranty and Support 19 HP Repair and Telephone Support 19 - HP D5970A | HP Netserver LXr 8000 for Compaq 4000/7000 Racks - Page 4
- HP D5970A | HP Netserver LXr 8000 for Compaq 4000/7000 Racks - Page 5
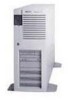
describes how to mount an HP NetServer LXr 8000 into a Compaq® model 4000- or 7000-series rack enclosure. Refer to the HP NetServer LXr 8000 Installation Guide that came with the NetServer for instructions on adding accessories to and configuring the NetServer. The HP NetServer LXr 8000 is shown in - HP D5970A | HP Netserver LXr 8000 for Compaq 4000/7000 Racks - Page 6
front of the rack enclosure. Be sure that the stabilizing, anti-tip feature is installed on the rack enclosure in which you are installing the HP NetServer LXr 8000. This feature consists of two "feet" at the front of the base of the enclosure and, if you are installing this - HP D5970A | HP Netserver LXr 8000 for Compaq 4000/7000 Racks - Page 7
Chapter 1 Introduction Figure 1-2. Single Rack Enclosure With the Anti-Tip Stabilizing Feature Installed 3 - HP D5970A | HP Netserver LXr 8000 for Compaq 4000/7000 Racks - Page 8
installed according to these instructions, damage to the NetServer or accessories may result. Damage due to improper installation is not covered by the HP Warranty. Observe the precautions listed in this section to maintain the NetServer's reliability. When the HP NetServer LXr 8000 is installed - HP D5970A | HP Netserver LXr 8000 for Compaq 4000/7000 Racks - Page 9
2 Overview The steps required to install the NetServer in the rack are summarized below: NOTE This is only a summary; detailed instructions are provided on the following pages. • Measure and mark the appropriate holes on all four rack columns. • Install four rack nuts on each of the - HP D5970A | HP Netserver LXr 8000 for Compaq 4000/7000 Racks - Page 10
Chapter 2 Warranty and Support Terms used in this document are defined in the table flange located at either end of the slide (see Figure 3-3). The equipment enclosure into which the NetServer will be installed. Industry standard measurement (1.75 inches / 44.45 mm), consisting of four vertical - HP D5970A | HP Netserver LXr 8000 for Compaq 4000/7000 Racks - Page 11
3 Installation This section contains detailed instructions for installing an HP NetServer LXr 8000 in certain models of Compaq rack enclosures. Preparation Before beginning the installation of the NetServer into the rack, you must prepare the rack and the NetServer. Determine the location at which - HP D5970A | HP Netserver LXr 8000 for Compaq 4000/7000 Racks - Page 12
Holes for Installation Now mark two holes on each of the front columns to use for the rack nuts where the server-attachment screws secure to the columns. To mark the server-attachment holes on the front columns (refer to Figure 3-1), count up from the top of the unit below, marking the - HP D5970A | HP Netserver LXr 8000 for Compaq 4000/7000 Racks - Page 13
Chapter 3 Rack Nut Installation Column Figure 3-2. Installing Rack Nuts Mounting the Slides 1. Orient each slide so that the front of the slide attaches to the front column and the rear attaches to the rear column. This ensures that once installed, the slides will extend correctly, toward the - HP D5970A | HP Netserver LXr 8000 for Compaq 4000/7000 Racks - Page 14
Chapter 3 Rear Flange Installation Front Flange Extendible Members Figure 3-3. Slide Components and Orientation 2. Place the mounting flange of the slide on the outside face of the column (see Figure 3-4). Do this at the front and rear columns. 3. Insert the two screws through the two holes in - HP D5970A | HP Netserver LXr 8000 for Compaq 4000/7000 Racks - Page 15
Chapter 3 Slide Flange Column Installation Screws Figure 3-4. Mounting a Slide To a Column Installing the NetServer 1. Extend the slides until you hear a click, indicating they are fully extended in the locked-out position. Note that the slides do not come apart ( - HP D5970A | HP Netserver LXr 8000 for Compaq 4000/7000 Racks - Page 16
the rack equipment enclosure. By removing the power supply modules, the center of balance shifts forward and allows you to lift and handle the NetServer safely. To remove a power supply module: • Pull down on the handle until power supply module ejects (see Figure 3-5). • Grasp the handle and pull - HP D5970A | HP Netserver LXr 8000 for Compaq 4000/7000 Racks - Page 17
all power supply modules and hot-swap hard disk drives before lifting the NetServer. Use two people when moving the NetServer or lifting it into the rack. 3. Using two people, lift the NetServer using the handles on each side. Move the NetServer in between the extended slide members and position - HP D5970A | HP Netserver LXr 8000 for Compaq 4000/7000 Racks - Page 18
Chapter 3 Installation Figure 3-6. Lifting the Server onto the Slide Members 4. Line up the mounting holes in the slide members with the holes in the NetServer chassis, insert the four screws on each side, and tighten them (see Figure 3-7). 14 - HP D5970A | HP Netserver LXr 8000 for Compaq 4000/7000 Racks - Page 19
Chapter 3 Installation Figure 3-7. Attaching the Slides To the NetServer Chassis 15 - HP D5970A | HP Netserver LXr 8000 for Compaq 4000/7000 Racks - Page 20
Chapter 3 Installation 5. Remove the two screws from each of the four handles and remove them (see Figure 3-8). Keep these handles and screws for later use, in case you need to remove the NetServer and ship it. Figure 3-8. Remove Mounting Handles 16 - HP D5970A | HP Netserver LXr 8000 for Compaq 4000/7000 Racks - Page 21
Chapter 3 Installation 6. Reinstall the power supply modules and hard disk modules removed earlier. 7. On both slide members, simultaneously depress the lockout releases and push the NetServer completely into the rack enclosure (see Figure 3-9). Figure 3-9. Location of Lockout Releases 17 - HP D5970A | HP Netserver LXr 8000 for Compaq 4000/7000 Racks - Page 22
Chapter 3 Installation 8. Install two screws through the two holes on either side of the NetServer front (see Figure 3-10) and into the rack nuts in the columns (previously installed). Figure 3-10. Securing the NetServer to the Columns 18 - HP D5970A | HP Netserver LXr 8000 for Compaq 4000/7000 Racks - Page 23
that the NetServer has adequate cooling airflow and proper temperature control to maintain system reliability. HP Repair and Telephone Support Refer to the Service and Support chapter of your HP NetServer system documentation for instructions on how to obtain HP repair and telephone support. 19 - HP D5970A | HP Netserver LXr 8000 for Compaq 4000/7000 Racks - Page 24
- HP D5970A | HP Netserver LXr 8000 for Compaq 4000/7000 Racks - Page 25
Index C Compaq, 3 D door, rack enclosure, 6 E EIA, 6 F fastening server to slides, 14 H handles, removing after mounting, 16 L lifting server into rack, 13 lockout releases, 17 P power supply modules, removing, 11 precautions, 6 R rack, 6 rack enclosure, 6 rack nut, 6 S slide, 6 location, 7
-
 1
1 -
 2
2 -
 3
3 -
 4
4 -
 5
5 -
 6
6 -
 7
7 -
8
-
9
-
10
-
11
-
12
-
13
-
14
-
15
-
16
-
17
-
18
-
19
-
20
-
21
-
22
-
23
-
24
-
25
 |
 |

HP NetServer LXr 8000
Installation Guide
for
Compaq
®
4000/7000 Racks
HP Part Number 5967-6631
Printed in October 1998