HP DL320s HP StorageWorks Storage server 2U fixed rail installation instructio
HP DL320s - ProLiant 9TB SATA Storage Server NAS Manual
 |
UPC - 883585264315
View all HP DL320s manuals
Add to My Manuals
Save this manual to your list of manuals |
HP DL320s manual content summary:
- HP DL320s | HP StorageWorks Storage server 2U fixed rail installation instructio - Page 1
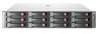
HP StorageWorks Storage server 2U fixed rail installation instructions Rail hardware This document provides procedures for installing a 2Usize storage server into a rack using fixed rails (nonsliding). HP assumes that you are qualified in servicing computer equipment, and trained in recognizing - HP DL320s | HP StorageWorks Storage server 2U fixed rail installation instructio - Page 2
upright holes until the latch engages. 3. Pull off the storage server side covers to expose the thumbscrews on each side. 4. Secure the server to the front of the rack using the thumbscrews (2). 5. Reattach the storage server side covers. Secure the server in the rack 1. With the locking nut loose
-
 1
1 -
 2
2
 |
 |

HP StorageWorks
Storage server 2U fixed rail in-
stallation instructions
This document provides procedures for installing a 2U-
size storage server into a rack using fixed rails (non-
sliding). HP assumes that you are qualified in servicing
computer equipment, and trained in recognizing haz-
ards in products with hazardous energy levels.
© Copyright 2007 Hewlett-Packard Development Company, L.P.
First edition (February 2007)
The information in this document is subject to change without notice.
Printed in the US
www.hp.com
*440929-001*
Rail hardware
Rail pins
3
Right rail assembly
1
Left rail assembly
2
WARNING!
Before you begin, make sure that the rack is sufficiently stable.
If provided, lower the rack leveler feet and make sure any re-
quired stabilizers are installed. If provided, extend the rack anti-
tip device. Failure to extend the anti-tip device could result in
personal injury or damage if the rack tips over.
Install the rails in the rack
NOTE:
If the holes in the rack uprights are round instead of square, re-
move the standard pins from the rails and replace them with the
round-hole pins provided with the rail kit. The pins are load-
bearing. Do not remove the standard pins except to replace
them with the pins for round-hole racks.
1.
Identify the left (L) and right (R) rack rails by markings stamped into
the rails.
2.
Insert the rear end of the right rack rail into the inside back of the
rack until the pins extend through the holes in the rack upright.
Squeeze the scissor-type locking latch to enable the latch and pins
to extend through the rack holes.
CAUTION:
Be sure that the scissor-type locking latch engages when
the end of the rail seats into the rack uprights.