HP DesignJet T3500 Assembly Instructions
HP DesignJet T3500 Manual
 |
View all HP DesignJet T3500 manuals
Add to My Manuals
Save this manual to your list of manuals |
HP DesignJet T3500 manual content summary:
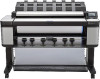
- HP DesignJet T3500 | Assembly Instructions - Page 1
and LAN cable not included. FR: Contenu de l'emballage 1. Documentation : Instructions d'assemblage, Informations de base, CD 2. Accessoire du chargeur 3. Imprimante 4. Panier 5. Accessoires du support 6. Tête d'impression 7. Cartouches d'encre 8. Cordons d'alimentation 9. Papier de calibrage du - HP DesignJet T3500 | Assembly Instructions - Page 2
la cesta...13 Configure la impresora...15 Cargue el papel...21 FR Ouvrez la boîte...2 Assemblez le support...5 Fixez la partie principale de l'imprimante au support...7 Retirez l'emballage...9 Assemblez le panier...13 Configurez l'imprimante...15 Chargez le papier...21 PT Abra a caixa...2 Monte - HP DesignJet T3500 | Assembly Instructions - Page 3
2 3 4 5 EN Remove the stacker cover. Important: Do not cut the green straps. FR Retirez le cache du chargeur. Important : ne coupez pas les sangles vertes. DE Entfernen Sie die Abdeckung des Staplers. Wichtiger Hinweis: Nicht die grünen Schlaufen abschneiden. IT Rimuovere il coperchio dell' - HP DesignJet T3500 | Assembly Instructions - Page 4
6 7 8 9 EN Remove the wooden pallet. FR Retirez la palette en bois. DE Entfernen Sie die Holzpalette. IT Rimuovere il pallet di legno. ES Retire el palé de madera. PT Remova a paleta de madeira. NL Verwijder de houten pallet. x2 Cut the straps and remove the box lid. Note: the scanner - HP DesignJet T3500 | Assembly Instructions - Page 5
essiccante. ES Extraiga la bolsa desecante. PT Remova o saco dissecante. NL Verwijder het zakje met droogmiddel. EN Assemble the stand FR Assemblage du support DE Zusammenbauen des Stand- fußes IT Assemblaggio del piedistallo ES Montaje del soporte PT Monte a base NL De voet in elkaar zetten 20 - HP DesignJet T3500 | Assembly Instructions - Page 6
13 14 5 15 5 16 10 EN Slot the two legs onto the crossbar. Note: The leg with the green plastic part must go on the green side of the crossbar. Fix the crossbar to the left leg with 5 screws, do not tighten them fully yet. FR Insérez les deux montants dans la barre transversale. Remarque: - HP DesignJet T3500 | Assembly Instructions - Page 7
ção vertical. NL Draai de staander 180° in rechtopstaande positie. EN Attach the stand assembly to the printer body FR Attachez l'assemblage du support à la partie principale de l'imprimante DE Bringen Sie den Standfuß an der Druckerbasiseinheit an IT Fissare il piedistallo al corpo della stampante - HP DesignJet T3500 | Assembly Instructions - Page 8
20 21 22 23 x4 90° 90° EN Check the 4 wheels are locked. FR Vérifiez que les 4 roues sont verrouillées. DE Überprüfen Sie, ob die Bremse in den vier Rollen eingerastet ist. IT Controllare che le 4 ruote siano bloccate. ES Asegúrese de que las 4 ruedas estén bloqueadas. PT Verifique se as 4 - HP DesignJet T3500 | Assembly Instructions - Page 9
EN Remove the packaging FR Retrait de l'emballage DE Entfernen der Verpackung IT Rimozione dalla scatola di imballaggio ES Retirar el embalaje PT Remova a embalagem NL Verwijder het verpakkingsmateriaal 10' x2 24 EN Remove the box. FR Retirez la boîte. DE Entfernen Sie die Abdeckung. IT - HP DesignJet T3500 | Assembly Instructions - Page 10
27 28 29 EN Remove all the orange tapes. FR Retirez toutes les rubans orange. DE Entfernen Sie alle orangefarbenen Klebebänder. IT Rimuovere tutto il nastro arancione. ES Retire todas las cintas de color naranja. PT Remova todas as fitas laranja. NL Verwijder alle oranje tape. Remove the screws - HP DesignJet T3500 | Assembly Instructions - Page 11
31 32 33 34 EN Remove the carton piece and attach the stacker cover by pushing it into place. Insert the 6 deflectors. FR Retirez l'élément en carton et poussez sur le couvercle du chargeur pour le mettre en place. Insérez les 6 déflecteurs. DE Entfernen Sie den Karton und bringen Sie die - HP DesignJet T3500 | Assembly Instructions - Page 12
35 36 37 38 EN Open the scanner cover (1 and 2) and remove the carton piece with tape on it (3). FR Ouvrez le couvercle du scanner (1 et 2) et retirez l'élément en carton avec l'adhésif (3). IMPORTANT: in the following step you must remove the carriage retainter; be very careful not to touch - HP DesignJet T3500 | Assembly Instructions - Page 13
39 EN Assemble the basket 40 41 FR Assemblage du panier DE Zusammenbauen der Ablage IT Installazione del raccoglitore ES Montaje de la cesta PT Monte o cesto NL De mand in elkaar zetten EN Remove the orange plastic piece from the back of the scanner by pulling it hard. FR Tirez fortement - HP DesignJet T3500 | Assembly Instructions - Page 14
42 43 44 45 EN Remove the tape, and feed the basket through to the front of the printer. Slot the bar through the basket. FR Retirez le ruban adhésif et chargez le panier par l'avant de l'imprimante. Insérez la barre via le panier. DE Entfernen Sie das Klebeband und führen Sie die Ablage - HP DesignJet T3500 | Assembly Instructions - Page 15
46 EN Unlock the wheels. FR Déverrouillez les roues. DE Entriegeln Sie die Räder. IT Sbloccare le ruote. ES Desbloquee las ruedas. PT Destrave as rodas. NL Ontgrendel de wieltjes. 47 Move the printer to its final destination. Placez l'imprimante à son emplacement final. Schieben Sie den Drucker an - HP DesignJet T3500 | Assembly Instructions - Page 16
49 50 51 52 EN Power cables attached to the right. FR Les câbles d'alimentation branchés sur la droite. DE Netzkabel rechts angeschlossen. IT Cavi di alimentazione fissati a destra. ES Cables de alimentación colocados hacia la derecha. PT Cabos de alimentação conectados à direita. NL - HP DesignJet T3500 | Assembly Instructions - Page 17
53 54 55 56 EN The front panel will ask you to install the ink cartridges. Open the ink cartridge covers (left and right). Shake all the ink cartridges. FR Le panneau de commande vous invitera à installer les cartouches d'encre. Ouvrez les couvercles de cartouche d'encre (gauche et droite). - HP DesignJet T3500 | Assembly Instructions - Page 18
57 58 59 60 EN Close the ink cartridge covers (left and right). FR Fermez les couvercles des cartouches d'encre (gauche et droite). DE Schließen Sie die Tintenpatronenabdeckungen (links und rechts). IT Chiudere i coperchi delle cartucce (sinistro e destro). ES Cierre las cubiertas de los - HP DesignJet T3500 | Assembly Instructions - Page 19
61 62 63 64 EN Pull the blue handle up as far as it will go. Open the printhead cover by pulling the handle forward. Remove the orange caps from inside the carriage. Insert the printhead. FR Tirez la poignée bleue vers le haut au maximum. DE Ziehen Sie den blauen Griff so weit wie möglich - HP DesignJet T3500 | Assembly Instructions - Page 20
65 66 67 68 EN Check the printhead is correctly aligned. Note: do not insert the nozzles yet. Lift the printhead cover handle. Push the handle down to clip the cover to the bar. Pull the handle down to close the cover. FR Vérifiez que la tête d'impression est correctement alignée. Remarque : - HP DesignJet T3500 | Assembly Instructions - Page 21
69 70 71 10' EN Push down to close the cover completely. FR Poussez vers le bas pour fermer le couvercle complètement. DE Drücken Sie die Abdeckung nach unten, um sie vollständig zu schließen. Close the scanner window and press OK. Fermez le capot du scanner et appuyez sur OK. Schließen Sie das - HP DesignJet T3500 | Assembly Instructions - Page 22
EN Load the paper 72 73 74 FR Chargement du papier DE Laden von Papier IT Caricamento della carta ES Carga del papel PT Coloque o papel NL Plaats het papier 5' x2 EN Push the latch, and open the upper front roll cover. Remove the orange tapes and two small carton pieces. FR Poussez le - HP DesignJet T3500 | Assembly Instructions - Page 23
75 76 77 78 EN Unlock (1), and remove the blue hub (2). FR Déverrouillez (1) et retirez le concentrateur bleu (2). DE Entsperren (1) und entfernen Sie die blaue Nabe (2). IT Sbloccare il mozzo blu (1), quindi rimuoverlo (2). ES Desbloquee (1) y retire el disco de color azul (2). PT Desbloqueie - HP DesignJet T3500 | Assembly Instructions - Page 24
79 80 81 82 EN Insert the paper edge into the printer. Feed the paper into the printer. FR Insérez le bord du papier dans l'imprimante. Chargez le papier dans l'imprimante. DE Führen Sie die Papierkante in den Drucker ein. Legen Sie das Papier in den Drucker. IT Inserire il bordo della - HP DesignJet T3500 | Assembly Instructions - Page 25
83 84 HP DesignJet T3500 Production MFP Start Up EN When the roll/rolls are loaded, the printer will align the printheads. This process involves printing, and needs the paper to have a straight leading edge. Note: printhead alignment requires paper at least 24in (61cm) wide. Roll paper is - HP DesignJet T3500 | Assembly Instructions - Page 26
85 86 87 EN The connectivity wizard will now start and take you step by step through connecting your printer to the internet. Click continue to follow the steps. FR L'assistant de connectivité va maintenant démarrer et vous mener étape par étape pour connecter votre imprimante à Internet. Cliquez - HP DesignJet T3500 | Assembly Instructions - Page 27
your Printer onto your computer. Be sure to follow the software installation instructions. Note: for HP ePrint you will need to perform the installation informazioni aggiornate, visitare il sito: http://www.hp.com/go/T3500/support ES Instale en el ordenador el software del producto mediante el CD - HP DesignJet T3500 | Assembly Instructions - Page 28
Ihres Druckers anpassen oder die Printer-Sicherheit verwalten. (Sie benötigen den Druckercode und ein Konto bei HP Connect. Prüfen Sie, ob dieser Service in Ihrer Region verfügbar ist). IT Opzionale: Gestione della protezione della stampante in HP Connected. Quando si abilitano i servizi Web, la
-
 1
1 -
 2
2 -
 3
3 -
 4
4 -
 5
5 -
 6
6 -
 7
7 -
8
-
9
-
10
-
11
-
12
-
13
-
14
-
15
-
16
-
17
-
18
-
19
-
20
-
21
-
22
-
23
-
24
-
25
-
26
-
27
-
28
 |
 |

1
© Copyright 2013, 201
6
HP Development
Company, L.P.
Camí de Can Graells 1-21 · 08174
Sant Cugat del Vallès
Barcelona · Spain
All rights reserved
Printed in XXX
HP
DesignJet
T3500
Production MFP
Assembly Instructions
HP
DesignJet
T3500
MFP de production
Instructions d’assemblage
HP
DesignJet
T3500
Produktions MFP
Anleitung
zum Zusammenbau
HP
DesignJet
T3500
MFP di produzione
Istruzioni per l’installazione
HP
DesignJet
T3500
MFP de producción
Instrucciones de montaje
HP
DesignJet
T3500
MFP de produção
Instruções de montagem
HP
DesignJet
T3500
MFP-productieprinter
Instructies voor het opstellen
EN: Please read these instructions carefully.
These assembly instructions explain how to assemble
the printer. Because spare screws are supplied, some screws may remain unused after assembly of
the printer.
FR: Veuillez lire attentivement ces instructions.
Ces instructions d’assemblage expliquent comment
assembler l’imprimante.
Des vis de rechange étant fournies, certaines vis pourront rester inutilisées après l’assemblage de
l’imprimante.
DE:Lesen Sie diese Anleitungen sorgfältig durch.
Dieses Dokument enthält Anleitungen für den
Zusammenbau des Druckers.
Zum Lieferumfang gehören Ersatzschrauben, sodass nach dem Zusammenbau einige Schrauben übrig
bleiben.
IT: Leggere attentamente queste istruzioni.
Queste istruzioni descrivono la procedura d’installazione
della stampante.
Poiché vengono fornite viti di riserva, alcune potrebbero risultare inutilizzate dopo l’installazione della
stampante.
ES: Lea atentamente estas instrucciones.
Estas instrucciones de montaje explican cómo se monta la
impresora.
Como también se incluyen tornillos de repuesto, después de montar la impresora pueden quedar
algunos sin utilizar.
PT: Leia as instruções com atenção.
Essas instruções de montagem explicam como montar a
impressora.
Como são fornecidos parafusos sobressalentes, alguns podem permanecer sem uso depois da
montagem da impressora.
NL: Lees deze instructies aandachtig door.
In deze assemblage-instructies wordt beschreven hoe de
printer wordt gemonteerd.
Omdat er reserveschroeven zijn geleverd, kunnen er na assemblage van de printer enkele ongebruikte
schroeven overblijven.
EN:
The size of the crate is 1502 x 781 x 805 mm. The space required
for assembly is 2.5m (8.5 feet) in front. /
FR :
La taille de l’emballage
est 1502 x 781 x 805 mm. L’espace requis pour l’ensemble est 2,5
mètres (8,5 pieds) à l’avant. /
DE:
Größe der Verpackungskiste: 1502 x
781 x 805 mm. Der erforderliche Raum für den Zusammenbau beträgt
2,5 m zur Vorderseite hin. /
IT:
Le dimensioni della cassa sono 1502 x 781 x 805 mm. Lo
spazio necessario per il montaggio è 2,5 m sul lato anteriore. /
ES:
Las dimensiones de la
caja son: 1502 x 781 x 805 mm. Espacio: El espacio necesario para el montaje es de 2,5
m por la parte delantera. /
PT:
O tamanho da caixa é de 1502 x 781 x 805 mm. O space:
O espaço necessário para a montagem é de 2,5 m (8,5 pés) à frente. /
NL:
Het formaat
van de kist is 1502 x 781 x 805 mm. De ruimte vereist voor de montage 2,5 m aan de
voorzijde.
EN:
4 people are required to perform certain tasks. /
FR :
L’exécution de certaines
tâches nécessite la présence de 4 personnes. /
DE:
Für bestimmte Tätigkeiten werden
4 Personen benötigt. /
IT:
Per determinate operazioni, sono necessarie 4 persone. / ES:
Algunas tareas se deben realizar entre 4 personas. /
PT:
São necessárias 4 pessoas para
a realização de determinadas tarefas. /
NL:
Voor bepaalde taken zijn 4 personen nodig.
100’
EN:
Time required for assembly of the printer is approximately
100 minutes . /
FR :
Le temps requis pour l’assemblage de l’imprimante est d’environ
100 minutes. /
DE:
Der Zusammenbau des Druckers dauert etwa 100 Minuten. /
IT:
L’installazione della stampante richiede circa 100 minuti. /
ES:
El tiempo de montaje
de la impresora es aproximadamente de 100 minutos. /
PT:
O tempo necessário para a
montagem da impressora é de aproximadamente 100 minutos. /
NL:
De vereiste tijd voor
assemblage van de printer is ongeveer 100 minuten.
EN:
Tools required: Screwdriver (included). /
FR :
Outils nécessaires : Tournevis (fourni).
/
DE:
Erforderliches Werkzeug: Schraubendreher (enthalten). /
IT:
Strumenti necessari:
cacciavite (incluso). /
ES:
Herramientas requeridas: Destornillador (incluido). /
PT:
Ferra-
mentas necessárias: Chave de fenda (incluída). /
NL:
Benodigd gereedschap: Schroeven
-
draaier (inbegrepen).
2.5m
8.5ft
NL
PT
ES
IT
DE
FR
EN
EN:
Crate contents
1. Documentation: Assembly
Instructions, Introductory info,
CD
2. Stacker accessory
3. Printer
4. Basket
5. Stand accessory pieces
6. Printhead
7. Ink cartridges
8. Power cords
9. Scanner calibration paper
Note: roll and LAN cable not
included.
FR:
Contenu de l’emballage
1. Documentation : Instructions
d’assemblage, Informations de
base, CD
2. Accessoire du chargeur
3. Imprimante
4. Panier
5. Accessoires du support
6. Tête d’impression
7. Cartouches d’encre
8. Cordons d’alimentation
9. Papier de calibrage du scanner
Remarque : Rouleau et câble LAN
non inclus.
DE:
Inhalt der Kiste
1. Dokumentation: Anleitung zum
Anleitungen, Einführende
Informationen, CD
2. Staplerzubehör
3. Drucker
4. Ablage
5. Standfuß-Zubehörteile
6. Druckkopf
7. Tintenpatronen
8. Netzkabel
9. Scannerkalibrierungsblatt
Hinweis: Rolle und LAN-Kabel sind
nicht im Lieferumfang enthalten.
IT:
Contenuto della scatola
1. Documentazione: Istruzioni
per l’installazione, Informazioni
introduttive, CD
2. Impilatore
3. Stampante
4. Raccoglitore
5. Componenti accessori
piedistallo
6. Testina di stampa
7. Cartucce di inchiostro
8. Cavi di alimentazione
9. Carta per la calibrazione dello
scanner
Nota: rotolo e cavo LAN non
inclusi.
ES:
Contenido de la caja
1. Documentación: Módulo
Instrucciones, Información
preliminar, CD
2. Accesorio de la apiladora
3. Impresora
4. Cesta
5. Piezas del accesorio del
soporte
6. Cabezal de impresión
7. Cartuchos de tinta
8. Cables de alimentación
9. Papel de calibración del
escáner
Nota: el rollo y el cable LAN no
están incluidos.
PT:
Conteúdo da caixa
1. Documentação: Montagem
Instruções, Informações de
introdução, CD
2. Acessório de empilhamento
3. Impressora
4. Cesto
5. Peças acessórias da base
6. Cabeçote de impressão
7. Cartuchos de tinta
8. Cabos de força
9. Papel de calibração do scanner
Nota: os cabos de rolo e LAN
não estão incluídos.
NL:
Inhoud van de kist
1. Documentatie: module
Instructies, inleidende
informatie, cd
2. Stapelaaraccessoire
3. Printer
4. Mand
5. Delen van
staanderaccessoire
6. Printkop
7. Inktpatronen
8. Netsnoeren
9. Scannercalibratiepapier
Let op: rol en LAN-kabel niet
meegeleverd.