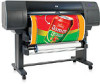
HP Designjet 4500mfp HP Designjet Scanner Series - Quick Reference Guide
HP Designjet 4500mfp Manual
 |
View all HP Designjet 4500mfp manuals
Add to My Manuals
Save this manual to your list of manuals |
HP Designjet 4500mfp manual content summary:
- HP Designjet 4500mfp | HP Designjet Scanner Series - Quick Reference Guide - Page 1
EN Quick reference guide - HP Designjet 4500mfp | HP Designjet Scanner Series - Quick Reference Guide - Page 2
on the CD. Further information is available at HP's support Web site (http://www.hp.com/go/knowledge_center/). Legal notices The information contained herein is subject to change without notice. The only warranties for HP Products and services are set forth in the express warranty statement - HP Designjet 4500mfp | HP Designjet Scanner Series - Quick Reference Guide - Page 3
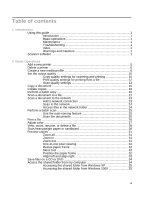
guide 1 Introduction 1 Basic operations 1 Maintenance 1 Troubleshooting 1 Index 1 Warnings and Cautions 1 Scanner software 1 2 Basic Operations Add a new printer 5 Delete a printer 24 Perform a batch scan 25 Use the auto-naming feature 25 Scan the documents 25 Print a file ...26 Adjust - HP Designjet 4500mfp | HP Designjet Scanner Series - Quick Reference Guide - Page 4
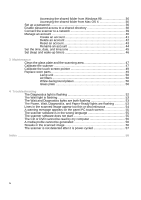
and wake-up timers 46 3 Maintenance Clean the glass plate and the scanning area 47 Calibrate the scanner 47 Calibrate the touch screen pointer 49 Replace worn parts 49 Lamp unit 50 Air filters 50 White-background platen 50 Glass plate 50 4 Troubleshooting The Diagnostics light is flashing - HP Designjet 4500mfp | HP Designjet Scanner Series - Quick Reference Guide - Page 5
to the scanner and its documentation for new users. Basic operations This chapter helps you to carry out various common procedures. Maintenance This chapter helps you to carry out various calibration and maintenance procedures. Troubleshooting This chapter helps you to solve problems that may - HP Designjet 4500mfp | HP Designjet Scanner Series - Quick Reference Guide - Page 6
Introduction NOTE: Some details of this screen may vary depending on which printer is connected to the scanner. The screen includes: ● The preview window. Fills most of the viewing section. Above it is the image toolbar, with nine buttons that can be used - HP Designjet 4500mfp | HP Designjet Scanner Series - Quick Reference Guide - Page 7
Introduction ◦ Reset: resets settings to default values ◦ Stop: cancels the current activity ◦ Copy, Scan, or Print: each icon appears in its respective tab, and initiates the copy, scan, or print function depending on the tab within which you are working. Scanner software 3 - HP Designjet 4500mfp | HP Designjet Scanner Series - Quick Reference Guide - Page 8
Basic Operations 2 Basic Operations ● Add a new printer ● Delete a printer ● Create a new media profile ● Set the output quality ● the shared folder from my computer ● Set up a password ● Enable password access to a shared directory ● Connect the scanner to a network ● Manage an account ● Set the - HP Designjet 4500mfp | HP Designjet Scanner Series - Quick Reference Guide - Page 9
a new HP Designjet printer to the printer list in your scanner software, follow these steps: 1. Press the Setup tab. Basic Operations 2. Press the Options button. The Options dialog box appears: 3. Press the System button. The System options dialog box appears: 4. Press the Install Printer Driver - HP Designjet 4500mfp | HP Designjet Scanner Series - Quick Reference Guide - Page 10
the system, the name of the second printer added is denoted by "#2", the third by "#3", and so on. Delete a printer To delete an HP Designjet printer from the printer list in your scanner software: 1. Press the Setup tab. Basic Operations 2. Press the Printer button, and then press the Tool button - HP Designjet 4500mfp | HP Designjet Scanner Series - Quick Reference Guide - Page 11
HP Designjet 45XX, 40XX, or T11XX, you can only create media profiles for paper types that are currently loaded in the printer profiles with these printers. When using Designjet 500, 800, 5X00, printer connected to the scanner before you can copy and print. The printer can be connected to the scanner - HP Designjet 4500mfp | HP Designjet Scanner Series - Quick Reference Guide - Page 12
to as gray balance). Press the Calibrate RIP button and follow the on-screen instructions to use this feature. 3. Press the button that corresponds to the media that you have loaded in the printer. 4. Press the OK button when this message appears. Basic Operations 8 Chapter 2 Basic Operations - HP Designjet 4500mfp | HP Designjet Scanner Series - Quick Reference Guide - Page 13
below). 6. Press the Scan Sheet button to scan the color sheet. NOTE: Some HP Designjet models require that you enter the media profile name when the system is connected through the LAN. 7. Load the color sheet into the scanner face down. Align the arrow on the color sheet with the arrow on the - HP Designjet 4500mfp | HP Designjet Scanner Series - Quick Reference Guide - Page 14
available) to rename media profiles. NOTE: When using HP Designjet 45XX, 40XX, or T11XX, the Rename button is not available in the dialog box. Use the Validate button to check that the media profile is valid for your scanner and printer combination. Set the output quality This section describes how - HP Designjet 4500mfp | HP Designjet Scanner Series - Quick Reference Guide - Page 15
following scan quality settings: ◦ Scan resolution: Manually set the scan resolution in dots per inch dpi in the example above). ◦ Descreen: The scanner scans with the optical resolution and relays the data images, such as .jpeg, .tiff, and .pdf files), however the scanning speed is reduced. ◦ - HP Designjet 4500mfp | HP Designjet Scanner Series - Quick Reference Guide - Page 16
appears: 3. Select from the following print settings: ● Print quality: Press the Print quality button to select a Fast, Normal, or Best print-quality setting. ● Ink printer original: This setting is used to improve the quality of your copy or print if the original you want to scan has been printed - HP Designjet 4500mfp | HP Designjet Scanner Series - Quick Reference Guide - Page 17
setting for documents which contain pictures can result in reduced image quality. 4. Press the OK button. NOTE: The availability of these options depends on the printer model. Scan-quality settings 1. Press the Scan tab. Set the output quality 13 - HP Designjet 4500mfp | HP Designjet Scanner Series - Quick Reference Guide - Page 18
scan-to-network process. ● Descreen: The scanner scans with the optical resolution and relays the images, such as .jpeg, .tiff, and .pdf files), however the scanning speed is reduced. ● Turbo quality decreases. To use the Turbo setting, first manually set the scan resolution, and then select Turbo. - HP Designjet 4500mfp | HP Designjet Scanner Series - Quick Reference Guide - Page 19
create one. See Create a new media profile on page 6. 2. Insert your document. a. Place the document face down with the top edge forward in the scanner insertion slot. Align the center of the document with the center of the insertion slot. b. Slide the document gently into the insertion slot until - HP Designjet 4500mfp | HP Designjet Scanner Series - Quick Reference Guide - Page 20
Basic Operations b. Press the Type of original button. The Type of original dialog box appears: c. Select a type-of-original template that best describes your current input. d. If you want to change the settings for any of these options, or want to create a new option, press the Tool button . To - HP Designjet 4500mfp | HP Designjet Scanner Series - Quick Reference Guide - Page 21
b. Press the Input size button. The Input size dialog box appears: c. Select the size that fits your original. Select Auto to have the scanner automatically detect the width and length of the original. d. If you want to change the settings for any of these options, or want to create a - HP Designjet 4500mfp | HP Designjet Scanner Series - Quick Reference Guide - Page 22
size, press the New button and enter a name for it. If you have selected an output size that differs from the input size, the scanner calculates the scaling percentage and display it on the Scale button in the Copy tab after the first preview. Alternatively, you can specify a scaling percentage - HP Designjet 4500mfp | HP Designjet Scanner Series - Quick Reference Guide - Page 23
number of these sets on your printer. All of the preview and enhancement options that are available for single document copying, are also available when using the collate feature. 1. Press the Copy tab. Basic Operations 2. Feed a document into the scanner, and then press the Collate button - HP Designjet 4500mfp | HP Designjet Scanner Series - Quick Reference Guide - Page 24
groups of documents with the same settings. 1. Prepare the originals that you want to copy with the same settings. 2. Feed the first original into the scanner. 3. Configure the settings in the Copy tab as you would for single-document copying. See Copy a document on page 15. NOTE: If you have - HP Designjet 4500mfp | HP Designjet Scanner Series - Quick Reference Guide - Page 25
to copy a single document with different settings. The batch-copy mode is resumed after you have copied the single document. TIP: You can configure the scanner to eject each original document upon copy completion so that the next original can be fed. To select this option, go to the Setup tab - HP Designjet 4500mfp | HP Designjet Scanner Series - Quick Reference Guide - Page 26
(Fast, Normal, or Best) that you select. ● Descreen: the scanner scans with the optical resolution and relays the data to the system without NOTE: For information on the auto-naming feature (which is more useful when batch scanning), see Use the auto-naming feature on page 25. 8. Press Settings - HP Designjet 4500mfp | HP Designjet Scanner Series - Quick Reference Guide - Page 27
. To view or delete the resulting file, see View, move, rename, or delete a file on page 28. Scan a document to the network By default, your scanner's file manager only displays local drives and folders. This topic explains how to add network connections, how to use the network locations as file - HP Designjet 4500mfp | HP Designjet Scanner Series - Quick Reference Guide - Page 28
or computer in the following format: DOMAIN\username. 6. Password: Enter the login password for the remote server or computer. 7. Label: Enter a name to help you to identify the remote destination. This is the name that appears in the HP Designjet scanner File Manager dialog box. NOTE: You can add - HP Designjet 4500mfp | HP Designjet Scanner Series - Quick Reference Guide - Page 29
with the same settings. Use the auto-naming feature When you batch scan documents, the scanner saves each document as an individual file and names the file-destination folder and begins numbering after the last number in a series of file names, to avoid overwriting any files already in the folder. - HP Designjet 4500mfp | HP Designjet Scanner Series - Quick Reference Guide - Page 30
to scan a single document with different settings. The batch-scan mode is resumed after you have scanned the single document. TIP: You can configure the scanner to eject each original document upon copy completion so that the next original can be fed. To select this option, go to the Setup tab - HP Designjet 4500mfp | HP Designjet Scanner Series - Quick Reference Guide - Page 31
as necessary. The Setup tab settings such as margins, layout, printer and media profile, apply to the entire print job. 4. Press the Print button to send the files to the printer. NOTE: The Print tab is designed for printing files created within the - HP Designjet 4500mfp | HP Designjet Scanner Series - Quick Reference Guide - Page 32
at the bottom of the 2. Select a file in the list. 3. View, move, rename, or delete the file as necessary. Scan heavyweight paper or cardboard Your scanner is capable of scanning heavyweight coated paper and cardboard. 28 Chapter 2 Basic Operations - HP Designjet 4500mfp | HP Designjet Scanner Series - Quick Reference Guide - Page 33
. Use the zoom function to see in greater detail NOTE: A large document might need to be supported with both hands as it is being fed into the scanner, and as it is being ejected from the scanner. If lines appear uneven, follow these steps: 1. Press the Setup tab. Scan heavyweight paper or cardboard - HP Designjet 4500mfp | HP Designjet Scanner Series - Quick Reference Guide - Page 34
then select the Scanning button. The Scan Options dialog box appears: 3. In the Scan Options dialog box, press the Scanner button. The Scanner dialog box appears: 4. In the Scanner dialog box, press the Setup button. 5. Select the Extended Thickness tab, and check the Use extended thickness paper - HP Designjet 4500mfp | HP Designjet Scanner Series - Quick Reference Guide - Page 35
minimum height for long periods of time. The insertion slot must be at its minimum height for the scanner to perform the automatic self-adjustment procedure. Preview copies The preview feature allows you to make various adjustment to the document size, margins, and paper frame. The document size is - HP Designjet 4500mfp | HP Designjet Scanner Series - Quick Reference Guide - Page 36
side or corner is resized to the new position. Move tool Use this feature to move the image within the the preview window. There are two ways the image is pressed becomes part of one of the edges of the preview window. Position the paper frame Use this feature to position the paper frame directly - HP Designjet 4500mfp | HP Designjet Scanner Series - Quick Reference Guide - Page 37
not satisfied with the result, press the Reset alignment button, press OK, and then use the left and right align buttons to align the image manually. Preview copies 33 - HP Designjet 4500mfp | HP Designjet Scanner Series - Quick Reference Guide - Page 38
HP Designjet is capable of writing to CDs or DVDs in the same easy way as it writes to other storage media. 1. Insert a blank CD or DVD into the touch screen's CD/DVD drive. You may also be able to write to a partly reasons, no other folders on the scanner system can be accessed over a network - HP Designjet 4500mfp | HP Designjet Scanner Series - Quick Reference Guide - Page 39
steps to obtain the IP address: 1. Press the Setup tab. 2. Press the Options button. 3. Press the General button. 4. Press the About button. The scanner's IP address is shown in the About box. Accessing the shared folder from Windows XP 1. On your computer's desktop, double-click My Network Places - HP Designjet 4500mfp | HP Designjet Scanner Series - Quick Reference Guide - Page 40
OS X 1. Select the Connect to Server feature from the Go menu. 2. In the Connect to Server window, enter http://scanner_ip/images (where "scanner_ip" is the IP address of your scanner system), and then click Connect. Set up a password An administrator password is used to protect key administrative - HP Designjet 4500mfp | HP Designjet Scanner Series - Quick Reference Guide - Page 41
Basic Operations If many users will share the system, HP recommends that the password be changed by the system administrator when the system is set up for the first time. To change the password, follow these steps: 1. Press the Setup tab. 2. Press the Options button. The Options dialog box appears. - HP Designjet 4500mfp | HP Designjet Scanner Series - Quick Reference Guide - Page 42
access to a shared directory Protect your system's shared folders from network access by applying a login and password under the FTP and WebDAV option area. 1. Press the Setup tab. 2. Press the Options button. 3. Press the System button. 4. Press the Advanced button. 5. Press the - HP Designjet 4500mfp | HP Designjet Scanner Series - Quick Reference Guide - Page 43
is always appended to the entered login name. 7. Restart the system to apply new login/password protection. TIP: Press the Reset button to remove login/password protection for FTP/ WebDAV access. Connect the scanner to a network To make your system recognizable to others on the network, follow these - HP Designjet 4500mfp | HP Designjet Scanner Series - Quick Reference Guide - Page 44
. h. Select the Manually option for manual connection. Obtain a valid printer to the same network. See your printer's documentation for further information. Manage an account The Accounting feature an administrator password has been set, users are required to enter the password before they - HP Designjet 4500mfp | HP Designjet Scanner Series - Quick Reference Guide - Page 45
tab. Basic Operations 2. Press the Account button, and then press the Tool button . 3. In the Accounting dialog box, press the New button. 4. Enter the administrator password if prompted. 5. Enter a name for the new account. 6. Press the OK button. Manage an account 41 - HP Designjet 4500mfp | HP Designjet Scanner Series - Quick Reference Guide - Page 46
automatically becomes the active account. To access the accounting information, enter: http://scanner_ip/ accounting (where "scanner_ip" is the IP address of your scanner system) in the Internet or network address field, and then press the Next button. NOTE: If an account is created, users are - HP Designjet 4500mfp | HP Designjet Scanner Series - Quick Reference Guide - Page 47
2. Press the Account button, and then press the Tool button . 3. Select the account that you want to reset. 4. Press the Reset button. 5. Enter the administrator password if prompted. Manage an account 43 - HP Designjet 4500mfp | HP Designjet Scanner Series - Quick Reference Guide - Page 48
. 3. Make sure that the Quick select list is showing. 4. Press the Tool button . 5. In the Accounting dialog box, press the Rename button. 6. Enter the administrator password if prompted. 7. Enter the new name for the account. 8. Press the OK button. 44 Chapter 2 Basic Operations - HP Designjet 4500mfp | HP Designjet Scanner Series - Quick Reference Guide - Page 49
Basic Operations Set the time, date, and timezone 1. Press the Setup tab. 2. Press the Options button. 3. Press the System button. 4. Press the Set time and date button. ● Select the value that you want to change and enter the correct value. ● Select your timezone from the list. NOTE: You can - HP Designjet 4500mfp | HP Designjet Scanner Series - Quick Reference Guide - Page 50
Basic Operations Set sleep and wake-up timers Because setting the sleep and wake-up timers ensures that the scanner will shut down automatically when not in use, it is the best way to maximize the useful life of the lamp. 1. Press the Setup tab. 2. - HP Designjet 4500mfp | HP Designjet Scanner Series - Quick Reference Guide - Page 51
like the one provided with the maintenance kit. Calibrate the scanner HP recommends that you calibrate the scanner once a month to maintain optimum calibrating the scanner. 1. Before calibrating, read the scanner's online guide on how to clean the scan area. Then turn off the scanner and clean the - HP Designjet 4500mfp | HP Designjet Scanner Series - Quick Reference Guide - Page 52
the preview screen. NOTE: If there are no pending actions, the messages section might be blank. 4. In the Scanner Messages dialog box, press the Scanner Maintenance button. 5. The Maintenance Wizard guides you through the procedures of camera alignment, stitching, and calibration. To calibrate the - HP Designjet 4500mfp | HP Designjet Scanner Series - Quick Reference Guide - Page 53
key scanner parts will deteriorate. This section addresses the parts that wear out under normal usage conditions and that can be replaced without the assistance of an HP support technician. To order any of the parts mentioned below, call HP Support. Calibrate the touch screen pointer 49 Maintenance - HP Designjet 4500mfp | HP Designjet Scanner Series - Quick Reference Guide - Page 54
it. Glass plate Over time, the condition of the glass plate can deteriorate. Even very small scratches can reduce image quality. For step-by-step instructions on replacing the glass plate, press and consult the scanner online help. Maintenance 50 Chapter - HP Designjet 4500mfp | HP Designjet Scanner Series - Quick Reference Guide - Page 55
NOTE: Before replacing the glass plate, you should thoroughly clean it and the entire scanning area. For more information on cleaning the glass plate and scanning area, see Clean the glass plate and the scanning area on page 47. Replace worn parts 51 Maintenance - HP Designjet 4500mfp | HP Designjet Scanner Series - Quick Reference Guide - Page 56
cleaned. To resolve this issue, perform the routine maintenance procedures explained in your online guide, and then restart the scanner. If the diagnostics light continues to flash, there may be camera position errors. In this case, contact HP Support. 52 Chapter 4 Troubleshooting Troubleshooting - HP Designjet 4500mfp | HP Designjet Scanner Series - Quick Reference Guide - Page 57
a readjustment but is unable to do so. To resolve this issue, remove any paper from the scanner, ensure that the insertion slot is set to the minimum height, and wait for the light to The Power, Wait, Diagnostics, and Paper-Ready lights are flashing The Wait light is flashing 53 Troubleshooting - HP Designjet 4500mfp | HP Designjet Scanner Series - Quick Reference Guide - Page 58
scanner. Lines in the scanned image appear too thin or discontinuous When scanning documents with thin lines, such as CAD drawings, a scanresolution setting of less than 300 dpi can result in disproportionately thin or discontinuous lines. HP at 300 dpi 54 Chapter 4 Troubleshooting Troubleshooting - HP Designjet 4500mfp | HP Designjet Scanner Series - Quick Reference Guide - Page 59
the user to perform maintenance: ● Scanner maintenance has not been scanner's online guide for information on recommended maintenance procedures. The scanner software is in the wrong language To change the scanner language. The scanner software does not start If your scanner system software does - HP Designjet 4500mfp | HP Designjet Scanner Series - Quick Reference Guide - Page 60
any part of Designjet supported, but HP does not guarantee that all computers can read the CDs and DVDs created by the scanner. A media profile cannot be generated Ensure that the scanner and the printer problem persists, you may need to replace the glass. 56 Chapter 4 Troubleshooting Troubleshooting - HP Designjet 4500mfp | HP Designjet Scanner Series - Quick Reference Guide - Page 61
and see if that solves the problem. If the problem persists, turn off the scanner and the touch screen, and then disconnect the touch screen from the scanner. Reconnect the touch screen and turn on the scanner and touch screen. The scanner is not detected after it is power-cycled 57 Troubleshooting - HP Designjet 4500mfp | HP Designjet Scanner Series - Quick Reference Guide - Page 62
worn parts 49 S saving files on CD or DVD 34 scanner not maintenance warnings 55 media profiles 6 move file 28 N network connection 39 T thick materials 28 touch screen calibration 49 U unreadable CD/DVD 56 using this guide 1 V view file 28 W wait light flashing 53 wrong language 55 P password - HP Designjet 4500mfp | HP Designjet Scanner Series - Quick Reference Guide - Page 63
- HP Designjet 4500mfp | HP Designjet Scanner Series - Quick Reference Guide - Page 64
© 2008 Hewlett-Packard Development Company L.P. Printed in Germany - Imprimé en Allemagne - Stampato in Germania www.hp.com
-
 1
1 -
 2
2 -
 3
3 -
 4
4 -
 5
5 -
 6
6 -
 7
7 -
8
-
9
-
10
-
11
-
12
-
13
-
14
-
15
-
16
-
17
-
18
-
19
-
20
-
21
-
22
-
23
-
24
-
25
-
26
-
27
-
28
-
29
-
30
-
31
-
32
-
33
-
34
-
35
-
36
-
37
-
38
-
39
-
40
-
41
-
42
-
43
-
44
-
45
-
46
-
47
-
48
-
49
-
50
-
51
-
52
-
53
-
54
-
55
-
56
-
57
-
58
-
59
-
60
-
61
-
62
-
63
-
64
 |
 |
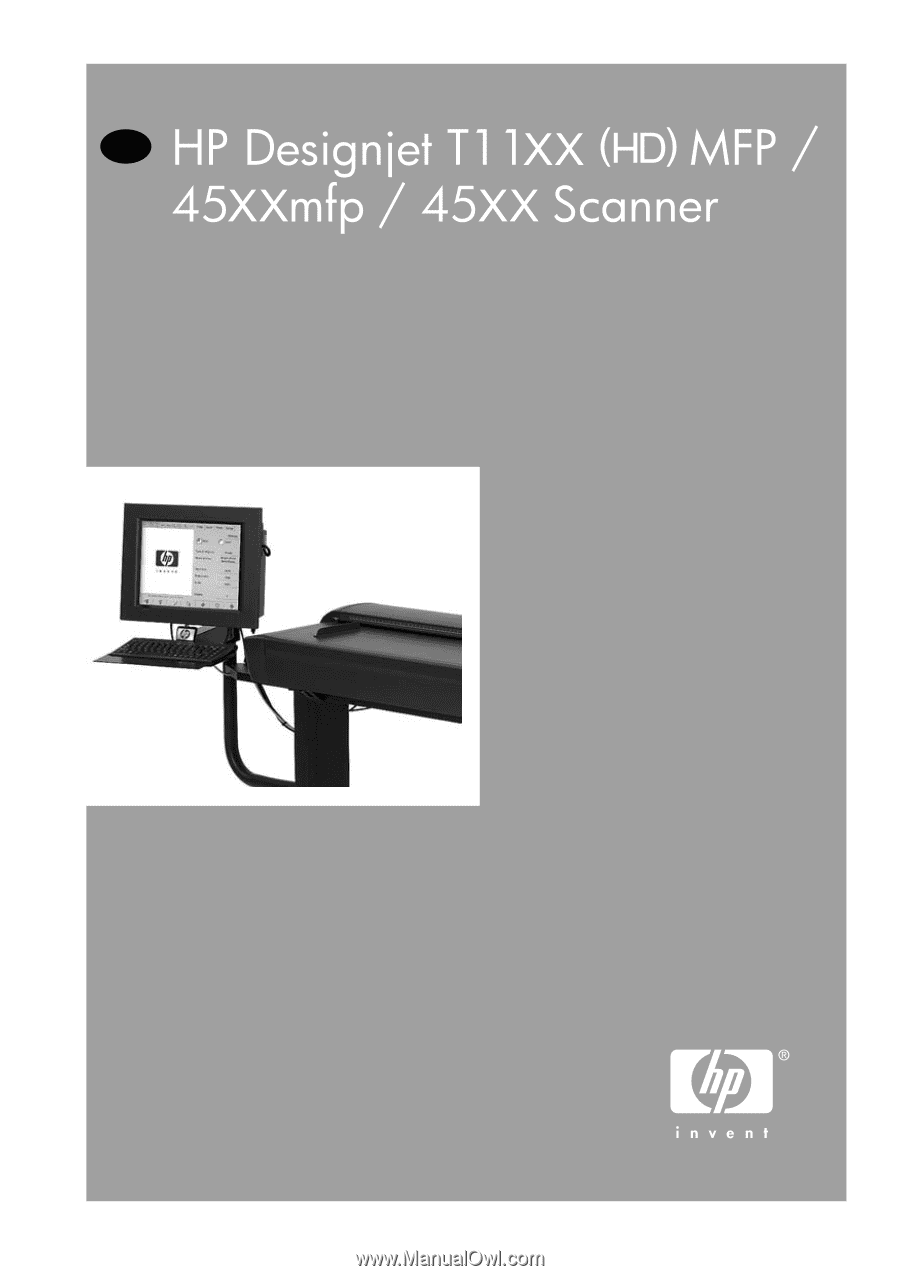
Quick reference guide
EN