HP Deskjet J300 User Guide
HP Deskjet J300 Manual
 |
View all HP Deskjet J300 manuals
Add to My Manuals
Save this manual to your list of manuals |
HP Deskjet J300 manual content summary:
- HP Deskjet J300 | User Guide - Page 1
HP Deskjet 3000 J310 series - HP Deskjet J300 | User Guide - Page 2
- HP Deskjet J300 | User Guide - Page 3
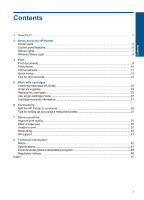
network 29 Tips for setting up and using a networked printer 31 7 Solve a problem Improve print quality...33 Clear a paper jam...35 Unable to print...37 Networking...40 HP support...41 8 Technical information Notice...43 Specifications...43 Environmental product stewardship program 45 Regulatory - HP Deskjet J300 | User Guide - Page 4
2 Contents - HP Deskjet J300 | User Guide - Page 5
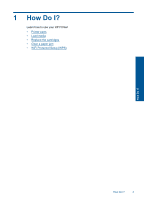
1 How Do I? Learn how to use your HP Printer • Printer parts • Load media • Replace the cartridges • Clear a paper jam • WiFi Protected Setup (WPS) How Do I? How Do I? 3 - HP Deskjet J300 | User Guide - Page 6
Chapter 1 How Do I? 4 How Do I? - HP Deskjet J300 | User Guide - Page 7
2 Get to know the HP Printer • Printer parts • Control panel features • Status Lights • Wireless Status Light Printer parts 1 Input tray 2 Paper-width guide for the input tray 3 Control panel 4 Cartridge door 5 Output tray 6 Output tray extender (also referred to as the tray extender) 7 Cartridges 8 - HP Deskjet J300 | User Guide - Page 8
Forms button or the Wireless buton to view menus for these options on the printer display. 8 Cartridge light: Indicates low ink or a print cartridge problem. 9 Attention light: Indicates that there is a paper jam, the printer is out of paper, or some event that requires your attention. 6 Get to - HP Deskjet J300 | User Guide - Page 9
Status Lights When the product is turned on, the on button light will be lit. When the product is processing a job, the on light will be blinking. Additional blinking lights signal errors that you can resolve. See below to learn about blinking lights and what to do. Behavior Solution On light is - HP Deskjet J300 | User Guide - Page 10
Chapter 2 (continued) Behavior Wireless Status Light Light behavior Off Blinking Fast blinking On Solution If the problem persists, contact HP support. Solution Wireless signal off. Press wireless button to enable wireless printing and access wireless menu on the printer display. Indicates printer - HP Deskjet J300 | User Guide - Page 11
3 Print Choose a print job to continue. Print documents Print photos Print envelopes Print documents To print from a software application 1. Make sure the output tray is open. 2. Make sure you have paper loaded in the input tray. See Load media for more information. 3. From your software - HP Deskjet J300 | User Guide - Page 12
Chapter 3 6. Select the appropriate options. • On Layout tab select Portrait or Landscape orientation. • On Paper/Quality tab select the appropriate paper size and paper type from the Paper Size and Media drop-down lists. • Click Advanced to select the appropriate output quality from the Printer - HP Deskjet J300 | User Guide - Page 13
. For best results, consider using a label for the return address on envelopes. To print envelopes 1. Make sure the output tray is open. 2. Slide the paper guide all the way to the left. 3. Place the envelopes in the right side of the tray. The side to be printed on should face up - HP Deskjet J300 | User Guide - Page 14
in the input tray lays flat and the edges are not bent or torn. • Adjust the paper-width guide in the input tray to fit snugly against all paper. Make sure the paper-width guide does not bend the paper in the input tray. • For more information, see Load media. Print 12 - HP Deskjet J300 | User Guide - Page 15
and papers to help you easily produce great results, time after time. NOTE: HP cannot guarantee the quality or reliability of non-HP supplies. Product service or repairs required as a result of using a non-HP supply will not be covered under warranty. If you believe you purchased genuine HP ink - HP Deskjet J300 | User Guide - Page 16
Chapter 3 Printing in maximum dpi takes longer than printing with other settings and requires a large amount of disk space. To print in Maximum dpi mode 1. Make sure you have photo paper loaded in the input tray. 2. On the File menu in your software application, click Print. 3. Make sure the product - HP Deskjet J300 | User Guide - Page 17
Paper basics 4 Paper basics You can load many different types and sizes of paper in the HP Printer, including letter or A4 paper, photo paper, transparencies, and envelopes. This section contains the following topics: Load media Recommended papers for printing If you want the best print quality, HP - HP Deskjet J300 | User Guide - Page 18
Paper basics Chapter 4 HP Brochure Paper or HP Superior Inkjet Paper These papers are glossy-coated or matte-coated on both sides for two-sided use. They are the perfect choice for near-photographic reproductions and business graphics for report covers, special presentations, brochures, mailers, - HP Deskjet J300 | User Guide - Page 19
Paper basics Load media ▲ Select a paper size to continue. Load full-size paper a. Raise the input tray ❑ Raise the input tray. b. Lower the output tray ❑ Lower the output tray and pull out the tray extender. Load media 17 - HP Deskjet J300 | User Guide - Page 20
Paper basics Chapter 4 c. Slide paper-width guide to the left ❑ Slide paper-width guide to the left. d. Load paper. ❑ Insert stack of paper into input tray with short edge forward and print side up. ❑ Slide stack of paper down until it stops. ❑ Slide paper-width guide to the right until it stops - HP Deskjet J300 | User Guide - Page 21
Paper basics Load small-size paper a. Raise the input tray ❑ Raise the input tray. b. Lower the output tray ❑ Lower the output tray and pull out the tray extender. Load media 19 - HP Deskjet J300 | User Guide - Page 22
Paper basics Chapter 4 c. Slide paper-width guide to the left. ❑ Slide paper-width guide to the left. d. Load paper. ❑ Insert stack of photo paper with short edge , load photo paper so that tabs are on top. ❑ Slide paper-width guide to the right until it stops at edge of paper. 20 Paper basics - HP Deskjet J300 | User Guide - Page 23
Paper basics Load envelopes a. Raise the input tray ❑ Raise the input tray. b. Lower the output tray ❑ Lower the output tray and pull out the tray extender. c. Slide paper-width guide to the left. ❑ Slide paper-width guide to the left. Load media 21 - HP Deskjet J300 | User Guide - Page 24
should face up. The flap should be on the left side and facing down. ❑ Slide stack of envelopes down until it stops. ❑ Slide paper-width guide to the right against stack of envelopes until it stops. Paper basics 22 Paper basics - HP Deskjet J300 | User Guide - Page 25
process in a number of different ways, including in the initialization process, which prepares the product and cartridges for printing, and in printhead servicing, which keeps print nozzles clear and ink flowing smoothly. In addition, some residual ink is left in the cartridge after it is used - HP Deskjet J300 | User Guide - Page 26
/region, follow the prompts to select your product, and then click one of the shopping links on the page. NOTE: Ordering cartridges online is not supported in all countries/regions. If it is not available in your country/region, you may still view supplies information and print a list for reference - HP Deskjet J300 | User Guide - Page 27
Replace the cartridges To replace the cartridges 1. Check power. 2. Load paper. 3. Remove cartridge. a. Open cartridge door. Wait for print carriage to move to center of the product. b. Press down to release cartridge, then remove it from slot. Work with cartridges Replace the cartridges 25 - HP Deskjet J300 | User Guide - Page 28
Chapter 5 4. Insert new cartridge. a. Remove cartridge from packaging. b. Remove plastic tape using pink pull tab. c. Slide cartridge into slot until it clicks into place. Work with cartridges 26 Work with cartridges - HP Deskjet J300 | User Guide - Page 29
d. Close cartridge door. Work with cartridges 5. Align cartridges. Related topics • Choose the right cartridges • Order ink supplies Use single-cartridge mode Use the single-cartridge mode to operate the HP Printer with only one print cartridge. The single-cartridge mode is initiated when a print - HP Deskjet J300 | User Guide - Page 30
Chapter 5 During the warranty period the product is covered as long as the HP ink is not depleted and the end of warranty date has not been reached. The end of warranty date, in YYYY/ MM/DD format, may be found on the product as indicated: For a copy of the HP Limited Warranty Statement, see the - HP Deskjet J300 | User Guide - Page 31
or access point. ❑ A desktop computer or laptop with either wireless networking support, or a network interface card (NIC). The computer must be connected to ❑ Select WPS. ❑ Select Push Button and follow the on-screen instructions on the printer display. NOTE: The product begins a timer for - HP Deskjet J300 | User Guide - Page 32
to the network. If the connection fails, follow the prompts to correct the problem, and then try again. 3. When the setup is finished, you will be Printer supports a rear USB 2.0 High Speed port for connection to a computer. To connect the product with the USB cable ▲ Refer to the setup instructions - HP Deskjet J300 | User Guide - Page 33
on a Windows computer ▲ Refer to the user guide that came with your computer or see the Windows onscreen here to go online for more information. • Learn about the Network Diagnostic Utility and other troubleshooting tips. Click here to go online for more information. • Learn how to change from - HP Deskjet J300 | User Guide - Page 34
Chapter 6 Connectivity 32 Connectivity - HP Deskjet J300 | User Guide - Page 35
7 Solve a problem This section contains the following topics: • Improve print quality • Clear a paper jam • Unable to print • Networking • HP support Click here to go online for more information. Improve print quality 1. Make sure you are using genuine HP cartridges. 2. Check the print properties to - HP Deskjet J300 | User Guide - Page 36
Software, click Printer Actions and then click Maintenence Tasks to access the Printer Toolbox. c. Click Clean Ink Cartridges. Follow the onscreen instructions. If the above solutions do not resolve the problem, click here for more online troubleshooting. 34 Solve a problem Solve a problem - HP Deskjet J300 | User Guide - Page 37
try to clear the jam automatically. If this does not work, the paper jam will need to be cleared manually. 2. Locate the paper jam Input tray If the paper jam is located near the back input tray, pull the print carriage to the right to access the paper jam. Solve a problem Clear a paper jam 35 - HP Deskjet J300 | User Guide - Page 38
to fit snugly against all paper. Make sure the paper-width guide does not bend the paper in the input tray. • Do not force paper too far forward in the input tray. If the above solutions do not resolve the problem, click here for more online troubleshooting. 36 Solve a problem Solve a problem - HP Deskjet J300 | User Guide - Page 39
wrong product is set as the default printer, right-click the correct product and select Set as Default Printer. d. Try using your product again. Solve a problem Unable to print 37 - HP Deskjet J300 | User Guide - Page 40
the Windows Start menu, click Control Panel, System and Security, and then Administrative Tools. • Double-click Services. • Right-click the Print Spooler, and then click Properties. • On the General tab, next to Startup as Default Printer. d. Try using your product again. Solve a problem 38 Solve - HP Deskjet J300 | User Guide - Page 41
it is clear but jobs are still failing to print, proceed to the next solution. If the above solutions do not resolve the problem, click here for more troubleshooting online. Clear the print carriage Remove any objects, such as paper, that are blocking the print carriage. NOTE: Do not use any tools - HP Deskjet J300 | User Guide - Page 42
. Networking • Learn how to find your network security settings. Click here to go online for more information. • Learn about the Network Diagnostic Utility and other troubleshooting tips. Click here to go online for more information. 40 Solve - HP Deskjet J300 | User Guide - Page 43
register, you can enjoy quicker service, more efficient support, and product support alerts. If you did not troubleshooting information for common problems • Proactive product updates, support alerts, and HP newsgrams that are available when you register the product 3. Call HP support. Support - HP Deskjet J300 | User Guide - Page 44
support options. Additional warranty options Extended service plans are available for the HP Printer at additional costs. Go to www.hp.com/support, select your country/region and language, then explore the services and warranty area for information about the extended service plans. Solve a problem - HP Deskjet J300 | User Guide - Page 45
for HP products and services are set forth in the express warranty statements accompanying such products and services. Nothing herein should be support. System requirements For information about future operating system releases and support, visit the HP online support Web site at www.hp.com/support - HP Deskjet J300 | User Guide - Page 46
Technical information Chapter 8 Envelopes: Up to 5 Index cards: Up to 10 Photo paper sheets: Up to 10 Paper size For a complete list of supported media sizes, see the printer software. Paper weights Plain Paper: 64 to 90 g/m² (16 to 24 lb) Envelopes: 75 to 90 g/m² (20 to 24 lb) - HP Deskjet J300 | User Guide - Page 47
Acoustic information If you have Internet access, you can get acoustic information from the HP Web site. Go to: www.hp.com/support. Environmental product stewardship program Hewlett-Packard is committed to providing quality products in an environmentally sound manner. Design for recycling has been - HP Deskjet J300 | User Guide - Page 48
Technical information Chapter 8 conserves resources by reselling some of its most popular products. For more information regarding recycling of HP products, please visit: www.hp.com/hpinfo/globalcitizenship/environment/recycle/ HP inkjet supplies recycling program HP is committed to protecting the - HP Deskjet J300 | User Guide - Page 49
more information about where you can drop off your waste equipment for recycling, please contact your local city office, your household waste disposal service or the shop where you purchased the product. Évacuation des équipements usagés par les utilisateurs dans les foyers privés au sein de l'Union - HP Deskjet J300 | User Guide - Page 50
Chapter 8 1907/2006 of the European Parliament and the Council). A chemical information report for this product can be found at: www.hp.com/go/reach. Toxic and hazardous substance table Technical information Regulatory notices The HP Printer meets product requirements from regulatory agencies in - HP Deskjet J300 | User Guide - Page 51
installation. This equipment generates, uses and can radiate radio frequency energy and, if not installed and used in accordance with the instructions, may cause harmful interference to radio communications. However, there is no guarantee that interference will not occur in a particular installation - HP Deskjet J300 | User Guide - Page 52
Chapter 8 Notice to users in Japan about the power cord Technical information 50 Technical information - HP Deskjet J300 | User Guide - Page 53
Technical information HP Deskjet 3000 J310 series declaration of conformity DECLARATION OF CONFORMITY according to ISO/IEC 17050-1 and EN 17050-1 Supplier's Name: Supplier's Address: DoC #: VCVRA-1005-01 Hewlett-Packard Company SE 34th Street, Vancouver, WA 98683-8906, USA declares, that the - HP Deskjet J300 | User Guide - Page 54
Technical information Chapter 8 European Union Regulatory Notice European Union Regulatory Notice Products bearing the CE marking comply with the following EU Directives: Low Voltage Directive 2006/95/EC EMC Directive 2004/108/EC EuP Directive 2005/32/EC CE compliance of this product is valid only - HP Deskjet J300 | User Guide - Page 55
be used in such a manner that the potential for human contact during normal operation is minimized. This product and any attached external antenna, if supported, shall be placed in such a manner to minimize the potential for human contact during normal operation. In order to avoid the possibility of - HP Deskjet J300 | User Guide - Page 56
Technical information Chapter 8 European Union regulatory notice Products with 2.4-GHz wireless LAN devices France L'utilisation de cet equipement (2.4 GHz Wireless LAN) est soumise a certaines restrictions: Cet equipement peut etre utilise a l'interieur d'un batiment en utilisant toutes les - HP Deskjet J300 | User Guide - Page 57
specifications 43 I interface card 29, 30 N network interface card 29, 30 P paper recommended types 15 phone support 41 phone support period period for support 41 print specifications 44 R recycle ink cartridges 46 regulatory notices regulatory model identification number 48 wireless statements 52 - HP Deskjet J300 | User Guide - Page 58
56 Index
-
 1
1 -
 2
2 -
 3
3 -
 4
4 -
 5
5 -
 6
6 -
 7
7 -
8
-
9
-
10
-
11
-
12
-
13
-
14
-
15
-
16
-
17
-
18
-
19
-
20
-
21
-
22
-
23
-
24
-
25
-
26
-
27
-
28
-
29
-
30
-
31
-
32
-
33
-
34
-
35
-
36
-
37
-
38
-
39
-
40
-
41
-
42
-
43
-
44
-
45
-
46
-
47
-
48
-
49
-
50
-
51
-
52
-
53
-
54
-
55
-
56
-
57
-
58
 |
 |

HP Deskjet 3000 J310 series