HP ENVY 700-047c Quick Setup Guide (For Linux and Freedos Only)
HP ENVY 700-047c Manual
 |
View all HP ENVY 700-047c manuals
Add to My Manuals
Save this manual to your list of manuals |
HP ENVY 700-047c manual content summary:
- HP ENVY 700-047c | Quick Setup Guide (For Linux and Freedos Only) - Page 1
Getting Started - HP ENVY 700-047c | Quick Setup Guide (For Linux and Freedos Only) - Page 2
- HP ENVY 700-047c | Quick Setup Guide (For Linux and Freedos Only) - Page 3
Quick Setup HP Consumer PCs - HP ENVY 700-047c | Quick Setup Guide (For Linux and Freedos Only) - Page 4
services are set forth in the express statements accompanying such products and services. Nothing herein should be construed as constituting an additional warranty. HP prohibited. Microsoft and Windows are trademarks of Microsoft Corporation in the U.S. and other countries. HP supports lawful use of - HP ENVY 700-047c | Quick Setup Guide (For Linux and Freedos Only) - Page 5
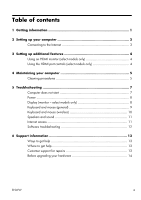
Maintaining your computer 5 Cleaning procedures 5 5 Troubleshooting 7 Computer does not start 7 Power 8 Display (monitor - select models only troubleshooting 12 6 Support information 13 Ways to get help 13 Where to get help 13 Customer support for repairs 13 Before upgrading your hardware - HP ENVY 700-047c | Quick Setup Guide (For Linux and Freedos Only) - Page 6
iv ENWW - HP ENVY 700-047c | Quick Setup Guide (For Linux and Freedos Only) - Page 7
troubleshooting help. HP Support website: http://www.hp.com/support ● Upgrade or replace Upgrading and Servicing Guide components of your computer. HP Support website: http://www.hp.com/support ● Find computer warranty information. ● Get technical support. Limited Warranty and Support Guide - HP ENVY 700-047c | Quick Setup Guide (For Linux and Freedos Only) - Page 8
or DVD drives. • The power supply is preset for the country power outlet. The computer may be heavy; be sure to use ergonomically correct lifting procedures when moving the computer. To reduce the risk of serious injury read the Safety & Comfort Guide. The guide is located on the web at http://www.hp - HP ENVY 700-047c | Quick Setup Guide (For Linux and Freedos Only) - Page 9
Steps to connect to the Internet: 1. Connect the hardware as shown on the setup view. 2. Get Internet service. ● Sign up with an Internet Service Provider (ISP). If you already have an account with an ISP, skip this step and follow the instructions provided by the ISP. 3. Using your Internet - HP ENVY 700-047c | Quick Setup Guide (For Linux and Freedos Only) - Page 10
card with an HDMI (High Definition Multimedia Interface) connector, Hewlett-Packard recommends using a DVI or VGA connector for a monitor, and using HDMI to connect a TV. If you use HDMI to connect your monitor, you may need to adjust some settings to hear sound. Because of this, HP graphics card - HP ENVY 700-047c | Quick Setup Guide (For Linux and Freedos Only) - Page 11
. ● Visit www.hp.com/support for additional cleaning instructions. Cleaning the computer vents Air vents keep the computer cool. Keep these vents clean by using a small, batterypowered vacuum cleaner. (A battery-powered - HP ENVY 700-047c | Quick Setup Guide (For Linux and Freedos Only) - Page 12
models only) Follow these steps to clean the touch screen: 1. Turn off the computer. Tap the Start button, and then tap Shut Down. 2. Disconnect the power cord from the wall. 3. Spray a small amount of mild glass cleaner on a soft cloth to clean the touch screen. 4. Wipe the surface and left and - HP ENVY 700-047c | Quick Setup Guide (For Linux and Freedos Only) - Page 13
source are plugged in properly, and the wall outlet is functioning, the green power supply light on the back of the computer should be on; if it is not, contact Support. If the display (monitor) is blank, the monitor might not be properly connected. Connect the monitor to the computer, plug it - HP ENVY 700-047c | Quick Setup Guide (For Linux and Freedos Only) - Page 14
Power button is pressed. Press and hold the Power button until the computer turns off. Check Power power light is not lit. Reconnect the power plug to the back of the monitor and to the wall outlet. Press the Power Press the Power button to turn on the computer. Inspect the monitor video connector - HP ENVY 700-047c | Quick Setup Guide (For Linux and Freedos Only) - Page 15
Keyboard and mouse (general) Symptom Possible solution Keyboard commands and typing are not recognized by the computer. Use the mouse to turn off the computer, unplug and reconnect the keyboard to the back of your computer, and then restart your computer. Mouse (with cable) does not work or is - HP ENVY 700-047c | Quick Setup Guide (For Linux and Freedos Only) - Page 16
the Connect button (C) on the underside of the keyboard for 5 to 10 seconds until the LED on the receiver lights or stops flashing. C 10 Chapter 5 Troubleshooting ENWW - HP ENVY 700-047c | Quick Setup Guide (For Linux and Freedos Only) - Page 17
an High-Definition Multimedia Interface (HDMI) connector on the graphics card (select models only) to connect your monitor to the audio is enabled and that the volume is set appropriately. Ensure that you connected powered (active) speakers and that they are turned on. Turn off your computer, - HP ENVY 700-047c | Quick Setup Guide (For Linux and Freedos Only) - Page 18
interface card, or service provider (ISP) for assistance. Software troubleshooting To repair software problems, try these methods: ● Turn the computer off completely and then turn it on again. This is the easiest (and sometimes the best) way. ● Reinstall the software program or hardware driver - HP ENVY 700-047c | Quick Setup Guide (For Linux and Freedos Only) - Page 19
the keyboard at the same time. Don't forget to register! Go to: http://www.hp.com/apac/register. Where to get help For help online, go to the HP Customer Care Center website at http://www.hp.com/support. Phone assistance to get you up and running is covered for thirty (30) days from - HP ENVY 700-047c | Quick Setup Guide (For Linux and Freedos Only) - Page 20
These services are covered during the warranty period. There are a few limitations and exclusions to the warranty (as well as some important details), which are described in the Hardware Limited Warranty section of the Limited Warranty and Support Guide. Before upgrading your hardware Any hardware
-
 1
1 -
 2
2 -
 3
3 -
 4
4 -
 5
5 -
 6
6 -
 7
7 -
8
-
9
-
10
-
11
-
12
-
13
-
14
-
15
-
16
-
17
-
18
-
19
-
20
 |
 |

Getting Started