HP G71-400 Power Management - Windows 7
HP G71-400 - Notebook PC Manual
 |
View all HP G71-400 manuals
Add to My Manuals
Save this manual to your list of manuals |
HP G71-400 manual content summary:
- HP G71-400 | Power Management - Windows 7 - Page 1
Power Management User Guide - HP G71-400 | Power Management - Windows 7 - Page 2
and services. Nothing herein should be construed as constituting an additional warranty. HP shall not be liable for technical or editorial errors or omissions contained herein. Second Edition: August 2009 First Edition: August 2009 Document Part Number: 539209-002 Product notice This user guide - HP G71-400 | Power Management - Windows 7 - Page 3
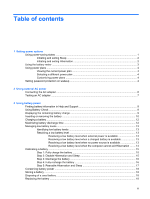
1: Fully charge the battery 15 Step 2: Disable Hibernation and Sleep 15 Step 3: Discharge the battery 16 Step 4: Fully recharge the battery 16 Step 5: Reenable Hibernation and Sleep 17 Conserving battery power ...18 Storing a battery ...18 Disposing of a used battery ...18 Replacing the battery - HP G71-400 | Power Management - Windows 7 - Page 4
4 Shutting down the computer Index ...20 iv - HP G71-400 | Power Management - Windows 7 - Page 5
lights blink and the screen clears. Your work is saved to memory , letting you exit Sleep faster than exiting Hibernation. If the computer is in the Sleep state for an extended period or if the battery reaches a critical battery an external media card. NOTE: - HP G71-400 | Power Management - Windows 7 - Page 6
to initiate Sleep after 15 minutes of inactivity when running on battery power and 30 minutes of inactivity when running on external power. Hibernation: ▲ Briefly press the power button. The power lights turn on and your work returns to the screen where you stopped working. NOTE: If you have set - HP G71-400 | Power Management - Windows 7 - Page 7
in the notification area, at the far right of the taskbar. The battery meter allows you to quickly access power settings, view remaining battery charge, and select a different power plan. ● To display the percentage of remaining battery charge and the current power plan, move the pointer over the - HP G71-400 | Power Management - Windows 7 - Page 8
conserve power or maximize performance. You can change power plan settings or create your own power plan. Viewing the current power plan ▲ Click the battery meter icon in the notification area, at the far right of the taskbar. - or - Select Start > Control Panel > System and Security > Power Options - HP G71-400 | Power Management - Windows 7 - Page 9
with the computer, a replacement AC adapter provided by HP, or a compatible AC adapter purchased from HP. ● Approved AC adapter ● Optional expansion product Connect the computer to external AC power under any of the following conditions: WARNING! Do not charge the computer battery while you are - HP G71-400 | Power Management - Windows 7 - Page 10
Connecting the AC adapter WARNING! To reduce the risk of electric shock or damage to the equipment: Plug the power cord into an AC outlet that is easily accessible at all times. Disconnect power from the computer by unplugging the power cord from the AC outlet (not by unplugging the power cord from - HP G71-400 | Power Management - Windows 7 - Page 11
. 3. Turn on the computer. ● If the power light turns on, the AC adapter is functioning properly. ● If the power light remains off, the AC adapter is not functioning and should be replaced. Contact technical support for information on obtaining a replacement AC power adapter. Testing an AC adapter 7 - HP G71-400 | Power Management - Windows 7 - Page 12
the computer contains a charged battery and is running on external AC power supplied through the AC adapter, the computer switches to battery power if the AC the battery provided with the computer, a replacement battery provided by HP, or a compatible battery purchased from HP. Computer battery life - HP G71-400 | Power Management - Windows 7 - Page 13
proper care and storage to maximize battery life ● Information on battery types, specifications, life cycles, and capacity To access Battery information: ▲ Select Start > Help and Support > Learning Center > HP Power and Battery Learning Center. Using Battery Check Battery Check, a part of the Total - HP G71-400 | Power Management - Windows 7 - Page 14
Turn the computer upside down on a flat surface. 2. Insert the battery into the battery bay (1) and rotate it downward until it is seated (2). The battery release latch (3) automatically locks the battery into place. To remove the battery: 1. Turn the computer upside down on a flat surface. 2. Slide - HP G71-400 | Power Management - Windows 7 - Page 15
3. Pivot the battery (2) upward and remove the battery from the computer (3). Inserting or removing the battery 11 - HP G71-400 | Power Management - Windows 7 - Page 16
one month or more, calibrate the battery instead of simply charging it. The battery light displays charge status: ● On: The battery is charging. ● Blinking: The battery has reached a low battery level or critical battery level and is not charging. ● Off: The battery is fully charged, in use, or not - HP G71-400 | Power Management - Windows 7 - Page 17
not affect lights. Identifying low battery levels When a battery that is the sole power source for the computer reaches a low battery level, the battery light blinks. If a low battery level is not resolved, the computer enters a critical battery level, and the battery light continues to blink. The - HP G71-400 | Power Management - Windows 7 - Page 18
a low battery level when the computer cannot exit Hibernation When the computer lacks sufficient power to exit Hibernation, follow these steps: 1. Insert a charged battery or plug the computer into external power. 2. Exit Hibernation by pressing the power button. 14 Chapter 3 Using battery power - HP G71-400 | Power Management - Windows 7 - Page 19
product, and then plug the adapter or device into external power. The battery light on the computer turns on. 3. Leave the computer plugged into external power until the battery is fully charged. The battery light on the computer turns off. Step 2: Disable Hibernation and Sleep 1. Click the - HP G71-400 | Power Management - Windows 7 - Page 20
not turn off the computer. 2. Run the computer on battery power until the battery is discharged. The battery light begins to blink when the battery has discharged to a low battery level. When the battery is discharged, the battery light turns off and the computer shuts down. Step 4: Fully recharge - HP G71-400 | Power Management - Windows 7 - Page 21
Security > Power Options. 2. Under the current power plan, click Change plan settings. 3. Reenter the settings that you recorded for the items in the On battery column. 4. Click Change advanced power settings. 5. Click the plus sign next to Sleep, and then click the plus sign next to Hibernate after - HP G71-400 | Power Management - Windows 7 - Page 22
an internal cell is not charging properly, or when the battery storage capacity has reached a "weak" condition. A message refers you to the HP Web site for more information about ordering a replacement battery. If the battery is possibly covered by an HP warranty, instructions include a warranty ID - HP G71-400 | Power Management - Windows 7 - Page 23
system, and then turns off the display and computer. Shut down the computer under any of the following conditions: ● When you need to replace the battery or access components inside the computer ● When you are connecting an external hardware device that does not connect to a USB port ● When the - HP G71-400 | Power Management - Windows 7 - Page 24
12 disposing 18 inserting 10 low battery levels 13 recharging 16 removing 10 replacing 18 storing 18 Battery Check 9 battery light 12, 13 battery power 8 battery release latch 10 battery temperature 18 C calibrating battery 15 charging batteries 12, 15 connection, external power 6 conservation - HP G71-400 | Power Management - Windows 7 - Page 25
-
 1
1 -
 2
2 -
 3
3 -
 4
4 -
 5
5 -
 6
6 -
 7
7 -
8
-
9
-
10
-
11
-
12
-
13
-
14
-
15
-
16
-
17
-
18
-
19
-
20
-
21
-
22
-
23
-
24
-
25
 |
 |

Power Management
User Guide