HP L1740 HP L1740 17" and L1940 19" Flat Panel Monitors User Guide
HP L1740 - 17" LCD Monitor Manual
 |
UPC - 829160882154
View all HP L1740 manuals
Add to My Manuals
Save this manual to your list of manuals |
HP L1740 manual content summary:
- HP L1740 | HP L1740 17" and L1940 19" Flat Panel Monitors User Guide - Page 1
User Guide HP L1740 17" and L1940 19" Flat Panel Monitors Document Part Number: 372837-001 January 2005 This guide provides information on setting up the monitor, installing drivers, using the on-screen display menu, troubleshooting and technical specifications. - HP L1740 | HP L1740 17" and L1940 19" Flat Panel Monitors User Guide - Page 2
warranties for HP products and services are set forth in the express warranty statements accompanying such products and services. Nothing herein should be construed as constituting an additional warranty. HP User Guide HP L1740 17" and L1940 19" Flat Panel Monitors First Edition (January 2005) Document - HP L1740 | HP L1740 17" and L1940 19" Flat Panel Monitors User Guide - Page 3
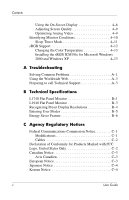
3-13 4 Operating the Monitor Software and Utilities 4-1 The Information File 4-1 The Image Color Matching File 4-2 Installing the .INF and .ICM Files 4-2 Installing from the CD 4-2 Downloading from the Worldwide Web 4-3 Front Panel Controls 4-4 Adjusting Monitor Settings 4-5 User Guide i - HP L1740 | HP L1740 17" and L1940 19" Flat Panel Monitors User Guide - Page 4
Troubleshooting Solving Common Problems A-1 Using the Worldwide Web A-3 Preparing to call Technical Support A-3 B Technical Specifications L1740 Flat Panel Monitor B-1 L1940 Flat Panel Monitor C-3 Avis Canadien C-3 European Notice C-3 Japanese Notice C-4 Korean Notice C-4 ii User Guide - HP L1740 | HP L1740 17" and L1940 19" Flat Panel Monitors User Guide - Page 5
Contents EPA Energy Star Compliance C-4 Power Cord Set Requirements C-5 D LCD Monitor Quality and Pixel Policy User Guide iii - HP L1740 | HP L1740 17" and L1940 19" Flat Panel Monitors User Guide - Page 6
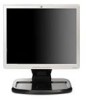
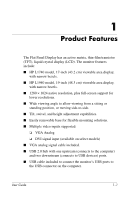
The monitor features include: ■ HP L1740 model, 17-inch (43.2 cm) viewable area display, with narrow bezels. ■ HP L1940 base for flexible mounting solutions. ■ Multiple video inputs supported: ❏ VGA Analog ❏ DVI signal input (available monitor's USB ports to the USB connector on the computer. User - HP L1740 | HP L1740 17" and L1940 19" Flat Panel Monitors User Guide - Page 7
■ Mounting feature on bottom of monitor to accept an optional Speaker Bar accessory kit. ■ Plug and play capability if supported by your system. ■ On- Star compliance. ■ AssetControl ■ Compliant with the following regulated specifications: ❏ EPA ENERGY STAR ❏ European Union CE Directives ❏ Swedish - HP L1740 | HP L1740 17" and L1940 19" Flat Panel Monitors User Guide - Page 8
Guidelines Important Safety Information A power cord is included with your monitor. If another cord is used, use only a power source and connection appropriate for this monitor. For information on the correct power cord set to use with your monitor, refer to the "Power Cord Set Requirements" section - HP L1740 | HP L1740 17" and L1940 19" Flat Panel Monitors User Guide - Page 9
controls that are covered in the operating instructions. If your monitor is not operating properly or has been dropped or damaged, contact your HP authorized dealer, reseller, or service provider. ■ Use only a power source and connection appropriate for this monitor, as indicated on the label/back - HP L1740 | HP L1740 17" and L1940 19" Flat Panel Monitors User Guide - Page 10
your monitor or place it on an unstable surface. ■ Do not allow anything to rest on the power cord. Do not walk on the cord. ■ Keep your monitor in to clean your monitor or the screen. These chemicals may damage the cabinet finish as well as the screen. Shipping the Monitor Keep the original packing - HP L1740 | HP L1740 17" and L1940 19" Flat Panel Monitors User Guide - Page 11
To set up the monitor, ensure that the power is turned off to the monitor, computer system, and other attached devices, then follow the steps below. Unfolding the Monitor Base The monitor is shipped with the base attached in a folded flat position. To begin using the monitor, you must unfold the - HP L1740 | HP L1740 17" and L1940 19" Flat Panel Monitors User Guide - Page 12
Identifying Rear Panel Components Rear Panel Components No. Component Function 1 AC power connector Connects the AC power cord to the monitor. 2 USB downstream Connects optional USB devices to the monitor. connectors 3 USB upstream connector Connects the USB cable to the host (computer - HP L1740 | HP L1740 17" and L1940 19" Flat Panel Monitors User Guide - Page 13
monitor by unplugging the power cord from the electrical outlet. Do not place anything on power cords or cables. Arrange them so that no one may accidentally step on or trip over them. Do not pull on a cord or cable. When unplugging from the electrical outlet, grasp the cord by the plug. User Guide - HP L1740 | HP L1740 17" and L1940 19" Flat Panel Monitors User Guide - Page 14
1. Place the monitor in a convenient, well-ventilated location near your computer. 2. Pivot the monitor to the portrait position. Connect one end of the power cable to the power connector on the monitor 1, and the other end to an electrical wall outlet 2. Connecting the Power Cable 3-4 User Guide - HP L1740 | HP L1740 17" and L1940 19" Flat Panel Monitors User Guide - Page 15
Setting Up the Monitor 3. For analog operation, connect one end of the VGA signal cable to the VGA connector on the monitor 1, and the other end to the VGA connector on the computer 2. Connecting the VGA Signal Cable User Guide 3-5 - HP L1740 | HP L1740 17" and L1940 19" Flat Panel Monitors User Guide - Page 16
Setting Up the Monitor 4. Connect the USB cable to the USB upstream connector on the monitor 1 and to a convenient USB connector on the computer 2. Connecting the USB Cable 3-6 User Guide - HP L1740 | HP L1740 17" and L1940 19" Flat Panel Monitors User Guide - Page 17
Setting Up the Monitor 5. Adjust the monitor as needed for your comfort using the monitor's tilt, swivel, and height adjustment capabilities. Adjusting the Tilt Adjusting the Swivel User Guide 3-7 - HP L1740 | HP L1740 17" and L1940 19" Flat Panel Monitors User Guide - Page 18
Setting Up the Monitor Adjusting the Height 3-8 User Guide - HP L1740 | HP L1740 17" and L1940 19" Flat Panel Monitors User Guide - Page 19
Ä CAUTION: Burn-in image damage may occur on monitors that display the same static image on screen for a prolonged period of time. To avoid burn-in image damage on your monitor screen, you should always activate a screen saver application or turn off the monitor when it is not in use for a prolonged - HP L1740 | HP L1740 17" and L1940 19" Flat Panel Monitors User Guide - Page 20
disassemble the monitor, be sure the monitor is turned off and the power and signal monitor while the monitor is in the upright position. Before removing the monitor from the base, ensure that the monitor and power cables from the back of the monitor. Ä CAUTION: Ensure that the bottom of the monitor - HP L1740 | HP L1740 17" and L1940 19" Flat Panel Monitors User Guide - Page 21
the Monitor Base" steps in the previous section. ✎ For stand mounting purposes, when the base is removed, four threaded mounting holes are exposed on the display panel. These mounting holes are spaced 100 mm apart and are compliant with the Video Electronics Standards Association (VESA) standard - HP L1740 | HP L1740 17" and L1940 19" Flat Panel Monitors User Guide - Page 22
Setting Up the Monitor 2. Using the screws 1 previously removed from the monitor base, mount the display 2 to a swing arm or other mounting fixture. Consult the documentation included with the mounting fixture for additional instructions. Mounting the Monitor 3-12 User Guide - HP L1740 | HP L1740 17" and L1940 19" Flat Panel Monitors User Guide - Page 23
Setting Up the Monitor Locating the Rating Label The rating label 1 is located along the bottom of the rear panel of the monitor. Locating the Rating Label User Guide 3-13 - HP L1740 | HP L1740 17" and L1940 19" Flat Panel Monitors User Guide - Page 24
If the monitor does not include a CD, the .INF and .ICM files can be downloaded from the HP monitors support Web site monitor will work correctly without installing the .INF file. Monitor Plug and Play compatibility requires that the computer's graphic card is VESA DDC2 compliant and that the monitor - HP L1740 | HP L1740 17" and L1940 19" Flat Panel Monitors User Guide - Page 25
screen. The .ICM file contains a monitor color system profile. This file is activated from within graphics programs that support this feature. ✎ The ICM color profile is written in accordance with the International Color Consortium (ICC) Profile Format specification. Installing the .INF and .ICM - HP L1740 | HP L1740 17" and L1940 19" Flat Panel Monitors User Guide - Page 26
the HP monitors support Web site: 1. Refer to http://www.hp.com/support and select your country region. 2. Follow the links for your monitor to the support page and download page. 3. Ensure your system meets the requirements. 4. Download the software by following the instructions. User Guide 4-3 - HP L1740 | HP L1740 17" and L1940 19" Flat Panel Monitors User Guide - Page 27
Operating the Monitor Front Panel Controls Front Panel Controls No. Control 1 Auto Adjust 2 Menu 3 - (Minus) 4 + (Plus) 5 Power Function Activates the auto adjustment feature for optimum image. Opens the On- off, press to enable the VGA signal input. Turns the monitor on or off. 4-4 User Guide - HP L1740 | HP L1740 17" and L1940 19" Flat Panel Monitors User Guide - Page 28
To access the OSD, do the following: 1. If the monitor is not already on, press the Power switch to turn on the monitor. 2. Press the Menu button on the monitor's front panel to launch the OSD Main Menu. 3. To using the + or - buttons on the front panel to adjust the scale. User Guide 4-5 - HP L1740 | HP L1740 17" and L1940 19" Flat Panel Monitors User Guide - Page 29
Operating the Monitor 6. After adjusting the function, access the Basic OSD Menu, press the menu button on the monitor's front panel. Basic OSD Menu Levels Menu Level 1 Menu Level OSD on subsequent power-ups of the monitor until the Basic Menu is selected or Factory Reset is applied. 4-6 User - HP L1740 | HP L1740 17" and L1940 19" Flat Panel Monitors User Guide - Page 30
Operating the Monitor The Advanced OSD Menu has up to three sublevels and can and Return Deutsch S. Chinese English Espanol Francais Italiano Nederlands Cancel Save and Return Power Saver Power On Recall "Adjusting" Message Adjustment Scale Adjustment Scale Adjustment Scale Adjustment Scale Custom - HP L1740 | HP L1740 17" and L1940 19" Flat Panel Monitors User Guide - Page 31
On / Off Selection N Power-On Status On / Off Selection N Display Sleep Timer Timer Set Menu N Default Video Input Analog - VGA N Digital Serial Number Display monitor s/n Basic Menu N Cancel Number Total Hours Backlight Hours Exit Factory Reset Yes No Exit 4-8 User Guide - HP L1740 | HP L1740 17" and L1940 19" Flat Panel Monitors User Guide - Page 32
described in the following section. Optimizing Analog Video This monitor contains advanced circuitry that allows the flat panel screen to function like a standard monitor. Two controls in the on-screen display can be by using the adjustment pattern application provided on the CD-ROM. User Guide 4-9 - HP L1740 | HP L1740 17" and L1940 19" Flat Panel Monitors User Guide - Page 33
Monitor Conditions Special messages will appear on the monitor screen when identifying the following monitor conditions: ■ Input Signal Out of Range- Indicates the monitor does not support Input Signal- Indicates the monitor is entering a reduced power state but the power saving feature is set Guide - HP L1740 | HP L1740 17" and L1940 19" Flat Panel Monitors User Guide - Page 34
feature that enables you to set a time for the monitor to power on and off at the same time every day. This also extends the life of the backlight bulbs in the monitor. The Sleep Timer has five settings: ■ Set . 8. Press the - (Minus) or + (Plus) buttons to adjust the minutes. User Guide 4-11 - HP L1740 | HP L1740 17" and L1940 19" Flat Panel Monitors User Guide - Page 35
next On Time activates or a monitor button is pressed. sRGB Support The monitor is designed to support sRGB for color management, which .html (English only). To take advantage of the sRGB support, you will need to change your monitor's color temperature to sRGB and install the sRGB color profile - HP L1740 | HP L1740 17" and L1940 19" Flat Panel Monitors User Guide - Page 36
the front panel of the monitor to launch the Main Menu completing this procedure. The sRGB ICM file does not support Windows 95 and Windows NT operating systems 1. Click To activate a color profile for your monitor, you must set it as the Default Monitor Profile. Select "sRGB Color Space Profile," - HP L1740 | HP L1740 17" and L1940 19" Flat Panel Monitors User Guide - Page 37
A Troubleshooting Solving Common Problems The following table lists possible problems, the possible cause of each problem, and the recommended solutions. Problem Screen is blank. Possible Cause Power cord is disconnected. Power switch on front panel of the monitor is turned off. Video cable is - HP L1740 | HP L1740 17" and L1940 19" Flat Panel Monitors User Guide - Page 38
Troubleshooting Problem Image appears blurred, indistinct, or too dark. Image is not centered. "Check Signal Cable" is displayed on screen. "Out of Range. Set Monitor monitor power is off while connecting the video cable. Restart your computer and enter Safe Mode. Change your settings to a supported - HP L1740 | HP L1740 17" and L1940 19" Flat Panel Monitors User Guide - Page 39
, online assistance, community forums of IT experts, broad multivendor knowledge base, monitoring and diagnostic tools, go to: http://www.hp.com/support. Preparing to call Technical Support If you cannot solve a problem using the troubleshooting tips in this section, you may need to call technical - HP L1740 | HP L1740 17" and L1940 19" Flat Panel Monitors User Guide - Page 40
the component manufacturers. Performance specifications represent the highest specification of all HP's component manufacturers' typical level specifications for performance and actual performance may vary either higher or lower. L1740 Flat Panel Monitor L1740 Flat Panel Monitor Display Type 17 - HP L1740 | HP L1740 17" and L1940 19" Flat Panel Monitors User Guide - Page 41
Technical Specifications L1740 Flat Panel Monitor (Continued) Maximum Graphics Resolution 1280 x 1024 (75 Hz) 35° C -20 to 60° C Relative Humidity 20 to 80% Power Source 100 - 240 VAC, 60-50 Hz Power Consumption - HP L1740 | HP L1740 17" and L1940 19" Flat Panel Monitors User Guide - Page 42
Technical Specifications L1940 Flat Panel Monitor L1940 Flat Panel Monitor Display Type 19.0 inches TFT LCD 48.3 cm Viewable Image Size 19.0-inch diagonal 48.3 cm Tilt Swivel --5 to 35° --90 to 90° Face Treatment - HP L1740 | HP L1740 17" and L1940 19" Flat Panel Monitors User Guide - Page 43
Technical Specifications L1940 Flat Panel Monitor (Continued) Relative Humidity 20 to 80% Power Source 100 - 240 VAC, 60-50 Hz Power Consumption - HP L1740 | HP L1740 17" and L1940 19" Flat Panel Monitors User Guide - Page 44
Technical Specifications Factory Preset Display this occurs, you may need to readjust the parameters of the monitor screen by using the on-screen display. Your changes can be made or all of these modes and saved in memory. The monitor automatically stores the new setting, then recognizes the new - HP L1740 | HP L1740 17" and L1940 19" Flat Panel Monitors User Guide - Page 45
Technical Specifications Energy Saver Feature When the monitor is in its normal operating mode, the monitor uses less than 70 watts of power and the Power light is green. The monitor also supports a reduced power state. The reduced power state will be entered into if the monitor detects the absence - HP L1740 | HP L1740 17" and L1940 19" Flat Panel Monitors User Guide - Page 46
can radiate radio frequency energy and, if not installed and used in accordance with the instructions, may cause harmful interference to radio communications. However, there is no guarantee that interference Packard Company may void the user's authority to operate the equipment. User Guide C-1 - HP L1740 | HP L1740 17" and L1940 19" Flat Panel Monitors User Guide - Page 47
, Texas 77269-2000 Or, call (281) 514-3333 To identify this product, refer to the Part, Series, or Model number found on the product. C-2 User Guide - HP L1740 | HP L1740 17" and L1940 19" Flat Panel Monitors User Guide - Page 48
equivalent international standards): ■ EN55022 (CISPR 22) - Electromagnetic Interference ■ EN55024 (IEC61000-4-2,3,4,5,6,8,11) - Electromagnetic Immunity ■ EN61000-3-2 (IEC61000-3-2) - Power Line Harmonics ■ EN61000-3-3 (IEC61000-3-3) - Power Line Flicker ■ EN60950 (IEC950) - Product Safety User - HP L1740 | HP L1740 17" and L1940 19" Flat Panel Monitors User Guide - Page 49
. As an Energy Star Partner, Hewlett Packard Company has determined that this product meets the Energy Star guidelines for energy efficiency. Specific details on using the Energy Saving features can be found in the energy saver or power management section of the computer manual. C-4 User Guide - HP L1740 | HP L1740 17" and L1940 19" Flat Panel Monitors User Guide - Page 50
, and the length of the cord must be between 6 feet (1.8 m) and 12 feet (3.6 m). If you have questions about the type of power cord to use, contact your HP authorized service provider. A power cord should be routed so that it is not likely to be walked on or pinched by items placed upon it or - HP L1740 | HP L1740 17" and L1940 19" Flat Panel Monitors User Guide - Page 51
, manufactured according to HP standards, to guarantee trouble-free performance. Nevertheless, the display may have cosmetic imperfections that appear as small bright or dark spots. This is common to all LCD displays used in products supplied by all vendors and is not specific to the HP LCD. These - HP L1740 | HP L1740 17" and L1940 19" Flat Panel Monitors User Guide - Page 52
Quality and Pixel Policy To locate defective pixels, the monitor should be viewed under normal operating conditions, in normal operating mode at a supported resolution and refresh rate, from a distance of approximately 50 cm (16 in.). HP expects that, over time, the industry will continue to improve
-
 1
1 -
 2
2 -
 3
3 -
 4
4 -
 5
5 -
 6
6 -
 7
7 -
8
-
9
-
10
-
11
-
12
-
13
-
14
-
15
-
16
-
17
-
18
-
19
-
20
-
21
-
22
-
23
-
24
-
25
-
26
-
27
-
28
-
29
-
30
-
31
-
32
-
33
-
34
-
35
-
36
-
37
-
38
-
39
-
40
-
41
-
42
-
43
-
44
-
45
-
46
-
47
-
48
-
49
-
50
-
51
-
52
 |
 |

User Guide
HP L1740 17” and L1940 19”
Flat Panel Monitors
Document Part Number: 372837-001
January 2005
This guide provides information on setting up the monitor,
installing drivers, using the on-screen display menu,
troubleshooting and technical specifications.