HP LaserJet 3200 HP LaserJet 3200 All-in-One Product - (English for Australia)
HP LaserJet 3200 - All-in-One Printer Manual
 |
View all HP LaserJet 3200 manuals
Add to My Manuals
Save this manual to your list of manuals |
HP LaserJet 3200 manual content summary:
- HP LaserJet 3200 | HP LaserJet 3200 All-in-One Product - (English for Australia) - Page 1
hp LaserJet 3200 printer · fax · copier · scanner getting started guide LaserJet all-in-one - HP LaserJet 3200 | HP LaserJet 3200 All-in-One Product - (English for Australia) - Page 2
- HP LaserJet 3200 | HP LaserJet 3200 All-in-One Product - (English for Australia) - Page 3
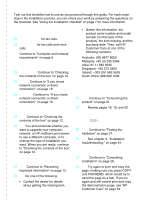
date. Then, call HP Customer Care at one of the following numbers: Australia: (03) 8877 8000 Malaysia: +60 (3) 295 2566 India: 91 11 682 6035 Singapore: +65 272 5300 Ireland: +353 (0)1 662 5525 South Africa: 086 000 1030 5 Were you able to install the toner, attach the supports, and load media into - HP LaserJet 3200 | HP LaserJet 3200 All-in-One Product - (English for Australia) - Page 4
messages and common installation issues. • If the troubleshooting section does not resolve the issue, see "HP Customer Care" on page 54. 9 Did . If you have ring pattern service, continue to "Enabling answer ring patterns" on page 48; if you do not have ring pattern service, continue to "To print a - HP LaserJet 3200 | HP LaserJet 3200 All-in-One Product - (English for Australia) - Page 5
HP LaserJet 3200 Product Getting Started Guide - HP LaserJet 3200 | HP LaserJet 3200 All-in-One Product - (English for Australia) - Page 6
risk of injury from fire or electric shock. 1 Read and understand all instructions in the user guide. 2 Observe all warnings and instructions marked on the product. 3 Use only a grounded electrical outlet when connecting the HP LaserJet 3200 product to a power source. If you don't know whether the - HP LaserJet 3200 | HP LaserJet 3200 All-in-One Product - (English for Australia) - Page 7
cable 32 Network installation 37 Standalone installation (no computer 42 3 Installation troubleshooting 4 Now that installation is complete . . . Using the HP LaserJet 3200 product 53 HP Customer Care 54 Warranty statement 56 Declaration of Conformity 58 Limited Warranty for Toner Cartridge - HP LaserJet 3200 | HP LaserJet 3200 All-in-One Product - (English for Australia) - Page 8
6 EN - HP LaserJet 3200 | HP LaserJet 3200 All-in-One Product - (English for Australia) - Page 9
HP LaserJet 3200 product, a powerful business tool with the capabilities of a full range of office equipment: use the product to print, fax, copy, and scan. Increase your productivity by doing more than one task at a time. Use this guide the front cover of this guide. The checklist lists all of - HP LaserJet 3200 | HP LaserJet 3200 All-in-One Product - (English for Australia) - Page 10
Setup requirements CAUTION Phone line requirements Connect the HP LaserJet 3200 product to the phone line in one of as call waiting and voice mail, might interfere with the correct operation of the product. HP recommends that you get a second phone line dedicated to fax calls if your phone system - HP LaserJet 3200 | HP LaserJet 3200 All-in-One Product - (English for Australia) - Page 11
features: l Direct connection to a computer l Network connection with an HP JetDirect Print Server l Standalone, to use the product as a fax machine from the computer (PC faxing) Optical character recognition (OCR) software for converting scanned text to editable text Special copying features, - HP LaserJet 3200 | HP LaserJet 3200 All-in-One Product - (English for Australia) - Page 12
direct connection: All of the computers that will use the product software must be PCcompatible computers that meet the following minimum requirements: l or the IPX/SPX network protocol. l An appropriate cable for the type of network connection. The cable is used to connect the print server to a - HP LaserJet 3200 | HP LaserJet 3200 All-in-One Product - (English for Australia) - Page 13
to the print server. • HP JetDirect 70X (J4155A) for a Home PNA network. • HP JetDirect 170X (J3258B - J3258A is not supported) for a 10Base-T network the print server. Instructions for printing the configuration page appear later in this guide. HP recommends against using HP JetDirect Print Servers - HP LaserJet 3200 | HP LaserJet 3200 All-in-One Product - (English for Australia) - Page 14
and check to see that it includes the following items: 1 HP LaserJet 3200 product 2 Four media supports 3 IEEE-1284 compliant parallel cable (with a "C" connector) 4 Power cord 5 Telephone cord 6 Software and documentation on CD-ROM 7 Toner cartridge 8 Modular double adapter Save the box and packing - HP LaserJet 3200 | HP LaserJet 3200 All-in-One Product - (English for Australia) - Page 15
items it should? Recording important information Take a moment now to write the model and serial numbers, which are located on the back of the product, and the date of purchase on the inside front cover of this guide. HP Customer Care will ask for this information if you call with a question. Also - HP LaserJet 3200 | HP LaserJet 3200 All-in-One Product - (English for Australia) - Page 16
Hardware overview Place the product on a sturdy, level surface in a well-ventilated area that meets the following environmental requirements: l temperature: 15° to 32.5° Celsius (59° to 90.5° Fahrenheit) l humidity: 10% to 80% relative humidity (no condensation) l install away from direct sunlight, - HP LaserJet 3200 | HP LaserJet 3200 All-in-One Product - (English for Australia) - Page 17
Then, make sure you can identify the parts shown in this overview. 4 5 3 2 1 1 Front paper path door 2 Document output slot 3 Control panel/document release door 4 Printer door 5 Printer door release latches EN Hardware overview 15 - HP LaserJet 3200 | HP LaserJet 3200 All-in-One Product - (English for Australia) - Page 18
8 7 6 10 9 11 6 Document feeder tray 7 Paper output bin 8 Single-sheet input tray 9 Paper input tray 10 Paper input guides 11 Special media lever When you are comfortable with parts identification, continue to Chapter 2, Installation. 16 Chapter 1 - Introduction EN - HP LaserJet 3200 | HP LaserJet 3200 All-in-One Product - (English for Australia) - Page 19
2 Installation HP LaserJet 3200 product installation involves one of the following installation paths, depending upon line devices 3 Connect power 4 Connect the product to a supported HP JetDirect Print Server 5 Install the software Standalone 1 Set up hardware 2 Set up phone connections, including - HP LaserJet 3200 | HP LaserJet 3200 All-in-One Product - (English for Australia) - Page 20
HP recommends using HP LaserJet toner cartridges, which are designed to work with the product to give you optimal image quality and reliability. CAUTION To prevent damage, do not expose the toner cartridge to light for more than a few minutes. To install the toner cartridge 1 Press the two printer - HP LaserJet 3200 | HP LaserJet 3200 All-in-One Product - (English for Australia) - Page 21
and coming out of the product, four supports d should be installed. To attach supports 1 Locate the four supports and the extension a paper input support b paper output support c document feeder support d document output support 2 Insert the paper input support into the groove on the paper - HP LaserJet 3200 | HP LaserJet 3200 All-in-One Product - (English for Australia) - Page 22
the new paper before loading to reduce multiple feeds and jams. 3 Readjust the paper input guides to fit snugly against the edges of the stack. Check your work #5 Were you able to install the toner, attach the supports, and load media into the paper input tray? 20 Chapter 2 - Installation EN - HP LaserJet 3200 | HP LaserJet 3200 All-in-One Product - (English for Australia) - Page 23
your way through connecting the product, you will make several decisions. Some are based on your personal preferences; others are based on phone services and equipment you already have. The first step in connecting the product is connecting the phone line to the product. Connecting the phone line - HP LaserJet 3200 | HP LaserJet 3200 All-in-One Product - (English for Australia) - Page 24
1 To connect the product to the phone line 1 If any telephone cord is plugged into the phone jack, unplug the cord and set it aside. 2 Plug one end of the telephone cord that was included in the product box 2 into the socket shown (on the back of the product). 3 Plug the other end into the - HP LaserJet 3200 | HP LaserJet 3200 All-in-One Product - (English for Australia) - Page 25
jack with a phone line for both fax calls and voice calls or if you have one phone line with two phone numbers and ring pattern service: l You can connect the devices listed above to the phone line. l If you have another phone jack for the phone line, you can connect some - HP LaserJet 3200 | HP LaserJet 3200 All-in-One Product - (English for Australia) - Page 26
12 23 4 5 6 24 Chapter 2 - Installation To prepare the product for additional devices 1 Unplug all of the additional devices you want to connect from their power sources. 2 Remove the plastic insert from the "phone" socket on the back of the product. To connect additional devices Connect additional - HP LaserJet 3200 | HP LaserJet 3200 All-in-One Product - (English for Australia) - Page 27
7 7 To connect a telephone, plug the phone cord into the "phone" socket on the product or on the last device you connected. 8 After you have finished connecting additional devices, plug back in all of the devices to their power sources. EN Connecting the product 25 - HP LaserJet 3200 | HP LaserJet 3200 All-in-One Product - (English for Australia) - Page 28
Connecting power and testing Connecting power Make sure the power switch is in the "off" position before you connect the power cord. 1 To connect the product power cord CAUTION Use the power cord that came in the product box. Using a different power cord can damage the product. 3 1 Connect - HP LaserJet 3200 | HP LaserJet 3200 All-in-One Product - (English for Australia) - Page 29
or group-dial later. 2 See the online user guide for information about configuring the one-touch keys. 2 Adjust the guides on the document feeder tray to the size of the READY. Check your work #7 Were you able to print and copy the demonstration page? EN Connecting power and testing 27 - HP LaserJet 3200 | HP LaserJet 3200 All-in-One Product - (English for Australia) - Page 30
: l Direct connection to a computer l Network connection with an HP JetDirect Print Server l Standalone, to use the product as a cable Network installation Standalone installation continue to . . . "Direct connect installation (USB cable)" on page 29 "Direct connect installation (parallel cable - HP LaserJet 3200 | HP LaserJet 3200 All-in-One Product - (English for Australia) - Page 31
or Windows 2000) or you can use a parallel cable. If you want to use a USB cable, HP recommends that you purchase the HP USB cable (part number C6518A) to ensure that your connection meets regulatory standards. If you want to use a parallel cable to connect the product, continue to "To connect the - HP LaserJet 3200 | HP LaserJet 3200 All-in-One Product - (English for Australia) - Page 32
then click Next>. f Continue to step 5 on page 31. To install the software for Windows Millennium Edition (direct connect installation with a USB cable) g In the "Add New Hardware Wizard" window, select Specify the location of the driver (Advanced) and then click Next>. h Select Search for the best - HP LaserJet 3200 | HP LaserJet 3200 All-in-One Product - (English for Australia) - Page 33
then click OK. q The Wizard should display a window indicating that it has found the driver; click Next>. r Continue to step 5 on page 31. Note Note 5 Follow the instructions on the screen to install the software. Before installation is complete, make sure that there is a check mark next to Print - HP LaserJet 3200 | HP LaserJet 3200 All-in-One Product - (English for Australia) - Page 34
the parallel port has another device attached to it, such as an external storage device, that device must be disconnected. Do not connect the parallel cable to a serial port on the computer. Doing so can damage the product. If you need help locating the parallel port, see the documentation for the - HP LaserJet 3200 | HP LaserJet 3200 All-in-One Product - (English for Australia) - Page 35
click OK. d Continue to step 6 on page 35. To install the software for Windows 98 (direct connect installation with a parallel cable) e In the "Add New Hardware Wizard" window, click Next>. f Select Search for the best driver for your device. (Recommended) and then click Next>. g Click the boxes - HP LaserJet 3200 | HP LaserJet 3200 All-in-One Product - (English for Australia) - Page 36
The Wizard should display a window indicating that it has found the driver; click Next>. q Continue to step 6 on page 35. To install the software for Windows Millennium Edition (direct connect installation with a parallel cable) r In the "Add New Hardware Wizard" window, select Specify the location - HP LaserJet 3200 | HP LaserJet 3200 All-in-One Product - (English for Australia) - Page 37
cable) To install the software on Windows NT 4.0, you must have administrator privileges (on start and restart). w Insert the product software button labeled Software Installation. z Continue to step 6 on page 35. Note Note 6 Follow the instructions on the screen to install the software. Before - HP LaserJet 3200 | HP LaserJet 3200 All-in-One Product - (English for Australia) - Page 38
modem you already have, but you cannot use it with the product. If you already have scanning software The product comes with scanning software. You can use it or any other TWAIN-compliant scanning software that is compatible with the product. (TWAIN is an industry standard.) See the Readme.txt file - HP LaserJet 3200 | HP LaserJet 3200 All-in-One Product - (English for Australia) - Page 39
JetDirect Print Server or check that the one you have is supported. (See page 11 for a list of supported print servers. See the documentation for the print server to set it up. Do not install the software that came with the HP JetDirect Print Server.) 2 Connect the product to the print server. (See - HP LaserJet 3200 | HP LaserJet 3200 All-in-One Product - (English for Australia) - Page 40
you printed in step 3 on page 37 contain the LAN hardware address you need for software installation. For TCP/IP users: Use only the product software to make the network connection to the printer. Other software might not work. The configuration pages you printed in step 3 on page 37 contain the - HP LaserJet 3200 | HP LaserJet 3200 All-in-One Product - (English for Australia) - Page 41
(where Z is the letter of your CD-ROM drive), and then click OK. 3 Follow the instructions on the screen. Make sure you select "Connected to the network" before you click Next> when the installer software prompts you to select how the product will be connected. 4 When the installation is nearly - HP LaserJet 3200 | HP LaserJet 3200 All-in-One Product - (English for Australia) - Page 42
to print an electronic document and ensure that the product and software are working properly. 1 Open a document created in a program such as Wordpad or Write. 2 On the File menu, select the Print command. Make sure the HP LaserJet 3200 product is selected and click OK. Check your work #9 Did the - HP LaserJet 3200 | HP LaserJet 3200 All-in-One Product - (English for Australia) - Page 43
To find the printer, click Browse, locate the printer name you assigned when you shared the printer, and then click OK. • When prompted, print a test page to ensure the printer driver is installed properly. You might need the product software CD-ROM to complete the printer driver installations. EN - HP LaserJet 3200 | HP LaserJet 3200 All-in-One Product - (English for Australia) - Page 44
product as a standalone fax machine, you must complete the following, instructions for which appear on the following pages: 1 Set the time or may not have to alter these settings. 4 If you have ring-pattern service (such as distinctive ring) from your local telephone company, "answer ring-pattern" - HP LaserJet 3200 | HP LaserJet 3200 All-in-One Product - (English for Australia) - Page 45
Note To set the time and date 1 Press ENTER/MENU. 2 Use the < and > keys to select TIME/DATE, HEADER, and then press ENTER/MENU. 3 Press ENTER/MENU to select TIME/DATE. 4 Use the < and > keys to select a 12-hour or a 24-hour clock, and then press ENTER/MENU. 5 Enter the current time using the - HP LaserJet 3200 | HP LaserJet 3200 All-in-One Product - (English for Australia) - Page 46
Note To set the fax header 1 Press ENTER/MENU. 2 Use the < and > keys to select TIME/DATE, HEADER, and then press ENTER/MENU. 3 Use the < and > keys to select FAX HEADER and press ENTER/MENU. 4 Enter your fax number and press ENTER/MENU. To separate numbers, press > to insert spaces. To add a plus - HP LaserJet 3200 | HP LaserJet 3200 All-in-One Product - (English for Australia) - Page 47
answers first and then answers if it is a fax call. In Manual mode, the product never answers calls. You must start the fax-receiving to more than 6 rings. One line with two separate numbers and ring pattern service Leave at Automatic Australia and Ireland: leave at 2 rings. Others: leave at 2 - HP LaserJet 3200 | HP LaserJet 3200 All-in-One Product - (English for Australia) - Page 48
tones if you do not answer or if they do not hang up by the number of rings at which the product answers. Use the Manual setting if you do not want voice callers ever to hear fax tones, but remember that fax calls are not received automatically. 46 Chapter 2 - Installation - HP LaserJet 3200 | HP LaserJet 3200 All-in-One Product - (English for Australia) - Page 49
to select FAX RECEIVE SETUP, and then press ENTER/MENU. 4 Press ENTER/MENU to select ANSWER MODE. 5 Use the < and > keys to select AUTOMATIC or MANUAL, and then press ENTER/MENU. To set the number of rings to answer 1 Press ENTER/MENU. 2 Use the < and > keys to select FAX SETUP, and - HP LaserJet 3200 | HP LaserJet 3200 All-in-One Product - (English for Australia) - Page 50
What is ring pattern service? Ring pattern service is available from some service? Call your local telephone company to check the availability and to subscribe. The service for this service. If ring pattern service is available and that the ring pattern service is working correctly: l Ask someone you know - HP LaserJet 3200 | HP LaserJet 3200 All-in-One Product - (English for Australia) - Page 51
Note To enable answer ring patterns If you do not have ring pattern service, and you change this setting from All Rings to another setting, the product might not be able to receive faxes. 1 Press ENTER/MENU. 2 Use the < and > keys to select FAX SETUP, and then press ENTER/ MENU. 3 Use the < and - HP LaserJet 3200 | HP LaserJet 3200 All-in-One Product - (English for Australia) - Page 52
To print a configuration report 1 Press ENTER/MENU. 2 Use the < and > keys to select REPORTS, and then press ENTER/ MENU. 3 Use the < and > keys to select CONFIGURATION REPORT, and then press ENTER/MENU. The product exits the Menu settings and prints the report, confirming that the product is - HP LaserJet 3200 | HP LaserJet 3200 All-in-One Product - (English for Australia) - Page 53
troubleshooting Use the following table to solve problems that might occur when installing the software or changing settings manually: Problem Cause Solution When installing software software The software did not Then, reinstall the software. To check in , reinstall the software. The computer - HP LaserJet 3200 | HP LaserJet 3200 All-in-One Product - (English for Australia) - Page 54
: l "The configuration wizard did not find your HP LaserJet 3200 All in One on the network." l "The configuration wizard was unable to find an All in One at the specified address." l "The JetDirect model found at the specified address does not support All in One devices." The print server you are - HP LaserJet 3200 | HP LaserJet 3200 All-in-One Product - (English for Australia) - Page 55
4 Now that installation is complete . . . Note Using the HP LaserJet 3200 product If you completed a network installation or direct connect installation, see the online help and the online user guide for all of the information you need to fax, copy, scan, and print. If you completed a standalone - HP LaserJet 3200 | HP LaserJet 3200 All-in-One Product - (English for Australia) - Page 56
training, and software updates you need, 24 hours a day, 7 days a week, all at no charge to you. Visit http://www.hp.com/support/lj3200. (Site ideas and usage suggestions at HP's online user forum for the HP LaserJet 3200 product. Visit HP's Web site at http://www.hp.com/support/lj3200. (Site is in - HP LaserJet 3200 | HP LaserJet 3200 All-in-One Product - (English for Australia) - Page 57
software, product announcements, and other important news about your HP LaserJet 3200 product. Sign up online at http:// www.hp.com/support/lj3200. (Site is in English.) By phone Speak with trained service the purchase date and note the product model and serial numbers, which are on the back of - HP LaserJet 3200 | HP LaserJet 3200 All-in-One Product - (English for Australia) - Page 58
HP LaserJet 3200 product ONE-YEAR LIMITED WARRANTY 1 HP warrants to you, the end-user customer, that HP HP warrants to you that HP software will not fail to execute its programming instructions return of the product. 4 HP products may contain remanufactured parts equivalent to a new in - HP LaserJet 3200 | HP LaserJet 3200 All-in-One Product - (English for Australia) - Page 59
ALLOWED BY LOCAL LAW, THE REMEDIES IN THIS WARRANTY STATEMENT ARE YOUR SOLE AND EXCLUSIVE REMEDIES. EXCEPT AS INDICATED ABOVE, IN NO EVENT WILL HP OR ITS SUPPLIERS BE LIABLE FOR LOSS OF DATA OR FOR DIRECT, SPECIAL, INCIDENTAL, CONSEQUENTIAL (INCLUDING LOST PROFIT OR DATA), OR OTHER DAMAGE, WHETHER - HP LaserJet 3200 | HP LaserJet 3200 All-in-One Product - (English for Australia) - Page 60
Guide 22 and EN 45014 Manufacturer's Name: Hewlett-Packard Company Manufacturer's Address: 11311 Chinden Boulevard Boise, Idaho 83714-1021, USA declares, that the product Product Name: HP LaserJet 3200 product Model Number: C7052A, 7053A, 7055A (Printer/Fax/Scanner CFR, Part 15 Class Service - HP LaserJet 3200 | HP LaserJet 3200 All-in-One Product - (English for Australia) - Page 61
warranted to be free from defects in materials and workmanship for cartridge life until the HP toner is depleted. Your HP toner is depleted when your printer indicates a toner low message. HP will, at HP's option, either replace products which prove to be defective or refund your purchase price. The - HP LaserJet 3200 | HP LaserJet 3200 All-in-One Product - (English for Australia) - Page 62
with the instructions, it may printer that are not expressly approved by HP could void the user's authority to operate this equipment. Use of a shielded interface cable is required to comply with the Class B limits of Part 15 of FCC rules. Additional regulatory statements See the online user guide - HP LaserJet 3200 | HP LaserJet 3200 All-in-One Product - (English for Australia) - Page 63
- HP LaserJet 3200 | HP LaserJet 3200 All-in-One Product - (English for Australia) - Page 64
Printed on Recycled Paper Copyrightᓻ 2001 Hewlett-Packard Co. http://www.hp.com/support/lj3200 English *C7052-90921* *C7052-90921* C7052-90921
-
 1
1 -
 2
2 -
 3
3 -
 4
4 -
 5
5 -
 6
6 -
 7
7 -
8
-
9
-
10
-
11
-
12
-
13
-
14
-
15
-
16
-
17
-
18
-
19
-
20
-
21
-
22
-
23
-
24
-
25
-
26
-
27
-
28
-
29
-
30
-
31
-
32
-
33
-
34
-
35
-
36
-
37
-
38
-
39
-
40
-
41
-
42
-
43
-
44
-
45
-
46
-
47
-
48
-
49
-
50
-
51
-
52
-
53
-
54
-
55
-
56
-
57
-
58
-
59
-
60
-
61
-
62
-
63
-
64
 |
 |

LaserJet
all-in-one
getting
started
guide
hp
LaserJet 3200
printer
fax
copier
scanner
·
·
·