HP Latex 115 Installation step by step
HP Latex 115 Manual
 |
View all HP Latex 115 manuals
Add to My Manuals
Save this manual to your list of manuals |
HP Latex 115 manual content summary:
- HP Latex 115 | Installation step by step - Page 1
Alignment-User Guide HP Latex 115 Print and Cut Solution 3. Learn more about how to operate each product, and how to take maximum advantage of them. For further information, see "D. Print and Cut Training". D. Print and Cut Training 7 Print and cut 1. HP Latex 115 Printer Support: http://hp.com
-
 1
1
 |
 |

© Copyright 2017 HP Development Company, L.P.
Large Format Division
Camí de Can Graells 1-21 · 08174
Sant Cugat del Vallès
Barcelona · Spain
All rights reserved
Printed in XXX
7
D.
Print and Cut Training
Print and cut
2. Print and Cut with FlexiEditor:
latex300printandcut/video2
3. Print and Cut with Production
Manager:
latex300printandcut/video3
4. Load Cutter:
latex300printandcut/video4
5. Direct Cut:
latex300printandcut/video1
E-Learning:
latex115printandcut/training
User Guide and other
Documents:
latex115/manuals/
You can now start to print and
cut.
Video
support is available at
the following links:
1. HP Latex 115 Printer Support:
http://hp.com/supportvideos/
1LH39-90009
1
2
3
4
5
6
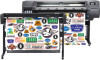
HP Latex 115
Print and Cut
Solution
A.
Preparing Installation
Get informed
HP Print and Cut Solution
Installation step by step
B
. Installation Day
C.
Printer and Cutter Calibration
1
Assemble
the cutter
Download
software
Assemble
the printer
P&C
Integration
Calibrate
1
. Find the
Assembly Instructions
on top of the cutter,
or online here:
2. The SAi card with the RIP activation code is in the
box. Save it for later.
3. There is also
video
support for cutter assembly.
If your cutter has a support label (found with the RIP
license), place it on the back of the cutter to use when
contacting support.
Start checking installation requirements and information.
1.
Read the
Site Preparation Guide
and con
fi
rm you meet all installation requirements:
2.
Watch the assembly
videos
before arrival:
Installation HP Latex 115 Printer
Installation HP Latex 54’’ Basic Cutter
3. Learn more about how to operate each product, and how to take maximum advantage of them.
For further information, see "D. Print and Cut Training"
.
Begin software installation while
you assemble the printer.
1. Take the SAi card and follow the
card and wizard instructions to
download the RIP and connect it to
the printer and the cutter.
1. During software download, assemble
the printer. Find the
Assembly
Instructions
on top of the printer, or
online here:
manuals/
2. There is also
video
support for
assembly:
The printer and cutter should now
be assembled with the energy and
LAN* cables connected (*you can
use a USB cable for the cutter, but
you will need to download the
driver).
Continue with the software
installation started in step 3. You
will now integrate the printer, cutter
and RIP. When
fi
nalized, two
programs will be installed on your
desktop. Use
HP Flexi Print and Cut
- FlexiEditor
to prepare an image
and add contour lines, or use the
Production Manager
if you already
have an image with contour lines.
Before continuing, you must calibrate the printer and
cutter:
1. Cutter: Pressure Calibration-
User Guide
2. Printer: Printhead Alignment-
User Guide
For more detailed support visit: