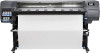
HP Latex 330 Printer assembly instructions
HP Latex 330 Manual
 |
View all HP Latex 330 manuals
Add to My Manuals
Save this manual to your list of manuals |
HP Latex 330 manual content summary:
- HP Latex 330 | Printer assembly instructions - Page 1
holders / 3. user maintenance / 4. printheads / 5. maintenance cartridge HP Latex 360 only 6. take-up reel / 7. 3-in spindle / 8. media loading accessory / 9. ink collector HP Latex 330 only 10.Take-up reel / 11.2-in spincle / 12. FlexiPRINT HP Basic Edition HP Latex 310 only 13. 2-in spindle / 14 - HP Latex 330 | Printer assembly instructions - Page 2
EN Remove the packaging FR Retrait de l'emballage 1 2 3 DE Entfernen der Verpackung IT Rimozione dalla scatola di imballaggio ES Extracción del embalaje PT Remova a embalagem 5' x2 x2 EN Close de box lids and remove the box by lifting it upwards. Carefully cut the straps around the boxes. - HP Latex 330 | Printer assembly instructions - Page 3
EN Assemble the stand FR Assemblage du support 4 DE Zusammenbauen des Ständers IT Assemblaggio del piedistallo ES Montaje del soporte PT Monte a base 5 6 x2 25' x2 EN Open the stand box, and - HP Latex 330 | Printer assembly instructions - Page 4
de la pata para fijarla al anclaje transversal. Asegúrese de apretar bien los tornillos. Fixe a perna na barra transversal, utilizando 4 parafusos na parte externa da perna. Certifique-se de que os parafusos estejam bem apertados. Répétez les étapes 8 et 9 pour le montant droit. Wiederholen Sie - HP Latex 330 | Printer assembly instructions - Page 5
deux vis sur chaque côté. Befestigen Sie die Fußleiste mit je zwei Schrauben an der Außenseite an beiden Seiten. Fissare la barra inferiore sulla parte esterna con due viti su ciascun lato. Fije la barra de los pies en el exterior con dos tornillos a cada lado. Fixe a barra inferior no - HP Latex 330 | Printer assembly instructions - Page 6
15 16 17 X2 18 180° 4+4 EN Connect each foot to the stand, inserting the two pins, and making sure that the holes on the feet are aligned with the ones on the leg (if not, rotate the foot in the other direction). Fix the feet with 4 screws on each side. Make sure the screws are fully tightened - HP Latex 330 | Printer assembly instructions - Page 7
19 20 21 22 1 2 EN Put the cover in place, placing it first on the left, and then the right hole. Use 4 screws to fix the cover in place, do not tighten them yet. Fully tighten all 6 screws. FR Remettez le couvercle en place en le plaçant d'abord sur le trou gauche, puis sur le trou droit. - HP Latex 330 | Printer assembly instructions - Page 8
da embalagem. Observação: essas 2 partes da embalagem serão necessárias mais tarde, não as quebre nem as descarte. Abra todas as 4 abas da caixa. 25 x2 Push the printer out towards the side where the desiccant bags are, and into the position shown above. Poussez l'imprimante vers le côté où se - HP Latex 330 | Printer assembly instructions - Page 9
bustine essiccanti. Extraiga las 2 bolsas desecantes. Remova as partes das tampas nas extremidades e abra a embalagem de plástico sacos dissecantes. x2 Attach the stand onto the printer. When attaching, check the plastic bag isn't between the printer and stand. Pose de l'imprimante sur le socle - HP Latex 330 | Printer assembly instructions - Page 10
avec 1 vis. Serrez entièrement la vis. Fixez le côté gauche du support à l'imprimante à l'aide de 2 vis. Assurez-vous que les vis sont . 32 Place the 2 packing pieces in front of the printer, aligned with the end caps. Placez les 2 cales d' partes da embalagem em frente à impressora, - HP Latex 330 | Printer assembly instructions - Page 11
the 2 foam end caps, and remove the plastic covering from the printer. x2 Remove the anti-slip material from the 2 rear wheels. antideslizante de las 2 ruedas traseras. PT Vire cuidadosamente a impressora sobre as partes da embalagem. Ponha a impressora em pé cuidadosamente. Remova as duas tampas - HP Latex 330 | Printer assembly instructions - Page 12
the carton piece and tape together. There are two carton pieces inside the printer. Détachez les deux bandes orange, tirez sur le morceau de carton puis collez ücke. 12 Staccare i due nastri arancioni e tirarli tenendo sia la parte di cartone che il nastro. Ci sono due parti di cartone all' - HP Latex 330 | Printer assembly instructions - Page 13
maintenance cartidge door and remove the packaging from inside of the printer. HP Designjet 360 Printer only: Remove the tape. Remove the tapes from the Uniquement pour l'imprimante HP Designjet 360 : Retirez l'adhésif. Retirez les bandes des supports de bords. Nur HP Designjet 360-Drucker - HP Latex 330 | Printer assembly instructions - Page 14
HP Designjet 360 and 330 Printers only (or accessory for the 310): Assemble 44 the Loop shaper and tension bar FR Imprimantes HP Designjet 360 et 330 uniquement (ou accessoire pour le modèle 310) : Assemblage de la barre de tension et du formateur de boucles DE Nur HP Designjet 360- und 330 - HP Latex 330 | Printer assembly instructions - Page 15
47 48 49 50 EN Locate the left pivot block (marked with "L") onto the left hand leg and fix with 3 screws. Insert the loop shaper into the left hand side pivot block. Locate the right pivot block onto the other side of the loop shaper. Slide the pivot block into the 3 holes of the leg and fix - HP Latex 330 | Printer assembly instructions - Page 16
laço. EN HP Designjet 360 and 330 Printers only (or accessory for the 310): Assemble the Take Up Reel FR Imprimantes HP Designjet 360 et 330 uniquement (ou den 3 längsten Schrauben am rechten Standbein an. 16 Fissare la parte destra del modulo del rullo di tensione (quella con il cavo) alla gamba destra - HP Latex 330 | Printer assembly instructions - Page 17
inside left leg and attach the Connect the cable from the tension bar right support, to Pass the cable through the hook of the printer. take up reel left hand module into the holes using 3 long the right part of the take up reel. screws. 5' FR Branchez le câble au port situé à l'arri - HP Latex 330 | Printer assembly instructions - Page 18
. Take care not to damage the cable (on the left). Fixez la table de chargement en insérant son côté gauche dans le support gauche, puis son côté droit dans le support droit. Prenez garde de ne pas endommager le câble (à gauche). Bringen Sie den Ladetisch an, indem Sie die linke Seite in die - HP Latex 330 | Printer assembly instructions - Page 19
de la barra y ponga un tornillo en cada lado. Na parte de trás da impressora, posicione a segunda barra com a etiqueta apontando em direção à outra etiqueta da barra, e coloque um parafuso em cada lado. EN HP Designjet 360 and 330 Printer only (or as an accessory for 310): Assemble the take up - HP Latex 330 | Printer assembly instructions - Page 20
the 2 take-up reel spindle hubs. Unlock the hubs by pushing the blue lever up. If the printer is a 330 or a 310, and 3 inch core paper is required, place adaptors on the inner part of each hub. FR Soulevez délicatement l'ensemble de l'enrouleur. Le tube central du mandrin contient la bobine - HP Latex 330 | Printer assembly instructions - Page 21
moyeu noir près de la roue dentée. Remarque : Pour les modèles 310 et 330, seul un moyeu doit être placé, l'autre est déjà fixé car il est les moyeux. Remarque : vous pouvez régler le moyeu lors du chargement du support. Verriegeln Sie die Anschläge. Hinweis: Sie können den Anschlag beim Laden - HP Latex 330 | Printer assembly instructions - Page 22
della stampante ES Instalación de la impresora PT Configure a impressora 45' EN Load the take-up reel spindle into the printer by pushing firmly on each end of the spindle. Note: the part marked A, with the black hub, should go to the right hand side. Note: If you are not using the - HP Latex 330 | Printer assembly instructions - Page 23
timent est conforme aux spécifications électriques de l'imprimante. Reportez-vous au guide de préparation du site pour plus d'informations. DE Schließen Sie dal retro. Encienda la impresora en la parte trasera. Ligue a impressora na parte traseira. The printer will ask you to select altitude. L' - HP Latex 330 | Printer assembly instructions - Page 24
the printer, find and install new media profiles, how to print from the RIP SW. Use the Quick Guide for de support et à comment imprimer à partir du programme RIP. Utilisez les rubriques du guide rapide de tinta. When prompted; install the 7 ink cartridges and press OK. Lorsque vous y êtes - HP Latex 330 | Printer assembly instructions - Page 25
, open the window and printhead cover, then check that all the setup printheads have ink. Lorsque vous y êtes invité par le panneau avant, ouvrez la fenêtre se todos os cabeçotes configurados têm tinta. Open the maintenance cartridge door. Ouvrez la porte d'accès à la cartouche de maintenance. - HP Latex 330 | Printer assembly instructions - Page 26
85 86 87 88 EN Insert the maintenance cartridge, and push it in as far as possible. When prompted; remove the setup printhead. Remove the orange packaging from the printhead. Insert the printheads and - HP Latex 330 | Printer assembly instructions - Page 27
desbloqueo del eje para desengancharlo. Remova a fita adesiva e erga a alavanca de trava do eixo para soltá-lo. 91 1 2 Remove the spindle from the printer. Retirez la bobine de l'imprimante. Nehmen Sie die Spindel aus dem Drucker. Rimuovete il mandrino dalla stampante. 27 Extraiga el eje de la - HP Latex 330 | Printer assembly instructions - Page 28
de que o rolo está posicionado corretamente como mostrado acima. 360 only: The right hub of the spindle has 2 positions: 1 for rolls of the printer's maximum width, and another for narrower rolls. Note: in order to move the hub, squeeze the 2 blue pieces. A = preferred position when possible. 360 - HP Latex 330 | Printer assembly instructions - Page 29
the blue hub on the left, lift the loading table to ease the spindle into the printer. Le moyeu bleu étant placé sur la gauche, soulevez la table de chargement pour di stampa nella stampante come illustrato. Inserte el borde de la parte delantera del sustrato en la impresora en el lugar que se - HP Latex 330 | Printer assembly instructions - Page 30
pressione OK. 20'' The printer automatically performs substrate advance calibration site preparation. See the Site Preparation Guide for instructions on how to obtain web proxy o endereço do proxy. Se você configurar um endereço IP manual, certifique-se de inserir corretamente os endereços de DNS e - HP Latex 330 | Printer assembly instructions - Page 31
directly from printer's front panel • Keep your printer up to date: automatically check, download and install new firmware to your printer (make o endereço e a porta do proxy. http://www.hp.com/go/latex300/eoi Important: To complete printer installation, access the link above and complete the End - HP Latex 330 | Printer assembly instructions - Page 32
de ce document sont susceptibles d'être modifiées sans préavis. Les garanties des produits et services HP sont exclusivement présentées dans la documentation accompagnant ces produits et services. Rien dans le présent document ne peut être considéré comme constituant une garantie supplémentaire
-
 1
1 -
 2
2 -
 3
3 -
 4
4 -
 5
5 -
 6
6 -
 7
7 -
8
-
9
-
10
-
11
-
12
-
13
-
14
-
15
-
16
-
17
-
18
-
19
-
20
-
21
-
22
-
23
-
24
-
25
-
26
-
27
-
28
-
29
-
30
-
31
-
32
 |
 |

1
© 2014 Hewlett-Packard Company
Large Format Division
Camí de Can Graells 1-21 · 08174
Sant Cugat del Vallès
Barcelona · Spain
All rights reserved
Printed in XXX
HP Latex 300
Printer Series
Printer assembly
instructions
Instructions d’assemblage
de l’imprimante
Anleitung zur
Druckermontage
Istruzioni per l’installazione
della stampante
Instrucciones de montaje
de la impresora
Instruções de montagem
da impressora
EN:
The space required for assembly
is 3m (10ft feet) in front and 1m (3,3ft
feet) at the back.
FR:
L’espace requis pour l’assemblage
est de 3 m (10 pieds) à l’avant de
l’imprimante et de 1 m (3,3 pieds) à
l’arrière.
DE:
Für den Zusammenbau ist vor dem Drucker ein Freiraum von
3 m und hinter dem Drucker ein Freiraum von 1 m erforderlich.
IT:
Per l’installazione, è necessario lasciare davanti alla stampante
uno spazio di 3 m e sul retro della stampante uno spazio di 1 m.
ES:
El espacio necesario para el montaje es de 3 m (10 pies) en la
parte frontal y de 1 m (3,3 pies) en la parte trasera.
PT:
O espaço necessário para a montagem é de 3m (10 pés) à
frente e 1m (3,3 pés) atrás.
EN:
4 people are required to perform certain tasks.
FR:
L’exécution de certaines tâches nécessite la
présence de 4 personnes.
DE:
Für bestimmte Tätigkeiten werden 4 Personen
benötigt.
IT:
Per determinate operazioni, sono necessarie 4 persone.
ES:
Algunas tareas se deben realizar entre 4 personas.
PT:
São necessárias 4 pessoas para a realização de determinadas
tarefas.
EN:
Time required for assembly of the printer is ap
-
proximately 135 minutes.
FR:
Le temps requis pour l’assemblage de
l’imprimante est d’environ 135 minutes.
DE:
Der Zusammenbau des Druckers dauert ca. 135
Minuten.
IT:
L’installazione della stampante richiede circa 135 minuti.
ES:
El tiempo de montaje de la impresora es de 135 minutos,
aproximadamente.
PT:
O tempo necessário para montagem da impressora é de aproxi-
madamente 135 minutos.
EN:
Note:
Depending on your LAN installation, a web proxy server
name and port may be required to complete the installation of this
printer. Contact your IT manager to get connectivity settings.
FR: Remarque :
Selon votre installation de réseau local, un port et
un nom du serveur proxy web peuvent être nécessaires pour réal-
iser l’installation de cette imprimante. Contactez votre responsable
informatique pour obtenir les paramètres de connectivité.
DE: Hinweis:
Abhängig von Ihrer LAN-Installation müssen bei der
Installation des Druckers möglicherweise ein Web-Proxy-Name und
ein Port angegeben werden. Fragen Sie Ihren IT-Manager nach den
Verbindungseinstellungen.
IT: Nota:
A seconda dell’installazione LAN, potrebbe essere neces
-
sario un nome e una porta del server proxy web per completare
l’installazione di questa stampante. Contattare il responsabile IT
per ottenere le impostazioni di connettività.
ES: Nota:
Dependiendo de su instalación de LAN, es posible que
necesite un nombre y un puerto de servidor proxy web para com-
pletar la instalación de esta impresora. Póngase en contacto con su
administrador de TI para obtener la configuración de conectividad.
PT: Nota:
Dependendo da instalação da sua rede local, para
completar a instalação desta impressora, podem ser necessários o
nome e a porta de um servidor proxy da web. Entre em contato com
o seu gerente de TI para obter as configurações de conectividade.
EN: Please read these instructions carefully.
These assembly instructions explain how to assemble the printer. Notice that the icons
used in this document are also located on the printer packaging. The icons help you locate the parts needed at each stage of the assembly.
Because spare screws are supplied, some screws will remain unused after assembly of the printer.
FR: Veuillez lire attentivement ces instructions.
Ces instructions d’assemblage expliquent comment assembler l’imprimante. Notez que
les icônes utilisées dans ce document apparaissent également sur l’emballage de l’imprimante. Les icônes vous aident à localiser les pièces
requises à chaque étape de l’assemblage. Des vis de rechange étant fournies, certaines vis pourront rester inutilisées après l’assemblage de
l’imprimante.
DE: Lesen Sie diese Anleitungen sorgfältig durch.
Dieses Dokument enthält Anleitungen für den Zusammenbau des Druckers. Die
im Dokument verwendeten Symbole befinden sich auch auf der Verpackung des Druckers. Die Symbole erleichtern das Auffinden der
Komponenten, die in den verschiedenen Montagephasen benötigt werden. Zum Lieferumfang gehören Ersatzschrauben, sodass nach dem
Zusammenbau einige Schrauben übrig bleiben.
IT: Leggere attentamente queste istruzioni.
Queste istruzioni descrivono la procedura d’installazione della stampante. Le icone utilizzate
in questo documento sono disponibili anche sulla confezione della stampante. Le icone consentono di individuare le parti necessarie durante
i vari passaggi dell’installazione. Poiché vengono fornite viti di riserva, alcune potrebbero risultare inutilizzate dopo l’installazione della
stampante.
ES: Lea atentamente estas instrucciones.
Estas instrucciones de montaje explican cómo se monta la impresora. Observe que los iconos
utilizados en este documento también se encuentran en el embalaje de la impresora. Los iconos le ayudan a localizar las piezas necesarias
en cada etapa del montaje. Como también se incluyen tornillos de repuesto, después de montar la impresora quedarán algunos sin utilizar.
PT: Leia as instruções com atenção.
Essas instruções de montagem explicam como montar a impressora. Observe que os ícones usados
neste documento também estão localizados na embalagem da impressora. Os ícones ajudam você a localizar as partes necessárias em cada
etapa da montagem. Como são fornecidos parafusos sobressalentes, alguns permanecerão sem uso depois da montagem da impressora.
EN: Box Contents: All models
1. cables / 2. edge holders / 3. user
maintenance / 4. printheads / 5. maintenance
cartridge
HP Latex 360 only
6. take-up reel / 7. 3-in spindle /
8. media loading accessory / 9. ink collector
HP Latex 330 only
10.Take-up reel / 11.2-in spincle /
12. FlexiPRINT HP Basic Edition
HP Latex 310 only
13. 2-in spindle / 14. FlexiPRINT HP Basic
Edition
NOTE:
LAN cable, roll of substrate, and
cartridges are not included.
EN
ES
DE
FR
PT
IT
Stand / Socle / Ständer / Piedistallo /
Soporte / Suporte
Take-Up Reel / Enrouleur /
Aufwickelvorrichtung / Rullo di
tensione / Rodillo de recogida /
Rolo de recolhimento
Accessories / Accessoires / Zubehör /
Accessori / Accesorios / Acessórios
Box Icons / Icônes de la boite / Symbole auf
Versandkarton / Icone della confezione /
Iconos de la caja / Ícones da caixa:
FR: Contenu de la boîte : Tous les modèles
1. câbles / 2. supports de bords /
3. maintenance par l’utilisateur /
4. têtes d’impression / 5. cartouche de
maintenance
HP Latex 360 uniquement
6. enrouleur / 7. bobine de 7,6 cm /
8. accessoire de chargement de média /
9. collecteur d’encre
HP Latex 330 uniquement
10. enrouleur / 11. bobine de 5,1 cm /
12. FlexiPRINT HP Basic Edition
HP Latex 310 uniquement
13. bobine de 5,1 cm / 14. FlexiPRINT HP Basic
Edition
REMARQUE :
le câble LAN, le rouleau de
support, et les cartouches ne sont pas inclus.
DE: Inhalt des Versandkartons: Alle Modelle
1. Kabel / 2. Kantenhalter /
3. Benutzerwartung / 4. Druckköpfe /
5. Wartungspatrone
Nur HP Latex 360
6. Aufwickelvorrichtung / 7. 3-Zolle-Spindel /
8. Medienladezubehör /
9. Tintenauffangvorrichtung
Nur HP Latex 330
10. Aufwickelvorrichtung / 11. 2-Zoll-Spindel
12. FlexiPRINT HP Basic Edition
Nur HP Latex 310
13. 2-Zoll-Spindel / 14. FlexiPRINT HP Basic
Edition
HINWEIS:
LAN-Kabel, Druckmaterialrolle und
Patronen sind nicht enthalten.
IT: Contenuto della confezione:
Tutti i modelli
1. cavi / 2. supporti dei bordi / 3. manutenzione
da parte dell’utente / 4. testine di stampa /
5. cartuccia di manutenzione
solo HP Latex 360
6. rullo di tensione / 7. mandrino da 3 pollici /
8. accessori per il caricamento dei supporti /
9. raccogli inchiostro
solo HP Latex 330
10. rullo di tensione / 11. mandrino da 2 pollici /
12. edizione base di FlexiPRINT HP
solo HP Latex 310
13. mandrino da 2 pollici / 14. edizione base di
FlexiPRINT HP
NOTA:
cavo LAN, rotolo del supporto di stampa
e cartuccenon sono inclusi.
ES: Contenido de la caja: Todos los
modelos
1. cables / 2. soportes de bordes / 3.
mantenimiento por el usuario /
4. cabezales de impresión /
5. cartucho de mantenimiento
Solo HP Latex 360
6. rodillo de recogida / 7. eje de 3 pulgadas
/ 8. accesorio de carga de sustrato /
9. colector de tinta
Solo HP Latex 330
10. rodillo de recogida / 11. eje de 2
pulgadas /
12. FlexiPRINT HP Basic Edition
Solo HP Latex 310
13. eje de 2 pulgadas / 14. FlexiPRINT HP
Basic Edition
NOTA:
El cable LAN, el rollo de sustrato y
los cartuchos no están incluidos.
PT: Conteúdo da caixa: Todos os modelos
1. cabos / 2. suportes de bordas /
3. manutenção pelo usuário / 4. cabeçotes
de impressão / 5. cartucho de manutenção
Somente na HP Latex 360
6. rolo de recolhimento / 7. eixo de 3
polegadas /
8. acessório de carregamento de mídi /
9. coletor de tint
Somente na HP Latex 330
10. Rolo de recolhimento / 11. eixo de 2
polegadas / 12. FlexiPRINT HP Edição Básic
Somente na HP Latex 310
13. eixo de 2 polegadas / 14. FlexiPRINT HP
Edição Básic
NOTA:
Cabo de LAN, rolo de substrato e
cartuchos não incluídos.
2¼