HP Mini 1103 HP Mini 110, Compaq Mini CQ10 and HP Mini 1103 - Maintenance and
HP Mini 1103 Manual
 |
View all HP Mini 1103 manuals
Add to My Manuals
Save this manual to your list of manuals |
HP Mini 1103 manual content summary:
- HP Mini 1103 | HP Mini 110, Compaq Mini CQ10 and HP Mini 1103 - Maintenance and - Page 1
HP Mini 110 Compaq Mini CQ10 HP Mini 1103 Maintenance and Service Guide - HP Mini 1103 | HP Mini 110, Compaq Mini CQ10 and HP Mini 1103 - Maintenance and - Page 2
Development Company, L.P. Bluetooth is a trademark owned by its proprietor and used by Hewlett-Packard Company under license. Intel and Atom are trademarks of Intel Corporation in the U.S. and other countries. Windows is a U.S. registered trademark of Microsoft Corporation. SD Logo is a trademark of - HP Mini 1103 | HP Mini 110, Compaq Mini CQ10 and HP Mini 1103 - Maintenance and - Page 3
surface, such as an adjoining optional printer, or a soft surface, such as pillows or rugs or clothing, to block airflow. Also, do not allow the AC adapter to contact the skin or a soft surface, such as pillows or rugs or clothing, during operation. The device and the - HP Mini 1103 | HP Mini 110, Compaq Mini CQ10 and HP Mini 1103 - Maintenance and - Page 4
iv Safety warning notice - HP Mini 1103 | HP Mini 110, Compaq Mini CQ10 and HP Mini 1103 - Maintenance and - Page 5
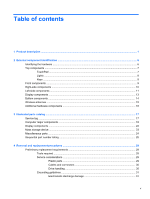
...9 Front components ...9 Right-side components ...10 Left-side components ...11 Display components ...13 Bottom components ...14 Wireless antennas ...15 Additional hardware components ...16 3 Illustrated parts catalog ...17 Service tag ...17 Computer major components ...18 Display components ...22 - HP Mini 1103 | HP Mini 110, Compaq Mini CQ10 and HP Mini 1103 - Maintenance and - Page 6
Computer feet ...34 Battery ...35 SIM ...37 Service access cover ...38 Hard drive ...40 WWAN and GPS modules (select models only 43 WLAN module ...45 Memory module ...47 RTC battery ...48 Keyboard ...50 Top cover ...53 Display assembly ...56 Fan/heat sink assembly ...64 75 25.7-cm (10.1-in) WSVGA - HP Mini 1103 | HP Mini 110, Compaq Mini CQ10 and HP Mini 1103 - Maintenance and - Page 7
the recovery discs 81 Backing up your information ...81 Using Windows Backup and Restore 81 Using system restore points 82 When to create restore points 82 Create a system restore point 82 Restore to a previous date and time 82 8 Power cord set requirements ...83 Requirements for all countries - HP Mini 1103 | HP Mini 110, Compaq Mini CQ10 and HP Mini 1103 - Maintenance and - Page 8
viii - HP Mini 1103 | HP Mini 110, Compaq Mini CQ10 and HP Mini 1103 - Maintenance and - Page 9
1 Product description Category Description HP Mini 110 Product name HP Mini 110 Netbook PC √ Compaq Mini CQ10 Netbook PC HP Mini 1103 Processor Intel® Atom™ N455 single-core, 1.66-GHz processor, 512-KB √ level 2 cache, 667-MHz front-side bus (FSB) Intel Atom N475 single-core, 1.83-GHz - HP Mini 1103 | HP Mini 110, Compaq Mini CQ10 and HP Mini 1103 - Maintenance and - Page 10
Visual Modem Ethernet Description HP Mini 110 One customer-accessible/upgradable memory module slot √ PC3-1333, 667-MHz, DDR3 NOTE: Memory always runs at 667 MHz because of chipset limitations. Supports the following configurations: ● 1-GB total system memory NOTE: Supported on all operating - HP Mini 1103 | HP Mini 110, Compaq Mini CQ10 and HP Mini 1103 - Maintenance and - Page 11
Broadband Module (HP Mini 1103 models only) 2 WWAN antennas built into display assembly (select models √ only) GPS by way of Broadcom GPS Mini Card (select models only) External media Digital Media Slot with push-push technology, supporting: √ cards ● Memory Stick (MS) ● Memory Stick Pro - HP Mini 1103 | HP Mini 110, Compaq Mini CQ10 and HP Mini 1103 - Maintenance and - Page 12
battery (2.55-Ahr, 55-Wh) Security Kensington lock slot √ Operating Windows 7 Starter √ system Windows 7 Professional (select countries) Support for HP QuickWeb USB Key Recovery support (for Service, refurbish centers, and repair centers) Linux FreeDOS √ Compaq HP Mini Mini CQ10 1103 - HP Mini 1103 | HP Mini 110, Compaq Mini CQ10 and HP Mini 1103 - Maintenance and - Page 13
Category Description Serviceability End-user replaceable parts: AC adapter Battery (system) Hard drive Memory module WLAN module or WLAN+Bluetooth module WWAN module (select models only) GPS module (select models only) Keyboard HP Mini 110 √ Compaq HP Mini Mini CQ10 1103 √ √ √ 5 - HP Mini 1103 | HP Mini 110, Compaq Mini CQ10 and HP Mini 1103 - Maintenance and - Page 14
in this chapter identify the standard features on most computer models. To see a list of hardware installed in the computer, follow these steps: 1. Select Start > My Computer. 2. In the left pane of the System Tasks window, select View system information. 3. Select Hardware tab > Device Manager - HP Mini 1103 | HP Mini 110, Compaq Mini CQ10 and HP Mini 1103 - Maintenance and - Page 15
Top components TouchPad Component Description (1) TouchPad zone Moves the pointer and selects or activates items on the screen. (2) Left TouchPad button* Functions like the left button on an external mouse. (3) Right TouchPad button* Functions like the right button on an external mouse. * - HP Mini 1103 | HP Mini 110, Compaq Mini CQ10 and HP Mini 1103 - Maintenance and - Page 16
light (2) Mute light (3) Wireless light Description ● White: Caps lock is on. ● Off: Caps lock is off. ● Amber: Computer sound is off. ● Off: Computer sound is on. ● White: An integrated wireless device, such as a wireless local area network (WLAN) device and/or a Bluetooth® device, is on. NOTE - HP Mini 1103 | HP Mini 110, Compaq Mini CQ10 and HP Mini 1103 - Maintenance and - Page 17
in combination with the fn key. Displays information about system hardware components and the system BIOS version number when pressed in combination with the esc key. Displays the Windows Start menu. Displays a shortcut menu for items beneath the pointer. Execute frequently used system functions - HP Mini 1103 | HP Mini 110, Compaq Mini CQ10 and HP Mini 1103 - Maintenance and - Page 18
10 Chapter 2 External component identification Description Supports the following optional digital card formats: ● Memory Stick ● Memory When the computer is in Hibernation, briefly slide the switch to exit Hibernation. If the computer has stopped responding and Windows shutdown procedures are - HP Mini 1103 | HP Mini 110, Compaq Mini CQ10 and HP Mini 1103 - Maintenance and - Page 19
an AC adapter. ● Off: The computer is running on battery power. ● Blinking white: The battery has reached a low battery level, a critical battery level, or there is a battery error. When the battery reaches a critical battery level, the battery light begins blinking rapidly. ● Amber: A battery is - HP Mini 1103 | HP Mini 110, Compaq Mini CQ10 and HP Mini 1103 - Maintenance and - Page 20
or a headset. For additional safety information, refer to the Regulatory, Safety and Environmental Notices. NOTE: When a device is connected to the jack, the computer speakers are disabled. NOTE: The audio component must have a 4conductor connector. 12 Chapter 2 External component identification - HP Mini 1103 | HP Mini 110, Compaq Mini CQ10 and HP Mini 1103 - Maintenance and - Page 21
Initiates Sleep if the display is closed while the power is on. NOTE: The display switch is not visible from the outside of the computer. Records sound. Records video and captures still photographs. NOTE: To record videos, you need to install additional webcam software. On: The webcam is in - HP Mini 1103 | HP Mini 110, Compaq Mini CQ10 and HP Mini 1103 - Maintenance and - Page 22
Bottom components Component (1) Battery locking latch (2) Battery bay (3) Battery release latch Description Locks the battery into the battery bay. Holds the battery. NOTE: The SIM slot is located under the battery. Releases the battery from the battery bay. 14 Chapter 2 External component - HP Mini 1103 | HP Mini 110, Compaq Mini CQ10 and HP Mini 1103 - Maintenance and - Page 23
wide-area networks (WWANs). *The antennas are not visible from the outside of the computer. For optimal transmission, keep the areas immediately around the antennas free from obstructions. To see to your country or region. These notices are located in Help and Support. Wireless antennas 15 - HP Mini 1103 | HP Mini 110, Compaq Mini CQ10 and HP Mini 1103 - Maintenance and - Page 24
hardware components Component Description (1) Power cord* Connects an AC adapter to an AC outlet. (2) AC adapter Converts AC power to DC power. (3) Battery* Powers the computer when the computer is not plugged into external power. *Batteries and power cords vary in appearance by region and - HP Mini 1103 | HP Mini 110, Compaq Mini CQ10 and HP Mini 1103 - Maintenance and - Page 25
3 Illustrated parts catalog Service tag When ordering parts or requesting information, provide the computer serial number and model description provided on the service tag. Component (1) Product name (2) Serial number (s/n) (3) Part number/Product number (p/n) (4) Warranty period (5) - HP Mini 1103 | HP Mini 110, Compaq Mini CQ10 and HP Mini 1103 - Maintenance and - Page 26
Computer major components 18 Chapter 3 Illustrated parts catalog - HP Mini 1103 | HP Mini 110, Compaq Mini CQ10 and HP Mini 1103 - Maintenance and - Page 27
Item Description Spare part number (1) Display assembly, 25.7-cm (10.1-in) (includes display panel cable, 2 WLAN transceivers and cables, 2 WWAN transceivers and cables (select models only), 633476-BG1 For use in Taiwan 633476-AB1 For use in Thailand 633476-281 Computer major components 19 - HP Mini 1103 | HP Mini 110, Compaq Mini CQ10 and HP Mini 1103 - Maintenance and - Page 28
250-GB, 7200-rpm 160-GB, 7200-rpm (7) System board (includes processor and replacement thermal material): For use in models without high-definition video: Intel Atom N455 1.66-GHz processor, 512-KB level 2 cache, 667-MHz front-side bus (FSB) for use in models without a WWAN module Intel - HP Mini 1103 | HP Mini 110, Compaq Mini CQ10 and HP Mini 1103 - Maintenance and - Page 29
(HP Mini 110/Compaq Mini CQ10 models only) HP lc 2000 Mobile Broadband Module (HP Mini 110/Compaq Mini CQ10 models only) Qualcomm Gobi 2000 3G module HP hs2320 HSPA Mobile Broadband Module (HP Mini 1103 models only) (12) RTC battery (13) WLAN module Atheros AR9285G 802.11b/g/n 1x1 WiFi Adapter - HP Mini 1103 | HP Mini 110, Compaq Mini CQ10 and HP Mini 1103 - Maintenance and - Page 30
(1a) Left and right hinge covers (1b) Left and right hinge caps (1c) Left and right hinge cap wall (2) Display Hinge Kit (includes right and left hinges) (3) Display bezel For use on Compaq-branded models For use on HP-branded models 22 Chapter 3 Illustrated parts catalog Spare part number - HP Mini 1103 | HP Mini 110, Compaq Mini CQ10 and HP Mini 1103 - Maintenance and - Page 31
module (5) Display panel (for use in HP Mini 110/Compaq Mini CQ10 models) (6) Display/webcam cable (7) Antenna Kit (includes WLAN and WWAN antennas) (8) Display enclosure For use in black Compaq models For use in black HP-branded models For use in white HP-branded models For use in red - HP Mini 1103 | HP Mini 110, Compaq Mini CQ10 and HP Mini 1103 - Maintenance and - Page 32
use in South Africa For use in South Korea For use in Switzerland For use in Taiwan For use in Thailand Screw Kit AC adapter (40-W , non-smart RC/V 2W) HP wireless optical mouse Spare part number 490371-D01 490371-001 490371-031 490371-011 490371-202 490371-081 490371-021 490371-D61 - HP Mini 1103 | HP Mini 110, Compaq Mini CQ10 and HP Mini 1103 - Maintenance and - Page 33
ready) Atheros AR9285G 802.11b/g/n 1x1 WiFi Adapter HP lc 2000 Mobile Broadband Module (HP Mini 110/Compaq Mini CQ10 models only) HP lc 2010 Mobile Broadband Module (HP Mini 110/Compaq Mini CQ10 models only) 1-GB memory module (667-MHz, DDR3): 2-GB memory module (667-MHz, DDR3): Sequential part - HP Mini 1103 | HP Mini 110, Compaq Mini CQ10 and HP Mini 1103 - Maintenance and - Page 34
thermal material) RTC battery Display panel for use in HP Mini 110/Compaq Mini CQ10 models 40-W AC adapter, non-Smart RC/V 2W 320-GB, 7200-rpm hard drive (includes bracket and screws) Hard Drive Cable Kit 3-cell Li-ion battery (28-WH 2.55-Ahr) 6-cell Li-ion high-capacity battery (55-WH 2.5-Ahr - HP Mini 1103 | HP Mini 110, Compaq Mini CQ10 and HP Mini 1103 - Maintenance and - Page 35
caps, and walls) Service access cover, black (for use in all countries and regions except Brazil) Service access cover, black (for use only in Brazil) System board with Intel Atom N455 use in HP-branded models System board with Intel Atom N455 1.66-GHz and cable) 25.7-cm (10.1-in) WSVGA, anti-glare - HP Mini 1103 | HP Mini 110, Compaq Mini CQ10 and HP Mini 1103 - Maintenance and - Page 36
001 636339-001 636762-001 636763-001 638148-001 Description 25.7-cm (10.1-in) WSVGA, anti-glare, LED display assembly in blue (includes display 160-GB, 7200-rpm hard drive (includes bracket and screws) System board with Intel Atom N455 1.66-GHz processor, 512-KB level 2 cache, 667-MHz FSB, 6.5 W, - HP Mini 1103 | HP Mini 110, Compaq Mini CQ10 and HP Mini 1103 - Maintenance and - Page 37
screwdriver ● Phillips P0 and P1 screwdrivers Service considerations The following sections include some of the considerations that you must keep in mind during disassembly and assembly procedures. NOTE: As you remove each subassembly from the computer, place the subassembly (and all accompanying - HP Mini 1103 | HP Mini 110, Compaq Mini CQ10 and HP Mini 1103 - Maintenance and - Page 38
Cables and connectors CAUTION: When servicing the device, be sure that cables are placed in or seat the cables during removal and insertion. Handle cables by the connector whenever possible. In all cases, avoid bending, twisting, or tearing cables. Be sure that cables are routed in such a way that - HP Mini 1103 | HP Mini 110, Compaq Mini CQ10 and HP Mini 1103 - Maintenance and - Page 39
some protection, but in many cases, ESD contains enough power to in the internal layers, reducing its life expectancy. CAUTION: To prevent damage to from PCB Packing PCBs in foam-lined box Typical electrostatic voltage levels Relative humidity 10% 40% 35,000 V 15,000 V 12,000 V 6,000 V 5, - HP Mini 1103 | HP Mini 110, Compaq Mini CQ10 and HP Mini 1103 - Maintenance and - Page 40
charges. Workstation guidelines Follow these grounding workstation guidelines: ● Cover the workstation with approved static-shielding material. ● Use a wrist strap connected to a properly grounded work surface and use properly grounded tools and equipment. ● Use conductive field service the case or - HP Mini 1103 | HP Mini 110, Compaq Mini CQ10 and HP Mini 1103 - Maintenance and - Page 41
minimum of one megohm ±10% resistance in the ground cords. To provide proper ground, wear a strap snugly against the skin at all times. On grounded mats with tables or floor mats with hard ties to the ground ● Field service kits ● Static awareness labels ● Material-handling packages ● Nonconductive - HP Mini 1103 | HP Mini 110, Compaq Mini CQ10 and HP Mini 1103 - Maintenance and - Page 42
as 33 screws, in 5 different sizes, that must be removed, replaced, or loosened when servicing the computer. Make special note of each screw size and location during removal and replacement. Computer feet The computer feet are adhesive-backed rubber pads. The feet are included in the Rubber Feet Kit - HP Mini 1103 | HP Mini 110, Compaq Mini CQ10 and HP Mini 1103 - Maintenance and - Page 43
Unplug the power cord from the AC outlet. 4. With the display closed, position the computer upside down on a flat surface with the battery bay toward you. 5. Slide the battery locking latch (1) inward to unlock the battery. NOTE: You can identify when the battery locking latch is unlocked by the red - HP Mini 1103 | HP Mini 110, Compaq Mini CQ10 and HP Mini 1103 - Maintenance and - Page 44
2. Slide the battery locking latch (3) to the right to lock the battery into the battery bay. 36 Chapter 4 Removal and replacement procedures - HP Mini 1103 | HP Mini 110, Compaq Mini CQ10 and HP Mini 1103 - Maintenance and - Page 45
system. 2. Disconnect all external devices connected to the computer. 3. Disconnect the power from the computer by first unplugging the power cord from the AC outlet and then unplugging the AC adapter from the computer. 4. Remove the battery (see Battery on page 35). Remove the SIM: 1. Press in - HP Mini 1103 | HP Mini 110, Compaq Mini CQ10 and HP Mini 1103 - Maintenance and - Page 46
connected to the computer. 3. Disconnect the power from the computer by first unplugging the power cord from the AC outlet and then unplugging the AC adapter from the computer. 4. Remove the battery (see Battery on page 35). Remove the service access cover: 1. Slide the service access cover release - HP Mini 1103 | HP Mini 110, Compaq Mini CQ10 and HP Mini 1103 - Maintenance and - Page 47
2. Insert the tabs into the slots (2), and swing the cover (3) down. 3. Press down firmly on the cover until it clicks into place. Component replacement procedures 39 - HP Mini 1103 | HP Mini 110, Compaq Mini CQ10 and HP Mini 1103 - Maintenance and - Page 48
by first unplugging the power cord from the AC outlet and then unplugging the AC adapter from the computer. 4. Remove the following components: a. Battery (see Battery on page 35). b. Service access cover (see Service access cover on page 38). Remove the hard drive: 1. Lift the Mylar (1) that - HP Mini 1103 | HP Mini 110, Compaq Mini CQ10 and HP Mini 1103 - Maintenance and - Page 49
6. Use the Mylar tab (5) to remove the hard drive from the computer. 7. If it is necessary to replace the hard drive bracket, follow these steps: a. Disconnect the cable adapter from the hard drive. b. Remove the 4 Phillips 3.0×3.0 screws (1) that secure the hard drive bracket to the drive. - HP Mini 1103 | HP Mini 110, Compaq Mini CQ10 and HP Mini 1103 - Maintenance and - Page 50
c. Remove the hard drive bracket (2). d. Remove the Mylar from the drive (3). Reverse this procedure to reassemble and install the hard drive. 42 Chapter 4 Removal and replacement procedures - HP Mini 1103 | HP Mini 110, Compaq Mini CQ10 and HP Mini 1103 - Maintenance and - Page 51
by first unplugging the power cord from the AC outlet and then unplugging the AC adapter from the computer. 4. Remove the following components: a. Battery (see Battery on page 35). b. Service access cover (see Service access cover on page 38). Remove the WWAN or GPS module: 1. Disconnect the - HP Mini 1103 | HP Mini 110, Compaq Mini CQ10 and HP Mini 1103 - Maintenance and - Page 52
3. Remove the WWAN or GPS module (3) by pulling the module away from the slot at an angle. NOTE: WWAN and GPS modules are designed with a notch (4) to prevent incorrect insertion of the module into the slot. Reverse this procedure to install the WWAN or GPS module. 44 Chapter 4 Removal and - HP Mini 1103 | HP Mini 110, Compaq Mini CQ10 and HP Mini 1103 - Maintenance and - Page 53
from the device by first unplugging the power cord from the AC outlet and then unplugging the AC adapter from the computer. 4. Remove the following components: a. Battery (see Battery on page 35). b. Service access cover (see Service access cover on page 38). Remove the WLAN module: 1. Disconnect - HP Mini 1103 | HP Mini 110, Compaq Mini CQ10 and HP Mini 1103 - Maintenance and - Page 54
3. Remove the WLAN module (3) by pulling the module away from the slot at an angle. NOTE: WLAN modules are designed with a notch (4) to prevent incorrect insertion of the WLAN module into the WLAN module slot. Reverse this procedure to install the WLAN module. 46 Chapter 4 Removal and replacement - HP Mini 1103 | HP Mini 110, Compaq Mini CQ10 and HP Mini 1103 - Maintenance and - Page 55
first unplugging the power cord from the AC outlet and then unplugging the AC adapter from the computer. 4. Remove the following components: a. Battery (see Battery on page 35). b. Service access cover (see Service access cover on page 38). Remove the memory module: 1. Pull away the retention clips - HP Mini 1103 | HP Mini 110, Compaq Mini CQ10 and HP Mini 1103 - Maintenance and - Page 56
power cord from the AC outlet and then unplugging the AC adapter from the computer. 4. Remove the following components: a. Battery (see Battery on page 35). b. Service access cover (see Service access cover on page 38). Remove the RTC battery: 1. Disconnect the RTC battery cable (1) from the system - HP Mini 1103 | HP Mini 110, Compaq Mini CQ10 and HP Mini 1103 - Maintenance and - Page 57
2. Remove the RTC battery (2) from the computer. NOTE: The RTC battery is attached with double-sided tape. Reverse this procedure to install the RTC battery. When installing the RTC battery, be sure the plus sign (+) faces up. Component replacement procedures 49 - HP Mini 1103 | HP Mini 110, Compaq Mini CQ10 and HP Mini 1103 - Maintenance and - Page 58
by first unplugging the power cord from the AC outlet and then unplugging the AC adapter from the computer. 4. Remove the following components: a. Battery (see Battery on page 35). b. Service access cover (see Service access cover on page 38). 50 Chapter 4 Removal and replacement procedures - HP Mini 1103 | HP Mini 110, Compaq Mini CQ10 and HP Mini 1103 - Maintenance and - Page 59
Remove the keyboard: 1. Remove the 3 Phillips 2.0×5.0 screws that secure the keyboard to the computer. 2. Turn the computer right-side up, with the front toward you. 3. Open the computer as far as possible. 4. Lift the rear edge of the keyboard until it rests at an angle. Component replacement - HP Mini 1103 | HP Mini 110, Compaq Mini CQ10 and HP Mini 1103 - Maintenance and - Page 60
5. Release the zero insertion force (ZIF) connector (1) to which the keyboard cable is attached, and then disconnect the keyboard cable (2) 6. Remove the keyboard. Reverse this procedure to install the keyboard. 52 Chapter 4 Removal and replacement procedures - HP Mini 1103 | HP Mini 110, Compaq Mini CQ10 and HP Mini 1103 - Maintenance and - Page 61
by first unplugging the power cord from the AC outlet and then unplugging the AC adapter from the computer. 4. Remove the following components: a. Battery (see Battery on page 35). b. Service access cover (see Service access cover on page 38). c. Keyboard (see Keyboard on page 50). Remove the - HP Mini 1103 | HP Mini 110, Compaq Mini CQ10 and HP Mini 1103 - Maintenance and - Page 62
(2) that secure the top cover to the base enclosure. 7. Turn the computer right-side up, with the front toward you. 8. Open the computer as far as possible. 9. Disconnect the speaker cable (1) from the system board. 10. Release the ZIF connector (2) to which the TouchPad cable is connected, and - HP Mini 1103 | HP Mini 110, Compaq Mini CQ10 and HP Mini 1103 - Maintenance and - Page 63
11. Release the ZIF connector (4) to which the TouchPad button cable is connected, and then disconnect the TouchPad button cable (5) from the system board. 12. Remove the 8 Phillips 2.0×4.0 screws that secure the top cover to the base enclosure. Component replacement procedures 55 - HP Mini 1103 | HP Mini 110, Compaq Mini CQ10 and HP Mini 1103 - Maintenance and - Page 64
number 25.7-cm (10.1-in) display assembly assembly in black for use only on HP-branded models 633496-001 ● WSVGA, anti AC outlet and then unplugging the AC adapter from the computer. 4. Remove the following components: a. Battery (see Battery on page 35). b. Service access cover (see Service - HP Mini 1103 | HP Mini 110, Compaq Mini CQ10 and HP Mini 1103 - Maintenance and - Page 65
you. 3. Release the WLAN antenna cables (1) from the clips (2) built into the base enclosure. 4. Turn the computer right-side up, with the front toward you. 5. Open the computer as far as possible. 6. Disconnect the display panel cable (1) from the system board. Component replacement procedures 57 - HP Mini 1103 | HP Mini 110, Compaq Mini CQ10 and HP Mini 1103 - Maintenance and - Page 66
7. Release the wireless antenna cables (2) from the clip built into the base enclosure. CAUTION: Support the display assembly when removing the following screws. Failure to support the display assembly can result in damage to the display assembly and other device components. 8. Remove the 2 Phillips - HP Mini 1103 | HP Mini 110, Compaq Mini CQ10 and HP Mini 1103 - Maintenance and - Page 67
9. Remove the display assembly (2). Remove the display assembly hinges: 1. Remove the hinge covers from the hinges. The display hinge covers are available using spare part number 633483-001. 2. Remove the 2 Phillips 2.0×5.0 screws (1) that secure the black plastic covers to the display assembly, and - HP Mini 1103 | HP Mini 110, Compaq Mini CQ10 and HP Mini 1103 - Maintenance and - Page 68
lift the bezel from the display (4). The display bezel is available using spare part number 633489-001 for Compaq-branded models and 633493-001 for HP-branded models. 60 Chapter 4 Removal and replacement procedures - HP Mini 1103 | HP Mini 110, Compaq Mini CQ10 and HP Mini 1103 - Maintenance and - Page 69
6. If you need to remove the webcam module, unplug the cable from the webcam module (1), remove the silver Phillips 2.0x3.0 screw (2), and then lift the module from the display (3). The webcam module is available using spare part number 631703-001. 7. If you need to remove the display panel from the - HP Mini 1103 | HP Mini 110, Compaq Mini CQ10 and HP Mini 1103 - Maintenance and - Page 70
8. If you need to remove the display/webcam cable assembly, disconnect the display cable (1) from the connector (2) on the back of the display panel. The display/webcam cable is available using spare part number 633490-001. 9. Lift the display/webcam cable (1) from its routing path (2) in the - HP Mini 1103 | HP Mini 110, Compaq Mini CQ10 and HP Mini 1103 - Maintenance and - Page 71
10. If you need to remove the antenna cables, lift the cables (1) from the Compaq-branded models ● 633477-001 for black HP-branded models ● 633478-001 for white HP-branded models ● 633479-001 for red HP-branded models ● 633480-001 for blue HP-branded models Reverse this procedure to reassemble and - HP Mini 1103 | HP Mini 110, Compaq Mini CQ10 and HP Mini 1103 - Maintenance and - Page 72
management/battery conservation configurations, battery fast charging, and computer by first unplugging the power cord from the AC outlet and then unplugging the AC adapter from the computer. 4. Remove the following components: a. Battery (see Battery on page 35). b. Service access cover (see Service - HP Mini 1103 | HP Mini 110, Compaq Mini CQ10 and HP Mini 1103 - Maintenance and - Page 73
the system board. NOTE: The thermal material must be thoroughly cleaned from the surfaces of the fan/heat sink assembly and the system board each time the fan/heat sink assembly is removed: Thermal paste is used on the processor (1) and the fan/heat sink assembly section (2) that - HP Mini 1103 | HP Mini 110, Compaq Mini CQ10 and HP Mini 1103 - Maintenance and - Page 74
by first unplugging the power cord from the AC outlet and then unplugging the AC adapter from the computer. 4. Remove the following components: a. Battery (see Battery on page 35). b. Service access cover (see Service access cover on page 38). c. Hard drive (see Hard drive on page 40). d. Keyboard - HP Mini 1103 | HP Mini 110, Compaq Mini CQ10 and HP Mini 1103 - Maintenance and - Page 75
only) on page 43) ● WLAN module (see WLAN module on page 45) ● Memory module (see Memory module on page 47) ● RTC battery (see RTC battery on page 48) ● Fan/heat sink assembly (see Fan/heat sink assembly on page 64) Remove the system board: 1. Disconnect the power connector cable from the system - HP Mini 1103 | HP Mini 110, Compaq Mini CQ10 and HP Mini 1103 - Maintenance and - Page 76
4. Remove the system board (3) by sliding it up and away from the base enclosure. Reverse the procedure to install the system board. 68 Chapter 4 Removal and replacement procedures - HP Mini 1103 | HP Mini 110, Compaq Mini CQ10 and HP Mini 1103 - Maintenance and - Page 77
by first unplugging the power cord from the AC outlet and then unplugging the AC adapter from the computer. 4. Remove the following components: a. Battery (see Battery on page 35). b. Service access cover (see Service access cover on page 38). c. Hard drive (see Hard drive on page 40). d. Keyboard - HP Mini 1103 | HP Mini 110, Compaq Mini CQ10 and HP Mini 1103 - Maintenance and - Page 78
Remove the power connector cable by grasping the connector and removing it from the base enclosure. Reverse this procedure to install the power connector cable. 70 Chapter 4 Removal and replacement procedures - HP Mini 1103 | HP Mini 110, Compaq Mini CQ10 and HP Mini 1103 - Maintenance and - Page 79
even when your Windows operating system is not working. The utility reports information about the computer and provides settings 1. Open Setup Utility by turning on or restarting the computer, and then pressing f10 while the "F10 = BIOS Setup Options" message is displayed in the lower-left corner - HP Mini 1103 | HP Mini 110, Compaq Mini CQ10 and HP Mini 1103 - Maintenance and - Page 80
Windows based, it does not support BIOS Setup Options" message is displayed in the lower-left corner of the screen. 2. Select the Main menu. System information such as the system time and date, and identification information about the computer settings go into effect when the computer restarts. - HP Mini 1103 | HP Mini 110, Compaq Mini CQ10 and HP Mini 1103 - Maintenance and - Page 81
, the computer restarts in Windows. Setup supported by your computer. Main menu Select System information To do this ● View and change the system time and date. ● View identification information about the computer. ● View specification information about the processor, memory size, and system BIOS - HP Mini 1103 | HP Mini 110, Compaq Mini CQ10 and HP Mini 1103 - Maintenance and - Page 82
models only) Memory Test To do 10, 15, 20). ● HP QuickWeb―Enable/disable the HP QuickWeb menu in Setup Utility. ● Internal Network Adapter boot―Enable/disable boot from Internal Network Adapter ROM drive ◦ USB flash drive ◦ USB Hard drive ◦ USB Card reader ◦ Network adapter NOTE: Only the devices - HP Mini 1103 | HP Mini 110, Compaq Mini CQ10 and HP Mini 1103 - Maintenance and - Page 83
in Height 2.3-3.2 cm 0.91-0.93 in Weight 25.7-cm (10.1-in) LCD, equipped with a 3-cell battery, hard drive, 1-GB memory, WLAN module, and 2 wireless antennas 1.14 kg 2.52 lb 25.7-cm (10.1-in). LCD, equipped with a 6-cell battery, hard drive, 1-GB memory, WLAN module, and 2 wireless antennas - HP Mini 1103 | HP Mini 110, Compaq Mini CQ10 and HP Mini 1103 - Maintenance and - Page 84
25.7-cm (10.1-in) WSVGA AntiGlare display specifications Dimensions Height Width Diagonal Number angle Metric U.S. 23.5 cm 14.3 cm 25.7 cm 262,144 500:1 (typical) 200 nits (typical) 9.3 in 5.6 in 10.1 in 0.2175 × 0.2088 mm 1024 × 600 RGB vertical stripe LED 80 × 25 3.46 W +/-45° horizontal, +15 - HP Mini 1103 | HP Mini 110, Compaq Mini CQ10 and HP Mini 1103 - Maintenance and - Page 85
mm 100.2 mm 100.2 mm Width 70 mm 70 mm 70 mm Weight 105-115 g 105-115 g 105-115 g Interface type SATA SATA Gbits/sec Security ATA security ATA security ATA security Seek times (typical read, including setting) Single track 1.5 ms support for details. Hard drive specifications 77 - HP Mini 1103 | HP Mini 110, Compaq Mini CQ10 and HP Mini 1103 - Maintenance and - Page 86
, click Manage, and then click Disk Management. If the partition is present, an HP Recovery drive is listed in the window. Recovery discs HP recommends that you create recovery discs to be sure that you can restore your computer to its original factory state if the hard drive fails, or if for any - HP Mini 1103 | HP Mini 110, Compaq Mini CQ10 and HP Mini 1103 - Maintenance and - Page 87
system recovery: ● You can recover only files that you have previously backed up. HP recommends that you use HP Recovery Manager to create a set of recovery discs (entire drive backup) as soon as you set up the computer. ● Windows has its own built-in repair features, such as System Restore. If you - HP Mini 1103 | HP Mini 110, Compaq Mini CQ10 and HP Mini 1103 - Maintenance and - Page 88
Recovery Manager > Recovery Manager. - or - ● Turn on or restart the computer, and then press esc while the "Press the ESC key for Startup Menu" "F11 (HP Recovery)" message is displayed on the screen. 2. Click System Recovery in the Recovery Manager window. 3. Follow the on-screen instructions. 80 - HP Mini 1103 | HP Mini 110, Compaq Mini CQ10 and HP Mini 1103 - Maintenance and - Page 89
. The screen shot can be a time-saver if you have to reset your preferences. Using Windows Backup and Restore Windows Backup and Restore allows you to back up individual files or back up the entire computer image. Guidelines: ● Be sure that the computer is connected to AC power before you start the - HP Mini 1103 | HP Mini 110, Compaq Mini CQ10 and HP Mini 1103 - Maintenance and - Page 90
click System Protection. 3. Click the System Protection tab. 4. Follow the on-screen instructions. Restore to a previous date and time To revert to a restore point (created at a previous date and time), when the computer was functioning optimally, follow these steps: 1. Select Start > Control Panel - HP Mini 1103 | HP Mini 110, Compaq Mini CQ10 and HP Mini 1103 - Maintenance and - Page 91
computer permits it to operate from any line voltage from 100 to 120 volts AC, or from 220 to 240 volts AC The 3-conductor power cord set included with the computer sets must have a minimum current capacity of 10 amps and a nominal voltage rating of 125 or 250 V AC, as required by the power system of - HP Mini 1103 | HP Mini 110, Compaq Mini CQ10 and HP Mini 1103 - Maintenance and - Page 92
Requirements for specific countries and regions Country/region Accredited agency Applicable note number Australia EANSW 1 Austria OVE 1 Belgium CEBC 1 Canada CSA 2 Denmark DEMKO 1 Finland FIMKO 1 France UTE 1 Germany VDE 1 Italy IMQ 1 Japan METI 3 The Netherlands - HP Mini 1103 | HP Mini 110, Compaq Mini CQ10 and HP Mini 1103 - Maintenance and - Page 93
HP product contains mercury in the backlight in the display assembly that might require special handling at end-of-life. disassembly instructions. Specific details, such as screw sizes, quantities, and locations, and component shapes and sizes, can vary from one computer model to another. Battery - HP Mini 1103 | HP Mini 110, Compaq Mini CQ10 and HP Mini 1103 - Maintenance and - Page 94
Perform the following steps: 1. Remove all screw covers (1) and screws (2) that secure the display bezel to the display assembly. 2. Lift up and out on the left and right inside edges (1) and the top and bottom inside edges (2) of the display bezel until the bezel disengages from the display - HP Mini 1103 | HP Mini 110, Compaq Mini CQ10 and HP Mini 1103 - Maintenance and - Page 95
4. Disconnect all display panel cables (1) from the display inverter and remove the inverter 2. 5. Remove all screws (1) that secure the display panel assembly to the display enclosure. 6. Remove the display panel assembly (2) from the display enclosure. 7. Turn the display panel assembly upside - HP Mini 1103 | HP Mini 110, Compaq Mini CQ10 and HP Mini 1103 - Maintenance and - Page 96
10. Remove the display panel frame (2) from the display panel. 11. Remove the screws (1) that secure the backlight cover to the display panel. 12. Lift the - HP Mini 1103 | HP Mini 110, Compaq Mini CQ10 and HP Mini 1103 - Maintenance and - Page 97
17. Remove the backlight frame from the display panel. WARNING! The backlight contains mercury. Exercise caution when removing and handling the backlight to avoid damaging this component and causing exposure to the mercury. 18. Remove the backlight from the backlight frame. 19. Disconnect the - HP Mini 1103 | HP Mini 110, Compaq Mini CQ10 and HP Mini 1103 - Maintenance and - Page 98
22. Release the tape (4) that secures the LCD panel to the display rear panel. 23. Remove the LCD panel. 24. Recycle the LCD panel and backlight. 90 Chapter 9 Recycling - HP Mini 1103 | HP Mini 110, Compaq Mini CQ10 and HP Mini 1103 - Maintenance and - Page 99
latch 14 bay, battery 14 bezel, spare part numbers 22, 27, 60 boot options 74 boot order 74 C cables, service considerations 30 caps lock light, identifying 8 changing Setup Utility language 71 chipset, product description 1 components additional hardware 16 bottom 14 computer, major 18 display - HP Mini 1103 | HP Mini 110, Compaq Mini CQ10 and HP Mini 1103 - Maintenance and - Page 100
Windows applications 9 Windows logo 9 L language support 73 latch, battery release 14 lights battery 11 caps lock 8 power 10 ports product description 4 USB 10, 12 power connector bracket, light, identifying 10 power requirements, product media cards 3 keyboard 4 memory module 2 modem 2 operating - HP Mini 1103 | HP Mini 110, Compaq Mini CQ10 and HP Mini 1103 - Maintenance and - Page 101
RTC battery removal 48 service considerations 29 serviceability, product description 5 SIM slot, identifying 14 SIM, removal 37 slots Digital Media 10 speakers 9 specifications device 75 display 76 hard drive 77 static-shielding materials 33 supported Windows applications key, identifying 9 Windows
-
 1
1 -
 2
2 -
 3
3 -
 4
4 -
 5
5 -
 6
6 -
 7
7 -
8
-
9
-
10
-
11
-
12
-
13
-
14
-
15
-
16
-
17
-
18
-
19
-
20
-
21
-
22
-
23
-
24
-
25
-
26
-
27
-
28
-
29
-
30
-
31
-
32
-
33
-
34
-
35
-
36
-
37
-
38
-
39
-
40
-
41
-
42
-
43
-
44
-
45
-
46
-
47
-
48
-
49
-
50
-
51
-
52
-
53
-
54
-
55
-
56
-
57
-
58
-
59
-
60
-
61
-
62
-
63
-
64
-
65
-
66
-
67
-
68
-
69
-
70
-
71
-
72
-
73
-
74
-
75
-
76
-
77
-
78
-
79
-
80
-
81
-
82
-
83
-
84
-
85
-
86
-
87
-
88
-
89
-
90
-
91
-
92
-
93
-
94
-
95
-
96
-
97
-
98
-
99
-
100
-
101
 |
 |

HP Mini 110
Compaq Mini CQ10
HP Mini 1103
Maintenance and Service Guide