HP NY650AA#ABA Getting Started
HP NY650AA#ABA - Compaq - CQ4010F Manual
 |
UPC - 884962347737
View all HP NY650AA#ABA manuals
Add to My Manuals
Save this manual to your list of manuals |
HP NY650AA#ABA manual content summary:
- HP NY650AA#ABA | Getting Started - Page 1
快速入門 - HP NY650AA#ABA | Getting Started - Page 2
Hewlett-Packard HP HP HP HP Hewlett-Packard Company P.O. Box 4010 Cupertino, CA 95015-4010 USA © Copyright 2000-2009 Hewlett-Packard Development Company, L.P. Macrovision Macrovision Microsoft、Windows 標誌和 Windows 是 Microsoft Wi-Fi CERTIFIED 802.11n Draft 2.0 Draft 2.0 Wi-Fi - HP NY650AA#ABA | Getting Started - Page 3
目錄 1 1 4 6 7 7 13 14 14 14 16 16 17 Microsoft 18 19 19 20 21 21 CD/DVD 23 使用 LightScribe 23 24 25 25 25 25 26 使用 PC 26 使用 HP Advisor 26 27 目錄 iii - HP NY650AA#ABA | Getting Started - Page 4
29 29 45 維護 ...48 49 50 54 54 索引 ...55 iv - HP NY650AA#ABA | Getting Started - Page 5
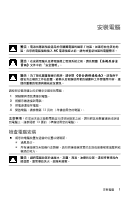
安裝電腦 AC 1 2 3 4 13 13 1 - HP NY650AA#ABA | Getting Started - Page 6
UPS 滑鼠 (PS/2 鍵盤 (PS/2 USB) 2.0 USB 2 - HP NY650AA#ABA | Getting Started - Page 7
網路接頭 ETHERNET LAN RJ-45 LAN LAN NIC LED 數據機 (Line-In-RJ-11 DVI VGA-to-DVI 或 HDMI-to-DVI VGA/Monitor VGA/Monitor VGA VGA-to-DVI DVI HDMI HDMI HDMI HDMI-to-DVI DVI VGA-DVI VGA-to-DVI HDMI-DVI HDMI-to-DVI 3 - HP NY650AA#ABA | Getting Started - Page 8
連接喇叭 25 音訊接頭 Center Rear Side CD 7.1 4 - HP NY650AA#ABA | Getting Started - Page 9
2.1 1 2 2.1 連接耳機 16 5 - HP NY650AA#ABA | Getting Started - Page 10
RJ-45 LAN 1 RJ-45) (A 2 B ACTIVITY LINK IEEE 802.11b、802.11g 或 802.11n ISP 37 Windows Enter 鍵。 6 - HP NY650AA#ABA | Getting Started - Page 11
ISP USB A 1 A 色的。 2 S-video 7 - HP NY650AA#ABA | Getting Started - Page 12
S-Video Composite Video S-Video 2 S-Video 輔助 S-Video VCR Composite Video 2 VCR A/V In Audio 1 L A/V In Audio 1 R A/V In Audio 2 L A/V In Audio 2 R 8 - HP NY650AA#ABA | Getting Started - Page 13
電視輸出 Analog Video S-video 電視輸入 電視 / ATSC CATV NTSC ATSC (Advanced Television System Committee CATV (Community Antenna Television NTSC (National Television System Committee 9 - HP NY650AA#ABA | Getting Started - Page 14
B A C A B 分隔器 C D E 電視 B F C IR G IR OUT 12 IR A B 分隔器 C D E 電視 F G IR 10 - HP NY650AA#ABA | Getting Started - Page 15
S-video F S-video S-video S-video H J IR G IR OUT 12 IR A B 分隔器 C D E 電視 F G IR H 電腦的 S-video J 11 - HP NY650AA#ABA | Getting Started - Page 16
IR) 傳輸器 IR 1 2 IR OUT 接頭 (3 3 2 1 IR OUT 12 IR IN IR 接收器 IR IR IR IN 接頭 (1)。將 IR 接收器 (2 3 IR 3 2 1 12 - HP NY650AA#ABA | Getting Started - Page 17
1 2 3 4 Microsoft® Windows® 7: 30 5 Windows 7 13 - HP NY650AA#ABA | Getting Started - Page 18
關閉電腦 Windows 7 1 2 3 1 ISP 2 DSL 或 cable ISP 3 LAN DSL ISP 14 - HP NY650AA#ABA | Getting Started - Page 19
1 1 6 37 7 2 ISP ISP ISP a b c d ISP ISP ISP ISP 3 ISP ISP 4 Microsoft Internet Explorer Internet Explorer: a b Internet Explorer]。 37 Wi-Fi Protected Access Personal (WPA-Personal) 和 Wired Equivalent Privacy (WEP WPA-Personal 或 WEP SSID 15 - HP NY650AA#ABA | Getting Started - Page 20
Windows 7 1 2 3 X 36 25 Windows 7 Windows 7 Windows 7 1 2 3 在 Windows 7 1 2 3 4 5 16 - HP NY650AA#ABA | Getting Started - Page 21
BIOS Windows 7 來自 Microsoft 的 Windows 7 使用密碼 Windows 7 Windows 7 Windows 7 Windows 7 Windows 7 Enter 25 17 - HP NY650AA#ABA | Getting Started - Page 22
Enter 25 Windows 7 Microsoft Microsoft Windows 7 Windows 7 Update Windows 7 Update Windows 7 Update 18 - HP NY650AA#ABA | Getting Started - Page 23
Microsoft Windows 7 Enter 25 Microsoft 19 - HP NY650AA#ABA | Getting Started - Page 24
CD 或 DVD Windows Windows 7 Windows Windows USB Windows USB 1 2 Windows Windows 輕鬆 傳輸 ]。 3 遵循 [Windows Enter 25 20 - HP NY650AA#ABA | Getting Started - Page 25
IBM Microdrive USB Mass Storage Device 讀卡機 A A 21 - HP NY650AA#ABA | Getting Started - Page 26
1 A 25 CompactFlash 和 Microdrive CF Ultra/III SM 與 xD 2 3 22 - HP NY650AA#ABA | Getting Started - Page 27
CD/DVD 磁碟機 A CD/DVD A 使用 LightScribe 技術 LightScribe? LightScribe LightScribe 可寫入 CD 或 DVD LightScribe 功能的 CD 或 DVD LightScribe LightScribe LightScribe LightScribe LightScribe LightScribe CyberLink LabelPrint 製作 LightScribe LightScribe 1 2 Lightscribe Enter 鍵。 23 - HP NY650AA#ABA | Getting Started - Page 28
Windows Media Center Windows Media Center Windows Media Center 或 8 公尺 (26 22.5 度 (共 45 24 - HP NY650AA#ABA | Getting Started - Page 29
1 http://www.hp.com/support。 2 3 4 1 2 3 Adobe® Acrobat® Reader pdf 25 - HP NY650AA#ABA | Getting Started - Page 30
1 2 3 使用 PC [PC PC 1 2 3 按一下 [PC 使用 HP Advisor 軟體 HP Advisor HP Advisor PC Dock HP PC Dock PC Dashboard PC Dashboard HP PC Discovery HP HP Advisor Dock (HP Advisor HP 標誌。 26 - HP NY650AA#ABA | Getting Started - Page 31
http://www.hp.com/ergo Enter。 27 - HP NY650AA#ABA | Getting Started - Page 32
28 - HP NY650AA#ABA | Getting Started - Page 33
45 48 25 30 31 31 32 33 36 37 38 頁的 〈CD 和 DVD 40 41 42 43 44 44 29 - HP NY650AA#ABA | Getting Started - Page 34
徵兆 31 使用 [Windows 1 Ctrl-Alt-Delete 鍵。 2 3 1 Ctrl-Alt-Delete 鍵。 2 1 5 2 30 - HP NY650AA#ABA | Getting Started - Page 35
電源 徵兆 50 按下 [Sleep Esc 在 Windows 7 1 2 3 31 - HP NY650AA#ABA | Getting Started - Page 36
徵兆 1 Alt 和 Tab 2 Ctrl 和 S Ctrl+S 3 1 與步驟 2 4 Ctrl 和 Esc Windows 5 Enter 鍵。 6 32 - HP NY650AA#ABA | Getting Started - Page 37
http://www.hp.com/support Num Lock Num Lock Num Lock 徵兆 10 公尺 (32 30 公分 (12 20 33 - HP NY650AA#ABA | Getting Started - Page 38
徵兆 30 公分 (12 1 USB USB 接頭。 2 LED 燈或是 [Connect LED Connect] 按鈕 (A A [Connect] 按鈕 (A) (也是 LED 燈) 5 到 10 閃爍。 34 - HP NY650AA#ABA | Getting Started - Page 39
徵兆 3 B Connect] 按鈕 (C) 5 至 10 LED 燈 (A C 60 B Off Connect On 4 5 Connect] 按鈕 (A Connect] 按鈕 (A) 5 到 10 6 Connect] 按鈕 (D) 5 至 10 LED (A D 35 - HP NY650AA#ABA | Getting Started - Page 40
徵兆 HDMI 1 2 OSD Sleep Esc 鍵。 36 - HP NY650AA#ABA | Getting Started - Page 41
ISP NIC LAN 25 1 2 3 4 1 2 3 802.11。 4 5 6 ISP ISP 37 - HP NY650AA#ABA | Getting Started - Page 42
CD 和 DVD 光碟機 徵兆 CD 或 DVD CD 或 DVD。 30 45 Eject Eject 1 2 CD 或 DVD 3 CD/DVD 1 2 CD/DVD 托槽。 3 38 - HP NY650AA#ABA | Getting Started - Page 43
CD 和 DVD 徵兆 使用 CD-R CD-R DVD 錄製到 DVD+R/-R 或 DVD+RW/-RW CD 錄製到 CD-R 或 CD-RW 光碟。 CD 或 DVD 39 - HP NY650AA#ABA | Getting Started - Page 44
CD 和 DVD 徵兆 DVD DVD 影片。 DVD DVD DVD 視訊 在 Windows Media Player Windows Media Player Windows Media Player Windows Media Player 1 2 3 4 5 6 7 40 - HP NY650AA#ABA | Getting Started - Page 45
硬體安裝 CD Windows 7 Hewlett-Packard HP http://www.hp.com/support 41 - HP NY650AA#ABA | Getting Started - Page 46
徵兆 1 2 3 4 5 6 7 效能 徵兆 42 - HP NY650AA#ABA | Getting Started - Page 47
無線裝置 1 2 3 4 5 802.11 43 - HP NY650AA#ABA | Getting Started - Page 48
遙控器 徵兆 USB IR) 連線: 1 2 3 4 eHome 紅 Windows 7 5 USB USB 接頭。 6 USB USB 裝置。 讀卡機 44 - HP NY650AA#ABA | Getting Started - Page 49
徵兆 CompactFlash (I、II 和 Microdrive)、Memory Stick、Memory Stick Pro、 MultiMedia、Secure Digital、SmartMedia 或 xD SDHC (Secure Digital High-Capacity Microsoft 46 頁的 〈Microsoft 47 50 45 - HP NY650AA#ABA | Getting Started - Page 50
1 2 3 DVD/CD-ROM 光 4 HP DVD Writer 640b)。 5 6 Microsoft Microsoft Windows 7 1 2 3 4 1 2 3 4 5 6 46 - HP NY650AA#ABA | Getting Started - Page 51
1 2 Enter 鍵。 CD 或 DVD CD 或 DVD 1 2 3 1 2 a b c d 1 2 3 4 5 47 - HP NY650AA#ABA | Getting Started - Page 52
維護 維護作業 使用 Windows Update Windows 50 48 - HP NY650AA#ABA | Getting Started - Page 53
CD 或 DVD Windows Windows 51 1 2 3 4 5 6 清潔。 49 - HP NY650AA#ABA | Getting Started - Page 54
1 2 USB 1 2 3 1 2 3 4 5 系統復原 CD 52 Windows 7 50 - HP NY650AA#ABA | Getting Started - Page 55
DVD DVD+R 或 DVD-R CD 或 DVD+RW、DVD-RW、DVD+RW DL、DVD-RW DL、DVD+R DL 或 DVD-R DL 1 至 3 片 DVD Recovery Disc Creator 1 2 3 Recovery 1、Recovery 2)。 4 1 Windows 7 2 F11 3 4 HP http://www.hp.com/support 51 - HP NY650AA#ABA | Getting Started - Page 56
從 Windows 7 Windows 7 1 2 3 4 5 6 53 7。 7 8 9 10 11 執行第 54 Windows 7 1 2 3 52 - HP NY650AA#ABA | Getting Started - Page 57
4 F11 Windows 5 6 7 8 9 執行第 54 51 1 CD 或 DVD 2 1 插入 DVD 3 5 4 5 6 7 8 53 - HP NY650AA#ABA | Getting Started - Page 58
9 10 11 13 1 Microsoft Windows 2 13 HP Support Assistant (HP HP Support Assistant (HP HP Support Assistant (HP HP HP Support Assistant] (HP Windows 7 Troubleshooting Tools (Windows 7 Windows 7 Windows 7 Troubleshooting Tools (Windows 7 1 2 3 54 - HP NY650AA#ABA | Getting Started - Page 59
標籤 23 H HDMI-to-DVI 3 HP Advisor 26 L LAN 天線 6 設定 6 連接 3 6 LightScribe 23 S S-video 8 T TV 7-11 V VGA-to-DVI 3 W Windows update 18 LAN 接頭 3 25 14 27 1, 27 索引 1 6 耳機 連接 5 Windows 7 18 系統 18 45 42 50 Microsoft 46 49, 50 防火牆 18 18 退出 CD/DVD 光碟機 23 14 紅外線 接收器 12 44 - HP NY650AA#ABA | Getting Started - Page 60
連接 5 16 49 喇叭 連接 5 56 36 16 47 15 連線 6 37 37 43 41-42 27 40 30 20 滑鼠 2 32 33-35 TV 31 2 電腦 清潔 49 設定 1 20 13 26 CD/DVD 光碟機 38-40 42 音訊 36 喇叭 36 43 41-42 視訊 40 開機 30 32 - HP NY650AA#ABA | Getting Started - Page 61
33-35 電源 31 37 遙控器 44 32 33-35 讀卡機 44 顯示器 31 14 3 18 連線 6-7 37 48 製作 LightScribe 23 25 26 遙控器 24 44 21 數據機 連線 3, 7 8 16 2 46 鍵盤 2 32 33-35 HDMI-to-DVI 3 VGA-to-DVI 3 14 14 45 44 21 21 接頭 3 31 索引 57 - HP NY650AA#ABA | Getting Started - Page 62
- HP NY650AA#ABA | Getting Started - Page 63
Getting Started - HP NY650AA#ABA | Getting Started - Page 64
This document contains proprietary information that is protected by copyright. No part of this document may be photocopied, reproduced, or translated to another language without the prior written consent of HP. Hewlett-Packard Company P.O. Box 4010 Cupertino, CA 95015-4010 USA © Copyright 2000-2009 - HP NY650AA#ABA | Getting Started - Page 65
Support on the Web 25 Finding Guides on the Web 25 Finding Onscreen Guides 26 Using the PC Help & Tools Folder 26 Using HP Advisor Software 26 Using the Computer with Safety and Comfort 27 Troubleshooting and Maintenance 29 Troubleshooting Computer Problems 29 Software Troubleshooting - HP NY650AA#ABA | Getting Started - Page 66
iv Getting Started (features vary by model) - HP NY650AA#ABA | Getting Started - Page 67
Setting Up Your Computer WARNING: The power supply is preset for the country/region in which you purchased your computer. If you move, please check the voltage requirements for your new location before plugging the computer into an AC power outlet. WARNING: Please read "Safety Notices" in the - HP NY650AA#ABA | Getting Started - Page 68
, and connected accessories by connecting all power cords to a power surge protection device. Use a power strip specifically labeled as having surge protection, an uninterruptible power supply (UPS), or a similar device. If the computer has a television tuner, or a modem or telephone connection - HP NY650AA#ABA | Getting Started - Page 69
Modem (Line In RJ-11) (select models only) to connect the computer modem to a telephone wall jack for dial-up connections to the Internet. Display video output Icon/label Description and function NOTE: For specific information, see the documentation that came with the display device. DVI - HP NY650AA#ABA | Getting Started - Page 70
available separately, or included with the monitor. Your computer supports only active (powered) speaker systems; the speaker system must have its own power source, such as batteries or a separate power cord. For detailed instructions about how to connect and configure other multichannel speakers - HP NY650AA#ABA | Getting Started - Page 71
speaker system To connect active speakers, such as left/right stereo speakers or a 2.1 system of two speakers and a subwoofer, to the computer: 1 Ensure that the computer is turned off, and that the speaker system is turned off and unplugged. 2 Connect the speaker system cable to the lime green - HP NY650AA#ABA | Getting Started - Page 72
network supporting IEEE 802.11b, 802.11g, or 802.11n by using the antenna that is included with the computer. If provided, connect the external antenna to the wireless antenna connector on the network card to increase the range and sensitivity of the wireless radio signal. NOTE: For the best - HP NY650AA#ABA | Getting Started - Page 73
Internet and send or receive e-mail and faxes, you must connect your telephone service line to the modem connector (A). 1 Plug a modem/telephone cable into the computer modem connector (A). Note that the modem connector on the computer may be green. 2 Plug the other end of the modem/telephone cable - HP NY650AA#ABA | Getting Started - Page 74
TV tuner. To record or listen to audio only, you must use the primary Audio In connector, which is connected to the motherboard and located on the back of the computer. Secondary right Audio In input connector (red). NOTE: This Audio In connector is connected to the TV tuner. To record or - HP NY650AA#ABA | Getting Started - Page 75
connector for TV cable or antenna, to receive NTSC (National Television System Committee) channels, which are over-the-air analog transmission channels. Setting Up Your Computer 9 - HP NY650AA#ABA | Getting Started - Page 76
IR) blaster" on page 12 for IR blaster placement details. Callouts A TV signal cable (coaxial) wall outlet (from antenna or cable) B Splitter C Computer coaxial TV In connector D Video recorder E TV F Set-top box/satellite box G Remote control IR blaster cable (select models only) 10 Getting Started - HP NY650AA#ABA | Getting Started - Page 77
the set-top box (F), add the cables to route video and audio to the computer: „ Do not detach any cables from the existing setup. „ Connect an S- signal cable (coaxial) wall outlet (from antenna or cable) B Splitter C Computer coaxial TV In connector D Video recorder E TV F Set-top box/satellite - HP NY650AA#ABA | Getting Started - Page 78
a direct line of sight to the remote sensor on the front of the computer, you can use an external IR receiver and place the IR receiver in a Connect the external receiver to the red IR IN connector on the back of the computer (1). Place the IR receiver (2) in a location with a direct line of sight - HP NY650AA#ABA | Getting Started - Page 79
an alternate language, it may take up to 30 minutes for this one-time language setup on the computer.) „ Follow the onscreen instructions to register, sign up for updates, and get online. 5 When you see the Windows 7 desktop, the initial setup is complete. For help with getting started using your - HP NY650AA#ABA | Getting Started - Page 80
on the keyboard to enter sleep mode. „ Hibernate mode (available as an advanced power setting) saves the system memory to a temporary file on the hard disk and then turns off the hardware. When you turn on the computer again, the programs, folders, and documents that you had open are restored to - HP NY650AA#ABA | Getting Started - Page 81
the ISP. „ If you did not set up the computer for Internet service during the initial setup, do so now by using Online Services: a Click the Start button. b Click All Programs. c Click Online Services, and then click Get Online. d Follow the onscreen instructions to select an ISP and set up Internet - HP NY650AA#ABA | Getting Started - Page 82
with audio, check the troubleshooting items in "Audio and speakers" on page 36. For more information, open the Help and Support Center or refer to the Support Web site; see "Getting More Information" on page 25. Selecting the Microphone The microphone connector on your computer is ready to use. If - HP NY650AA#ABA | Getting Started - Page 83
Computer risk Computer feature Unauthorized use of the computer or user User password account Computer viruses Antivirus program Unauthorized access to data Firewall program Windows 7 updates Unauthorized access to Setup Utility, BIOS click Help and Support, and then type passwords into the Search - HP NY650AA#ABA | Getting Started - Page 84
period, purchase an extended update service. Instructions for using and updating the antivirus software, and for purchasing extended update service, are provided within the program. For more information about computer viruses: Click the Start button, click Help and Support, and then type viruses - HP NY650AA#ABA | Getting Started - Page 85
the Help and Support Center" on page 25. Guidelines for Installing Software and Hardware Devices After you set up the computer and complete the use. „ Choose software that is compatible with the computer; check the operating system, memory, and other requirements listed for the new software. „ - HP NY650AA#ABA | Getting Started - Page 86
Transferring Files and Settings from an Old Computer to Your New Computer You can copy files from the old computer to your new computer by using CDs or DVDs, memory sticks, or personal media drives, or by using the Windows Easy Transfer cable. To transfer files and copy certain settings, such as Web - HP NY650AA#ABA | Getting Started - Page 87
cards, or media, to store digital picture files. The memory card reader can read from and write to a variety of types of memory cards and the IBM Microdrive disk drive. „ The card reader is accessible directly on the front of the computer. It has two or four horizontal card slots which accept the - HP NY650AA#ABA | Getting Started - Page 88
computer automatically detects the media. NOTE: You must insert media correctly. Note the direction of the notched corner on the media. For more information, open the Help and Support Center or refer to the Support Start button, click Computer, and then double-click the Memory Card icon to display - HP NY650AA#ABA | Getting Started - Page 89
CD/DVD Drive (Select models only) Your computer may have an optical disc drive that is installed in a vertical position. Press the Eject button on or near the drive door (A) to eject the CD/DVD by the LightScribe logo „ Labeling software that supports LightScribe „ A writable LightScribe disc (sold - HP NY650AA#ABA | Getting Started - Page 90
play music, movies, or video. To open Windows Media Center, point the remote control at the remote control sensor on the top front of the computer, and press the Windows Media Center Start button on the remote control. Or To use the remote control, point it in a direct line of sight - HP NY650AA#ABA | Getting Started - Page 91
on the Web You can find information for your computer by using the Internet to access the Support Web site address listed in the Limited Warranty and Support Guide, or use the following steps: 1 Go to http://www.hp.com/support in your Web browser. 2 Select your country/region and language. 3 Click - HP NY650AA#ABA | Getting Started - Page 92
on your desktop and customize your dock by dragging and dropping items. „ PC Dashboard - Check your computer status at a glance with the PC Dashboard. Access all the items you need to run your computer from HP and Partners. „ PC Discovery - Explore HP and Partner software and online services that - HP NY650AA#ABA | Getting Started - Page 93
, arrange the computer and your work area to maintain your comfort and productivity. Refer to the Safety & Comfort Guide for important ergonomic information: „ Click the Start button, click All Programs, click User Guides, and then click Safety & Comfort Guide. Or „ Type http://www.hp.com/ergo into - HP NY650AA#ABA | Getting Started - Page 94
28 Getting Started (features vary by model) - HP NY650AA#ABA | Getting Started - Page 95
Center or access the Support Web site; see "Getting More Information" on page 25. Refer to the documentation provided by the product manufacturer for information about peripheral-specific problems, such as issues with a monitor or a printer. Troubleshooting Computer Problems The following tables - HP NY650AA#ABA | Getting Started - Page 96
source are plugged in properly, and the wall outlet is functioning, the green power supply light on the back of the computer should be on; if it is not, refer to the Limited Warranty and Support Guide to contact Support. If the display (monitor) is blank, the monitor may not be properly connected - HP NY650AA#ABA | Getting Started - Page 97
hold the On button until the computer turns off. Check Power Settings. Computer shuts down automatically. The computer may be in an exceedingly hot environment. Let it cool down. Ensure computer air vents are not blocked and internal fan is running. Note that your computer may not have an internal - HP NY650AA#ABA | Getting Started - Page 98
does not respond to mouse movement. Possible solution Turn off the computer by using the mouse, unplug and reconnect the keyboard to the back of your computer, and then turn on your computer. Unplug and reconnect the mouse cable to your computer. If the mouse is still not detected, turn off the - HP NY650AA#ABA | Getting Started - Page 99
For detailed cleaning instructions, go to: http://www.hp.com/support Select your country/region and language, search on your computer model number, does not work or is not detected. Check for these problems: „ Ensure you are using the wireless keyboard or wireless Troubleshooting and Maintenance 33 - HP NY650AA#ABA | Getting Started - Page 100
30 cm (12 inches) of the receiver, and away from interference from other devices. 1 Unplug the receiver from a USB connector on the computer, and then reconnect it. Your computer model may have a connector dedicated to the receiver. If you have a choice, use a USB connector on the front of the - HP NY650AA#ABA | Getting Started - Page 101
and hold the Connect button (D) on the underside of the keyboard for 5 to 10 seconds until the LED (A) on the receiver lights or stops flashing. D Troubleshooting and Maintenance 35 - HP NY650AA#ABA | Getting Started - Page 102
the graphics card (select models only) to connect your display (monitor) to the computer, you should also connect analog speakers to the computer Audio program. Ensure that you connected powered (active) speakers and that they are turned on. Turn off your computer, and then unplug and reconnect the - HP NY650AA#ABA | Getting Started - Page 103
to a network, and then follow the onscreen instructions. If your system has an external antenna, try to move the antenna to a better position. If the antenna is internal, try to move the computer. Try to connect again later, or contact your ISP for assistance. Troubleshooting and Maintenance 37 - HP NY650AA#ABA | Getting Started - Page 104
or outdated. For detailed information about restoring and updating drivers, see "Updating drivers" on page 45. I cannot remove a CD or DVD. Turn on your computer, and press the Eject button nearest the drive to open the tray. If you suspect a problem with the Eject button itself: 1 Click the Start - HP NY650AA#ABA | Getting Started - Page 105
disc. Ensure that the disc is in the correct drive, and that you specify the same drive in the CD or DVD recording software. Select a slower write speed for the recording drive, if a slower speed is available. The recording software may not let you add a track if it exceeds the available space on - HP NY650AA#ABA | Getting Started - Page 106
game controllers. 4 Right-click TV tuner (select models only), and then click Update Driver Software. 5 Select Search automatically for updated driver software. 6 Follow the instructions to update the driver. 7 If you are prompted, restart the computer. 40 Getting Started (features vary by model) - HP NY650AA#ABA | Getting Started - Page 107
the CD provided with the device, or download and install the driver from the device manufacturer Web site. You may need an updated driver for Windows 7. Contact the device vendor directly for an update. For Hewlett-Packard peripheral devices, visit the HP Web site at http://www.hp.com/support Ensure - HP NY650AA#ABA | Getting Started - Page 108
an old device driver: 1 Click the problem device and instructions in the device troubleshooter wizard. 7 Restart the computer. Click the Start button, click the Arrow button next to Shut Down, and then click Restart. Performance Symptom Possible solution Computer displays a processor speed - HP NY650AA#ABA | Getting Started - Page 109
computer are the correct distance apart-not too far and not too near. For the correct distance, refer to the device instructions then click Next. 5 Follow the onscreen wizard instructions. The device may have too many connections. , refer to the device instructions. Ensure other devices that use - HP NY650AA#ABA | Getting Started - Page 110
sensor connected, and then restart the computer. Connect other USB devices after the remote sensor appears in the Device Manager window. Memory card reader Symptom Memory card reader cannot read the memory card. Possible solution Do not insert or remove memory cards when the in-use (activity - HP NY650AA#ABA | Getting Started - Page 111
data files you have created, and then reinstalls the operating system, programs, and drivers. Updating drivers A driver is a software program that enables your computer to communicate with an attached device, such as a printer, hard disk drive, mouse, or keyboard. Troubleshooting and Maintenance 45 - HP NY650AA#ABA | Getting Started - Page 112
the type of device you want to update or rollback. (For example, DVD/CD-ROM drives). 4 Double-click the specific item (for example, HP DVD Writer 640b). 5 Click the Driver tab. 6 To update a driver, click Update Driver, and then follow the onscreen instructions. Or To revert to an earlier version - HP NY650AA#ABA | Getting Started - Page 113
-installed software program or hardware driver is damaged, you can reinstall it by using the Recovery Manager program (select models only). NOTE: Do not use the Recovery Manager program to reinstall software programs that came on CDs or DVDs included in the computer box. Reinstall these programs - HP NY650AA#ABA | Getting Started - Page 114
problems arise in the future. Maintenance tasks It is important that you perform simple maintenance of your computer to ensure that it works at peak performance. Weekly Software Cleanup Defragmentation Virus Scan Monthly Hardware Cleanup Software Updates Hard Disk Diagnostic Yearly System Recovery - HP NY650AA#ABA | Getting Started - Page 115
Creating data backup discs Use CD or DVD recording (or burning) software that is installed on your computer to create backup discs of important information, including personal files, e-mail messages, and Web site bookmarks. You can also move data to an external hard disk drive. When writing data to - HP NY650AA#ABA | Getting Started - Page 116
and reformats the hard disk drive, deleting all data files you have created. System recovery reinstalls the operating system, programs, and drivers. However, you must reinstall any software that was not installed on the computer at the factory. This includes software that came on CDs included in the - HP NY650AA#ABA | Getting Started - Page 117
on the keyboard during system startup. 3 Through recovery discs that you create. 4 Through recovery discs purchased from HP Support. To purchase recovery discs, go to http://www.hp.com/support and visit the Software & Driver downloads page for your computer model. Troubleshooting and Maintenance 51 - HP NY650AA#ABA | Getting Started - Page 118
the registration process, and wait until you see the desktop. 10 Turn off the computer, reconnect all peripheral devices, and turn the computer back on. 11 Perform the procedure "Performing the Post-Recovery Procedure" on page 54. System recovery at system startup If Windows 7 is not responding, but - HP NY650AA#ABA | Getting Started - Page 119
backup disc from the drive tray. CAUTION: All data on the hard disk drive will be deleted. You will lose data if it is not backed up. 2 Insert recovery disc #1 into the DVD drive tray, and close the tray. 3 If the computer works, click the Start button, click the Arrow button next to Shut - HP NY650AA#ABA | Getting Started - Page 120
the instructions in "Preparing to Use Your Computer" on page 13. Additional Troubleshooting For additional troubleshooting solutions, refer to the following: „ HP Support Assistant HP Support Assistant helps you maintain your PC performance and resolve problems faster with automated updates, onboard - HP NY650AA#ABA | Getting Started - Page 121
left and right connectors 8 troubleshooting 36 B backup 49 buttons eject CD/DVD drive 23 Off, See turning off computer 14 C card reader, memory 21 CD/DVD drive troubleshooting 38-40 using vertical 23 23 D digital picture 21 display see monitor documentation, onscreen 26 drivers, update 46 Index 55 - HP NY650AA#ABA | Getting Started - Page 122
performance troubleshooting 42 power troubleshooting 31 power connector 2 R recording level, adjusting 16 Recovery Manager 47 reinstall a software program 47 remote control 24 troubleshooting 44 repairing software 45 repetitive strain injury (RSI), see Safety & Comfort Guide restarting the computer - HP NY650AA#ABA | Getting Started - Page 123
information to your new computer 20 troubleshooting audio 36 CD/DVD drive 38-40 hardware installation 41-42 Internet connection 37-38 keyboard (wired) 32 keyboard (wireless) 33-35 memory card reader 44 monitor 31 mouse (wired) 32 mouse (wireless) 33-35 power 31 remote control 44 speakers - HP NY650AA#ABA | Getting Started - Page 124
HP HP 請前往:www.hp.com/go/recycle 以瞭解 HP The power to make a change Thank you for your purchase. HP is dedicated to producing the highest quality, best performing, and easiest to use PCs in the world. HP also designed this product with the environment in mind. If this computer is a
-
 1
1 -
 2
2 -
 3
3 -
 4
4 -
 5
5 -
 6
6 -
 7
7 -
8
-
9
-
10
-
11
-
12
-
13
-
14
-
15
-
16
-
17
-
18
-
19
-
20
-
21
-
22
-
23
-
24
-
25
-
26
-
27
-
28
-
29
-
30
-
31
-
32
-
33
-
34
-
35
-
36
-
37
-
38
-
39
-
40
-
41
-
42
-
43
-
44
-
45
-
46
-
47
-
48
-
49
-
50
-
51
-
52
-
53
-
54
-
55
-
56
-
57
-
58
-
59
-
60
-
61
-
62
-
63
-
64
-
65
-
66
-
67
-
68
-
69
-
70
-
71
-
72
-
73
-
74
-
75
-
76
-
77
-
78
-
79
-
80
-
81
-
82
-
83
-
84
-
85
-
86
-
87
-
88
-
89
-
90
-
91
-
92
-
93
-
94
-
95
-
96
-
97
-
98
-
99
-
100
-
101
-
102
-
103
-
104
-
105
-
106
-
107
-
108
-
109
-
110
-
111
-
112
-
113
-
114
-
115
-
116
-
117
-
118
-
119
-
120
-
121
-
122
-
123
-
124
 |
 |

快速入門