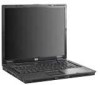
HP Nc6120 Getting Started Enhanced for Accessibility
HP Nc6120 - Compaq Business Notebook Manual
 |
UPC - 882780128941
View all HP Nc6120 manuals
Add to My Manuals
Save this manual to your list of manuals |
HP Nc6120 manual content summary:
- HP Nc6120 | Getting Started Enhanced for Accessibility - Page 1
Getting Started HP Compaq Notebook Series Document Part Number: 393685-002 June 2005 This guide explains how to set up your hardware and software, and begin using your notebook in Microsoft® Windows®. - HP Nc6120 | Getting Started Enhanced for Accessibility - Page 2
warranty statements accompanying such products and services. Nothing herein should be construed as constituting an additional warranty. HP shall not be liable for technical or editorial errors or omissions contained herein. Getting Started HP Compaq Notebook Series Second Edition June 2005 First - HP Nc6120 | Getting Started Enhanced for Accessibility - Page 3
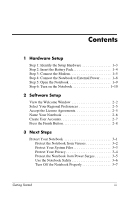
the Setup Hardware 1-3 Step 2: Insert the Battery Pack 1-4 Step 3: Connect the Modem 1-5 Step 4: Connect the Notebook to External Power 1-8 Step 5: Open the Notebook 1-9 Step 6: Turn on the Notebook 1-10 2 Software Setup View the Welcome Window 2-2 Select Your Regional Preferences 2-5 Accept - HP Nc6120 | Getting Started Enhanced for Accessibility - Page 4
Service 3-9 4 Notebook Features Top Components 4-2 Lights 4-2 Pointing Devices 4-6 Buttons and Switches Recovery A-2 System Restore Points A-3 Creating a System Restore Point A-4 Restoring to a Restore Point A-4 Reinstalling Applications A-5 Reinstalling Applications from the Hard Drive - HP Nc6120 | Getting Started Enhanced for Accessibility - Page 5
to ensure that the correct drivers are installed: ■ Do not set up the notebook for the first time while the notebook is docked in an optional unplug the notebook from external power. ❏ Do not shut down the notebook or initiate standby or hibernation. ❏ Do connect the modem cable as instructed in the - HP Nc6120 | Getting Started Enhanced for Accessibility - Page 6
you need to set up the notebook. 2. Insert the battery pack into the notebook so that it can begin to charge as soon as the notebook is connected to external power. 3. Connect the modem. 4. Connect the notebook to external power. 5. Open the notebook. 6. Turn on the notebook. After you turn on the - HP Nc6120 | Getting Started Enhanced for Accessibility - Page 7
-11 jacks are not standard, a modem adapter specific to the country in which you purchased the notebook is included with the notebook.) Å WARNING: To reduce potential safety issues, use only the AC adapter or battery pack provided with the computer, a replacement AC adapter or battery pack provided - HP Nc6120 | Getting Started Enhanced for Accessibility - Page 8
Step 2: Insert the Battery Pack This notebook supports up to 2 battery packs: ■ One primary lithium-ion battery pack is included with the notebook. ■ The travel battery pack is an optional battery pack that can be attached to the bottom of the notebook. To insert the primary battery pack: 1. Turn - HP Nc6120 | Getting Started Enhanced for Accessibility - Page 9
with an Adapter" later in this chapter. Å WARNING: To reduce the risk of electric shock, disconnect the modem from the telephone network before accessing an internal compartment of the notebook. Internal compartments include the memory compartment, the battery bay, and the hard drive bay. Getting - HP Nc6120 | Getting Started Enhanced for Accessibility - Page 10
the Modem Cable To connect the modem to an analog telephone line that has an RJ-11 (modem) jack: 1. Turn the notebook display-side up on a flat surface near an RJ-11 (modem) jack. 2. If your modem cable contains noise suppression circuitry 1, which prevents interference with TV and radio reception - HP Nc6120 | Getting Started Enhanced for Accessibility - Page 11
. 3. Plug the modem cable 2 into the RJ-11 (modem) jack on the notebook. 4. Plug the modem cable 3 into the country-specific modem adapter. 5. Plug the country-specific modem adapter 4 into the telephone jack. ✎ Telephone wall jacks and modem cables vary in appearance by region and country. Getting - HP Nc6120 | Getting Started Enhanced for Accessibility - Page 12
.) 2. Plug the power cord 2 into the AC adapter, and then into an AC outlet 3. When the notebook receives AC power, the battery pack begins to charge and the battery light (on the front of the notebook) 4 is turned on. When the battery pack is fully charged, the battery light is turned off. It is - HP Nc6120 | Getting Started Enhanced for Accessibility - Page 13
Hardware Setup Step 5: Open the Notebook To open the notebook: 1. Slide the display release latch 1 to the right to release the display. 2. Raise the display 2. Getting Started 1-9 - HP Nc6120 | Getting Started Enhanced for Accessibility - Page 14
Hardware Setup Step 6: Turn on the Notebook To turn on the notebook: » Press the power/standby button 1. The power/standby light next to the power/standby button 2 and the power/standby light on the front of the notebook 3 are turned on, and you are prompted to begin software setup. 1-10 Getting - HP Nc6120 | Getting Started Enhanced for Accessibility - Page 15
instructions, refer to Chapter 2, "Managing Your Software," in the Help and Support Guide located in the Help and Support Center. To access the Help and Support Center, select Start > Help and Support > User Guides. Software setup begins when you respond to the setup prompt on the notebook screen - HP Nc6120 | Getting Started Enhanced for Accessibility - Page 16
the question mark icon in the lower-right corner of the window or press the f1 key on your keyboard. ■ To continue to the next window: Select the Next button in the lower-right corner of the window. ■ To return to the previous window: Select the Back button in the lower-left corner of the - HP Nc6120 | Getting Started Enhanced for Accessibility - Page 17
Software Setup If your computer model has a TouchPad (select models only), to navigate in a window, slide your finger on the TouchPad 1 in the direction that you want to move the cursor. To select an item, move the cursor over the - HP Nc6120 | Getting Started Enhanced for Accessibility - Page 18
Software Setup If your computer model has a pointing stick (select models only), navigate in a window by pressing the pointing stick 1 in the direction that you want to move the pointer. To select an item, move the pointer over the item, - HP Nc6120 | Getting Started Enhanced for Accessibility - Page 19
software. On the following screen you will be offered only 2 options: You can choose Back to return to the End-User License Agreement window or choose Shutdown to turn off the notebook. When you start the notebook after selecting Shutdown, the Welcome to Windows window is displayed and you must - HP Nc6120 | Getting Started Enhanced for Accessibility - Page 20
must have a unique name. In the What's your computer's name? window, you can retain the default name shown in the Computer name text field or choose another name. For example, you might want to base your notebook name on a person's name, "David," or a location, "Familyroom." In order for your - HP Nc6120 | Getting Started Enhanced for Accessibility - Page 21
as display and security settings, personal files, screen savers, and the appearance of the Windows desktop. When you turn on the notebook in Windows, a prompt to select a Windows user account is displayed. When a Windows user account is selected, Windows opens according to the preferences set by - HP Nc6120 | Getting Started Enhanced for Accessibility - Page 22
chapter. ✎ All Windows instructions in your notebook documentation describe Microsoft Windows XP procedures based on the default Windows XP category view. For information about switching between Windows XP classic view and Windows XP category view, select Start > Help and Support > Customizing your - HP Nc6120 | Getting Started Enhanced for Accessibility - Page 23
safely. ■ Turn off your notebook properly. For information about other notebook security features, such as passwords, device disabling, and using an optional security cable lock, refer to the "Security" chapter in the Hardware and Software Guide located in the Help and Support Center. To access the - HP Nc6120 | Getting Started Enhanced for Accessibility - Page 24
Norton AntiVirus software is preinstalled on your notebook to protect against such viruses. Norton updated. ■ For information about using and updating your Norton AntiVirus software, and for other information such as troubleshooting: Select Start > All Programs > Norton AntiVirus > Help and Support - HP Nc6120 | Getting Started Enhanced for Accessibility - Page 25
benchmark "snapshots" of your application, driver, and operating system files. The notebook sets restore points at regular intervals and system restore point manually: 1. Select Start > Help and Support > System Restore. A System Restore window opens. 2. Follow the on-screen directions for setting - HP Nc6120 | Getting Started Enhanced for Accessibility - Page 26
was functioning optimally: 1. Make sure the notebook is connected to reliable external power through the AC adapter. 2. Select Start > Help and Support > System Restore. The System Restore window opens. 3. Follow the on-screen directions for restoring the notebook. Protect Your Privacy When you use - HP Nc6120 | Getting Started Enhanced for Accessibility - Page 27
, perform the task, and then enable the firewall. To permanently resolve the problem, reconfigure the firewall as follows: ■ If you are using Windows Firewall, select Start > Help and Support to search for instructions on reconfiguring the firewall. ■ If you are using an optional firewall, refer - HP Nc6120 | Getting Started Enhanced for Accessibility - Page 28
available on the Web at http://www.hp.com/ergo, and in the Help and Support Center. To access the Help and Support Center, select Start > Help and Support > User Guides. Å WARNING: To avoid potential discomfort or burns, do not block the air vents or use the notebook on your lap for extended periods - HP Nc6120 | Getting Started Enhanced for Accessibility - Page 29
computer, a replacement AC adapter or battery pack provided by HP, or a compatible AC adapter or battery pack purchased as an accessory from HP should be used with the computer. For more safety and regulatory information, refer to Regulatory and Safety Notices located in the Help and Support Center - HP Nc6120 | Getting Started Enhanced for Accessibility - Page 30
connect the modem cable during hardware setup: a. Turn off your notebook. b. Follow the instructions in the "Step 3: Connect the Modem" section of Chapter 1, "Hardware Setup." c. Start your notebook in Windows. d. Then proceed to "Set Up Internet Service" next in this chapter. 3-8 Getting Started - HP Nc6120 | Getting Started Enhanced for Accessibility - Page 31
might be displayed either individually on the Windows desktop or grouped in a desktop folder named Online Services. To set up a new Internet account or configure your notebook to use an existing account, double-click an icon, and then follow the instructions on the screen. Getting Started 3-9 - HP Nc6120 | Getting Started Enhanced for Accessibility - Page 32
ISP and the ISP has provided you with such information as a specific IP address, and POP3 and SMTP settings. To access the Internet Connection wizard and instructions for using the wizard: 1. Select Start > Help and Support. 2. In the Search text field, type Make an Internet connection. 3. Then - HP Nc6120 | Getting Started Enhanced for Accessibility - Page 33
Features This chapter describes hardware features of the notebook. ✎ Components included with your notebook may vary by geographical region and by model. The illustrations in this chapter identify the standard external features included in most notebook models. Refer to the illustrations that most - HP Nc6120 | Getting Started Enhanced for Accessibility - Page 34
2 Wireless lights (2) 4-2 Description Green: The notebook is on. Blinking green: The notebook is in standby mode. Off: The notebook is off or in hibernation. On: An integrated wireless device, such as a wireless local area network (LAN) device and/or a Bluetooth® device is turned on. (Continued - HP Nc6120 | Getting Started Enhanced for Accessibility - Page 35
is turned off when all batteries in the notebook are fully charged. If the notebook is not connected to an external power source, the light is turned off until the battery reaches a low-battery condition. Blinking: The hard drive or optical drive is being accessed. On: System sound is turned off. On - HP Nc6120 | Getting Started Enhanced for Accessibility - Page 36
is in standby mode. Off: The notebook is off or in hibernation. On: An integrated wireless device, such as a wireless LAN device and/or a Bluetooth device is turned on. Green: The notebook is on. Blinking green: The notebook is in standby mode. Off: The notebook is off or in hibernation. (Continued - HP Nc6120 | Getting Started Enhanced for Accessibility - Page 37
source, the light is turned off when all batteries in the notebook are fully charged. If the notebook is not connected to an external power source, the light is turned off until the battery reaches a low-battery condition. Blinking: The hard drive or optical drive is being accessed. On: Num lock is - HP Nc6120 | Getting Started Enhanced for Accessibility - Page 38
Notebook Features Pointing Devices TouchPad (Select Models Only) Component Description 1 TouchPad* 2 Left TouchPad button* 3 Right TouchPad button* 4 TouchPad scroll zone* Moves the pointer and selects or activates items on the screen 3 of the Hardware and Software Guide. 4-6 Getting Started - HP Nc6120 | Getting Started Enhanced for Accessibility - Page 39
Pointing Stick (Select Models Only) Notebook Features Component 1 Pointing stick 2 Left pointing stick button 3 Right pointing stick button Description Moves the pointer and selects or activates items on the screen. Functions like the left button on an external mouse. Functions like the right - HP Nc6120 | Getting Started Enhanced for Accessibility - Page 40
Switches ✎ Refer to the illustration that most closely matches your notebook. Component 1 Power/standby button* Description When the notebook is: ■ Off, press the button to turn on the notebook hibernation. If the notebook has stopped responding and Microsoft® Windows® shutdown procedures cannot - HP Nc6120 | Getting Started Enhanced for Accessibility - Page 41
mode if the display is closed while the notebook is turned on. Launches Info Center. 4 Wireless button* ✎ For more information about the Info Center, refer to "Using Info Center (Select Models Only)" in the Hardware and Software Guide located in the Help and Support Center. To access the Help and - HP Nc6120 | Getting Started Enhanced for Accessibility - Page 42
* 2 Display switch Description When the notebook is: ■ Off, press the button to turn on the notebook. ■ In standby, briefly press the button to to exit standby. ■ In hibernation, briefly press the button to exit hibernation. If the notebook has stopped responding and Microsoft Windows shutdown - HP Nc6120 | Getting Started Enhanced for Accessibility - Page 43
Notebook Features Component 3 Wireless information about establishing a wireless connection from Windows, visit http://www.hp.com/go/wireless. *This table describes Software Guide. For information about changing the functions of wireless features, see Chapter 6 of the Hardware and Software Guide. - HP Nc6120 | Getting Started Enhanced for Accessibility - Page 44
Features Keys ✎ Your notebook may look slightly different from the illustration in this section. Component 1 Function keys 2 fn key 3 Windows logo key 4 Windows applications key 5 Keypad keys Description Execute frequently used system functions when pressed in combination with the fn key. Executes - HP Nc6120 | Getting Started Enhanced for Accessibility - Page 45
2 Speakers (2) Produce system sound. 3 Digital Media Slot (select models only) Supports 6 optional digital memory card formats: SD (Secure Digital) Memory Card, MultiMediaCard, Memory Stick, Memory Stick Pro, Smart Media, and xD-Picture Card. Ä This notebook does not support adapters in the 6-in - HP Nc6120 | Getting Started Enhanced for Accessibility - Page 46
Notebook Features Component 1 Speaker 2 Display release latch Description Produce system sound. Opens the notebook. 4-14 Getting Started - HP Nc6120 | Getting Started Enhanced for Accessibility - Page 47
limits, human proximity to the antennae should not be less than 20 cm (8 inches) during normal operation, including when the notebook display is closed. On select notebook models, there are 2 wireless antennae that send and receive wireless device signals. They are not visible from the outside of - HP Nc6120 | Getting Started Enhanced for Accessibility - Page 48
port 4 S-Video-out jack Description Attaches an optional security cable to the notebook. Ä Security solutions are designed to act as deterrents. These deterrents may not prevent a product from being mishandled or stolen. Connects an AC adapter, or an optional power adapter. Connects an optional - HP Nc6120 | Getting Started Enhanced for Accessibility - Page 49
slot 2 Power connector Description Attaches an optional security cable to the notebook. Ä Security solutions are designed to act as deterrents. These deterrents may not prevent a product from being mishandled or stolen. Connects an AC adapter, or an optional power adapter. Getting Started 4-17 - HP Nc6120 | Getting Started Enhanced for Accessibility - Page 50
that most closely matches your notebook. Component 1 Audio-out (headphone) jack 2 Audio-in (microphone) jack 3 USB ports (2) 4 Optical drive (select models only) 5 Optical drive button (select models only) 6 Serial port Description Produces system sound when connected to optional powered - HP Nc6120 | Getting Started Enhanced for Accessibility - Page 51
Notebook Features Component 1 Audio-out (headphone) jack 2 Audio-in (microphone) jack 3 Optical drive (select models only) 4 Optical drive button (select models only) Description Produces system sound when connected to optional powered stereo speakers, headphones, headset, or television audio. - HP Nc6120 | Getting Started Enhanced for Accessibility - Page 52
✎ Refer to the illustration that most closely matches your notebook. Component 1 USB ports (2) 2 External monitor port 3 RJ-11 (modem) jack 4 RJ-45 (network) jack Description Connect USB 1.1- and 2.0-compliant devices to the notebook using a standard USB cable, or connect an optional External - HP Nc6120 | Getting Started Enhanced for Accessibility - Page 53
Notebook Features Component Description 5 1394 port Connects an optional IEEE 1394 device, such as a camcorder. 6 PC Card slots (2) Support optional Type I, Type II, or Type III 32-bit (CardBus) or 16-bit PC Cards. Some models may be shipped with a smart card reader in the bottom card slot. 7 - HP Nc6120 | Getting Started Enhanced for Accessibility - Page 54
a network cable. 5 1394 port Connects an optional IEEE 1394 device, such as a camcorder. 6 PC Card slot (1) Supports an optional Type I, Type II, or Type III 32-bit (CardBus) or 16-bit PC Card. 7 PC Card slot eject button (1) Ejects a PC Card from the PC Card slot. 4-22 Getting Started - HP Nc6120 | Getting Started Enhanced for Accessibility - Page 55
that most closely matches your notebook. Component 1 Primary battery bay 2 Primary battery release latches (2) 3 Travel battery connector 4 Expansion memory module compartment Description Holds the primary battery pack. Release the primary battery pack from the battery bay. Connects an optional - HP Nc6120 | Getting Started Enhanced for Accessibility - Page 56
bay 6 Vents (4) 7 Docking connector Description Holds the hard drive. Enable airflow to cool internal components. Ä To prevent overheating, do not obstruct vents. Use the notebook only on a hard, flat surface. Do not allow another hard surface, such as a printer, or a soft surface, such as pillows - HP Nc6120 | Getting Started Enhanced for Accessibility - Page 57
Notebook Features Component 1 Primary battery bay 2 Primary battery release latches (2) 3 Travel battery connector 4 Expansion memory module compartment 5 Hard drive bay 6 Vents (4) Description Holds the primary battery pack. Release the primary battery pack from the battery bay. Connects an - HP Nc6120 | Getting Started Enhanced for Accessibility - Page 58
AC adapter to an AC electrical outlet. 2 AC adapter Converts AC power to DC power. 3 Primary battery pack Powers the notebook when the notebook is not connected to external power. 4 Modem cable* (select models only) Connects an internal modem to an RJ-11 telephone jack or to a country-specific - HP Nc6120 | Getting Started Enhanced for Accessibility - Page 59
A System Recovery The notebook system recovery process provides several ways to recover optimal system functionality. For best results, attempt to recover optimal notebook functionality by using the following procedures in the order described here. Safeguarding Your Data Software or devices added to - HP Nc6120 | Getting Started Enhanced for Accessibility - Page 60
one of the listed snapshots: » Drag the snapshot file to the appropriate location on your hard drive. For more information on configuring and using Altiris Local Recovery, visit the HP Web site at http://www.hp.com/go/easydeploy, or open the software and click Help on the menu bar. A-2 Getting - HP Nc6120 | Getting Started Enhanced for Accessibility - Page 61
Recovery System Restore Points System Restore is an operating system feature that allows you to reverse undesirable changes to your notebook by restoring the notebook to an earlier state, called a restore point. A restore point is a "snapshot" of your software, drivers that you manually create - HP Nc6120 | Getting Started Enhanced for Accessibility - Page 62
system restore point: 1. Select Start > Help and Support. 2. Click System Restore. The System Restore window opens. 3. Click Create a restore point, and then click Next. 4. Follow the on-screen instructions. Restoring to a Restore Point To restore the notebook to a previous date and time when it was - HP Nc6120 | Getting Started Enhanced for Accessibility - Page 63
or preloaded on your notebook can be reinstalled by using the Recovery disc or a third-party software disc. ✎ In most cases, the applications preloaded on your notebook, such as those available in the Software Setup utility, can be reinstalled from your hard drive. To access the Software - HP Nc6120 | Getting Started Enhanced for Accessibility - Page 64
System Recovery Reinstalling Applications from the Hard Drive To reinstall a preloaded application or utility from your hard drive: 1. Select Start > All Programs > Software Setup, and then follow the instructions on the screen. 2. When you are prompted to select the software you want to reinstall, - HP Nc6120 | Getting Started Enhanced for Accessibility - Page 65
System disc that was shipped with the notebook: ✎ If your notebook does not have an optical drive, you may need to connect to an optional external MultiBay. 1. Connect the notebook to external power through the AC adapter and turn on the notebook. 2. Immediately insert the Operating System disc into - HP Nc6120 | Getting Started Enhanced for Accessibility - Page 66
recovery efforts do not successfully repair the operating system, you can reinstall it. To reinstall the operating system: ✎ If your notebook does not have an optical drive, you may need to connect to an optional external MultiBay. 1. Connect the notebook to external power through the AC adapter - HP Nc6120 | Getting Started Enhanced for Accessibility - Page 67
System Recovery 8. Press esc to continue installing a new copy of the operating system instead Formatting this drive deletes all current files. 12. Press F to format the drive. The reinstallation process begins. This process takes 1 to 2 hours to complete. The notebook restarts in Windows when the - HP Nc6120 | Getting Started Enhanced for Accessibility - Page 68
the notebook: 1. While running Windows, insert the Recovery disc into the optical drive. 2. If the disc does not start immediately: a. Select Start > Run. b. Then type D:\SWSETUP\APPINSTL\SETUP.EXE where D indicates the optical drive. 3. Follow the on-screen instructions for installing the drivers - HP Nc6120 | Getting Started Enhanced for Accessibility - Page 69
Slot light 4-13 A AC adapter connecting 1-8 identifying 4-26 Altiris Local Recovery A-2 antennae 4-15 antivirus software 3-2 applications key, Windows 4-12 applications, reinstalling or repairing A-5 audio-in (microphone) jack 4-18, 4-19 audio-out (headphone) jack 4-18, 4-19 B battery bay 4-23, 4-25 - HP Nc6120 | Getting Started Enhanced for Accessibility - Page 70
1-5, 3-9 E eject buttons optical drive 4-18, 4-19 PC Card Slot 4-21, 4-22 electrical storm, safety issues 3-5 exhaust vents 4-24, 4-25 F firewalls 3-4 fn key 4-12 function keys 4-12 H hard drive bay, indentifying 4-24, 4-25 headphone (audio-out) jack 4-18, 4-19 HP Software Product License Agreement - HP Nc6120 | Getting Started Enhanced for Accessibility - Page 71
1-10 wireless 4-2, 4-4 lock, security cable 4-16, 4-17 M memory module compartment 4-23, 4-25 Memory Stick 4-13 Memory Stick Pro 4-13 microphone (audio-in) jack 4-18, 4-19 Microsoft End-User License Agreement 2-5 modem connecting 1-5, 3-8 country-specific adapter 1-3, 1-7 Getting Started Index-3 - HP Nc6120 | Getting Started Enhanced for Accessibility - Page 72
4-21, 4-22 infrared 4-13 monitor 4-20, 4-22 parallel 4-16 serial 4-18 USB 4-18, 4-20, 4-22 power running the notebook on battery 1-8 surge protection 3-5 turning off notebook 3-7 turning on notebook (Windows) 1-10 power adapter 4-16, 4-17 power connector 1-8, 4-16, 4-17 Index-4 Getting Started - HP Nc6120 | Getting Started Enhanced for Accessibility - Page 73
4-22, 4-26 RJ-45 (network) jack 4-22 S Safety and Comfort Guide 3-6 scrolling zones, TouchPad 4-6 Secure Digital (SD) Memory Card 4-13 security cable slot 4-16, 4-17 serial port 4-18 shutting down notebook 3-7 slots 6-in-1 Digital Media 4-13 memory 4-23, 4-25 PC Card 4-21, 4-22 security cable 4-16 - HP Nc6120 | Getting Started Enhanced for Accessibility - Page 74
System Restore 3-3 system restore points A-3 T telephone (RJ-11) jack 1-5 temperature, safety considerations 3-6 time settings, software setup 2-5 TouchPad 2-3, 2-4, 4-6 travel battery connector 4-23, 4-25 turning off notebook 3-7 turning on notebook (Windows) 1-10 U USB cable 4-18, 4-20, 4-22 USB
-
 1
1 -
 2
2 -
 3
3 -
 4
4 -
 5
5 -
 6
6 -
 7
7 -
8
-
9
-
10
-
11
-
12
-
13
-
14
-
15
-
16
-
17
-
18
-
19
-
20
-
21
-
22
-
23
-
24
-
25
-
26
-
27
-
28
-
29
-
30
-
31
-
32
-
33
-
34
-
35
-
36
-
37
-
38
-
39
-
40
-
41
-
42
-
43
-
44
-
45
-
46
-
47
-
48
-
49
-
50
-
51
-
52
-
53
-
54
-
55
-
56
-
57
-
58
-
59
-
60
-
61
-
62
-
63
-
64
-
65
-
66
-
67
-
68
-
69
-
70
-
71
-
72
-
73
-
74
 |
 |

Getting Started
HP Compaq Notebook Series
Document Part Number: 393685-002
June 2005
This guide explains how to set up your hardware and software,
and begin using your notebook in Microsoft
®
Windows
®
.