HP Nx9110 Hardware Guide
HP Nx9110 - Compaq Business Notebook Manual
 |
UPC - 829160280288
View all HP Nx9110 manuals
Add to My Manuals
Save this manual to your list of manuals |
HP Nx9110 manual content summary:
- HP Nx9110 | Hardware Guide - Page 1
Guide HP Notebook Series Document Part Number: 355386-001 November 2003 This guide explains how to identify and use notebook hardware features, including connectors for external devices. It also includes power and environmental specifications, which might be helpful when traveling with the notebook - HP Nx9110 | Hardware Guide - Page 2
such products and services. Nothing herein should be construed as constituting an additional warranty. HP shall not be liable for technical or editorial errors or omissions contained herein. Hardware Guide HP Notebook Series First Edition November 2003 Reference Number: zx5000/zv5000/nx9100/nx9105 - HP Nx9110 | Hardware Guide - Page 3
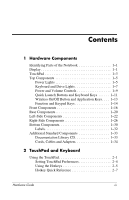
Parts of the Notebook 1-1 Display 1-1 TouchPad 1-3 Top Components 1-5 Power Lights 1-5 Keyboard and Drive Lights 1-7 Power and Volume Controls 1-9 Quick Launch Buttons and Keyboard Keys 1-11 Wireless 1-33 Documentation Library CD 1-33 Cords, Cables and Adapters 1-34 2 TouchPad and Keyboard - HP Nx9110 | Hardware Guide - Page 4
13 Using the Keypad 2-13 3 Battery Packs Running the Notebook on Battery Power 3-1 Inserting or Removing the Battery Pack 3-2 Charging a Battery Pack 3-4 Obtaining Accurate Charge Information 3-5 Accessing the Battery Charge Display 3-5 Placing the Power Meter Icon on the Taskbar 3-6 Managing - HP Nx9110 | Hardware Guide - Page 5
or DVD (Without Power 4-12 Inserting a Diskette (Select Models 4-14 Removing a Diskette (Select Models 4-15 Installing an Optional HP USB Digital Drive (Select Models 4-16 Installing an Optional SD Memory Card 4-17 Connecting an Optional Digital Drive to the USB Port 4-18 Inserting an Optional - HP Nx9110 | Hardware Guide - Page 6
the Wireless Connection Status 7-14 Making Bluetooth Wireless Connections (Select Models 7-15 8 Hardware Upgrades Obtaining Upgrades 8-1 Using PC Cards 8-2 Selecting a PC Card 8-2 Configuring a PC Card 8-2 Inserting a PC Card 8-3 Stopping and Removing a PC Card 8-5 vi Hardware Guide - HP Nx9110 | Hardware Guide - Page 7
Digital Media Card 8-10 Increasing Memory 8-11 Displaying Memory Information 8-11 Removing or Inserting a Memory Module 8-12 Replacing the Hard Drive 8-21 Finding More Upgrade Information 8-28 9 Specifications Operating Environment 9-1 Rated Input Power 9-2 Index Hardware Guide vii - HP Nx9110 | Hardware Guide - Page 8
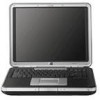
Components Identifying Parts of the Notebook Components included with the notebook vary by geographical region and by model. This guide includes illustrations for the different models and features. In each section, refer to the illustrations that closely match your notebook. The illustrations - HP Nx9110 | Hardware Guide - Page 9
Hardware Components Component Display release latch Description Opens the notebook. 1-2 Hardware Guide - HP Nx9110 | Hardware Guide - Page 10
up and down. Turns TouchPad on or off. 5 TouchPad light On: TouchPad is enabled. *For information about TouchPad settings, see Chapter 2, "TouchPad and Keyboard." Hardware Guide 1-3 - HP Nx9110 | Hardware Guide - Page 11
an external mouse. Turns TouchPad on or off. 4 TouchPad light On: TouchPad is enabled. *For information about TouchPad settings, see Chapter 2, "TouchPad and Keyboard." 1-4 Hardware Guide - HP Nx9110 | Hardware Guide - Page 12
on. Blinking: Notebook is in Standby. Off: Notebook is off or in Hibernation. On: Battery pack is charging. Blinking: Battery pack has reached a low-battery condition. Off: AC power is applied, with battery pack either fully charged or not installed, or no AC power is applied. Hardware Guide 1-5 - HP Nx9110 | Hardware Guide - Page 13
on. Blinking: Notebook is in Standby. Off: Notebook is off or in Hibernation. On: Battery pack is charging. Blinking: Battery pack has reached a low-battery condition. Off: AC power is applied, with battery pack either fully charged or not installed, or no AC power is applied. 1-6 Hardware Guide - HP Nx9110 | Hardware Guide - Page 14
as hard drive/optical drive activity light On: The internal hard drive or optical drive bay is being accessed. 4 Optical disk drive light On: The optical drive bay is being accessed. 5 5-in-1 Digital Media slot light On: Slot is accessing an optional (select models). digital media card. *For - HP Nx9110 | Hardware Guide - Page 15
to as hard drive/optical drive activity light On: The internal hard drive or the optical drive bay is being accessed. 4 Optical disk drive light On: The optical drive bay is being accessed. 5 5-in-1 Digital Media slot light On: Slot is accessing an optional (select models) digital media card - HP Nx9110 | Hardware Guide - Page 16
button to resume from Hibernation. ✎ If the system has stopped responding and Windows shutdown procedures cannot be used, press and hold the button for at least 4 seconds to turn off the notebook. 2 Volume buttons (3) Decrease, mute, and increase the system volume: ■ To decrease volume, use the - HP Nx9110 | Hardware Guide - Page 17
the button to resume from Hibernation. ✎ If the system has stopped responding and Microsoft® Windows® shutdown procedures cannot be used, press and hold the button for at least 4 seconds to turn off the notebook. 2 Mute button On: Audio is muted. 3 Volume buttons (2) Decrease and increase the - HP Nx9110 | Hardware Guide - Page 18
the Internet with one keystroke. The icon on each button represents the default destination. Buttons can be programmed to point to other locations. ✎ See the instructions on changing the destination of Quick Launch buttons in Chapter 2, "TouchPad and Keyboard." (continued) Hardware - HP Nx9110 | Hardware Guide - Page 19
Applications key Enables wireless functionality, but does not create a wireless connection. ✎ To set up and complete a wireless connection, additional hardware and software might be required. Displays Windows Start menu. Displays shortcut menu for any highlighted items. 1-12 Hardware Guide - HP Nx9110 | Hardware Guide - Page 20
key Description Enables wireless functionality, but does not create a wireless connection. ✎ To set up and complete a wireless connection, additional hardware and software might be required. Displays Windows Start menu. Displays shortcut menu for any highlighted items. Hardware Guide 1-13 - HP Nx9110 | Hardware Guide - Page 21
the function keys to perform additional system and application tasks. For example, pressing Fn+F8 increases screen brightness. 2 Function keys (11)* Perform system and application tasks. When combined with "Hotkey Quick Reference" section in Chapter 2, "TouchPad and Keyboard." 1-14 Hardware Guide - HP Nx9110 | Hardware Guide - Page 22
tasks. For example, pressing Fn+F8 increases screen brightness. 2 Function keys (11)* Perform system and application tasks. When combined with the Fn key, function keys F1 through F12 perform refer to the "Hotkey Quick Reference" section in Chapter 2, "TouchPad and Keyboard." Hardware Guide 1-15 - HP Nx9110 | Hardware Guide - Page 23
latch 2 Power/Standby light 3 IDE (Integrated Drive Electronics) light; also referred to as hard drive/optical drive activity light Description Opens the notebook. On: Notebook is turned on. Blinking: Notebook is in Standby. Off: Notebook is off or in Hibernation. On: The internal hard drive or - HP Nx9110 | Hardware Guide - Page 24
pack has reached a low-battery condition. Off: AC power is applied, with battery pack either fully charged or not installed, or no AC power is applied. 5 Stereo speakers (2) Produce stereo sound. 6 Volume and mute buttons (3) Decrease, mute, and increase the system volume: ■ To decrease volume - HP Nx9110 | Hardware Guide - Page 25
referred to as hard drive/optical drive activity light Description Produce stereo sound. On: Notebook is turned on. Blinking: Notebook is in Standby. Off: Notebook is off or in Hibernation. Opens the notebook. On: The internal hard drive or optical drive bay is being accessed. 1-18 Hardware Guide - HP Nx9110 | Hardware Guide - Page 26
Off: AC power is applied, with battery pack either fully charged or not installed, or no AC power is applied. Enables wireless functionality, but does not create a wireless connection. ✎ To set up and complete a wireless connection, additional hardware and software might be required. Hardware Guide - HP Nx9110 | Hardware Guide - Page 27
1 Power connector 2 Exhaust vent 3 External monitor connector 4 Parallel connector 5 RJ-11 jack Description Connects an AC adapter. Allows airflow to cool internal components. Additional vents are on the bottom of the notebook. Ä To prevent overheating, do not obstruct the vent. Do not allow a hard - HP Nx9110 | Hardware Guide - Page 28
Hardware Components Component 1 Power connector 2 Exhaust vent 3 External monitor connector 4 Parallel connector 5 RJ-11 jack (select models) Description Connects an AC adapter. Allows airflow to cool internal components. Additional vents are on the bottom of the notebook. Ä To prevent overheating - HP Nx9110 | Hardware Guide - Page 29
, SmartMedia, Memory Stick, and Memory Stick Pro. Light On: Slot is accessing digital media. 3 PC Card slot Supports an optional Type I or Type II 32-bit (CardBus) or 16-bit PC Card. 4 PC Card eject button Ejects an optional PC Card from the PC Card slot. (continued) 1-22 Hardware Guide - HP Nx9110 | Hardware Guide - Page 30
5 USB connectors (2) Connect optional USB device, such as printers. 6 Three drive configurations: Digital Bay: Supports optional optional Digital Bay, optional pocket-sized HP USB Digital Drive. diskette drive, no drive Diskette drive: Supports standard 1.4-MB diskette. No drive: No drive is - HP Nx9110 | Hardware Guide - Page 31
cable to the notebook. ✎ The purpose of security solutions is to act as a deterrent. These solutions do not prevent the product from being mishandled or stolen. Supports an optional Type I or Type II 32-bit (CardBus) or 16-bit PC Card. Ejects an optional PC Card from the PC Card slot. (continued - HP Nx9110 | Hardware Guide - Page 32
4 USB connectors (2) Connect optional USB devices, such as printers. 5 Three drive configurations: Digital Bay: Supports optional optional Digital Bay, optional pocket-sized HP USB Digital Drive. diskette drive, no drive Diskette drive: Supports standard 1.4-MB diskette. No drive: No drive is - HP Nx9110 | Hardware Guide - Page 33
Right-Side Components Component 1 Audio-out headphone jack 2 Audio-in microphone jack 3 USB connector 4 1394 connector (select models) Description Connects an optional headphone, a headset, or powered stereo speakers. Also connects the audio function of an audio/video device, such as a television - HP Nx9110 | Hardware Guide - Page 34
6 Expansion port 7 RJ-45 network jack 8 S-Video-out jack Hardware Components Provides wireless communication between the notebook and an optional IrDA-compliant device. Connects an optional HP Notebook Expansion Base. Connects an optional network cable. Connects an optional S-Video device, such as - HP Nx9110 | Hardware Guide - Page 35
Hardware Components Component Description 1 Wireless on/off light On: Wireless functionality is enabled, but wireless connection might not be configured. Off: No wireless device is active. 2 Volume buttons (3) and audio mute light Decrease, mute, and increase the system volume: ■ To decrease - HP Nx9110 | Hardware Guide - Page 36
an optional IEEE 1394 device, such as a camcorder. 7 Infrared port (select models) Provides wireless communication between the notebook and an optional IrDA-compliant device. 8 Expansion port Connects an optional HP Notebook Expansion Base. 9 RJ-45 network jack Connects an optional network - HP Nx9110 | Hardware Guide - Page 37
primary hard drive. 5 Memory compartment Contains 2 memory slots, one of which is accessible for an optional 128-MB, 256-MB, 512-MB, or 1024-MB memory module upgrade. As shipped, the memory slot might be filled with a replaceable memory module, or it might be vacant, depending on the notebook model - HP Nx9110 | Hardware Guide - Page 38
hard drive. Contains 2 memory slots, one of which is accessible for an optional 128-MB, 256-MB, 512-MB, or 1024-MB memory module upgrade. As shipped, the memory slot might be filled with a replaceable memory module, or it might be vacant, depending on the notebook model. Hardware Guide 1-31 - HP Nx9110 | Hardware Guide - Page 39
contains the Product Key. You might need this number to update or troubleshoot problems with the operating system. ■ The System label affixed to the inside of the battery compartment provides regulatory information about the notebook. ■ The Product identification label affixed to the inside of the - HP Nx9110 | Hardware Guide - Page 40
Library CD Your notebook Documentation Library CD includes the following guides: ■ Hardware Guide (the document you are viewing) ■ Software Guide ■ Maintenance, Shipping and Travel guide ■ Regulatory and Safety Notices ■ Safety & Comfort Guide ■ Troubleshooting guide ■ Modem and Networking - HP Nx9110 | Hardware Guide - Page 41
-specific modem adapter. Adapts the modem cable to a non-RJ-11 telephone jack. 5 Japan-specific outlet adapter Connects the AC adapter to a 2-prong (Japan only) electrical outlet. *Power cords and modem cables vary in appearance by region. **AC adapters vary by region. 1-34 Hardware Guide - HP Nx9110 | Hardware Guide - Page 42
2 TouchPad and Keyboard Using the TouchPad The TouchPad duplicates the functions of an optional external mouse. Hardware Guide 2-1 - HP Nx9110 | Hardware Guide - Page 43
and right buttons on an external mouse. ■ Use the TouchPad scroll pad 3 as you would the arrows on the scroll bars on the edges of windows. This moves the viewing area up, down, right, and left. ■ Use the TouchPad on/off button 4 to turn off the Touchpad. This also turns off - HP Nx9110 | Hardware Guide - Page 44
an external mouse. ■ Use the TouchPad on/off button 3 to turn off the Touchpad. This also turns off the TouchPad light 4. Identifying TouchPad components Hardware Guide 2-3 - HP Nx9110 | Hardware Guide - Page 45
and Keyboard Setting TouchPad Preferences The TouchPad is supported by the mouse software in the operating system. To access the Mouse Properties window, select Start > Control Panel > Printers and and mouse speed preferences, are available in the Mouse Properties window. 2-4 Hardware Guide - HP Nx9110 | Hardware Guide - Page 46
TouchPad and Keyboard Using the Hotkeys ✎ In this guide, the function keys are capitalized (Fn, F5). The function keys on your keyboard might key F2, the icons on F1 through F12 represent the hotkey functions available on your notebook. The F2 function key is not used. Identifying hotkeys Hardware - HP Nx9110 | Hardware Guide - Page 47
TouchPad and Keyboard Identifying hotkeys 2-6 Hardware Guide - HP Nx9110 | Hardware Guide - Page 48
factory. Default Function Open Help and Support Center. Not used. Open Microsoft audio CD or DVD. Play the previous track or chapter of an audio CD or DVD. Play the next track of an audio CD or DVD. Hotkey Fn+F1 Fn+F2 Fn+F3 Fn+F4 Fn+F5 Fn+F6 Fn+F7 Fn+F8 Fn+F9 Fn+F10 Fn+F11 Fn+F12 Hardware Guide - HP Nx9110 | Hardware Guide - Page 49
online resource tool for contacting an HP support specialist, for downloading the latest software driver updates and product information, and for learning more about using and maintaining your notebook. Press the Fn+F1 hotkey to open the Help and Support Center window. Open Internet Explorer (Fn+F3 - HP Nx9110 | Hardware Guide - Page 50
is saved in random access memory (RAM), the screen is cleared, and power is conserved. While the notebook is in Standby, the power/Standby light blinks. ■ To exit Standby, briefly press the power button, or tap the TouchPad, a key on the keyboard, or other pointing device component. The function of - HP Nx9110 | Hardware Guide - Page 51
brightness of the notebook screen. Decreasing brightness conserves power. Increase Screen Brightness (Fn+F8) Press the Fn+F8 hotkey to increase the brightness of the notebook screen. Play, Pause or Resume an Audio CD or DVD (Fn+F9) If an audio CD or DVD is inserted into the optical drive, press the - HP Nx9110 | Hardware Guide - Page 52
photo and imaging software application. Launches the default multimedia software application. Opens to Microsoft Internet Explorer or to a personal Web page you can customize. Hardware Guide 2-11 - HP Nx9110 | Hardware Guide - Page 53
and Keyboard Reprogramming the Quick Launch Buttons Your notebook Quick Launch buttons can be assigned to an assignments and schemes are set up, changed, or deleted in the Quick Launch buttons window. To reprogram a button: 1. Select Start > All Programs > Utilities > Quick 2-12 Hardware Guide - HP Nx9110 | Hardware Guide - Page 54
TouchPad and Keyboard Keypad The notebook has an internal numeric keypad and supports an optional external numeric keypad or an optional external keyboard that includes a numeric keypad. Using "Turning the Keypad On and Off" later in this chapter. Identifying the keypad keys Hardware Guide 2-13 - HP Nx9110 | Hardware Guide - Page 55
TouchPad and Keyboard Identifying the keypad keys 2-14 Hardware Guide - HP Nx9110 | Hardware Guide - Page 56
Fn+num lk 1 on the notebook to turn the keypad on. When the keypad is on, press Fn+num lk on the notebook (or the num lock key on to the system. ✎ The keypad cannot be turned on while an optional external keypad is connected to the USB connector on an optional HP Notebook Expansion Base. Identifying - HP Nx9110 | Hardware Guide - Page 57
TouchPad and Keyboard Identifying the Fn and num lock keys and the num lock light 2-16 Hardware Guide - HP Nx9110 | Hardware Guide - Page 58
turn num lock on or off on an external keypad as you work, press the num lock key on the external keypad (not on the notebook keypad). Hardware Guide 2-17 - HP Nx9110 | Hardware Guide - Page 59
The notebook switches between AC power and battery power according to the availability of an external AC power source, always preferring AC power. If the notebook contains a charged battery pack and is running on external AC power, the notebook will switch to battery power only if the AC adapter is - HP Nx9110 | Hardware Guide - Page 60
pack from the battery bay 3. Ä CAUTION: Do not restore power until the power/Standby light turns off, indicating that the notebook is in Hibernation. ■ Turn on the notebook or resume from Hibernation by briefly pressing the power button. Inserting or removing the battery pack 3-2 Hardware Guide - HP Nx9110 | Hardware Guide - Page 61
Battery Packs Inserting or removing the battery pack Hardware Guide 3-3 - HP Nx9110 | Hardware Guide - Page 62
to external power through an AC adapter. The battery pack charges whether the notebook is powered off or in use, but it charges faster when the notebook is powered off. When the notebook is in use, charging will take longer, depending on system activity. The battery light on the notebook stays on - HP Nx9110 | Hardware Guide - Page 63
on the taskbar, it will change shape according to whether a battery pack or AC power is the primary power source. Interpreting Battery Charge Displays Most battery charge displays report battery status in terms of percent of charge remaining and run time remaining. The run time remaining indicates - HP Nx9110 | Hardware Guide - Page 64
percent of a full charge, the notebook has reached a low-battery condition. When this condition occurs, the battery light blinks and a text warning message is displayed. The Power Options utility allows you to redefine a low-battery condition, set audio warnings, and change other power defaults. For - HP Nx9110 | Hardware Guide - Page 65
briefly in Standby, then shuts down. The power/Standby light turns off, and the notebook cannot save system memory to the hard drive. Verifying Hibernation Settings Hibernation, enabled by default, is an important safeguard in low-battery situations. To verify that Hibernation is enabled, access - HP Nx9110 | Hardware Guide - Page 66
battery pack when the notebook is in use. To charge the battery pack: 1. Insert the battery pack into the notebook. 2. Connect the notebook to external power through an AC adapter. (The battery light turns on.) The battery light turns off when the battery pack is fully charged. 3-8 Hardware Guide - HP Nx9110 | Hardware Guide - Page 67
support check box. Discharging the Battery Pack Ä CAUTION: If you plan to leave the notebook unattended during discharge, save your work before starting the discharge procedure. After the battery light turns off, which indicates that the battery pack is fully charged, begin discharging the battery - HP Nx9110 | Hardware Guide - Page 68
section extends the run time of the battery pack. Conserving Power as You Work To conserve power while you use the notebook: ■ Plug in the AC adapter, especially if you are using a CD-ROM or DVD-ROM drive, or any external connections. ■ Turn off wireless and local area network (LAN) connections and - HP Nx9110 | Hardware Guide - Page 69
OK. For more details about using power options, refer to the "Power" chapter in the Software Guide on the this CD. Storing a Battery Pack Ä CAUTION: To prevent damage to the battery pack, do not expose it to high temperatures for extended periods of time. If the notebook will be unused and unplugged - HP Nx9110 | Hardware Guide - Page 70
dispose of or recycle battery packs by using the public collection system or by returning them to HP, your authorized HP, or their agents. ■ In other regions, refer to the Worldwide Telephone Numbers booklet included with the notebook to contact a reseller or service provider and request information - HP Nx9110 | Hardware Guide - Page 71
of data files and software, such as system files, applications, and drivers. A hard drive is sometimes called a hard disk drive. Optional disk drives (select models) include diskette drives. A diskette drive is sometimes called a floppy disk drive or floppy drive. Drives are often used to store or - HP Nx9110 | Hardware Guide - Page 72
pocket-sized, SD (Secure Digital) Memory Card drives for storing and transferring files such as digital pictures, music, video, or large data files. An HP USB Digital Drive can be connected to an optional Digital Bay or to a USB port with the HP USB Digital Drive cable either retracted or extended - HP Nx9110 | Hardware Guide - Page 73
specific procedures are included with the procedures. Caring for Drives Ä CAUTION: To prevent damage to the notebook or a drive and loss of work: ■ Do not remove the internal hard drive except for repair or replacement. ■ Do not try to remove a Digital Drive while it is still in use. ■ Electrostatic - HP Nx9110 | Hardware Guide - Page 74
want to continue?" Select No. Resume from Hibernation or Standby by pressing the power button briefly. Audio and video might resume or you might need to restart the drive media. For details about Standby and Hibernation, refer to the "Power" chapter in the Software Guide on this CD. 4-4 Hardware - HP Nx9110 | Hardware Guide - Page 75
AutoPlay is enabled or disabled through the operating system: 1. Select Start > My Computer. 2. Right-click the optical drive. 3. Select Properties > AutoPlay, and follow the instructions on the screen. Canceling AutoPlay on an Audio CD To prevent an audio CD from opening when AutoPlay is enabled - HP Nx9110 | Hardware Guide - Page 76
microdrive PC Card or an external hard drive. Some notebook models include an optional diskette drive or an optional HP USB Digital Drive. The HP USB Digital Drive can be connected to one of the USB connectors or to the optional Digital Bay. An optional disk drive can also be added to the system by - HP Nx9110 | Hardware Guide - Page 77
IDE Drive Light The IDE (Integrated Drive Electronics) light turns on when the internal hard drive or an optical drive is being accessed. The light is also referred to as the hard drive/optical drive activity light. Identifying the IDE drive light Identifying the IDE drive light Hardware Guide - HP Nx9110 | Hardware Guide - Page 78
DVD and exit media software before inserting or removing an optical drive. Inserting a CD or DVD 1. Turn on the notebook. 2. Press the release button 1 on the drive bezel to release the media tray, and then pull the the media tray 4. Inserting a CD or DVD into an optical drive 4-8 Hardware Guide - HP Nx9110 | Hardware Guide - Page 79
Drives Inserting a CD or DVD into an optical drive Hardware Guide 4-9 - HP Nx9110 | Hardware Guide - Page 80
Removing a CD or DVD (With Power) 1. Turn on the notebook. 2. Press the release button 1 on the drive bezel to release the media tray, and then pull the tray out until it 5. Place the disc in a protective case. Removing a CD or DVD from an optical drive when power is available 4-10 Hardware Guide - HP Nx9110 | Hardware Guide - Page 81
Drives Removing a CD or DVD from an optical drive when power is available Hardware Guide 4-11 - HP Nx9110 | Hardware Guide - Page 82
CD or DVD (Without Power) If the notebook is turned off or if no power is available, the release button on the drive will not work. To remove a disc from an optical drive without using the release case. Removing a CD or DVD from an optical drive when power is not available 4-12 Hardware Guide - HP Nx9110 | Hardware Guide - Page 83
Drives Removing a CD or DVD from an optical drive when power is not available Hardware Guide 4-13 - HP Nx9110 | Hardware Guide - Page 84
(Select Models) To insert a diskette into a diskette drive, gently slide the diskette, label side up, into the drive until it clicks into place. The media eject button extends when the diskette is correctly inserted. Identifying the media eject button on a diskette drive 4-14 Hardware Guide - HP Nx9110 | Hardware Guide - Page 85
the media eject button on a diskette drive Removing a Diskette (Select Models) To remove a diskette from a diskette drive: 1. Press the media eject button on the drive to eject the diskette. 2. Slide the diskette from the drive. 3. Place the diskette in a protective case. Hardware Guide 4-15 - HP Nx9110 | Hardware Guide - Page 86
, music, video, or data files. An HP USB Digital Drive can be connected to the optional Digital Bay or to the USB port. An SD Memory Card must be installed in the HP USB Digital Drive before you can install the Digital Drive in your notebook. Depending on your notebook model, you might or might not - HP Nx9110 | Hardware Guide - Page 87
Drives Installing an Optional SD Memory Card To install an SD Memory Card into the Digital Drive: 1. Remove the cap of the Digital Drive. 2. Insert an SD Memory Card into the SD slot of the Digital Drive. Hardware Guide 4-17 - HP Nx9110 | Hardware Guide - Page 88
or extended. To connect the Digital Drive with the USB cable retracted: 1. Ensure that you have installed an SD Memory Card into the Digital Drive. 2. Insert the USB connector on the Digital Drive into the USB port on your notebook. Connecting the Digital Drive to the USB port 4-18 Hardware Guide - HP Nx9110 | Hardware Guide - Page 89
Drives Connecting the Digital Drive to the USB port Hardware Guide 4-19 - HP Nx9110 | Hardware Guide - Page 90
Drives To connect the optional Digital Drive with the USB cable extended: 1. Rotate the USB cable until it is fully extended. Extending the USB Cable 4-20 Hardware Guide - HP Nx9110 | Hardware Guide - Page 91
Drives 2. Insert the connector on the USB cable into the USB port on your notebook. Connecting the extended USB cable to the USB Port Connecting the extended USB cable to the USB Port Hardware Guide 4-21 - HP Nx9110 | Hardware Guide - Page 92
Digital Drive into the optional Digital Bay: 1. Ensure that you have installed an SD Memory Card into the Digital Drive. 2. Gently insert the Digital Drive, label side up, into the Digital Bay until the drive clicks into place. Inserting the Digital Drive into the Digital Bay 4-22 Hardware Guide - HP Nx9110 | Hardware Guide - Page 93
Drives I Inserting the Digital Drive into the Digital Bay Hardware Guide 4-23 - HP Nx9110 | Hardware Guide - Page 94
Digital Drive from an Optional Digital Bay To remove the optional Digital Drive from the optional Digital Bay: 1. Press the Digital Drive release button 1 to eject the Digital Drive. 2. Remove the Digital Drive from the bay 2. Removing the Digital Drive from the Digital Bay 4-24 Hardware Guide - HP Nx9110 | Hardware Guide - Page 95
Drives Removing the Digital Drive from the Digital Bay Finding Optional Drive Software Information Software you need to play CDs and DVDs is available on the notebook. For more information, refer to the "Multimedia" chapter in the Software Guide on this CD. Hardware Guide 4-25 - HP Nx9110 | Hardware Guide - Page 96
5 Audio and Video Adjusting Volume Volume can be adjusted by using the volume buttons on the notebook or by accessing the volume control software. Volume adjustment is also available ■ To mute or restore volume, press the middle volume button 2. Identifying the volume buttons Hardware Guide 5-1 - HP Nx9110 | Hardware Guide - Page 97
the volume buttons Using the Volume Control Icon To place the Volume Control icon on the taskbar, select Start > Control Panel > Sounds, Speech, and Audio Devices > Volume. Select the Place Volume icon in the taskbar check box. To adjust volume, select the icon. To increase or decrease volume, drag - HP Nx9110 | Hardware Guide - Page 98
speakers play stereo sound from applications, the operating system, games, drive media, the Internet, and other sources. ✎ If an external device, such as a headset, is connected to the audio-out jack, sometimes called the line-out jack, the internal speakers are disabled. Identifying the internal - HP Nx9110 | Hardware Guide - Page 99
Connecting an Audio Device Identifying Audio Jacks The notebook has 2 audio jacks: ■ The audio-out jack 1, sometimes called the line-out jack, connects a headset, headphones, or external stereo speakers. The audio-out jack is also used to connect the audio functions of an audio/video device such as - HP Nx9110 | Hardware Guide - Page 100
and Video Identifying audio jacks Using the Microphone Jack Your notebook is equipped with a stereo microphone jack. Using sound recording application software and an and right channels. When connecting a microphone to the microphone jack, use a microphone with a 3.5-mm plug. Hardware Guide 5-5 - HP Nx9110 | Hardware Guide - Page 101
the volume before putting on headphones or a headset. Ä CAUTION: To prevent possible damage to an external device, do not plug a monaural plug into the audio-out jack. When connecting a device to the audio-out jack: ■ Use only a 3.5-mm stereo plug. ■ For best sound quality, use 24-ohm to 32-ohm - HP Nx9110 | Hardware Guide - Page 102
Video Connecting an S-Video Device Connecting the Audio The S-Video-out jack supports video signals only. If you are setting up a configuration that combines audio and video functions, such as playing a DVD movie on your notebook and displaying it on your television screen, you will need a standard - HP Nx9110 | Hardware Guide - Page 103
Audio and Video Identifying the S-Video-out jack Identifying the S-Video-out jack 5-8 Hardware Guide - HP Nx9110 | Hardware Guide - Page 104
✎ To conserve power, turn off the device before disconnecting the device from the system. Changing the Color Television Format Color television formats are modes by which television video signals are sent and received. To send signals between the notebook and a television, both the notebook and the - HP Nx9110 | Hardware Guide - Page 105
Audio and Video To change the color television format: 1. Select Start > Control Panel > Appearance and Themes > Display > Settings. Select the or country, select Country/Region, select a location from the list, and select the OK button. 4. At the prompt, restart the notebook. 5-10 Hardware Guide - HP Nx9110 | Hardware Guide - Page 106
a standard external device to the notebook: 1. If you are connecting a powered device, be sure that the device is turned off. 2. Connect the device to the correct jack or connector on the notebook. 3. If you are connecting a powered device, plug the device power cord into a grounded electrical - HP Nx9110 | Hardware Guide - Page 107
optional HP Notebook Expansion Base, or to other USB devices. Hubs can support several USB devices. ■ Powered hubs must be connected to external power. ■ Unpowered hubs must be connected either to a USB connector on the notebook or to a port on a powered hub. The USB connectors support USB 2.0 and - HP Nx9110 | Hardware Guide - Page 108
exception: by default, USB devices do not function unless an operating system that supports USB is loaded. Windows XP Home and Windows XP Professional do support USB. To use a USB keyboard or hub that is connected to a USB connector on the notebook during startup (before Windows loads) or in a non - HP Nx9110 | Hardware Guide - Page 109
Linking to an Infrared Device (Select Models) Some notebook models are IrDA-compliant and can communicate with another infrared-equipped device that is also IrDA-compliant. The IrDA connection speed standard is 4 megabits per second (Mbps). The infrared port supports low-speed connections up - HP Nx9110 | Hardware Guide - Page 110
to the operating system Help files. To set up infrared devices for optimal transmission: ■ Prepare the infrared ports on both devices for transmission. ✎ The notebook infrared port is fully enabled when the notebook is turned on. ■ Position the devices so that their infrared ports face each other - HP Nx9110 | Hardware Guide - Page 111
wireless device (such as a cell phone, headphones, or audio device) do not aim at either port. ■ During the transmission, do not move either device and do not allow objects or movement to disrupt the beam. Avoiding Standby While Using Infrared If the notebook power button. When the notebook resumes - HP Nx9110 | Hardware Guide - Page 112
External Device Connections Connecting an Optional Cable Lock ✎ The purpose of security solutions is to lock 3. 3. Insert the cable lock (with the key inserted) into the security cable slot 4 on the notebook. 4. Turn the key counterclockwise and remove the key. Connecting a security lock Hardware - HP Nx9110 | Hardware Guide - Page 113
External Device Connections Connecting a security lock For more information about other security features of your notebook, refer to the "Security" chapter in the Software Guide on this CD. 6-8 Hardware Guide - HP Nx9110 | Hardware Guide - Page 114
and receiving email messages ■ Windows Fax Console, for sending and receiving faxes For best performance, you can connect to any Internet service provider (ISP) or modem network that has V.90 or V.92 interoperable modems. Check with your ISP for a list of telephone numbers that support V.90 or V.92 - HP Nx9110 | Hardware Guide - Page 115
RJ-45 network jack. Å WARNING: Connecting the notebook to a systems might resemble RJ-11 telephone jacks, but they are not compatible with the modem. A modem must be connected to an analog telephone line. The maximum speed for faxing is 14.4 Kbps, even though the modem is capable of downloading - HP Nx9110 | Hardware Guide - Page 116
Modem and Network Connections Connecting the Modem to an RJ-11 Jack Refer to one of the following illustrations to connect an RJ-11 modem cable. Connecting the RJ-11 modem cable Hardware Guide 7-3 - HP Nx9110 | Hardware Guide - Page 117
Modem and Network Connections Connecting the RJ-11 modem cable 7-4 Hardware Guide - HP Nx9110 | Hardware Guide - Page 118
have an RJ-11 telephone jack: 1. Plug the modem cable into the RJ-11 jack on the notebook 1. 2. Plug the modem cable into the country-specific modem adapter 2. 3. Plug the country-specific modem adapter into the telephone jack 3. Connecting a modem cable using a modem adapter Hardware Guide 7-5 - HP Nx9110 | Hardware Guide - Page 119
Modem and Network Connections Connecting a modem cable using a modem adapter Special Restrictions in Certain Countries ■ Many countries impose a blackout period after a modem repeatedly fails to connect to a service provider. The number of failed attempts and the period you must wait before trying - HP Nx9110 | Hardware Guide - Page 120
Advanced tab in the space for extra settings. Connecting to a Local Area Network (LAN) Your notebook has an RJ-45 network jack and preinstalled 10BASE-T/100BASE-TX Ethernet circuity. The notebook supports network speeds up to 10 Mbps when connected to a 10BASE-T network and 100 Mbps when connected - HP Nx9110 | Hardware Guide - Page 121
To connect to a LAN: 1. Check that the existing LAN supports Ethernet 10BASE-T/100BASE-TX connections. 2. Plug the purchased network cable into the notebook RJ-45 jack 1. 3. Plug the other end into the LAN network jack 2. 4. Windows automatically detects and sets up a LAN connection. To edit - HP Nx9110 | Hardware Guide - Page 122
Connecting an RJ-45 network cable See Windows Help for information about setting up and using LAN connections. Select Start > Help and Support. Contact your network administrator for network information. Turning a Network Connection Off and On To conserve power, turn off a network connection you are - HP Nx9110 | Hardware Guide - Page 123
Modem and Network Connections Making Wireless Network Connections (Select Models) Some notebook models are equipped with a wireless network device that can connect by radio signals to an 802.11a, 802.11b, or 802.11g wireless local area network (WLAN) and then access computers and other resources on - HP Nx9110 | Hardware Guide - Page 124
the wireless antenna Å WARNING: Exposure to Radio Frequency Radiation The radiated output power of this device is below the FCC radio frequency exposure limits. Nevertheless, the device should cm (8 inches) during normal operation, including when the notebook display is closed. Hardware Guide 7-11 - HP Nx9110 | Hardware Guide - Page 125
are examples of devices that use wireless communication. The use of some devices might be restricted in certain situations or environments, such as when traveling in an airplane. If in doubt, be sure to ask for authorization before turning on your notebook wireless networking. Certain countries - HP Nx9110 | Hardware Guide - Page 126
Modem and Network Connections Putting the notebook in Standby or Hibernation, or shutting it down, also turns off the wireless function. Pressing the Wireless On/Off button Pressing the Wireless On/Off button Hardware Guide 7-13 - HP Nx9110 | Hardware Guide - Page 127
For details on how to configure your notebook for wireless networking, open the Windows Help and Support Center and enter "wireless" as a search topic. This provides you with overviews, tutorials, articles, and step-by-step information on setting up your wireless device. To check the status of your - HP Nx9110 | Hardware Guide - Page 128
use it to make short-range radio connections to a wireless personal area network (PAN) and access other Bluetooth-compatible devices, such as other notebooks, cell phones, and printers. For details on how to use your notebook for Bluetooth wireless networking, refer to the Bluetooth CD included with - HP Nx9110 | Hardware Guide - Page 129
or HP service provider by referring to the Worldwide Telephone Numbers booklet (English only) included with the notebook. Compatible hardware upgrade information is also available online by accessing the Help and Support Center on your notebook. Press Fn+F1 to open the Help and Support Center window - HP Nx9110 | Hardware Guide - Page 130
If you are instructed by the documentation included with your PC Card to install device drivers: ■ Do not install other software, such as card services, socket services, or enablers, that might also be supplied by the PC Card manufacturer. ■ Install only the device drivers for your operating system - HP Nx9110 | Hardware Guide - Page 131
Hardware Upgrades Inserting a PC Card Ä CAUTION: To prevent damage to the PC Card connectors, use minimal force when inserting a PC Card into a PC Card slot. 1. Hold the PC Card label-side up with the connectors facing the notebook. 2. Gently slide the card into the slot until it is seated. - HP Nx9110 | Hardware Guide - Page 132
Hardware Upgrades Inserting a PC Card 8-4 Hardware Guide - HP Nx9110 | Hardware Guide - Page 133
Hardware Upgrades Stopping and Removing a PC Card Ä CAUTION: To prevent loss of work or an unresponsive system, stop the PC Card before removing it. ✎ Stopping a PC Card, even if it is not in use, conserves power. 1. To stop a PC Card, you might need to select the Safely Remove Hardware icon on the - HP Nx9110 | Hardware Guide - Page 134
Hardware Upgrades Removing a PC Card Using Digital Media Cards (Select Models) Optional digital media cards are removable storage devices that provide a convenient method of storing data and sharing it with other devices such as PDAs, cameras, and other memory card-equipped PCs. The 5-in-1 Digital - HP Nx9110 | Hardware Guide - Page 135
a Digital Media slot. To insert a digital media card: 1. Hold the digital media card label-side up (finger-side up for SD cards) with the connectors facing the notebook. 2. Slide the media card into the Digital Media slot until the card is seated. Inserting a digital media card Hardware Guide 8-7 - HP Nx9110 | Hardware Guide - Page 136
Hardware Upgrades Inserting a digital media card 8-8 Hardware Guide - HP Nx9110 | Hardware Guide - Page 137
applications that are using it. (To stop a data transfer, select the cancel button in the operating system Copying window.) 2. Push the media card in fully, and then release. The media card will eject 1. 3. Slide the media card out of the slot 2. Removing a digital media card Hardware Guide 8-9 - HP Nx9110 | Hardware Guide - Page 138
Upgrades Removing a digital media card Disabling an Optional Digital Media Card A digital media card inserted into the Digital Media slot uses power even when the card is not in use. Disabling the card conserves power. To disable a media card: » Select Start > My Computer. Right-click the drive - HP Nx9110 | Hardware Guide - Page 139
upgrade. Depending on the notebook model, the notebook might ship with a vacant memory slot. On other models the memory slot contains a preinstalled memory module that can be replaced at any time. Displaying Memory Information When RAM is increased, the operating system increases the hard drive - HP Nx9110 | Hardware Guide - Page 140
should be opened only by an authorized HP service provider. Å WARNING: To prevent exposure to electrical shock and damage to the notebook, shut down the notebook, unplug the power cord, and remove all battery packs before installing a memory module. Ä CAUTION: To prevent electrostatic discharge from - HP Nx9110 | Hardware Guide - Page 141
Hardware Upgrades 5. Turn the notebook upside down. 6. Loosen the screw that secures the memory compartment cover 1, and then tilt and remove the cover 2. Opening the memory compartment Hardware Guide 8-13 - HP Nx9110 | Hardware Guide - Page 142
Hardware Upgrades Opening the memory compartment 8-14 Hardware Guide - HP Nx9110 | Hardware Guide - Page 143
Hardware Upgrades 7. Remove or insert the memory module. To remove a memory module: a. Pull away the retention clips on each side of the module 1. (The module tilts up.) b. Grasp the edges of the memory module and gently pull it out of the memory slot 2. c. To protect a memory module after removal, - HP Nx9110 | Hardware Guide - Page 144
Hardware Upgrades Removing a memory module 8-16 Hardware Guide - HP Nx9110 | Hardware Guide - Page 145
Upgrades To insert a memory module: a. Align the keyed (notched) edge of the module with the keyed area in the expansion slot 1. b. From a 45-degree angle, press the module into the slot until it is seated 2. c. Press the module down until the retention clips snap into place. Inserting a memory - HP Nx9110 | Hardware Guide - Page 146
Hardware Upgrades Inserting a memory module 8-18 Hardware Guide - HP Nx9110 | Hardware Guide - Page 147
Upgrades 8. Align the tabs on the memory compartment cover with the cover slots on the notebook. 9. Tilt the cover down until it is seated 1. 10. Reinsert and tighten the screw that secures the cover to the notebook 2. 11. Replace the battery pack, reconnect AC power, and then restart the notebook - HP Nx9110 | Hardware Guide - Page 148
Hardware Upgrades Closing the memory compartment 8-20 Hardware Guide - HP Nx9110 | Hardware Guide - Page 149
devices connected to the notebook. 3. Disconnect the power cord or other external power source. 4. Remove any battery packs in the notebook. 5. Turn the notebook upside down. 6. Loosen the 2 hard drive assembly retaining screws 1, and then tilt the hard drive upward 2. Loosening the hard drive - HP Nx9110 | Hardware Guide - Page 150
Hardware Upgrades Loosening the hard drive assembly retaining screws 8-22 Hardware Guide - HP Nx9110 | Hardware Guide - Page 151
Hardware Upgrades 7. Remove the hard drive assembly from the bay. 8. Remove the 4 hard drive bracket screws 1. 9. Remove the hard drive from the bracket 2. Removing the hard drive from the hard drive bracket Hardware Guide 8-23 - HP Nx9110 | Hardware Guide - Page 152
Hardware Upgrades Removing the hard drive from the hard drive bracket 8-24 Hardware Guide - HP Nx9110 | Hardware Guide - Page 153
Hardware Upgrades 10. Insert the new hard drive into the hard drive bracket 1. 11. Replace the 4 hard drive bracket screws 2. Inserting the hard drive into the hard drive bracket Hardware Guide 8-25 - HP Nx9110 | Hardware Guide - Page 154
Hardware Upgrades Inserting the hard drive into the hard drive bay 8-26 Hardware Guide - HP Nx9110 | Hardware Guide - Page 155
Hardware Upgrades 12. Reinsert the hard drive assembly into the hard drive bay until it is seated 1. 13. Tighten the 2 hard drive assembly retaining screws 2. Inserting the hard drive assembly into the hard drive bay Inserting the hard drive assembly into the hard drive bay Hardware Guide 8-27 - HP Nx9110 | Hardware Guide - Page 156
Hardware Upgrades Finding More Upgrade Information For additional information about installing, removing, or operating an optional device, refer to the documentation included with the device. 8-28 Hardware Guide - HP Nx9110 | Hardware Guide - Page 157
,192 m U.S. 32° to 95°F 41° to 95°F -4° to 140°F 10% to 90% 5% to 95% -50 to 10,000 ft -50 to 40,000 ft Hardware Guide 9-1 - HP Nx9110 | Hardware Guide - Page 158
Rated Input Power Input Power Rating Operating voltage 100-240 VAC RMS Operating frequency range 50 to 60 Hz AC When powered by a DC source 18.5 Vdc 6.5 A ✎ This product is designed for IT power systems in Norway with phase-to-phase voltage not exceeding 240 Vrms. 9-2 Hardware Guide - HP Nx9110 | Hardware Guide - Page 159
Index A AC adapter disconnecting 3-1 identifying 1-34 adapter, modem 7-5 airport security devices 4-3 altitude specifications 9-1 AT commands 7-7 audio devices, connecting 5-4 audio-out jack connecting devices 5-6 location 5-4 AutoPlay/Autorun 4-5 B battery bay 1-31 battery light 1-5, 1-6, 1-17, 1- - HP Nx9110 | Hardware Guide - Page 160
26, 1-29 expansion 1-27, 1-29 drive 4-3 external monitor 1-20, 1-21 modem 7-2 parallel 1-20, 1-21 power 1-20, 1-21 USB 1-23, 1-26, 1-29, 6-2 See also infrared port; jacks conserving power, tips 3-10 cords 1-34 country-specific modem cable adapter 7-5 D digital media cards 8-6 Digital Media slot 1-22 - HP Nx9110 | Hardware Guide - Page 161
2-8 HP USB Digital Drives connecting to USB port 4-18 inserting into optional Digital Bay 4-22 inserting SD card 4-16 installing 4-16 hub, USB 6-2 I IDE light 1-7, 1-8, 1-16, 1-18 identifying notebook parts 1-1 infrared port linking to 6-4 location 1-27, 1-29 See also connectors; jacks J jacks audio - HP Nx9110 | Hardware Guide - Page 162
16, 1-18, 4-7 keyboard 1-7, 1-8 num lock 1-7, 1-8, 2-15 power 1-5, 1-6 power/Standby 1-5, 1-6, 1-16, 1-18 wireless on/off 1-28, 7-12 line-out jack. See audio-out jack lock, security cable (optional) 6-7 M media hotkeys 2-10 media, drive affected by airport security 4-3 caring for 4-3, 4-4 displaying - HP Nx9110 | Hardware Guide - Page 163
external devices (optional) pointing devices setting preferences 2-4 TouchPad 2-2, 2-3 power conserving 3-10 light 1-5, 1-6 Power Options window 3-6 rated input 9-2 resolving low-battery conditions 3-7 switching between AC and battery 3-1 power button 1-9, 1-10 power cord 1-34 power/Standby light - HP Nx9110 | Hardware Guide - Page 164
Video cable, connecting video 5-7 S-Video-out jack 1-27, 1-29, 5-7 system label 1-32 T television (optional) changing color format 5-9 connecting audio 5-4 temperature, operating 9-1 top components 1-5 TouchPad. See pointing devices traveling with notebook battery pack temperature 3-11 environmental - HP Nx9110 | Hardware Guide - Page 165
1-20, 1-21, 1-22, 1-30, 1-31 video device connecting audio 5-7 S-Video-out jack 5-8 turning on and off 5-9 volume, adjusting 5-1 W Windows applications key 1-12, 1-13 Windows logo key 1-12 wireless antenna 7-10 wireless certification label 1-32 wireless device connecting LAN 7-7 turning on and off
-
 1
1 -
 2
2 -
 3
3 -
 4
4 -
 5
5 -
 6
6 -
 7
7 -
8
-
9
-
10
-
11
-
12
-
13
-
14
-
15
-
16
-
17
-
18
-
19
-
20
-
21
-
22
-
23
-
24
-
25
-
26
-
27
-
28
-
29
-
30
-
31
-
32
-
33
-
34
-
35
-
36
-
37
-
38
-
39
-
40
-
41
-
42
-
43
-
44
-
45
-
46
-
47
-
48
-
49
-
50
-
51
-
52
-
53
-
54
-
55
-
56
-
57
-
58
-
59
-
60
-
61
-
62
-
63
-
64
-
65
-
66
-
67
-
68
-
69
-
70
-
71
-
72
-
73
-
74
-
75
-
76
-
77
-
78
-
79
-
80
-
81
-
82
-
83
-
84
-
85
-
86
-
87
-
88
-
89
-
90
-
91
-
92
-
93
-
94
-
95
-
96
-
97
-
98
-
99
-
100
-
101
-
102
-
103
-
104
-
105
-
106
-
107
-
108
-
109
-
110
-
111
-
112
-
113
-
114
-
115
-
116
-
117
-
118
-
119
-
120
-
121
-
122
-
123
-
124
-
125
-
126
-
127
-
128
-
129
-
130
-
131
-
132
-
133
-
134
-
135
-
136
-
137
-
138
-
139
-
140
-
141
-
142
-
143
-
144
-
145
-
146
-
147
-
148
-
149
-
150
-
151
-
152
-
153
-
154
-
155
-
156
-
157
-
158
-
159
-
160
-
161
-
162
-
163
-
164
-
165
 |
 |

Hardware Guide
HP Notebook Series
Document Part Number: 355386-001
November 2003
This guide explains how to identify and use notebook hardware
features, including connectors for external devices. It also
includes power and environmental specifications, which might
be helpful when traveling with the notebook.