HP PageWide XL 4600 User Guide
HP PageWide XL 4600 Manual
 |
View all HP PageWide XL 4600 manuals
Add to My Manuals
Save this manual to your list of manuals |
HP PageWide XL 4600 manual content summary:
- HP PageWide XL 4600 | User Guide - Page 1
HP PageWide XL 4500/4600 Printer and MFP User Guide - HP PageWide XL 4600 | User Guide - Page 2
to change without notice. The only warranties for HP products and services are set forth in the express warranty statement accompanying such products and services. Nothing herein should be construed as constituting an additional warranty. HP shall not be liable for technical or editorial errors - HP PageWide XL 4600 | User Guide - Page 3
...7 Front panel ...8 HP Utility ...12 Embedded Web Server ...13 Turn the printer on and off ...14 Internal prints ...15 Preparing your printer ...16 Accessibility ...35 Other sources of information ...35 2 Paper handling ...36 General information and tips ...37 Supported paper types ...38 Paper - HP PageWide XL 4600 | User Guide - Page 4
...89 Troubleshooting ...89 5 Sending a job to print ...94 Print from the driver ...95 Print from a USB flash drive ...98 Print by email (HP ePrint) accuracy ...151 Manual printhead alignment ...151 10 Maintenance ...153 Check printer status ...154 Clean the exterior of the printer ...154 iv - HP PageWide XL 4600 | User Guide - Page 5
How to order ...169 List of accessories ...169 Non-HP accessories ...170 12 When you need help ...171 Request support ...172 Customer Self-Repair ...172 Service information ...172 13 Retrieving printer usage information ...173 Get printer usage and accounting information ...174 Get usage information - HP PageWide XL 4600 | User Guide - Page 6
vi ENWW - HP PageWide XL 4600 | User Guide - Page 7
1 Introduction ● Welcome to your printer ● Safety precautions ● Main components ● Front panel ● HP Utility ● Embedded Web Server ● Turn the printer on and off ● Internal prints ● Preparing your printer ● Accessibility ● Other sources of information ENWW 1 - HP PageWide XL 4600 | User Guide - Page 8
MFP model. Some major features: ● HP PageWide XL 4500 printer series: Print up to 12 D/A1 pages/min in monochrome and color; first page out in 20 s. ● HP PageWide XL 4600 printer individual drivers by using the HP DesignJet Universal Print Driver. Safety precautions Before using your printer, read - HP PageWide XL 4600 | User Guide - Page 9
) operate at hazardous voltages capable of causing death or serious personal injury. The printer uses one power cord. Unplug the power cord before servicing the printer. To avoid the risk of electric shock: ● The printer must be connected to earthed mains outlets only. ● Do not attempt to dismantle - HP PageWide XL 4600 | User Guide - Page 10
only the power cord supplied by HP with the printer. Do not use a damaged printer. ● Take care that sleeves or gloves do not get caught in the printer's moving parts. ● Do not operate the printer with covers bypassed. ● Do not try to dismantle the cutter assembly: refer servicing to qualified service - HP PageWide XL 4600 | User Guide - Page 11
handling HP recommends that you wear gloves when handling the ink maintenance cartridge or waste container. Warnings and cautions The following symbols are used in this manual to ensure the proper use of the printer and to prevent the printer from being damaged. Follow the instructions marked with - HP PageWide XL 4600 | User Guide - Page 12
and safety instructions. Crush hazard. Keep hands away from the moving service carriage. This label is located by the access to the service carriage, cleaning container and by the access to the service carriage. Do not use the drawers as stairs: the printer could overbalance. This label is located on - HP PageWide XL 4600 | User Guide - Page 13
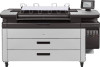
Main components The following front and rear views of the printer illustrate the main components. Front view 1. Print bar 2. Front panel 3. Ink cartridges 4. Paper access front cover 5. Drawer 6. Maintenance cartridge Rear view 1. Output module 2. Paper output 3. - HP PageWide XL 4600 | User Guide - Page 14
. It can also be tilted to minimize reflections. It gives you complete control of your printer: from the front panel, you can view information about the printer, change printer settings, monitor printer status, and perform tasks such as supplies replacement and calibrations. The front panel displays - HP PageWide XL 4600 | User Guide - Page 15
the screen, or tapping the appropriate button at the bottom of the screen: ● The first main screen provides direct access to the important printer functions, depending on your printer model and accessories. Non-MFP screen MFP screen ● The all-app screen displays a list of all apps available in your - HP PageWide XL 4600 | User Guide - Page 16
glance supplies such as ink and paper, the job currently being printed, and the job queue. Printer alerts The printer has a beacon located on top of the front panel; it gives a summary of the printer status that can be seen from a distance. IMPORTANT: The information provided in the beacon is for - HP PageWide XL 4600 | User Guide - Page 17
problem persists, contact your support representative. While printing, you will see a yellow instead of a white light. Red light The printer is unable to print and needs attention, or a major subsystem of the printer a page into the scanner (MFP only) The printer wakes up in several seconds, - HP PageWide XL 4600 | User Guide - Page 18
to collectively as the HP Utility in this guide. ● Under Windows, start the HP DesignJet Utility from the icon on your taskbar or from Start > All Programs > HP > HP DesignJet Utility > HP DesignJet Utility. This launches the HP DesignJet Utility, showing the printers installed on your computer - HP PageWide XL 4600 | User Guide - Page 19
. Embedded Web Server The Embedded Web Server is a Web server running inside the printer. You can use it to obtain printer information, manage settings and presets, install new firmware, and troubleshoot problems. Service engineers can use it to retrieve internal information that helps to diagnose - HP PageWide XL 4600 | User Guide - Page 20
Embedded Web Server on any computer, open your Web browser and enter the printer's IP address in the browser's address bar. The Embedded Web Server window your Web browser options. If you specify a language that it cannot support, it functions in English. To change the language, change your Web - HP PageWide XL 4600 | User Guide - Page 21
of these estimates is not guaranteed) - HP-GL/2 palette shows the color or grayscale definitions in the currently selected color palette - PostScript font list shows PostScript fonts available (PostScript printers only) - Print folder pattern ● Service information prints ENWW Internal prints 15 - HP PageWide XL 4600 | User Guide - Page 22
on stacker to test alignment Preparing your printer Connect the printer to your network The printer is able to configure itself automatically for here it is possible, though not normally necessary, to change the settings manually; this can also be done remotely using the Embedded Web Server. - HP PageWide XL 4600 | User Guide - Page 23
page 13). 2. Download the printer software from HP's website at http://www.hp.com/go/pagewidexlseries/support/ drivers. 3. Select Windows or Mac : The printer does not support AppleTalk. The following instructions apply if you intend to print from software applications using a printer driver. See - HP PageWide XL 4600 | User Guide - Page 24
front panel and tap . Note the mDNS service name of your printer. 2. Access the install package from HP's website: http://www.hp.com/go/pagewidexlseries/support/drivers. If prompted, select your printer from the list. 3. When the PageWide Printer window appears on your screen, click Software and - HP PageWide XL 4600 | User Guide - Page 25
its own connectivity. Configure and troubleshoot the printer's connectivity and start benefitting from connecting your printer. If you are part of the HP Partner Link Pay-per-use service, remember to go to the Connectivity app and tap Printer services > Register new service in order to register the - HP PageWide XL 4600 | User Guide - Page 26
Connectivity menu: You can enable or disable HP Connected for this printer, or completely remove it from the HP Connected service. ● Printer code: You can view or renew the printer code. ● Email address: You can view the printer's email address. ● HP Connected jobs: You can decide whether jobs - HP PageWide XL 4600 | User Guide - Page 27
OS on page 24. 2. Create a user account on the same computer for the printer. 3. Change the sharing options of the folder so that it is shared with the Web Server on page 13. Alternatively, in the HP Utility, click the Settings tab and then Scan to network. See HP Utility on page 12. 2. On the Scan - HP PageWide XL 4600 | User Guide - Page 28
to the network and you now want to use a different shared folder, click Modify. 4. The printer automatically checks that it can access the network folder. If not, see Cannot access the network folder or HP SmartStream (if installed as an accessory) on page 129. You can check at any later time that - HP PageWide XL 4600 | User Guide - Page 29
folder. To do this, click Permissions and grant Full Control to the user (or to any suitable group that includes that user). ENWW Preparing your printer 23 - HP PageWide XL 4600 | User Guide - Page 30
file systems such as NTFS require this. The 'scanner user' can now access the folder and write files to it. Next, you must configure the printer to send scans to the folder. Example: Create a scan-to-network folder under Mac OS 1. Create a new user account for the 'scanner user' on the - HP PageWide XL 4600 | User Guide - Page 31
email address will appear in the From: field of all the email messages sent by the printer. This is not the same email address that is used by HP Connected. ● Attachment size limit: The maximum size of a file attached to an email message. When you scan to email from the front panel - HP PageWide XL 4600 | User Guide - Page 32
the email address book (MFP only) The printer uses LDAP v3, the latest printer firmware release dated January 2016 or later. The following instructions explain how to use LDAP to connect the printer and performing a new search. Printers that support LDAP also support the use of a standard outgoing - HP PageWide XL 4600 | User Guide - Page 33
. 9. In the Path to start search (BaseDN, Search Root) box, enter the path to start searching the database (for example, o=mycompany.com). ENWW Preparing your printer 27 - HP PageWide XL 4600 | User Guide - Page 34
25. Turn email notifications on and off In order to receive email notifications from the printer, you must have configured the email server (see Configure the email server on page 25). The notification service is always turned on, but all specific notifications are turned off by default. You can - HP PageWide XL 4600 | User Guide - Page 35
. ● Printer access control: Enable, disable, or change the administrator password. ● Printing & management Web services: Enable or disable Web services that are used by printing and management tools such as the HP Utility, HP SmartStream, and SDK for RIPs. ● Scan remote-control Web service (MFP only - HP PageWide XL 4600 | User Guide - Page 36
access to the front panel. ● Moderate Lock: In addition to the Minimum Lock, denies access to all printer settings, the job queue, information and service prints, and the printer log. ● Intermediate Lock: In addition to the Moderate Lock, denies access to the paper, ink supplies, maintenance - HP PageWide XL 4600 | User Guide - Page 37
the only available sign-in method is Local device, referring to local accounts that have access codes between 4 and 8 digits long, stored on the printer's hard disk. Device user accounts There are four available actions: ● New: Add a new user account. ● Edit: Edit the selected user account. ● Delete - HP PageWide XL 4600 | User Guide - Page 38
Sign-in and permissions policies You can change the permissions for device and guest users here, and click Apply to apply them. NOTE: To use some functions, you must be able to use the higher-level function: for example, Print from USB requires Print. NOTE: All users have at least guest permissions - HP PageWide XL 4600 | User Guide - Page 39
PprDinetesrisgnyojeuthparvienters supported (only drivers available at http://www.hp.com/go/PageWideXL/drivers. Universal Windows driver for fleet of HP Designjet printers and Page wide XL series printers ENWW • Use this extended driver If managing a fleet of HP PageWide printers - HP PageWide XL 4600 | User Guide - Page 40
is recommended if you have a fleet of HP DesignJet and PageWide XL printers: it facilitates installation and queue management. The driver includes HP-GL/2 and PostScript options. Universal Windows driver configuration tool The Universal Windows driver configuration tool is a utility to create VDF - HP PageWide XL 4600 | User Guide - Page 41
can see the status of the printer, and perform other actions without using the services accessible to people with disabilities. Other sources of information The following documents can be downloaded from http://www.hp.com/go/pagewidexlseries/support/manuals/: ● Introductory information ● User's guide - HP PageWide XL 4600 | User Guide - Page 42
2 Paper handling ● General information and tips ● Supported paper types ● Paper status ● Load paper ● Unload paper ● Paper options ● Store paper ● Cannot load paper ● Protect a paper type ● Paper jam 36 Chapter 2 Paper handling ENWW - HP PageWide XL 4600 | User Guide - Page 43
photo paper, wear cotton gloves to avoid transferring oils onto the paper. ● Each drawer can be loaded with two paper rolls (front and rear). Your printer has one or two drawers: the second may be purchased as an accessory. The roll positions are numbered 1 and 2 in the top drawer, 3 and 4 in - HP PageWide XL 4600 | User Guide - Page 44
paper types The following paper types are compatible with your printer. Supported HP papers Name Plain paper HP Universal Bond Paper, 3-in core HP Bright White Inkjet Paper, 3-in core HP Premium Bond Paper, 3-in core Coated paper Width Length Product number 16.5 in (420 mm) 18 in (457 mm - HP PageWide XL 4600 | User Guide - Page 45
Heavyweight Coated Paper, 3-in core Poster paper HP Production Matte Poster Paper, 3-in core HP Production Satin Poster Paper, 3-in core HP Gloss Poster Paper, 3-in core Banner HP Matte Polypropylene, 3-in core Other supported paper types Plain papers Plain paper < 90 g/m² Plain paper - HP PageWide XL 4600 | User Guide - Page 46
-gloss paper ● Blue-back paper Banner and sign ● Polypropylene ● Tyvek 135 g/m² Blueprint ● Blueprint Paper status The paper source displays the drawers in your printer, and one of the following status messages for each roll: ● Low on paper ● Out of paper ● Paper not loaded ● Calibration pending - HP PageWide XL 4600 | User Guide - Page 47
lock light on the drawer is off, you can skip this step. 2. Open the drawer. WARNING! Do not stand on the drawer: the printer could fall over. CAUTION: MFP only: Do not leave the roll on top of the scanner. TIP: You can load more than one roll at the same time - HP PageWide XL 4600 | User Guide - Page 48
4. Move the hubs outwards (they are linked) to make room for the roll. 5. Place the roll into the drawer between the hubs, with the paper edge as shown. Do not load the roll at an angle, like this: 6. Slide the hubs back towards the center so that they engage with the roll. 42 Chapter 2 Paper - HP PageWide XL 4600 | User Guide - Page 49
7. Ensure that the hubs are fitted tightly to the roll on both sides. 8. Important: Close the locking levers on the left and right hubs. 9. Feed the paper into the appropriate slot: the front slot for the front roll, the rear slot for the rear roll. TIP: The rear roll may need extra roll-ups to - HP PageWide XL 4600 | User Guide - Page 50
front panel remembers the last paper type loaded in this position, in case that helps. 14. When you are ready, tap Finish and check. The printer checks the position, width, and length of the loaded paper. The width and length are displayed on the main screen. NOTE: If you do not - HP PageWide XL 4600 | User Guide - Page 51
not printing and that the lock light on the drawer is off. 2. Open the drawer. WARNING! Do not stand on the drawer: the printer could fall over. 3. Remove the paper from the feeding slot. 4. Open the locking levers on the left and right hubs. 5. Slide the hubs to the - HP PageWide XL 4600 | User Guide - Page 52
● Ensure that you locked the hubs before feeding paper into the printer. ● Check that the paper is correctly fed into the printer. ● Check that the paper is not crumpled or warped, and , you must feed more paper manually (about 40 cm, or 16 in) than with front rolls. 46 Chapter 2 Paper handling - HP PageWide XL 4600 | User Guide - Page 53
job from a printer driver or other job printer detects a jam, it tries to resolve the issue automatically. If it cannot, it stops, and you must fix the problem manually. The front panel starts the paper jam wizard to display where the jam occurs and how to fix it. Clear the paper jam as instructed - HP PageWide XL 4600 | User Guide - Page 54
Paper jam in a drawer 1. Open the drawer in which the paper jam has occurred. 2. Cut the paper if necessary. 3. Open the front cover of the drawer. Areas where a jam may occur are identified with this label: 48 Chapter 2 Paper handling ENWW - HP PageWide XL 4600 | User Guide - Page 55
not to cut yourself when moving the cutter. CAUTION: Do not dismantle the cutter assembly: refer it to qualified service personnel for servicing. 5. Remove the paper, cutting it manually if necessary. 6. Make sure there are no loose pieces of paper left in the drawer. 7. Close the front cover - HP PageWide XL 4600 | User Guide - Page 56
the slot. 11. Use the paper-cut button to cut the leading edge again. 12. Close the drawer. 13. Wait until the printer is ready for paper. 14. The printer resumes the job and automatically reprints any lost pages. However, you should check that all pages of the job have been printed - HP PageWide XL 4600 | User Guide - Page 57
front cover 1. Open the front cover. 2. Pull out the paper. CAUTION: Be careful to pull out only the paper and not the struts of the printer. 3. Cut the paper if necessary. IMPORTANT: Use scissors for this purpose, not a single blade. 4. Make sure there are no loose pieces of paper left. 5. Close - HP PageWide XL 4600 | User Guide - Page 58
Paper jam in the belts 1. Locate the top-stacker cover. 2. Open the top-stacker cover. 52 Chapter 2 Paper handling ENWW - HP PageWide XL 4600 | User Guide - Page 59
3. Empty the top stacker. 4. Locate and pull the left handle to open the print-bar cover. 5. Remove any paper from the belts area. 6. Close the print-bar cover. ENWW Paper jam 53 - HP PageWide XL 4600 | User Guide - Page 60
7. Close the top-stacker cover. 8. Check that there is no paper in the output zone at the rear of the printer. Be careful with the pinchwheels. 9. Ensure that no pieces of paper are left in the printer. Paper jam in the top stacker 1. Locate the top-stacker cover. 54 Chapter 2 Paper handling ENWW - HP PageWide XL 4600 | User Guide - Page 61
2. Open the top-stacker cover and remove the paper. 3. Close the top-stacker cover. ENWW Paper jam 55 - HP PageWide XL 4600 | User Guide - Page 62
4. Locate the top-stacker rear cover. 5. Open the top-stacker rear cover and remove the paper. 6. Close the top-stacker rear cover. 56 Chapter 2 Paper handling ENWW - HP PageWide XL 4600 | User Guide - Page 63
7. Check that there is no paper in the output zone. Be careful with the pinchwheels. 8. Ensure that no pieces of paper are left in the printer. Paper jam in the folder input (HP F60, HP F70, and HP PageWide XL folders) 1. Lift the folder tray. 2. Remove the paper from the tray. ENWW Paper jam 57 - HP PageWide XL 4600 | User Guide - Page 64
3. Pull the paper to remove it from the printer. Be careful with the pinchwheels. 4. Ensure that no pieces of paper are left in the printer. 5. Close the folder tray. Paper jam in the no-fold tray (HP F60, HP F70, and HP PageWide XL folders) 58 Chapter 2 Paper handling ENWW - HP PageWide XL 4600 | User Guide - Page 65
your hands. 5. Wait until the printer is ready for paper. 6. The printer resumes the job and automatically reprints any lost pages. However, you should check that all pages of the job have been printed. Paper jam on the fan-folding path (HP F60, HP F70, and HP PageWide XL folders) 1. Try to remove - HP PageWide XL 4600 | User Guide - Page 66
remain in place. 6. Close the cover. 7. Wait until the printer is ready for paper. 8. The printer resumes the job and automatically reprints any lost pages. However, you cross-folding path (HP F60, HP F70, and HP PageWide XL folders) 1. Open the cross-folding cover. 60 Chapter 2 Paper - HP PageWide XL 4600 | User Guide - Page 67
2. Remove the paper. CAUTION: Take care to avoid injury. 3. Close the cover. 4. Wait until the printer is ready for paper. 5. The printer resumes the job and automatically reprints any lost pages. However, you should check that all pages of the job have been printed. Paper jam in - HP PageWide XL 4600 | User Guide - Page 68
4. Remove the paper from the high-capacity stacker. 5. Remove the paper from the printer. 6. Close the output module. 7. Reconnect the high-capacity stacker. 62 Chapter 2 Paper handling ENWW - HP PageWide XL 4600 | User Guide - Page 69
is ready for paper. 9. The printer resumes the job and automatically reprints any lost pages. However, you should check that all pages of the job have been printed. Paper jam in the scanner (MFP only) 1. Empty the top stacker. 2. Pull out the top stacker. 3. There is a small lever at the rear - HP PageWide XL 4600 | User Guide - Page 70
6. Close the cover. 7. Close the top stacker. 8. The printer resumes the job and automatically reprints any lost pages. However, you should check that all pages of the job have been printed. 64 Chapter 2 Paper handling ENWW - HP PageWide XL 4600 | User Guide - Page 71
3 Ink system ● Ink cartridges ● Print bar ● Cleaning container ● Maintenance cartridge ● Safe mode ENWW 65 - HP PageWide XL 4600 | User Guide - Page 72
The cartridge is not responding, but removing and reinserting it may solve the problem. ● Replace: The cartridge has been identified as faulty. It should be Wrong/Incompatible/Incorrect: The cartridge type is not suitable for this printer. ● Expired: The cartridge has reached its expiration date. ● - HP PageWide XL 4600 | User Guide - Page 73
Ink cartridge part numbers PageWide Printer 400 ml C1Q57A C1Q58A C1Q59A C1Q60A C1Q61A C1Q62A C1Q63A C1Q64A C1Q65A C1Q66A C1Q67A C1Q68A HP 843A 400-ml Black Ink Cartridge HP 843A 400-ml Cyan Ink Cartridge HP 843A 400-ml Magenta Ink Cartridge HP 843A 400-ml Yellow Ink Cartridge HP 843B 400-ml Black - HP PageWide XL 4600 | User Guide - Page 74
and push it in as far as it will go. 5. Follow the instructions in the front panel. 6. When you have replaced all cartridges that you and the interrupted page is reprinted in full. HP recommends that you replace an empty cartridge with a new HP cartridge. See Ink cartridge part numbers on page - HP PageWide XL 4600 | User Guide - Page 75
printer. In this case the printer warranty will not be valid for any printer repairs that are related to the cartridge, nor for any problems instructions displayed on the front panel. If your cartridge is not an Original HP cartridge, HP front panel. Ink cartridge troubleshooting 1. Check that you - HP PageWide XL 4600 | User Guide - Page 76
are automatically tested at regular intervals, and automatically serviced when necessary. This takes a little time and Printheads are best preserved inside the printer. Moreover, if you remove the printheads, the printer will need to be recalibrated whenever problem. 70 Chapter 3 Ink system ENWW - HP PageWide XL 4600 | User Guide - Page 77
number The HP 841 printhead has the part number C1Q19A. Replace printheads Printheads rarely need to be replaced, but the front panel will tell you when a printhead is failing or has reached the end of its life. Alternatively, a test print may indicate a printhead problem before the printer detects - HP PageWide XL 4600 | User Guide - Page 78
1. Ensure that all ink cartridges are at least 25% full. 2. Start the printhead replacement from the front panel: tap 3. Locate the top-stacker cover. , then the Printhead tab, then Replace. 4. Open the top-stacker cover. 72 Chapter 3 Ink system ENWW - HP PageWide XL 4600 | User Guide - Page 79
5. Locate and pull the left handle to open the print-bar cover. 6. Open the internal cover. 7. Pull the blue handle to open the latch. ENWW Print bar 73 - HP PageWide XL 4600 | User Guide - Page 80
8. Pull the latch to place it on the cover. 9. Extract the printhead, using the handle. 10. Slowly remove the protective caps from the new printhead in the order shown below. 74 Chapter 3 Ink system ENWW - HP PageWide XL 4600 | User Guide - Page 81
11. Insert the new printhead in the correct orientation, clipping it into place. 12. Close the latch. ENWW Print bar 75 - HP PageWide XL 4600 | User Guide - Page 82
13. Close the blue handle. 14. Close the internal cover. 15. Close the print-bar cover. 76 Chapter 3 Ink system ENWW - HP PageWide XL 4600 | User Guide - Page 83
Printhead maintenance The printer and the maintenance cartridge clean the printheads automatically. Avoid removing printheads unnecessarily. Printhead troubleshooting 1. Check that the printhead cover. 5. If you still have problems when printing, see Print quality on page 146. ENWW Print bar 77 - HP PageWide XL 4600 | User Guide - Page 84
container is not detected. ● Almost full: This is estimated by the printer. ● Full: The printer has stopped printing. It will continue after the cleaning container has been replaced. Cleaning container part number The HP 841 cleaning container has the part number F9J47A. Replace the cleaning - HP PageWide XL 4600 | User Guide - Page 85
the printer without printer checks the installation. 7. Make sure that you comply with all applicable federal, state, and local regulations when disposing of ink system consumables. Cleaning container troubleshooting If the cleaning container is correctly installed but the printer - HP PageWide XL 4600 | User Guide - Page 86
user will need to replace it about every 2 months. The printer will refuse to start a print job if it detects the end Maintenance cartridge part number The HP 841 maintenance cartridge has the If the front panel shows an error, close the service door. 1. Remove the packaging from the new maintenance - HP PageWide XL 4600 | User Guide - Page 87
3. When prompted by the front panel, open the maintenance cartridge door. IMPORTANT: When removing a maintenance cartridge, remember that it contains ink. Therefore, wear gloves and hold the cartridge by the handle. 4. To remove the maintenance cartridge, grip the handle and slide it out. 5. If you - HP PageWide XL 4600 | User Guide - Page 88
need replacing. Maintenance cartridge troubleshooting If the printer does not detect the maintenance cartridge that you have inserted, open the door and make sure the maintenance cartridge is correctly inserted. If this does not solve the problem, contact your support representative. 82 Chapter - HP PageWide XL 4600 | User Guide - Page 89
operation outside of environmental specifications, and when a used, refilled, or counterfeit ink cartridge has been detected, the printer will operate in safe mode. HP is unable to warrant the performance of the printing system when operated outside of environmental specifications or when a used - HP PageWide XL 4600 | User Guide - Page 90
4 Networking ● Introduction ● Control network protocols ● Front-panel menu items ● Link configuration methods ● Troubleshooting 84 Chapter 4 Networking ENWW - HP PageWide XL 4600 | User Guide - Page 91
manually configure the link using the printer's front panel, or through other configuration tools once network communication is established. The printer can support the embedded Telnet server, see the HP Jetdirect Print Server Administrator's Guide for your print server model. ENWW Introduction 85 - HP PageWide XL 4600 | User Guide - Page 92
method that TCP/IPv4 parameters will be configured on the HP Jetdirect print server. Bootp : Use BootP (Bootstrap Protocol Manual ) Configure parameters directly from the printer control panel: IP Address : The unique IP address of the printer (n.n.n.n). Subnet Mask : The subnet mask for the printer - HP PageWide XL 4600 | User Guide - Page 93
.254.x.x is set. Legacy : The address 192.0.0.192 is set, consistent with older HP Jetdirect devices. Specify the IP address (n.n.n.n) of a Primary DNS Server. NOTE: This item appears only if Manual configuration is a higher priority than DHCP in the Config. Precedence table, configured through the - HP PageWide XL 4600 | User Guide - Page 94
can be up to 255 octets. For some networks, you may need to contact your Independent Service Provider (ISP) for the proxy server address. Type the port number used by the proxy server for client support. The port number identifies the port reserved for proxy activity on your network, and can be - HP PageWide XL 4600 | User Guide - Page 95
100 Mbps. 1000TX Full : 1000 Mbps, full-duplex operation. Link configuration methods The printer supports 10, 100, or 1000 Mbps network link speeds using full-duplex or half-duplex from a BootP or DHCP server ● Network management tools such as HP Web Jetadmin ENWW Link configuration methods 89 - HP PageWide XL 4600 | User Guide - Page 96
lights (LEDs) are providing proper status. See the HP Jetdirect Print Servers Administrator's Guide for your print server model to interpret and troubleshoot other messages. Reset network parameters If you accidentally misconfigured the printer's network settings, they can be reset to factory - HP PageWide XL 4600 | User Guide - Page 97
configure the link setting to match the port configuration of the network hub or switch. For manual configuration methods, see Link configuration methods on page 89. Turn the printer off, then on again, to re-initialize the setting. 5. Print an IO Configuration page and check link settings. Item - HP PageWide XL 4600 | User Guide - Page 98
the action to resolve the problems. 6. If all else fails, turn the printer off and on again with the power key on the front panel. Cannot access the printer from the HP Utility 1. If you have not done so already, read HP Utility on page 12. 2. Make sure your printer driver is available and working - HP PageWide XL 4600 | User Guide - Page 99
configured in the printer, network performance may HP SmartStream or thirdparty RIPs, check that the RIP printing service test connecting the computer to the printer directly, using a normal Ethernet (Cat5e router. In this configuration, the printer and the computer should both automatically change - HP PageWide XL 4600 | User Guide - Page 100
HP SmartStream: See the HP SmartStream documentation at http://www.hp.com/go/ smartstreampagewidexl/manuals/. ● From a printer driver: printer. RIP software is available from various different companies. See your RIP vendor's documentation. ● MFP only: Copy a file. See Scanning and copying (MFP only - HP PageWide XL 4600 | User Guide - Page 101
, we recommend installation using the install package that you can download from HP's website http://www.hp.com/go/ pagewidexlseries/support/drivers, so that all of the printer software is installed. Check and change main driver settings There are a relatively large number of print settings that you - HP PageWide XL 4600 | User Guide - Page 102
TIP: In general you are recommended to use the default settings unless you know that they do not meet your requirements. The printer will apply its own policies regarding roll and paper to choose the most suitable for your job. TIP: Windows only: If you intend to reuse a - HP PageWide XL 4600 | User Guide - Page 103
The printer drivers support any accessories such as a stacker or folder connected to your printer. The printer's default output is also the driver's default output. However, from the driver you can change the output destination and other options such as the folding style, collation, and first or - HP PageWide XL 4600 | User Guide - Page 104
containing one or more TIFF, JPEG, HP-GL/2, RTL, PDF, or PostScript files into the printer's USB port. NOTE: To print PDF or PostScript file printed are indicated with . 3. Select a file to be printed. Multipage documents are supported only in PDF files; in this case, you can also select a page to - HP PageWide XL 4600 | User Guide - Page 105
2, or you can choose Save paper, which automatically chooses the narrowest roll on which the print will fit (if two rolls are loaded). NOTE: The printer setting Roll width selection has two values: Print on same width only and Print on same width or wider. When Print on same width only - HP PageWide XL 4600 | User Guide - Page 106
way, you can print from anywhere with an Internet connection, without needing any printer driver. There are a few limitations that you should bear in mind: ● The quality modes are for 1-pass printing (in contrast to HP DesignJet printers), several parameters such as print speed, color strategy, - HP PageWide XL 4600 | User Guide - Page 107
If the image content is... B Large areas of uniform colors Text or lines on top of color backgrounds C Highly complex drawings with plenty of detail Recommended print mode Uniform areas High detail You will obtain... More uniform and saturated colors for longdistance viewing Smooth background with - HP PageWide XL 4600 | User Guide - Page 108
6 Queue management ● Job queue introduction ● Job queue actions ● Job queue options ● Default printing preferences ● Job deletion ● Job queue in the Embedded Web Server 102 Chapter 6 Queue management ENWW - HP PageWide XL 4600 | User Guide - Page 109
, rendered, printed, already printed, and so on. The scan queue (MFP only) includes jobs that are being scanned and jobs that have been scanned NOTE: Sometimes, while printing, you may see a Self-servicing status, which means that the printer is performing some task such as paper type change or - HP PageWide XL 4600 | User Guide - Page 110
an account ID to be used for the job. ● On hold: Recovered job: After a printer recovery, some jobs that were not printed are kept on hold. ● On hold for supplies: The printer needs paper, ink cartridge, printhead, cleaning container, or maintenance cartridge to be replaced. History ● Printed - HP PageWide XL 4600 | User Guide - Page 111
are suitable for the job, the roll is chosen according to your preferences. ● Increase productivity: To increase the productivity of the printer. - Job autorotation: The printer can rotate a job automatically in order to save paper. ● Automatic roll selection: When the job arrives with the roll not - HP PageWide XL 4600 | User Guide - Page 112
● Print anyway (the least restrictive option): Print on whatever paper is loaded. The printer will choose the roll to print according to the following criteria: first where the page be empty, size/type/length not supported by that output, or folder is offline. 106 Chapter 6 Queue management ENWW - HP PageWide XL 4600 | User Guide - Page 113
to delete jobs on hold after a specified time. MFP only: You can also select whether or not to driver, HP SmartStream, quickset, and so on. But the mirror option is not available in HP SmartStream or quickset; so, if it is activated, all jobs printed by any path, except from the printer driver - HP PageWide XL 4600 | User Guide - Page 114
To delete a job manually, select the job and tap Delete in the footer. To delete all jobs, the Embedded Web Server from any computer with an Internet connection, by entering the IP address of the printer in your Web browser; the job queue is shown by default in the first window that appears. The - HP PageWide XL 4600 | User Guide - Page 115
7 Scanning and copying (MFP only) ● Quicksets ● Scanning ● Copying ● Scanner preferences ● Scanner troubleshooting ● Scanner diagnostic plot ENWW 109 - HP PageWide XL 4600 | User Guide - Page 116
efficient and is convenient for inexpert users. Factory quicksets The printer comes with some factory quicksets already defined, designed to support typical user requirements. Quicksets can be used for scan, copy shown first. Scanning 1. Tap . 110 Chapter 7 Scanning and copying (MFP only) ENWW - HP PageWide XL 4600 | User Guide - Page 117
2. Select the scan destination. ● Scan to USB flash drive ● Scan to network folder (if a network folder has been added) ● Scan to HP SmartStream folder (if installed) ● Scan to email (if an email server has been configured) 3. Select an appropriate quickset for your scan job. Any quickset can - HP PageWide XL 4600 | User Guide - Page 118
result will be a single file containing all the scanned pages. When scanning a multipage document, insert the next page when prompted. 112 Chapter 7 Scanning and copying (MFP only) ENWW - HP PageWide XL 4600 | User Guide - Page 119
● Single-page: The result will be a single-page file for each scanned page. When scanning a single page, the document is automatically saved. If you insert another page, a new document is created. NOTE: By tapping you can show or hide the toolbar, show or hide the background removal setting, and - HP PageWide XL 4600 | User Guide - Page 120
allows you to fine-tune the result of the smart background removal when it is on, or to set a manual level of background removal when smart removal is off, for any type of original. You can define these values be used to change dark grays to black. 114 Chapter 7 Scanning and copying (MFP only) ENWW - HP PageWide XL 4600 | User Guide - Page 121
For example, if you are copying a brochure with a mixture of text and pictures, the text is often digitized to a color that we may see as black but is really a dark gray. When the printer receives this gray text, it may be printed with a halftone pattern, meaning scattered dots instead of solid - HP PageWide XL 4600 | User Guide - Page 122
pages of the copy job is not available. - The input length is always automatic: you cannot set a manual value. - If you want to print an urgent job interrupting the job currently being printed, select Allow copy . 5. Tap Copy to continue. 116 Chapter 7 Scanning and copying (MFP only) ENWW - HP PageWide XL 4600 | User Guide - Page 123
6. Insert the original, facing upwards. 7. In the next screen you can see a preview of each copied page and browse the thumbnails. NOTE: By tapping you can show or hide the toolbar, show or hide the background removal setting, and change the copy settings for the following pages. Change the - HP PageWide XL 4600 | User Guide - Page 124
the resolution to 200, 300, or 600 dpi. ● Color options allows you to choose Black and white, Grayscale, or Color. 118 Chapter 7 Scanning and copying (MFP only) ENWW - HP PageWide XL 4600 | User Guide - Page 125
when it is on, or to set a manual level of background removal when smart removal is off grays to black. For example, if you are copying a brochure with a mixture of text and pictures, the text is often black but is really a dark gray. When the printer receives this gray text, it may be printed with - HP PageWide XL 4600 | User Guide - Page 126
to select the paper output from those available to the printer. ● Folding style allows you to select the folding paper type is White paper. Scanner troubleshooting In this section the most common Do not use any printed version of this guide to test the scanner, as the resolution MFP only) ENWW - HP PageWide XL 4600 | User Guide - Page 127
visually. If it is damaged (scratched or broken), call your support representative. 4. If the streaks remain, there may be dust particles MFP only) on page 155. NOTE: The problem of vertical streaks cannot always be solved, due to the technological limitations of CIS technology. HP troubleshooting 121 - HP PageWide XL 4600 | User Guide - Page 128
if copying). It may also help to flatten the original manually as much as possible before scanning it again. NOTE: The problem of wrinkles cannot always be solved, due to the technological limitations of CIS technology. HP offers HD Scanners with CCD technology for higher quality requirements. If - HP PageWide XL 4600 | User Guide - Page 129
kind of error usually appears. If the error appears outside these areas, call your support representative and report "line discontinuities within a CIS module". Small color differences between adjacent a serious scanner malfunction, as in the following example. ENWW Scanner troubleshooting 123 - HP PageWide XL 4600 | User Guide - Page 130
original 90 degrees before scanning it again. 2. If the problem persists, clean and calibrate the scanner as indicated in Maintenance on of the bars for neutral and vivid colors, call your support representative and report "small color differences between adjacent CIS modules copying (MFP only) ENWW - HP PageWide XL 4600 | User Guide - Page 131
resolution (Max if scanning, Best if copying) and check whether the problem disappears. 3. If the problem still persists, you can diagnose this issue by analyzing the patterns 6 call your support representative and report "color fringing problem after calibration". ENWW Scanner troubleshooting 125 - HP PageWide XL 4600 | User Guide - Page 132
correctly closed, and the printer is not working while you are scanning. Scan your original again. 2. If the problem persists, change (increase or your support representative and report the error message. If no error message appears, try repeating your scan. 126 Chapter 7 Scanning and copying (MFP - HP PageWide XL 4600 | User Guide - Page 133
problem persists, try to calibrate the scanner as indicated in Calibrate the scanner (MFP only) on page 160. If this operation fails, call your support If the problem persists, call your support representative and report a "vertical black band 20 cm wide". Scanner damages some originals HP is aware - HP PageWide XL 4600 | User Guide - Page 134
your printer. Then calibrate the scanner, as indicated in Calibrate the scanner (MFP only) on page 160, and repeat your scan. Turn the original 90 degrees if possible before rescanning. 2. If the problem persists, analyze pattern 3, modules A through E, of the diagnostic plot. Call your support - HP PageWide XL 4600 | User Guide - Page 135
problem, printer cannot access it, try the following suggestions: ● Check that you have filled in each field correctly. ● Check that the printer is connected to the network. ● Check that the remote computer is switched on, working normally and connected to the network. ENWW Scanner troubleshooting - HP PageWide XL 4600 | User Guide - Page 136
network, using the printer's logon credentials. ● Check that the printer and the remote computer may help you to locate and solve the problem. 1. Use the front panel to check USB flash drive interface compatibility. Your system supports a Hi-Speed USB interface. Your USB and copying (MFP only) ENWW - HP PageWide XL 4600 | User Guide - Page 137
610 × 914 mm (24 × 36 in). Once the correct paper is loaded, if this paper permits color calibration then we recommend color-calibrating the printer. You can print the diagnostic plot from the front panel: tap Image-quality maintenance > Scanner IQ plot. , then Internal prints > Scanner IQ plot or - HP PageWide XL 4600 | User Guide - Page 138
look like this: If you see any problems, you should follow the recommended recovery procedure file can be analyzed more easily by a remote support engineer if necessary. If you decide to scan the in (914 mm) wide is loaded in the printer. Ideally, the same type of paper used to print MFP only) ENWW - HP PageWide XL 4600 | User Guide - Page 139
Load the diagnostic plot into the scanner input tray, making sure that the printed side of the plot is facing up. The black arrows on the diagnostic plot indicate the direction of loading. Make sure that the diagnostic plot is loaded without skew, and it is centered (that is, it covers the whole - HP PageWide XL 4600 | User Guide - Page 140
8 Collection and finishing If you choose no specific job destination, prints are sent to the default output destination, which can be changed from the front panel. From the home screen, tap , then Output destination. ● Top stacker ● HP folders 134 Chapter 8 Collection and finishing ENWW - HP PageWide XL 4600 | User Guide - Page 141
Paper, use the supports attached to the top stacker (not recommended for other paper types). By default, the printer cuts the paper after stacker. ● Printer driver: Go to the printer properties, select the Layout/Output tab, and change the output destination to Top stacker. ● HP SmartStream: Set - HP PageWide XL 4600 | User Guide - Page 142
: To avoid problems due to the characteristics of some papers, in some cases you may need to collect printed jobs to continue printing. HP folders HP F60, HP F70, and HP PageWide Folders The HP folders fold printed sheets of paper, managing the printed sheet from end to end. They support roll sizes - HP PageWide XL 4600 | User Guide - Page 143
destination and select the folding style. ● Printer driver: Go to the printer properties, select the Layout/Output tab, and driver; from there you can assign one folding style to each predefine. Then, in the printing dialog, you will be able to select each predefine or the default. ENWW HP - HP PageWide XL 4600 | User Guide - Page 144
orientation: Select this in the Layout/Output tab. There are some paper types that are not supported by the folder. You will see a warning if you try to send such a paper type to the folder. ● HP SmartStream: Set the destination to Folder, in the job preparation pane or in the settings pane - HP PageWide XL 4600 | User Guide - Page 145
status ● Starting: The folder is initializing and not yet ready. ● Ready: The folder is ready to receive jobs, waiting for jobs, or receiving jobs. ENWW HP folders 139 - HP PageWide XL 4600 | User Guide - Page 146
● Full: The cross-fold or no-fold tray has reached its full capacity. The printer finishes the current page, then stops printing. ● Error. In these cases, all jobs are put on hold for output. - Paper jam - Cover open - Folder not - HP PageWide XL 4600 | User Guide - Page 147
B 210 × 297 mm TAB* 210 mm width, 297 mm height, with tabs ● DIN C 210 × 297 mm (compact fold) 210 mm width, 297 mm height ENWW HP folders 141 - HP PageWide XL 4600 | User Guide - Page 148
● DIN B 210 × 305 mm* 210 mm width, 305 mm height AFNOR (HP F60, HP F70, and HP PageWide XL folders only) For AFNOR style, use DIN format rolls. Jobs should be submitted as A0 portrait, A1 landscape, or A3 landscape. ● AFNOR (297 × 210 mm) - HP PageWide XL 4600 | User Guide - Page 149
to compensate automatically if the sheet width is exceeded. If the compensation is not successful, try choosing the DIN B 210 × 305 mm folding style. ENWW HP folders 143 - HP PageWide XL 4600 | User Guide - Page 150
for purchase. For more information, contact your support representative. Tab applicator (HP F60, HP F70, and HP PageWide XL folders only) ● When available, a folding style with tab application can be selected from HP SmartStream, the printer driver, USB flash drive, or Copy. ● During installation - HP PageWide XL 4600 | User Guide - Page 151
the document you are inserting. 5. Go to the job queue and release it. Troubleshooting ● Jams: If a paper jam is detected, the front panel will notify you. your support representative. ● Communication problems: If the printer does not recognize the folder, try to switch off the printer and folder - HP PageWide XL 4600 | User Guide - Page 152
9 Print quality ● General printing advice ● Optimize print quality app ● Print diagnostic plot ● Advanced options ● Enhanced printhead recovery ● Page length accuracy ● Manual printhead alignment 146 Chapter 9 Print quality ENWW - HP PageWide XL 4600 | User Guide - Page 153
problem: ● To achieve the best performance from your printer, use only genuine manufacturer's supplies and accessories, whose reliability and performance have been thoroughly tested to give trouble print-quality problems, you can follow a more hands-on print-quality troubleshooting procedure, by - HP PageWide XL 4600 | User Guide - Page 154
that the selected paper type is the same as the paper loaded into the printer. The print is divided into three parts. The top part is about print-bar and color calibration problems, the center is about alignment problems, and the bottom part is an illustration of the printhead positions that can be - HP PageWide XL 4600 | User Guide - Page 155
bands in the top part of the plot indicates a possible problem in the color calibration. The central part of the plot indicates defects, you should calibrate the printer by tapping Calibrate print bar in the optimize print quality app. You should also calibrate the printer if you are warned that a - HP PageWide XL 4600 | User Guide - Page 156
best results and least waste. NOTE: You are highly recommended to use HP Production Matte Polypropylene, 40 in (1016mm) wide, to calibrate the uses about 1.3 m (51 in) of paper. 5. After the calibration, the printer uses the results to calculate calibrations for all other paper types. If the print- - HP PageWide XL 4600 | User Guide - Page 157
updated to +2 mm when you enter the measured value. IMPORTANT: You could cause a system error or damage to the printer by entering an incorrect error value after Adjust manually. If the above procedures do not solve your problem, call your support representative. ENWW Advanced options 151 - HP PageWide XL 4600 | User Guide - Page 158
type. TIP: In some cases, Calibrate print bar by itself may be enough to correct defects. If not, try manual printhead alignment. TIP: However, if the results after manual printhead alignment are not satisfactory, you can use Calibrate print bar to restore automatic alignment. 152 Chapter 9 Print - HP PageWide XL 4600 | User Guide - Page 159
status ● Clean the exterior of the printer ● Move or store the printer ● Move or store the folder ● Clean the scanner's glass plate (MFP only) ● Replace the scanner's glass plate (MFP only) ● Calibrate the scanner (MFP only) ● Replace the folder's tab reel ● Update the firmware ● Secure File Erase - HP PageWide XL 4600 | User Guide - Page 160
alert to get help in solving the problem. ● From a distance, you can get a quick idea of the printer status by looking at the beacon. See Printer alerts on page 10. Clean the exterior of the printer Clean the outside of the printer and all other parts of the printer that you regularly touch as part - HP PageWide XL 4600 | User Guide - Page 161
and humid location, water from the atmosphere can condense on the printer parts and cartridges and can result in ink leaks and printer errors. In this case, HP recommends that you wait at least 3 hours before turning on the printer or installing the ink cartridges, to allow the water to evaporate - HP PageWide XL 4600 | User Guide - Page 162
the glass plate and the surrounding area with a lint-free cloth dampened with water and then wrung dry. A suitable cloth is provided with the printer. CAUTION: Do not use abrasives, acetone, benzene or fluids that contain these chemicals. Do not spray liquids directly onto the scanner glass plate or - HP PageWide XL 4600 | User Guide - Page 163
at the rear, and turn on the printer using the Power key. Replace the scanner's glass plate (MFP only) Over time, the condition of the glass plate can deteriorate. Small scratches on the surface of the glass can reduce image quality. Contact your support representative (see When you need help on - HP PageWide XL 4600 | User Guide - Page 164
2. There is a small lever at the rear left of the scanner. Slide the lever up and open the scanner cover. WARNING! Do not lift the scanner while the scanner cover is open. Your fingers or hand may be trapped or crushed. 3. Unscrew 4 screws from the upper part if you intend to replace any of the - HP PageWide XL 4600 | User Guide - Page 165
back the plastic tabs you removed earlier. 8. Put back and screw in the black metal piece you removed earlier. ENWW Replace the scanner's glass plate (MFP only) 159 - HP PageWide XL 4600 | User Guide - Page 166
explained in this guide. If you perform calibration successfully and still have concerns about the image quality, see Scanner troubleshooting on page 120 plate (MFP only) on page 155. 2. Go to the front panel and tap , then Scanner preferences > Calibrate scanner. 3. Follow the instructions in the - HP PageWide XL 4600 | User Guide - Page 167
If the above steps do not help, eject the sheet and restart the printer (turn off and on). When the system has restarted, repeat the cannot perform the calibration successfully in three consecutive attempts, call your support representative and report the error code that appears in the front - HP PageWide XL 4600 | User Guide - Page 168
Illustration for folder with part number L3M58A Illustration for folder with part number L3M58B 3. Rotate the tab protector to remove it. Illustration for folder with part number L3M58A Illustration for folder with part number L3M58B 4. Remove the empty tabs. Illustration for folder with part - HP PageWide XL 4600 | User Guide - Page 169
Illustration for folder with part number L3M58A Illustration for folder with part number L3M58B 6. Put back the tab protector. Illustration for folder with part number L3M58A Illustration for folder with part number L3M58B 7. Pull the upper lever. Illustration for folder with part number L3M58A - HP PageWide XL 4600 | User Guide - Page 170
Illustration for folder with part number L3M58A Open the two parts as shown to pass the tab reel Illustration for folder with part number L3M58B Pass the tab between the wheels 9. Pass the tab reel by the path shown in the image. Illustration for folder with part number L3M58A Illustration for - HP PageWide XL 4600 | User Guide - Page 171
asked for tabs but they do not appear on the folded jobs, open the cover and check that they are properly installed and that no problem has occurred. ENWW Replace the folder's tab reel 165 - HP PageWide XL 4600 | User Guide - Page 172
printer. From time to time firmware updates will be available from HP. These updates increase the printer's functionality, enhance its features, and may correct minor problems . They can be divided into two categories: automatic and manual updates. NOTE: The firmware includes a set of the most - HP PageWide XL 4600 | User Guide - Page 173
firmware file from http://www.hp.com/go/pagewidexlseries/ support/firmware/ (according to your printer model) into the USB flash drive and insert it into the Hi-Speed USB host port in the front panel. A firmware update assistant will appear on the front panel to guide you through the update process - HP PageWide XL 4600 | User Guide - Page 174
or the Embedded Web Server (Setup > Security). NOTE: If you choose to erase the whole hard disk, you may be asked to restart the printer several times during the process, which will take about 6 hours with Secure Fast Erase or 24 hours with Secure Sanitizing Erase. 168 Chapter 10 Maintenance - HP PageWide XL 4600 | User Guide - Page 175
11 Accessories How to order Contact your support representative (see When you need help on HP SmartStream software ● HP DesignJet SD Pro 44-in Scanner (G6H50B) ● HP DesignJet HD Pro 42-in Scanner (G6H51B) ● HP PageWide XL PostScript/PDF Upgrade Kit (CZ317A) The PostScript upgrade enables the printer - HP PageWide XL 4600 | User Guide - Page 176
accessory. NOTE: Before installing the non-HP accessory, make sure it is connected to the printer (with cable and hooks) and switched on. Configure The following settings are available: ● Minimum gap between sheets. Range from 100 to 3000 milliseconds. ● Maximum supported speed. Range from 2 to 15 - HP PageWide XL 4600 | User Guide - Page 177
12 When you need help ● Request support ● Customer Self-Repair ● Service information ENWW 171 - HP PageWide XL 4600 | User Guide - Page 178
from which you bought the printer. If this is not the case, contact HP Support on the Web: http://www.hp.com/go/pagewidexlseries/ support/. Before calling your support representative, prepare for the call as follows: ● Review the troubleshooting suggestions in this guide. ● Review your software - HP PageWide XL 4600 | User Guide - Page 179
13 Retrieving printer usage information ● Get printer usage and accounting information ● Get usage information ● Get detailed job accounting information ENWW 173 - HP PageWide XL 4600 | User Guide - Page 180
There is also the capability of configuring the printer to send usage and accounting reports by email a Software Development Kit provided by HP. Get usage information Click on the Depending on the contract you have with your support representative, print categories or paper types information may - HP PageWide XL 4600 | User Guide - Page 181
- High density image: Over 50% of pixel coverage printed on standard paper - Premium quality image: Any content type printed on premium paper ● Scan usage: The copy and scan usage in m², and the total amount. ● Ink usage: The ink consumed by each cartridge in ml, and the total amount of ink consumed - HP PageWide XL 4600 | User Guide - Page 182
home screen: ● Tap to launch the usage information screen, then tap the Print usage report button. ● Tap , then Internal prints > Printer usage information > User information print > Print usage report. Get detailed job accounting information Accounting statistics with the Embedded Web Server - HP PageWide XL 4600 | User Guide - Page 183
client. If someone sends a job without providing an account ID, the printer will hold the unidentified job in the queue without printing it until an name is not included. When you have completed the above steps, the printer will send accounting data by email with the frequency that you specified. - HP PageWide XL 4600 | User Guide - Page 184
14 Printer specifications ● Functional specifications ● Physical specifications ● Memory specifications ● Power specifications ● Environmental specifications ● Acoustic specifications ● Speed specifications (Lines/Fast mode) 178 Chapter 14 Printer specifications ENWW - HP PageWide XL 4600 | User Guide - Page 185
Functional specifications HP ink supplies Printheads Ink cartridges Eight CMYK printheads, each containing 25344 nozzles spaced at 1200 nozzles per inch Cartridges containing 400 ml of ink: black, - HP PageWide XL 4600 | User Guide - Page 186
languages supported Printer Languages PostScript PostScript, PDF, TIFF, JPEG Non-PostScript HP-GL/2, PCL 3 Win Physical specifications Printer physical MFP) Physical DRAM Hard disk 8 GB 500 GB Memory specifications (MFP) Physical DRAM Hard disk 8 GB 500 GB Power specifications Printer - HP PageWide XL 4600 | User Guide - Page 187
type < 90% RH 0 to 3000 m (10000 ft) Acoustic specifications Printer acoustic specifications Printing acoustic pressure Printing acoustic power Ready acoustic pressure Ready acoustic power Sleep acoustic pressure Sleep acoustic power HP PageWide XL 4500 HP PageWide XL 4600 ≤ 55 dB(A) ≤ 58 dB - HP PageWide XL 4600 | User Guide - Page 188
fix it automatically. If the problem persists after restarting, you should contact your support representative and be ready to give the numerical code from the error message. If the error message contains some other recommended action, follow the printer's instructions. 182 Chapter 15 Front-panel - HP PageWide XL 4600 | User Guide - Page 189
Mac OS X from version 10.2 onwards. It is used to discover services available on a local area network. It was originally known as Rendezvous. same colors from a particular print job from print to print and from printer to printer. Color model A system of representing colors by numbers, such as RGB - HP PageWide XL 4600 | User Guide - Page 190
HP RTL HP Raster Transfer Language: a language defined by HP to describe raster (bitmap) graphics. HP-GL/2 HP Graphics Language 2: a language defined by HP The flat surface within the printer over which the paper passes while it is being printed on. Printer driver Software that converts a print job - HP PageWide XL 4600 | User Guide - Page 191
protocols on which the Internet is based. USB Universal Serial Bus: a standard serial bus designed to connect devices to computers. Your printer supports Hi-Speed USB (sometimes called USB 2.0). USB device port A square USB socket found on USB devices, though which a computer can control - HP PageWide XL 4600 | User Guide - Page 192
printer general 16 Mac OS X network 17 Windows network 17 connectivity configure 18 copy mode 116 copying 115 CSR 172 customer self-repair 172 D delayed printing 92 DHCP settings 86 diagnostic plot 148 dim mode 11 disk wipe 168 DNS settings 87 driver preferences 34 drivers manual HP ePrint 100 HP - HP PageWide XL 4600 | User Guide - Page 193
from driver 95 print from USB flash drive 98 print modes 100 print next 104 print now 105 print quality 146 printer calibration 149 printer software Mac OS X uninstall 18 Windows uninstall 17 printer status 154 printer's main components 7 printhead specification 179 printhead alignment 149 manual
-
 1
1 -
 2
2 -
 3
3 -
 4
4 -
 5
5 -
 6
6 -
 7
7 -
8
-
9
-
10
-
11
-
12
-
13
-
14
-
15
-
16
-
17
-
18
-
19
-
20
-
21
-
22
-
23
-
24
-
25
-
26
-
27
-
28
-
29
-
30
-
31
-
32
-
33
-
34
-
35
-
36
-
37
-
38
-
39
-
40
-
41
-
42
-
43
-
44
-
45
-
46
-
47
-
48
-
49
-
50
-
51
-
52
-
53
-
54
-
55
-
56
-
57
-
58
-
59
-
60
-
61
-
62
-
63
-
64
-
65
-
66
-
67
-
68
-
69
-
70
-
71
-
72
-
73
-
74
-
75
-
76
-
77
-
78
-
79
-
80
-
81
-
82
-
83
-
84
-
85
-
86
-
87
-
88
-
89
-
90
-
91
-
92
-
93
-
94
-
95
-
96
-
97
-
98
-
99
-
100
-
101
-
102
-
103
-
104
-
105
-
106
-
107
-
108
-
109
-
110
-
111
-
112
-
113
-
114
-
115
-
116
-
117
-
118
-
119
-
120
-
121
-
122
-
123
-
124
-
125
-
126
-
127
-
128
-
129
-
130
-
131
-
132
-
133
-
134
-
135
-
136
-
137
-
138
-
139
-
140
-
141
-
142
-
143
-
144
-
145
-
146
-
147
-
148
-
149
-
150
-
151
-
152
-
153
-
154
-
155
-
156
-
157
-
158
-
159
-
160
-
161
-
162
-
163
-
164
-
165
-
166
-
167
-
168
-
169
-
170
-
171
-
172
-
173
-
174
-
175
-
176
-
177
-
178
-
179
-
180
-
181
-
182
-
183
-
184
-
185
-
186
-
187
-
188
-
189
-
190
-
191
-
192
-
193
 |
 |

HP PageWide XL 4500/4600 Printer and MFP
User Guide