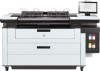
HP PageWide XL Pro 5200 F60 and F70 Folder Assembly instructions
HP PageWide XL Pro 5200 Manual
 |
View all HP PageWide XL Pro 5200 manuals
Add to My Manuals
Save this manual to your list of manuals |
HP PageWide XL Pro 5200 manual content summary:
- HP PageWide XL Pro 5200 | F60 and F70 Folder Assembly instructions - Page 1
F60 and F70 Folder Assembly instructions FR Plieuse HP F60 et F70 Instructions d'assemblage DE HP Falter F60 und F70 Einbauanweisungen JA HP F60 および F70 ZHCN HP F60 和 F70 KO HP F60 및 F70 ID HP F60 and F70 Folder Petunjuk Pemasangan EN Please read these instructions carefully. FR Veuillez lire - HP PageWide XL Pro 5200 | F60 and F70 Folder Assembly instructions - Page 2
1 2 3 4 EN Cut the straps. FR Coupez les sangles. DE Schneiden Sie die Gurte ab. JA ZHCN KO ID Potong tali pengikat. Using two people, lift the cardboard box up and off the folder. Cut the plastic bag and remove the foams. Remove the small boxes (with the pieces to be assembled during set - HP PageWide XL Pro 5200 | F60 and F70 Folder Assembly instructions - Page 3
untuk menyelesaikan langkah berikut ini. Lepaskan sekrup pengaman. 3 Place 2 brackets on the right, with one screw on each. Placez deux supports à droite avec une vis pour chaque. Bringen Sie rechts 2 Halterungen mit je einer Schraube an. それぞれ1 2 将 2 1 2 Letakkan 2 braket di sebelah - HP PageWide XL Pro 5200 | F60 and F70 Folder Assembly instructions - Page 4
bottom cover, and fix it to the brackets with 4 screws. Caution: Take care with the cable. Placez le capot inférieur et attachez-le aux supports à l'aide des quatre vis. Attention : Faites attention au câble. Place the fan-fold tray. Placez le bac de pliage en accordéon. DE Bringen Sie - HP PageWide XL Pro 5200 | F60 and F70 Folder Assembly instructions - Page 5
le bac du pli croisé. Installez l'extrémité de la plaque du convoyeur et fixez-la avec 2 vis. Dévissez les trois vis des supports d'expédition des patins (x 6). Legen Sie 5 Stapler-beenden-Regler unter das Querfalz-Fach. Installieren Sie die Förderband-Abschlussplatte und befestigen Sie sie mit - HP PageWide XL Pro 5200 | F60 and F70 Folder Assembly instructions - Page 6
. FR Vissez les quatre patins de nivellement jusqu'à ce que les supports de livraison se trouvent 10 mm au-dessus. DE Schrauben Sie die mit dem HP PageWide XL-Drucker geliefert wurden, können diese verwendet werden. 2 HP PageWide XL 让 2 HP PageWide XL HP PageWide XL Dengan menggunakan - HP PageWide XL Pro 5200 | F60 and F70 Folder Assembly instructions - Page 7
21 22 23 24 EN Unscrew the 2 air cushions. Note: A mechanical screwdriver is recommended to remove 1 screw from each air cushion. Important: 2 people are required, as 1 person must hold the folder on the other side. FR Dévissez les 2 coussins amortisseurs. Remarque : Un tournevis mécanique - HP PageWide XL Pro 5200 | F60 and F70 Folder Assembly instructions - Page 8
rollers, and pull from the rear. Close the top cover and place the stacking guides. Ouvrez le capot supérieur et assurez-vous que les billes de métal de tirez par l'arrière. Refermez le capot supérieur et placez les guides d'empilage. Öffnen Sie die obere Abdeckung und stellen Sie sicher, dass - HP PageWide XL Pro 5200 | F60 and F70 Folder Assembly instructions - Page 9
29 30 31 32 EN If not done already; remove the covers for the rear accessories. FR Si cela n'a pas déjà été effectué, retirez les capots des accessoires arrière. Fix the 2 accessory hooks to the printer with 3 screws each side. On the left side of the roller tray, remove the cable tie from the - HP PageWide XL Pro 5200 | F60 and F70 Folder Assembly instructions - Page 10
ID Sambungkan kabel. 34 35 Assemble the fan unit into the upper and lower support rails. The screw has to be in the fan unit gap. Please ensure . ü Yes; X No. Assemblez l'unité de ventilation aux rails de support supérieur et inférieur. La vis doit se trouver dans l'écart de - HP PageWide XL Pro 5200 | F60 and F70 Folder Assembly instructions - Page 11
36 EN Open the tab cover. FR Ouvrez le capot du compartiment à étiquettes. DE Öffnen Sie die Registerkartenabdeckung. JA ZHCN KO ID Buka penutup tab. 37 Remove the piece shown by removing 1 screw on the lateral. Retirez la pièce indiquée en retirant la vis sur le côté. EN 5X00/6000/8X00 Printer - HP PageWide XL Pro 5200 | F60 and F70 Folder Assembly instructions - Page 12
39 40 41 42 EN Remove the tray's cover. FR Retirez le capot du bac. DE Nehmen Sie die Abdeckung des Fachs heraus. JA ZHCN KO ID Lepaskan penutup baki. Remove 1 screw from each side, then remove the piece shown. Retirez 1 vis de chaque côté, puis retirez la pièce indiquée. Remove 2 screws - HP PageWide XL Pro 5200 | F60 and F70 Folder Assembly instructions - Page 13
an Druckern mit dem Falter: Diese Schritte sollte bei allen HP PageWide XL Druckern durchgeführt werden, die den Falter verwenden. JA HP PageWide XL ZHCN HP PageWide XL KO HP PageWide XL ID Menyamakanketinggianpemasangankaki pada printer menggunakan folder: Langkah-langkah berikut - HP PageWide XL Pro 5200 | F60 and F70 Folder Assembly instructions - Page 14
46 47 48 49 EN Remove the 3 front and 3 back foot covers. Fix the 4 levelling feet to the structure base with 4 M6x25 screws each. Level the printer adjusting the height of each foot. Replace all 6 foot covers. FR Retirez les 3 protections de pied avant et arrière. DE Entfernen Sie die 3 - HP PageWide XL Pro 5200 | F60 and F70 Folder Assembly instructions - Page 15
50 51 52 EN Final adjustments FR Derniers réglages DE Abschließende Anpassungen JA ZHCN KO ID Penyesuaian akhir EN Pull the folder tray up and loosen the gas springs stoppers. FR Tirez le bac de la plieuse vers le haut et desserrez les butées des ressorts à gaz. DE Ziehen Sie die Faltablage - HP PageWide XL Pro 5200 | F60 and F70 Folder Assembly instructions - Page 16
53 54 55 EN Switch on the folder with the rear button and switch on the printer. Go to the front panel and tap Settings > Output options > Install accessory. FR Mettez la plieuse sous tension à l'aide du bouton arrière et mettez l'imprimante sous tension. Accédez au panneau avant et touchez Param - HP PageWide XL Pro 5200 | F60 and F70 Folder Assembly instructions - Page 17
56 57 58 59 EN If the misalignment appears on the right, the folder needs to be closer on the left; loosen the two hooks' screws, move the hook, and tighten later. FR Si le défaut d'alignement apparaît à droite, la plieuse doit être plus à gauche ; Desserrez les vis des deux crochets, déplacez - HP PageWide XL Pro 5200 | F60 and F70 Folder Assembly instructions - Page 18
Bodenunebenheiten. JA ZHCN Check the service manual and training material for further instructions on alignment and calibration. To connect auf die richtige Position eingestellt werden. RRUU H KKKK * HP KO ID Sesuaikan alas pendataran ke posisi terendah. Tempatnya pita - HP PageWide XL Pro 5200 | F60 and F70 Folder Assembly instructions - Page 19
19 - HP PageWide XL Pro 5200 | F60 and F70 Folder Assembly instructions - Page 20
de ce document sont susceptibles d'être modifiées sans préavis. Les garanties des produits et services HP sont exclusivement présentées dans la documentation accompagnant ces produits et services. Rien dans le présent document ne peut être considéré comme constituant une garantie supplémentaire
-
 1
1 -
 2
2 -
 3
3 -
 4
4 -
 5
5 -
 6
6 -
 7
7 -
8
-
9
-
10
-
11
-
12
-
13
-
14
-
15
-
16
-
17
-
18
-
19
-
20
 |
 |

1
Edition 3
© Copyright 2018-2021 HP Development Company, L.P.
Large Format Division
Camí de Can Graells 1-21
08174 · Sant Cugat del Vallès
Barcelona · Spain
All rights reserved
Printed in XXX
ZHCN
KO
JA
FR
DE
ID
EN
HP F60 and F70 Folder
Assembly instructions
Plieuse HP F60 et F70
Instructions d’assemblage
HP Falter F60 und F70
Einbauanweisungen
HP F60 および
F70フ ォルダー
フォルダ組み立て説明書
HP F60 和 F70 折图机
组装说明
HP F60 및 F70 폴더
폴더 조립 지침
HP F60 and F70
Folder
Petunjuk Pemasangan
EN
Please read these instructions carefully.
FR
Veuillez lire attentivement les instructions suivantes.
DE
Lesen Sie diese Anweisungen sorgfältig durch:
JA
以下の指示をよくお読みください。
ZHCN
请仔细阅读这些说明。
KO
이 지침을 주의깊게 읽으십시오.
ID
Baca petunjuk ini dengan cermat.
EN
The space required for assembly is 2,5m (8,2 feet) at the front and 1m (3,3
feet) on each side.
FR
L’espace requis pour l’assemblage est de 2,5 m (8,2 pieds) à l’avant et de 1 m
(3,3 pieds) de chaque côté.
DE
Der für die Montage erforderliche Platz beträgt vorne 2,5 m und auf jeder
Seite 1 m.
JA
組み立てには前面に2.5m(8.2フィート)、両側に1m(3.3フィート)の
スペースが必要です。
ZHCN
组装时需要折图机前方有 2.5 米(8.2 英尺)、两侧有 1 米(3.3 英尺)的
空间。
KO
조립을 하려면 프린터 앞쪽에 2.5m(8.2피트), 각 면에 1m(3.3피트)의 공간이 필
요합니다.
ID
Ruang yang diperlukan untuk pemasangan adalah 2,5 m (8,2 kaki) di bagian
depan dan 1 m (3,3 kaki) di setiap sisi.
150’
EN
Time required for assembly is approximately 150 minutes .
FR
Le temps requis pour l’assemblage de l’imprimante est d’environ 90 minutes.
DE
Der Zusammenbau des Druckers dauert etwa 90 Minuten.
JA
組み立て所要時間は約150分です。
ZHCN
组装折图机大约需要 150 分钟时间。
KO
조립에 소요되는 시간은 약 150분입니다.
ID
Waktu yang diperlukan untuk pemasangan adalah sekitar 150 menit.
EN
2 people are required to perform certain tasks.
FR
L’exécution de certaines tâches nécessite la présence de 4personnes.
DE
Für bestimmte Tätigkeiten werden 4 Personen benötigt.
JA
特定の作業は、2名で行う必要があります。
ZHCN
某些任务需要 2 人完成。
KO
일부 작업의 경우 2명이 필요합니다.
ID
Diperlukan 2 orang untuk menjalankan tugas tertentu.
EN
Tools :
Allen, torx, and Phillips screwdrivers.
FR
Outils:
Tournevis Allen, torx et Philips.
DE
Werkzeuge:
Inbus-, Torx- und Kreuzschlitzschraubendreher.
JA
ツール:
六角レンチ、トルクス ドライバ、プラス ドライバ。
ZHCN
工具:
内六角、内六星和十字螺丝刀
KO
공구:
육각, 별 모양 및 십자 드라이버.
ID
Tools [Alat bantu]:
Obeng Allen, torx, dan Phillips.