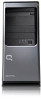
HP Presario SG3200 PC Troubleshooting
HP Presario SG3200 - Desktop PC Manual
 |
View all HP Presario SG3200 manuals
Add to My Manuals
Save this manual to your list of manuals |
HP Presario SG3200 manual content summary:
- HP Presario SG3200 | PC Troubleshooting - Page 1
Troubleshooting and Maintenance Guide - HP Presario SG3200 | PC Troubleshooting - Page 2
forth in the express statements accompanying such products and services. Nothing herein should be construed as constituting an trademark of Microsoft Corporation in the United States and/or other countries/regions. HP supports lawful use of technology and does not endorse or encourage the use of our - HP Presario SG3200 | PC Troubleshooting - Page 3
startup 2 Running the Disk Cleanup Program 2 Running Disk Cleanup manually 2 Scheduling Disk Cleanup to run automatically 2 Running the Cleaning the computer and monitor 4 Cleaning the keyboard and mouse 4 Troubleshooting Computer Problems 5 Audio ...5 CD and DVD Drives 7 Video...9 Display ( - HP Presario SG3200 | PC Troubleshooting - Page 4
iv Troubleshooting and Maintenance Guide - HP Presario SG3200 | PC Troubleshooting - Page 5
trouble-free operation of your computer, and to ease the recovery of important information on your computer if problems up data; refer to Help and Support for more information. 1 Click the Windows you may need to manually enable this feature (refer Follow the onscreen instructions. NOTE: Some - HP Presario SG3200 | PC Troubleshooting - Page 6
files in the Recycle Bin). You can run Disk Cleanup manually, or you can set it up to run automatically. Running Disk Cleanup manually 1 Click the Windows Start Button, All Programs, Accessories, a long time to complete. You can run it unattended overnight. 2 Troubleshooting and Maintenance Guide - HP Presario SG3200 | PC Troubleshooting - Page 7
1 Save your work and close all open programs. 2 Press the Ctrl-Alt-Delete keys simultaneously. 3 Click Start Task Manager. 4 On the Applications tab, select all the programs that are listed, and then click End Task. Close the Task Manager. 5 Click the Windows Start Button, All Programs, Accessories, - HP Presario SG3200 | PC Troubleshooting - Page 8
the mouse with a cotton swab dampened with isopropyl alcohol. 5 After the roller ball and rollers are completely dry, replace the ball and ball-cover ring. 4 Troubleshooting and Maintenance Guide - HP Presario SG3200 | PC Troubleshooting - Page 9
The troubleshooting tables appear in the following order: Audio CD and DVD Drives Video Display (Monitor) Hard Disk Drive Hardware Installation Internet Access Keyboard and Mouse Power Performance Bluetooth Wireless Devices Miscellaneous For more information about monitor problems, or for problems - HP Presario SG3200 | PC Troubleshooting - Page 10
powered speakers. Powered speakers have a power cord and On button, and they connect to the Audio Out (green) connector on the back of the computer. 6 Troubleshooting and Maintenance Guide - HP Presario SG3200 | PC Troubleshooting - Page 11
Turn on your computer, and press the Eject button nearest the drive to open the tray. If you suspect a problem with the Eject button itself: 1 Click the Windows Start Button and then Computer. 2 Right-click the CD or drive in the CD or DVD recording software. Troubleshooting Computer Problems 7 - HP Presario SG3200 | PC Troubleshooting - Page 12
data files. To play a movie properly, use a video recording program. Some video files may be viewed on a computer, but not on a home DVD video player. 8 Troubleshooting and Maintenance Guide - HP Presario SG3200 | PC Troubleshooting - Page 13
file in a video editor, and then resave the file in a supported format. Codec error messages appear Open the file in Windows Media Player. Select Search automatically for updated driver software. 6 Follow the instructions to update the driver. 7 If you are prompted, Troubleshooting Computer Problems 9 - HP Presario SG3200 | PC Troubleshooting - Page 14
to turn off the computer. 2 Press the On button to start the computer. Press the Help ? button on the keyboard to open the Help and Support Center, or refer to the Limited Warranty and Support Guide to contact Support. 10 Troubleshooting and Maintenance - HP Presario SG3200 | PC Troubleshooting - Page 15
Web site. For details, refer to the Limited Warranty and Support Guide for details. Ensure that all cables are properly and securely the computer. Restart the computer, and follow the instructions for accepting the changes. Disable the automatic settings in Troubleshooting Computer Problems 11 - HP Presario SG3200 | PC Troubleshooting - Page 16
Click the plus sign (+) next to the problem device and check for exclamation points in a point means there is a device conflict or problem with the device. Exclamation points do not always click the Troubleshoot button, and follow the onscreen instructions in the device troubleshooter wizard. - HP Presario SG3200 | PC Troubleshooting - Page 17
Do not plug a network cable into a telephone service line; doing so may damage the NIC. the keyboard to open the Help and Support Center. Verify that the Web browser is open the wizard. 4 Follow the onscreen instructions. If your system has external antennas, try Troubleshooting Computer Problems 13 - HP Presario SG3200 | PC Troubleshooting - Page 18
America Online, click Uninstall, and then follow the onscreen instructions. NOTE: Removing the AOL program will not cancel your Internet. This is typically caused by adware or advertising-supported software. You can configure your Web browser to block pop Troubleshooting and Maintenance Guide - HP Presario SG3200 | PC Troubleshooting - Page 19
Use the Print menu item in the program (usually located on the File menu). Check for these problems: Ensure the mouse and keyboard are within range of the receiver. Replace the batteries in the keyboard and time out instead, move the mouse and check for response. Troubleshooting Computer Problems 15 - HP Presario SG3200 | PC Troubleshooting - Page 20
you have a rollerball mouse, clean the roller ball. For detailed cleaning instructions, go to: http://www.hp.com/support Select your country/region and language, search on your computer model number, and mouse, try a less reflective surface under the mouse. 16 Troubleshooting and Maintenance Guide - HP Presario SG3200 | PC Troubleshooting - Page 21
refer to the Limited Warranty and Support Guide to contact Support. If the display (monitor) is instructions, refer to the Upgrading and Servicing Guide. Reseat the hard disk drive data and power cables. For instructions, refer to the Upgrading and Servicing Guide. Troubleshooting Computer Problems - HP Presario SG3200 | PC Troubleshooting - Page 22
is approximately seven years. Before replacing the battery, try resetting the date and time in your operating system by using the Control Panel. If the problem persists, replace the battery. For instructions, refer to the Upgrading and Servicing Guide. 18 Troubleshooting and Maintenance - HP Presario SG3200 | PC Troubleshooting - Page 23
then Control Panel. 2 Click Uninstall a program. The Programs and Features window opens. 3 Select the program you want to remove and click Uninstall. 4 Follow the onscreen instructions. Troubleshooting Computer Problems 19 - HP Presario SG3200 | PC Troubleshooting - Page 24
the device instructions. Ensure other devices that use radio frequencies (for example, microwave ovens, cordless phones, and 802.11 wireless networks) are not creating interference. Try moving the device that is not working farther away from other devices. 20 Troubleshooting and Maintenance Guide - HP Presario SG3200 | PC Troubleshooting - Page 25
, Memory Stick Pro, MultiMedia, Secure Digital, SmartMedia, or xD. Some models may support additional types. Ensure the memory card is fully inserted into the correct slot. Inspect the small amount of isopropyl alcohol. Replace the memory card if necessary. Troubleshooting Computer Problems 21 - HP Presario SG3200 | PC Troubleshooting - Page 26
version of the driver if the new one does not solve your problem: 1 Click the Windows Start Button, right-click Computer, and then instructions. Or To revert to an earlier version of a driver, click Rollback Driver, and follow the onscreen instructions. 22 Troubleshooting and Maintenance Guide - HP Presario SG3200 | PC Troubleshooting - Page 27
a previous time when the current software problem did not exist. The feature does this click Next. 4 Follow the onscreen instructions. To manually add restore points: 1 Close all instructions. For more information about software restore points: 1 Click the Windows Start Button, and Help and Support - HP Presario SG3200 | PC Troubleshooting - Page 28
the Welcome screen. 4 Choose the program you want to install, click Next, and follow the onscreen instructions. 5 When you have finished reinstalling, restart the computer. NOTE: Do not skip this last step. is normal that some of your discs may be rejected. 24 Troubleshooting and Maintenance Guide - HP Presario SG3200 | PC Troubleshooting - Page 29
Layer CD CD-R 7-11 discs No CD or DVD drive Contact HP Support The process takes some time to verify that the information written on the Help & Tools, and then Recovery Disc Creation. 3 Follow the onscreen instructions. Label each disc as you make it (for example, Recovery 1, Problems 25 - HP Presario SG3200 | PC Troubleshooting - Page 30
to turn on the computer. A window may open, prompting you to choose between running system recovery from the discs or from your hard drive. 26 Troubleshooting and Maintenance Guide - HP Presario SG3200 | PC Troubleshooting - Page 31
At the Welcome to Microsoft Windows screen, follow the onscreen setup instructions, and then click Start in the last screen to display the All Programs, the HP folder, and then HP Update. b Follow the onscreen instruction to download driver and software updates. 8 If you performed a backup before the - HP Presario SG3200 | PC Troubleshooting - Page 32
www.hp.com Printed in
-
 1
1 -
 2
2 -
 3
3 -
 4
4 -
 5
5 -
 6
6 -
 7
7 -
8
-
9
-
10
-
11
-
12
-
13
-
14
-
15
-
16
-
17
-
18
-
19
-
20
-
21
-
22
-
23
-
24
-
25
-
26
-
27
-
28
-
29
-
30
-
31
-
32
 |
 |

Troubleshooting and Maintenance Guide