HP Presario V5100 Notebook PC User Guide
HP Presario V5100 - Notebook PC Manual
 |
View all HP Presario V5100 manuals
Add to My Manuals
Save this manual to your list of manuals |
HP Presario V5100 manual content summary:
- HP Presario V5100 | Notebook PC User Guide - Page 1
Notebook PC User Guide - HP Presario V5100 | Notebook PC User Guide - Page 2
Packard Development Company, L.P. Microsoft and Windows are U.S. registered trademarks of Microsoft HP products and services are set forth in the express warranty statements accompanying such products and services. Nothing herein should be construed as constituting an additional warranty. HP - HP Presario V5100 | Notebook PC User Guide - Page 3
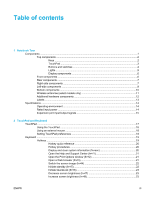
Table of contents 1 Notebook Tour Components ...1 Top components ...2 Additional hardware components 12 Labels ...13 Specifications ...14 Operating environment ...14 Rated input (fn+esc 20 Open the Help and Support Center (fn+f1 21 Open the Print Options window (fn+f2 21 Open a Web browser - HP Presario V5100 | Notebook PC User Guide - Page 4
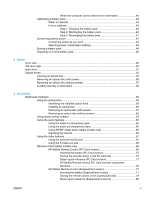
Play, pause or resume an audio CD or a DVD (fn+f9 23 Stop an audio CD or a DVD (fn+f10 23 Play previous track or section of an audio CD or a DVD (fn+f11 23 Play next track or section of an audio CD or a DVD (fn+f12 23 Keypads ...24 Using the embedded numeric keypad 24 Enabling and disabling the - HP Presario V5100 | Notebook PC User Guide - Page 5
volume 66 Using the video features ...67 Using the external monitor port 67 Using the S-Video-out jack 68 Remote control (select models only 69 HP Mobile Remote Control (PC Card version 69 Inserting the battery (PC Card version 70 Storing the remote control in the PC Card slot 72 Button - HP Presario V5100 | Notebook PC User Guide - Page 6
HP Mobile Remote Control (ExpressCard version) component functions 83 Troubleshooting the remote control 83 Multimedia software ...84 Identifying preinstalled multimedia software 84 Installing multimedia software from a CD (select models only 84 Using multimedia software 85 - HP Presario V5100 | Notebook PC User Guide - Page 7
modem cable 116 Connecting a country-specific modem cable adapter 117 Selecting a 118 Solving travel connection problems 119 Using preinstalled passwords 124 Passwords set in Windows 125 QuickLock ...125 Passwords set updates ...137 HP Software Update ...137 Software updates and the HP Web site - HP Presario V5100 | Notebook PC User Guide - Page 8
Cleanup 152 Regular tune-ups ...153 Traveling and shipping ...154 15 Troubleshooting Quick checklist ...155 The computer will not start up 155 The computer e-mail or telephone 159 Taking the computer to a service partner 159 16 Electrostatic Discharge Preventing electrostatic discharge ...161 - HP Presario V5100 | Notebook PC User Guide - Page 9
ENWW ix - HP Presario V5100 | Notebook PC User Guide - Page 10
x ENWW - HP Presario V5100 | Notebook PC User Guide - Page 11
1 Notebook Tour Components This chapter explains the hardware features of the computer. To see a list of installed hardware in the computer: 1. Select Start > My Computer. 2. In the left pane of the System Tasks window, select View system information. 3. Select Hardware tab > Device Manager. You can - HP Presario V5100 | Notebook PC User Guide - Page 12
combination with a function key or the esc key. (3) Windows logo key Displays the Microsoft Windows Start menu. (4) Embedded numeric keypad keys Can be used like the keys on an external numeric keypad. (5) Windows applications key Displays a shortcut menu for items beneath the pointer. - HP Presario V5100 | Notebook PC User Guide - Page 13
TouchPad Component Description (1) TouchPad* (2) Left TouchPad button* (3) TouchPad horizontal scroll zone* (4) Right TouchPad button* Moves the pointer and selects or activates items on the screen. Can be set to perform other mouse functions, such as scrolling, selecting, and doubleclicking. - HP Presario V5100 | Notebook PC User Guide - Page 14
In standby, briefly press to exit standby. ● In hibernation, briefly press to exit hibernation. If the computer has stopped responding and Microsoft® Windows® shutdown procedures cannot be used, press and hold the power button for at least 5 seconds to turn off the computer. Decreases system volume - HP Presario V5100 | Notebook PC User Guide - Page 15
drive is being accessed. (6) Num lock light On: Num lock is on or the embedded numeric keypad is enabled. (7) Volume mute light On: System sound is turned off. *There are 2 power lights. Both display the same information. The light on the power button is visible only when the computer is - HP Presario V5100 | Notebook PC User Guide - Page 16
Opens the computer. Initiates standby if the display is closed while the notebook is turned on. CAUTION The internal display switch is magnetic. Keep diskettes Description Links the computer to an optional remote control. Produce system sound. Opens the computer. 6 Chapter 1 Notebook Tour ENWW - HP Presario V5100 | Notebook PC User Guide - Page 17
ExpressCard slot (4) USB port (select models only) Description Produces system sound when connected to optional powered stereo speakers, headphones, ear buds, optional computer headset microphone or a microphone. Supports optional ExpressCard/54 or ExpressCard/34 cards. Connects an optional USB - HP Presario V5100 | Notebook PC User Guide - Page 18
Component (5) Optical drive (6) RJ-11 (modem) jack (7) Power connector Description Reads an optical disc. Connects a modem cable. Connects an AC adapter or an optional power adapter. 8 Chapter 1 Notebook Tour ENWW - HP Presario V5100 | Notebook PC User Guide - Page 19
only) Connects an optional IEEE 1394 device, such as a camcorder. (8) PC Card slot (select models only) Supports optional Type I or Type II PC Cards. (9) Media Reader (select models only) Supports 7 optional digital card formats: Secure Digital (SD) Memory Card, Secure Digital Input/Output (SD - HP Presario V5100 | Notebook PC User Guide - Page 20
during routine operation. *Battery packs vary by model. †The computer has 3 vents. One other vent is located on the rear of the computer. 10 Chapter 1 Notebook Tour ENWW - HP Presario V5100 | Notebook PC User Guide - Page 21
Wireless antennae (select models only) On select computer models, there are at least 2 wireless antennae that send and receive wireless device signals. They are not visible from the outside of the computer. For optimal transmission, keep the areas immediately around the antennae free from - HP Presario V5100 | Notebook PC User Guide - Page 22
external power. Converts AC power to DC power. Connects an AC adapter to an AC outlet. (4) Country-specific modem cable adapter (select models only) (5) Modem cable* Adapts the modem cable to a non-RJ-11 , and power cords vary in appearance by region and country. 12 Chapter 1 Notebook Tour ENWW - HP Presario V5100 | Notebook PC User Guide - Page 23
affixed to the computer provide information you may need when you troubleshoot system problems or travel internationally with the computer. ● Service tag-Provides the product name, serial number (S/N), and other specifics about the computer. Have this information available when you contact Customer - HP Presario V5100 | Notebook PC User Guide - Page 24
be powered only with an AC adapter or a DC power cord supplied by or approved for an HP computer. The computer is capable of accepting DC power within the following specifications. Input Power Operating voltage Operating current Rating 18.5 V dc to 19.0 V dc 3.5 A or 4.74 A or 4.9 A This product - HP Presario V5100 | Notebook PC User Guide - Page 25
-side components" section. The following table identifies the input and output signals supported by the expansion port on the computer. Feature USB 2.0 10/100 Ethernet of an optional expansion product. Support Yes Yes No Yes Yes 65W - 135W maximum Yes Yes No Yes No Yes Yes ENWW Specifications 15 - HP Presario V5100 | Notebook PC User Guide - Page 26
16 Chapter 1 Notebook Tour ENWW - HP Presario V5100 | Notebook PC User Guide - Page 27
2 TouchPad and Keyboard TouchPad The following illustration and table describe the computer TouchPad. Component Description (1) TouchPad* Moves the pointer and selects or activates items on the screen. Can be set to perform other mouse functions, such as scrolling, selecting, and doubleclicking. - HP Presario V5100 | Notebook PC User Guide - Page 28
can also be connected to the system using the connectors on an optional expansion product. Setting TouchPad preferences Mouse Properties in Microsoft® Windows® allows you to customize settings for pointing devices, including ● TouchPad tapping, which enables you to tap the TouchPad once to select an - HP Presario V5100 | Notebook PC User Guide - Page 29
Keyboard The following sections provide information on the keyboard features of the notebook. Hotkeys Hotkeys are combinations of the fn key (1) and either the esc key (2) or one of the function keys (3). The icons on the f1 through - HP Presario V5100 | Notebook PC User Guide - Page 30
Hotkey quick reference Function Display and clear system information. Open the Help and Support Center. Open the Print Options window. Open a Web browser. Switch the screen image between the computer display and an external display. Initiate standby. Initiate QuickLock. Decrease screen brightness. - HP Presario V5100 | Notebook PC User Guide - Page 31
for computer functionality. ● Automated and interactive troubleshooting, repair solutions, and system recovery procedures. ● Links to HP support specialists. You can also access the Help and Support Center by selecting Start > Help and Support. Open the Print Options window (fn+f2) Press fn+f2 to - HP Presario V5100 | Notebook PC User Guide - Page 32
The following video transmission types, with examples of devices that use them, are supported by the fn+f4 hotkey: ● LCD (computer display) ● External VGA instead of standby. NOTE In all Windows operating system windows, references to the sleep button apply to the fn+f5 hotkey. 22 - HP Presario V5100 | Notebook PC User Guide - Page 33
, you must set a Windows user password or a Windows administrator password. For instructions, refer to the Help and Support Center. To use QuickLock, press fn+f6 to display the Log On window and lock the computer. Then follow the instructions on the screen to enter your Windows user password or your - HP Presario V5100 | Notebook PC User Guide - Page 34
Keypads The computer has an embedded numeric keypad and also supports an optional external numeric keypad or an optional external keyboard that includes a numeric keypad. Component (1) fn key (2) num lock light (3) num lk key (4) Embedded numeric - HP Presario V5100 | Notebook PC User Guide - Page 35
Switching key functions on the embedded numeric keypad You can temporarily alternate the functions of keys on the embedded numeric keypad between their standard keyboard functions and their keypad functions by using the fn key or the fn+shift key combination. ● To change the function of a keypad key - HP Presario V5100 | Notebook PC User Guide - Page 36
26 Chapter 2 TouchPad and Keyboard ENWW - HP Presario V5100 | Notebook PC User Guide - Page 37
In standby, briefly press to exit standby. ● In hibernation, briefly press to exit hibernation. If the computer has stopped responding and Microsoft® Windows® shutdown procedures cannot be used, press and hold the power button for at least 5 seconds to turn off the computer. Power control and light - HP Presario V5100 | Notebook PC User Guide - Page 38
Component Description (2) Power lights* (2) On: The computer is on. Blinking: The computer is in standby. Off: The computer is off or in hibernation. (3) fn+f5 Initiates standby. (4) Battery light On: A battery pack is charging or is close to full charge capacity. Blinking: A battery pack - HP Presario V5100 | Notebook PC User Guide - Page 39
Power sources The computer can run on internal or external AC power. The following table indicates the best power sources for common tasks. Task Recommended power source Work in most software applications ● Charged battery pack in the computer ● External power supplied through one of the - HP Presario V5100 | Notebook PC User Guide - Page 40
Connecting the AC adapter WARNING! To reduce the risk of electric shock or damage to the equipment: Plug the power cord into an AC outlet that is easily accessible at all times. Disconnect power from the computer by unplugging the power cord from the AC outlet (not by unplugging the power cord from - HP Presario V5100 | Notebook PC User Guide - Page 41
system will not automatically save your work while power is on or when standby has been initiated. Use Power Options in Microsoft® Windows® Control Panel to reenable hibernation: 1. Select Start > Control Panel > Performance and Maintenance > Power Options > Hibernate tab. 2. Be sure that the Enable - HP Presario V5100 | Notebook PC User Guide - Page 42
To set the time interval after which the system initiates hibernation: 1. Select Start > Control Panel > Performance and Maintenance > Power Options. 2. Click one of the intervals in the System hibernates list. Initiating standby, hibernation or shutdown The following sections explain when to - HP Presario V5100 | Notebook PC User Guide - Page 43
When using wireless communication or readable or writable media (select models only) CAUTION To prevent possible audio and video degradation, or loss of audio or video playback functionality, do not initiate standby or hibernation while reading or writing to a CD, DVD, or external media card. To - HP Presario V5100 | Notebook PC User Guide - Page 44
Emergency shutdown procedures result in the loss of unsaved information. If the computer is unresponsive and you are unable to use normal Windows shutdown procedures, try the following emergency procedures in the sequence provided: ● Press ctrl+alt+delete. Then, select Shut Down > Turn Off. ● Press - HP Presario V5100 | Notebook PC User Guide - Page 45
system initiates standby after 10 minutes of computer inactivity. (Default setting) Resume from user-initiated ● or system-initiated standby. ● Power settings and timeouts can be changed using Power Options in Windows Control Panel. Press the power button. ● If the display was closed while - HP Presario V5100 | Notebook PC User Guide - Page 46
low-battery condition. The power lights are turned off. The screen clears. Restore from user-initiated or system-initiated hibernation. Power settings and timeouts can be changed using Power Options in Windows Control Panel. Press the power button.* ● ● The power lights are turned on. Your - HP Presario V5100 | Notebook PC User Guide - Page 47
Power options You can change many default power settings in Windows Control Panel. For example, you can set an audio alert to warn you when the battery pack reaches a low-power condition, or you can change - HP Presario V5100 | Notebook PC User Guide - Page 48
Setting or changing a power scheme The Power Schemes tab in the Power Options Properties dialog box assigns power levels to system components. You can assign different schemes, depending on whether the computer is running on battery or external power. You can also set a power scheme that initiates - HP Presario V5100 | Notebook PC User Guide - Page 49
to conserve power by reducing processor speed and graphics performance. Windows XP enables you to manage the processor performance controls by selecting power. Each power scheme for external power or battery power sets a specific processor state. After a power scheme has been set, no other - HP Presario V5100 | Notebook PC User Guide - Page 50
Battery packs When a charged battery pack is in the computer and the computer is not plugged into external power, the computer runs on battery power. When the computer is plugged into external AC power, the computer runs on AC power. If the computer contains a charged battery pack and is running on - HP Presario V5100 | Notebook PC User Guide - Page 51
To remove a battery pack: 1. Turn the computer upside down with the battery bay to the left. 2. Slide the battery pack release latch (1) to release the battery pack. 3. Pivot the battery pack (2) away from the computer and remove it from the computer (3). Charging a battery pack To prolong battery - HP Presario V5100 | Notebook PC User Guide - Page 52
. ● If a battery pack has been unused for one month or more, calibrate the battery pack instead of simply charging it. For calibration instructions, refer to "Calibrating a battery pack." Displaying charge information on the screen This section explains how to access and interpret battery charge - HP Presario V5100 | Notebook PC User Guide - Page 53
-battery condition alerts and system responses can be changed using Power Options in Windows Control Panel. Preferences set using Power Options do not affect lights. Identifying > Power Options > Hibernate. 2. Be sure that the Enable hibernation support check box is selected. ENWW Battery packs 43 - HP Presario V5100 | Notebook PC User Guide - Page 54
Resolving low-battery conditions CAUTION To reduce the risk of losing information when the computer reaches a critical lowbattery condition and has initiated hibernation, do not restore power until the power lights are turned off. When external power is available To resolve a low-battery condition - HP Presario V5100 | Notebook PC User Guide - Page 55
Calibrating a battery pack When to calibrate Even if a battery pack is heavily used, it should not be necessary to calibrate it more than once a month. It is not necessary to calibrate a new battery pack. Calibrate a battery pack under the following conditions: ● When battery charge displays seem - HP Presario V5100 | Notebook PC User Guide - Page 56
Step 2: Discharging the battery pack Before you begin a full discharge, disable hibernation. To disable hibernation: 1. Select Start > Control Panel > Performance and Maintenance > Power Options > Hibernate. 2. Clear the Enable hibernation check box. 3. Click Apply. The computer must remain on while - HP Presario V5100 | Notebook PC User Guide - Page 57
Step 3: Recharging the battery pack To recharge the battery pack: 1. Plug the computer into external power and maintain external power until the battery pack is fully recharged. When the battery pack is recharged, the battery light on the computer is turned off. You can use the computer while the - HP Presario V5100 | Notebook PC User Guide - Page 58
avoid potential safety issues, use only the battery pack provided with the computer, a replacement battery pack provided by HP, or a compatible battery pack purchased as an accessory from HP. CAUTION To prevent damage to a battery pack, do not expose it to high temperatures for extended periods of - HP Presario V5100 | Notebook PC User Guide - Page 59
4 Drives Drive care Drives are fragile computer components that must be handled with care. The following cautions apply to all drives. Additional cautions are included with the procedures to which they apply. CAUTION To reduce the risk of damage to the computer, damage to a drive, or loss - HP Presario V5100 | Notebook PC User Guide - Page 60
IDE drive light The IDE drive light blinks when either the primary hard drive or an optical drive is being accessed. 50 Chapter 4 Drives ENWW - HP Presario V5100 | Notebook PC User Guide - Page 61
Hard drive CAUTION To prevent system lockup and loss of information: Shut down the computer before removing the hard drive from the hard drive bay. Do not remove the hard drive while the computer is on, in standby, or in hibernation. If you are not sure whether the computer is off or in hibernation, - HP Presario V5100 | Notebook PC User Guide - Page 62
7. Lift the hard drive away from the computer (2). To install a hard drive: 1. Lower the hard drive into the hard drive bay (1). 2. Slide the hard drive toward the hard drive connector (2) until it is fully seated. 3. Align the tabs (1) on the hard drive cover with the notches on the computer. 4. - HP Presario V5100 | Notebook PC User Guide - Page 63
5. Tighten the hard drive cover screws (3). ENWW Hard drive 53 - HP Presario V5100 | Notebook PC User Guide - Page 64
Optical drives An optical drive, such as a DVD-ROM drive, supports optical discs (CDs and DVDs). These discs are used to store or transport data and Yes Yes Yes Yes Layer Some of the optical drives listed may not be supported by your computer. The listed drives are not necessarily all of the - HP Presario V5100 | Notebook PC User Guide - Page 65
Inserting an optical disc 1. Turn on the computer. 2. Press the release button (1) on the drive bezel to release the media tray. 3. Pull out the tray (2). 4. Hold the CD or DVD by the edges to avoid touching the flat surfaces, and position the disc over the tray spindle, with the label-side up. NOTE - HP Presario V5100 | Notebook PC User Guide - Page 66
Removing an optical disc (with power) If the computer is running on external or battery power: 1. Turn on the computer. 2. Press the release button (1) on the drive bezel to release the media tray, and then pull out the tray (2). 3. Remove the disc (3) from the tray by gently pressing down on the - HP Presario V5100 | Notebook PC User Guide - Page 67
Removing an optical disc (without power) If external or battery power is unavailable: 1. Insert the end of a paper clip (1) into the release access in the front bezel of the drive. 2. Press in gently until the tray is released, and then pull out the tray (2). 3. Remove the disc (3) from the tray by - HP Presario V5100 | Notebook PC User Guide - Page 68
Avoiding standby or hibernation CAUTION To prevent possible audio and video degradation, or loss of audio or video playback functionality, do not initiate standby or hibernation while reading or writing to a CD or DVD. To prevent loss of data, do not initiate standby or hibernation when writing to a - HP Presario V5100 | Notebook PC User Guide - Page 69
5 Multimedia Multimedia hardware Using the optical drive The optical drive allows you to play, copy, and create CDs or DVDs, depending on the type of installed drive and installed software. Identifying the installed optical drive To view the type of optical drive installed in the computer: ▲ Select - HP Presario V5100 | Notebook PC User Guide - Page 70
Inserting an optical disc 1. Turn on the computer. 2. Press the release button (1) on the drive bezel to release the media tray. 3. Pull out the tray (2). 4. Hold the CD or DVD by the edges to avoid touching the flat surfaces, and position the disc over the tray spindle, with the label-side up. NOTE - HP Presario V5100 | Notebook PC User Guide - Page 71
Removing an optical disc (with power) If the computer is running on external or battery power: 1. Turn on the computer. 2. Press the release button (1) on the drive bezel to release the media tray, and then pull out the tray (2). 3. Remove the disc (3) from the tray by gently pressing down on the - HP Presario V5100 | Notebook PC User Guide - Page 72
Removing an optical disc (without power) If external or battery power is unavailable: 1. Insert the end of a paper clip (1) into the release access in the front bezel of the drive. 2. Press in gently until the tray is released, and then pull out the tray (2). 3. Remove the disc (3) from the tray by - HP Presario V5100 | Notebook PC User Guide - Page 73
Using media activity hotkeys Media activity hotkeys are combinations of the fn key (1) and 4 of the function keys. You can use these keys to control the play of an audio CD or a DVD that is inserted in the optical drive. NOTE To control the play of an inserted video CD, use the media activity - HP Presario V5100 | Notebook PC User Guide - Page 74
mute button (4) Audio-in (microphone) jack (5) Audio-out (headphone) jack (6) Speakers (2) Description Decreases computer sound. Increases computer sound. Turns off computer sound. Connects an optional computer headset or microphone. Connects optional optional powered stereo speakers, headphones - HP Presario V5100 | Notebook PC User Guide - Page 75
Using the audio-in (microphone) jack The computer is equipped with a microphone jack that supports an optional monaural (single sound channel) microphone. Select models support a stereo (dual sound channel) microphone. NOTE When connecting a microphone to the microphone jack, use a microphone with a - HP Presario V5100 | Notebook PC User Guide - Page 76
. ● To increase the volume, press the volume up button. ● Microsoft® Windows® volume control: a. Click the Volume icon in the notification area, at the to place it there: a. Select Start > Control Panel > Sounds, Speech, and Audio Devices > Sounds and Audio Devices. b. Click the Volume tab. c. Select - HP Presario V5100 | Notebook PC User Guide - Page 77
Using the video features The computer includes the following video features: ● S-Video-out jack that connects a range of video components that allow you to maximize your multimedia features ● External monitor port that connects a television, monitor, or projector to the computer Using the external - HP Presario V5100 | Notebook PC User Guide - Page 78
support one S-Video device connected to the S-Video-out jack, while simultaneously supporting an image on the computer display or on any other supported 2. Connect the other end of the cable to the video device, as instructed in the documentation included with the device. 3. Press the fn+f4 keys to - HP Presario V5100 | Notebook PC User Guide - Page 79
an ExpressCard slot. Refer to the computer user guide. The following illustration identifies the 2 remote controls. (1) HP Mobile Remote Control (PC Card version) For more information, refer to "HP Mobile Remote Control (PC Card version)." (2) HP Mobile Remote Control (ExpressCard version) For more - HP Presario V5100 | Notebook PC User Guide - Page 80
) WARNING! Risk of explosion if battery is replaced by an incorrect type. Dispose of used batteries according to the instructions. To insert the battery into the HP Mobile Remote Control (PC Card version): 1. On the back of the remote control, turn the battery compartment cover counterclockwise - HP Presario V5100 | Notebook PC User Guide - Page 81
2. With the positive side of the battery facing up, insert the battery into the compartment. 3. Insert the tabs on the battery compartment cover into the slots in the battery compartment and turn the cover clockwise to close. ENWW Multimedia hardware 71 - HP Presario V5100 | Notebook PC User Guide - Page 82
the remote control in the PC Card slot The HP Mobile Remote Control (PC Card version) can be NOTE Your computer model may look different than the illustrations in this section. Refer to the computer user guide for the location of the PC Card slot. 1. Remove the PC Card slot insert. 2. Gently - HP Presario V5100 | Notebook PC User Guide - Page 83
(PC Card version) This section provides information on the button functions of the HP Mobile Remote Control (PC Card version). When the computer is off: ● Press the power button (1) to start the computer in Windows. ● Press the DVD Menu button (2) to open QuickPlay DVD mode (select computer models - HP Presario V5100 | Notebook PC User Guide - Page 84
Button Music Stop Rewind Function in Microsoft® Windows® Function in QuickPlay (select models only) ● In Windows, press to open the default Windows music player. In QuickPlay DVD mode, press to switch to QuickPlay music mode. ● In standby, press briefly to resume from standby. ● In hibernation - HP Presario V5100 | Notebook PC User Guide - Page 85
left arrow command in the active application. Press to view information about a selected item in an application (if available). Press to open the print options window of the active application. ● In music mode, press to move up one directory level in the My Music display. ● In DVD mode, this button - HP Presario V5100 | Notebook PC User Guide - Page 86
the computer. Things to remember: ● The HP Mobile Remote Control operates within Microsoft® Windows®, QuickPlay (select computer models only), and functions as computer hotkeys. Refer to the computer user guide for information on supported hotkeys. ● Other remote control buttons provide functions - HP Presario V5100 | Notebook PC User Guide - Page 87
For information on the PC Card remote control, refer to "HP Mobile Remote Control (PC Card version)." Inserting the battery (ExpressCard incorrect type. Dispose of used batteries according to the instructions. To insert the battery into the HP Mobile Remote Control (ExpressCard version): 1. On the - HP Presario V5100 | Notebook PC User Guide - Page 88
2. With the positive side of the battery facing up, insert the battery into the compartment. 3. Replace the battery compartment cover. 78 Chapter 5 Multimedia ENWW - HP Presario V5100 | Notebook PC User Guide - Page 89
the remote control in the ExpressCard slot The HP Mobile Remote Control (ExpressCard version) can be computer model may look different than the illustrations in this section. Refer to the computer user guide for the location of the ExpressCard slot. 1. Remove the ExpressCard slot insert. 2. Gently - HP Presario V5100 | Notebook PC User Guide - Page 90
(ExpressCard version) This section provides information on the button functions of the HP Mobile Remote Control (ExpressCard version). When the computer is off: ● Press the power button (1) to start the computer in Windows. ● Press the Media button (2) to open QuickPlay (select computer models only - HP Presario V5100 | Notebook PC User Guide - Page 91
to open QuickPlay (select computer models only) or the default music application. None DVD Menu If the computer is ● ● On, press to open the default Windows DVD player. ● ● On and playing a DVD, press to view the menu of the DVD. ● In standby, press briefly to resume from standby. ● In - HP Presario V5100 | Notebook PC User Guide - Page 92
Button Previous Function in Microsoft® Windows® Function in QuickPlay (select models only) Press to go back to the previous track or chapter. Press to go back to the previous track or - HP Presario V5100 | Notebook PC User Guide - Page 93
user guide for information on supported hotkeys. ● Other remote control buttons provide functions that are not duplicated by computer buttons or preset key combinations. Troubleshooting the remote control Refer to the following table for help in troubleshooting remote control problems. Problem - HP Presario V5100 | Notebook PC User Guide - Page 94
, the following multimedia tasks may be supported: ● Playing digital media, including audio user guides. These guides may be provided on CD or as online help files within the specific application. User guides installation wizard opens, follow the installation instructions on the screen. 3. Restart the - HP Presario V5100 | Notebook PC User Guide - Page 95
Media Player to play an audio CD, select Windows Media Player. NOTE Some applications may be located in subfolders. 2. Insert the media disc, such as an audio CD, into the optical drive. 3. Follow the instructions on the screen. - or - 1. Insert the media disc, such as an audio CD, into the optical - HP Presario V5100 | Notebook PC User Guide - Page 96
playing a CD or a DVD. ● Do not connect or disconnect hardware while playing a disc. To prevent the loss of playback while the computer is in Windows, do not initiate standby or hibernation while playing a disc. If standby or hibernation is initiated while a disc is in use, you may see the warning - HP Presario V5100 | Notebook PC User Guide - Page 97
through the operating system: 1. Select Start > My Computer. 2. Right-click in the window and select Properties> Hardware tab > Device Manager. 3. Click DVD/CD-ROM drives, material, including computer programs, films, broadcasts, and sound recordings. Do not use this computer for such purposes. - HP Presario V5100 | Notebook PC User Guide - Page 98
88 Chapter 5 Multimedia ENWW - HP Presario V5100 | Notebook PC User Guide - Page 99
are often used with digital-media-equipped cameras and PDAs as well as with other computers. The Media Reader (select models only) supports the following digital card formats: ● Secure Digital (SD) Memory Card ● Secure Digital Input/Output (SD I/O) ● MultiMediaCard (MMC) ● Memory Stick (MS) ● Memory - HP Presario V5100 | Notebook PC User Guide - Page 100
with the connectors facing the computer. 2. Gently slide the card into the Media Reader until the card is seated. The operating system will issue a sound to indicate that a device has been connected. NOTE The first time you insert a digital card, the "Found New Hardware" message is displayed in the - HP Presario V5100 | Notebook PC User Guide - Page 101
Close all files and applications that are associated with the digital card. NOTE To stop a data transfer, click Cancel in the operating system Copying window. 2. To stop the digital card: a. Double-click the Safely Remove Hardware icon in the notification area, at the far right of the taskbar. NOTE - HP Presario V5100 | Notebook PC User Guide - Page 102
loss of support for other PC Cards, install only the software required for the device. If you are instructed by the PC Card manufacturer to install device drivers: Install only the device drivers for your operating system. Do not install other software, such as card services, socket services, or - HP Presario V5100 | Notebook PC User Guide - Page 103
, with the connectors facing the computer. 2. Gently slide the card into the PC Card slot until the card is seated. The operating system will issue a sound to indicate that a device has been detected. NOTE The first time you insert a PC card, the "Found New Hardware" message is displayed in the - HP Presario V5100 | Notebook PC User Guide - Page 104
applications and complete all activities that are associated with the PC Card. NOTE To stop a data transfer, click Cancel in the operating system Copying window. 2. To stop the PC Card: a. Double-click the Safely Remove Hardware icon in the notification area, at the far right of the taskbar. NOTE - HP Presario V5100 | Notebook PC User Guide - Page 105
tuner functionality to the computer. For more information, refer to the manufacturer's user guide. Selecting an ExpressCard ExpressCards use one of 2 interfaces and are available in 2 sizes. The ExpressCard slot on the computer supports both interfaces and both sizes. For example, you can use ● An - HP Presario V5100 | Notebook PC User Guide - Page 106
Inserting an ExpressCard CAUTION To prevent damage to the computer and external media cards, do not insert an ExpressCard into a PC Card slot or a PC Card into an ExpressCard slot. CAUTION To prevent damage to the connectors: Use minimal force to insert an ExpressCard. Do not move or transport the - HP Presario V5100 | Notebook PC User Guide - Page 107
b. Gently slide the card into the ExpressCard slot until the card is seated. The operating system will issue a sound to indicate that a device has been connected. NOTE The first time you insert an ExpressCard, the "Found New Hardware" message is displayed in the notification - HP Presario V5100 | Notebook PC User Guide - Page 108
applications and complete all activities that are associated with the ExpressCard. NOTE To stop a data transfer, click Cancel in the operating system Copying window. 2. To stop the ExpressCard: a. Double-click the Safely Remove Hardware icon in the notification area, at the far right of the taskbar - HP Presario V5100 | Notebook PC User Guide - Page 109
can be used with the computer. The USB ports on the computer support USB 2.0 and USB 1.1 devices. Connecting a USB device CAUTION To USB cable of the device to the USB port. The operating system will issue a sound to indicate that a device has been connected. NOTE The first time you connect a - HP Presario V5100 | Notebook PC User Guide - Page 110
Icons in the notification area. 3. Click Stop. Required USB software Some USB devices may require additional support software, which is usually included with the device. For more information about device-specific software, refer to the user guide for the device. 100 Chapter 7 External Devices ENWW - HP Presario V5100 | Notebook PC User Guide - Page 111
port, illustrated below, supports IEEE 1394a devices. 1394 port. The operating system will issue a sound to indicate that a device has been connected. specific drivers and other software before using some 1394 devices. For more information about device-specific software, refer to the user guide - HP Presario V5100 | Notebook PC User Guide - Page 112
Using the expansion port The expansion port on the left side of the computer allows you to connect the computer to an optional expansion product. An optional expansion product provides additional ports and connectors that can be used with the computer. 102 Chapter 7 External Devices ENWW - HP Presario V5100 | Notebook PC User Guide - Page 113
8 Memory Modules Adding or replacing memory modules The computer has one memory module compartment, which is located on the bottom of the computer. The memory capacity of the computer can be upgraded by adding a memory module to the vacant expansion memory module slot or by upgrading the existing - HP Presario V5100 | Notebook PC User Guide - Page 114
7. Lift the memory module compartment cover (2) away from the computer. 8. To remove a memory module: a. Pull away the retention clips (1) on each side of the memory module . (The memory module tilts up.) b. Grasp the edge of the memory module (2) and gently pull the module out of the memory module - HP Presario V5100 | Notebook PC User Guide - Page 115
9. To insert a memory module: a. Align the notched edge (1) of the memory module with the tab in the memory module slot. b. With the memory module at a 45-degree angle from the surface of the memory module compartment, press the module (2) into the memory module slot until it is seated. c. Press the - HP Presario V5100 | Notebook PC User Guide - Page 116
12. Tighten the memory module compartment cover screw (3). 13. Replace the battery pack. 14. Reconnect external power and external devices. 15. Turn on the computer. 106 Chapter 8 Memory Modules ENWW - HP Presario V5100 | Notebook PC User Guide - Page 117
When random access memory (RAM) increases, the operating system increases the hard drive space reserved for the hibernation file. If you experience problems with hibernation after increasing memory, verify that the hard drive has enough free space to accommodate a larger hibernation file. To display - HP Presario V5100 | Notebook PC User Guide - Page 118
can be changed on select models only and should only be changed by advanced users. On select models, you can improve the video performance of the computer exit the Setup Utility, press f10 and then follow the instructions on the screen. Your preferences go into effect when the computer restarts. 108 - HP Presario V5100 | Notebook PC User Guide - Page 119
access a wireless network. Contact your Internet service provider (ISP) or search the Web may look different from the illustrations in this guide. The location and number of buttons, lights My Computer. b. Right-click in the My Computer window. c. Select Properties > Hardware tab > Device Manager - HP Presario V5100 | Notebook PC User Guide - Page 120
Wireless controls The wireless button enables and disables 802.11 and Bluetooth wireless devices, and the wireless light indicates the state of the wireless devices. The following illustration shows the wireless button (1) and associated wireless light (2). The wireless light is on by default. NOTE - HP Presario V5100 | Notebook PC User Guide - Page 121
a frequency of 2.4 GHz. An 802.11g WLAN device is backward compatible with 802.11b devices, so they can operate on the same network. ● 802.11a supports data rates of up to 54 Mbps and operates at a frequency of 5 GHz. 802.11a is not compatible with 802.11b and 802.11g. For - HP Presario V5100 | Notebook PC User Guide - Page 122
a WLAN in your home Microsoft® Windows® XP supports WLAN with the Wireless Network Connection feature. To set up a WLAN and connect to the Internet in your home, you need the following equipment: ● A broadband modem (either DSL or cable) (1) and high-speed Internet service purchased from an Internet - HP Presario V5100 | Notebook PC User Guide - Page 123
For instructions, refer to your router user guide. 3. Use the Wireless Network Connection feature of Microsoft Windows XP to and the user guide included with your wireless router and other WLAN equipment. ● Access the information and Web site links provided in the Help and Support Center. Connecting - HP Presario V5100 | Notebook PC User Guide - Page 124
electronic devices such as ● Network access points. ● Computers (desktop, notebook, PDA). ● Phones (cellular, cordless, smart phone). ● Imaging devices are represented in the Bluetooth for Windows software by graphical icons. The Bluetooth for Windows software provides the following functions: ● - HP Presario V5100 | Notebook PC User Guide - Page 125
telephone line using a 6-pin, RJ-11 modem cable. In some countries, a country-specific modem cable adapter is also required. Jacks for digital PBX systems may resemble analog telephone different from the illustrations in this guide. The location of the modem jack varies by model. ENWW Modem 115 - HP Presario V5100 | Notebook PC User Guide - Page 126
Connecting the modem cable WARNING! To reduce the risk of electric shock, fire, or damage to the equipment, do not plug a modem or telephone cable into the RJ-45 (network) jack. To connect a modem cable: 1. Plug the modem cable into the modem jack (1) on the computer. 2. Plug the modem cable into - HP Presario V5100 | Notebook PC User Guide - Page 127
jacks vary by country. To use the modem and the modem cable outside the country in which you purchased the computer, you must obtain a country-specific modem cable adapter. To connect the modem to an analog telephone line that does not have an RJ-11 telephone jack: 1. Plug the modem cable - HP Presario V5100 | Notebook PC User Guide - Page 128
drop-down list. (If you select a country or region that is not supported by the modem, the Country/Region selection for USA or UK is displayed by default.) 6. Click OK to save your new location setting. (The Dialing Rules window is displayed.) Then ● To set your new location setting as the current - HP Presario V5100 | Notebook PC User Guide - Page 129
you experience modem connection problems when using the supports tone dialing. To change the dialing mode in your current modem location setting: a. Select Start > Control Panel > Network and Internet Connections. b. On the upper menu in the left pane of the Network and Internet Connections window - HP Presario V5100 | Notebook PC User Guide - Page 130
/Region drop-down list. If you select a country or region that is not supported by the modem, the Country/Region selection for USA or UK is displayed by default. 7. Click Apply and then OK. 8. In the Phone and Modem Options window, click the Modems tab. 9. Click the listing for the modem, and then - HP Presario V5100 | Notebook PC User Guide - Page 131
and radio reception, orient the circuitry end of the cable (2) toward the computer. NOTE The computer may look different from the illustrations in this guide. The location of the network jack varies by model. To connect the network cable: 1. Plug the network cable into the network jack (1) on the - HP Presario V5100 | Notebook PC User Guide - Page 132
2. Plug the other end of the cable into a network wall jack (2). WARNING! To reduce the risk of electric shock, fire, or damage to the equipment, do not plug a modem or telephone cable into the RJ-45 (network) jack. 122 Chapter 10 Modem and Local Area Network ENWW - HP Presario V5100 | Notebook PC User Guide - Page 133
Utility, BIOS settings, and other system identification information Ongoing or future threats to the computer Unauthorized access to a Windows user account Unauthorized removal of the computer Use this security feature ● QuickLock ● Power-on password Norton Internet Security software ● Firewall - HP Presario V5100 | Notebook PC User Guide - Page 134
password immediately and store it in a secure place. Guidelines for setting passwords You can use the same password for a Setup Utility feature and for a Windows security feature. You can also use the same password for more than one Setup Utility feature. A password set in the Setup Utility ● Can be - HP Presario V5100 | Notebook PC User Guide - Page 135
Protects administrator-level access to computer contents. NOTE This password cannot be used to access the Setup Utility contents. Protects access to a Windows user account. It also protects access to the computer contents and must be entered when you resume from standby or restore from hibernation - HP Presario V5100 | Notebook PC User Guide - Page 136
Utility. The administrator password ● Is not interchangeable with an administrator password set in Windows. ● Is not displayed as it is set, entered, changed, or deleted. Utility, press f10, and then follow the instructions on the screen. Your preferences go into effect when the computer restarts. - HP Presario V5100 | Notebook PC User Guide - Page 137
Current Password field, and then press enter 4 times. 3. To save your preferences and exit the Setup Utility, press f10, and then follow the instructions on the screen. Your preferences go into effect when the computer restarts. Entering a power-on password At the Enter Password prompt, type your - HP Presario V5100 | Notebook PC User Guide - Page 138
service. Instructions for using and updating Norton Internet Security software and for purchasing extended update service to the firewall user guide or contact your To permanently resolve the problem, reconfigure the firewall installed on the computer: ● Run Windows Update monthly to install the latest - HP Presario V5100 | Notebook PC User Guide - Page 139
Optional security cable NOTE The security cable is designed to act as a deterrent, but may not prevent the computer from being mishandled or stolen. To install a security cable: 1. Loop the security cable around a secured object. 2. Insert the key (1) into the cable lock (2). 3. Insert the cable - HP Presario V5100 | Notebook PC User Guide - Page 140
130 Chapter 11 Security ENWW - HP Presario V5100 | Notebook PC User Guide - Page 141
keyboard arrow keys to navigate and make selections. Pointing devices are not supported in the Setup Utility. An external keyboard connected to a USB port enter, and then follow the instructions on the screen. - or - ● Press f10, and then follow the instructions on the screen. Your preferences go - HP Presario V5100 | Notebook PC User Guide - Page 142
corner of the screen. 2. Use the arrow keys to select System Configuration > Language Support, and then press enter. 3. Press f5 or f6 to change a language, enter, and then follow the instructions on the screen. - or - ● Press f10, and then follow the instructions on the screen. Your preferences go - HP Presario V5100 | Notebook PC User Guide - Page 143
Utility: ● Use the arrow keys to select Exit > Exit Saving Changes, press enter, and then follow the instructions on the screen. - or - ● Press f10, and then follow the instructions on the screen. Your preferences go into effect when the computer restarts. NOTE Your password, security, and language - HP Presario V5100 | Notebook PC User Guide - Page 144
information To do this ● View and change the system time and date. ● View identification information about the computer. ● View specification information about the processor, memory size, system BIOS, and keyboard controller version (select models only). Security menu Select Administrator Password - HP Presario V5100 | Notebook PC User Guide - Page 145
embedded wireless LAN device. Embedded Bluetooth® device (select models only) Enable/disable an embedded Bluetooth device (select models only). Enhanced SATA support Enable/disable enhanced SATA mode. Boot Options Set the following boot options: ● f10 and f12 Delay (sec)-Set the delay for the - HP Presario V5100 | Notebook PC User Guide - Page 146
136 Chapter 12 Setup Utility ENWW - HP Presario V5100 | Notebook PC User Guide - Page 147
on the computer that automatically checks for software updates from HP. It automatically runs every 30 days and provides a list of software updates and support alerts for the computer. To run HP Software Update: ▲ Select Start > All Programs > HP > HP Software Update. ENWW Software updates 137 - HP Presario V5100 | Notebook PC User Guide - Page 148
troubleshooting the file. Readme.txt files included with the SoftPaqs are provided in English only.) Accessing computer information Before you access updates from the HP Web site, collect the following information: ● The product category is computer. ● The product family name, series in Windows) or - HP Presario V5100 | Notebook PC User Guide - Page 149
, remove, connect, or disconnect any device, cable, or cord. To download a BIOS update: 1. Visit the HP Web site at http://www.hp.com and click the software and drivers download link. 2. Follow the instructions on the screen to identify the computer and access the BIOS update you want to download - HP Presario V5100 | Notebook PC User Guide - Page 150
on the screen after the download is complete. If no instructions are displayed: 1. Open Microsoft® Windows® Explorer by selecting Start > All Programs > Accessories > Windows Explorer. 2. In the left pane of the Windows Explorer window: a. Click My Computer and then your hard drive designation. (The - HP Presario V5100 | Notebook PC User Guide - Page 151
update: 1. Visit the HP Web site at http://www.hp.com and click the software and drivers download link. 2. Follow the instructions on the screen to find , open Windows Explorer by selecting Start > All Programs > Accessories > Windows Explorer. 5. In the left pane of the Windows Explorer window: a. - HP Presario V5100 | Notebook PC User Guide - Page 152
your personal settings or add software or hardware. You can manually create additional restore points to provide increased protection for your Help and Support Center. The System Restore window opens. 2. Click Create a restore point, and then click Next. 3. Follow the on-screen instructions. 142 - HP Presario V5100 | Notebook PC User Guide - Page 153
functioning optimally: 1. Click System Restore in the Help and Support Center. The System Restore window opens. 2. Click Restore my computer to an earlier time, and then click Next. 3. Follow the on-screen instructions. Reinstalling applications Applications preinstalled or preloaded on the computer - HP Presario V5100 | Notebook PC User Guide - Page 154
to continue. A licensing agreement page is displayed. 7. Press f8 to accept the agreement and continue. The "Setup" page is displayed. 8. Press R to repair the selected Windows installation. The repair process begins. This process may take up to 2 hours to complete. The computer restarts in - HP Presario V5100 | Notebook PC User Guide - Page 155
the operating system If you could not solve the problem by repairing the operating system as described in Display the element on the screen. b. Copy the element or the entire screen: To copy only the active window, press alt+fn+prt sc. To copy the entire screen, press fn+prt sc. c. To paste the - HP Presario V5100 | Notebook PC User Guide - Page 156
current files. 12. Press F to format the drive. The reinstallation process begins. This process may take up to 2 hours to complete. The computer restarts in Windows when the process is complete. 146 Chapter 13 Software Update and Recovery ENWW - HP Presario V5100 | Notebook PC User Guide - Page 157
drivers, use the Recoverydisc included with the computer: 1. While running Windows, insert the Recoverydisc into the optical drive. 2. If Autorun is the HP website at http://www.hp.com and click the software and drivers download link. To update optional software, follow the instructions included - HP Presario V5100 | Notebook PC User Guide - Page 158
148 Chapter 13 Software Update and Recovery ENWW - HP Presario V5100 | Notebook PC User Guide - Page 159
14 Routine Care Hardware maintenance The computer is designed for durability and long operating life. Follow the routine care guidelines described in this chapter to extend the life of the computer and maintain its peak performance. ● Carry and store the computer in a portable carrying case. CAUTION - HP Presario V5100 | Notebook PC User Guide - Page 160
computer battery pack disposal. In Europe, dispose of or recycle the battery packs by using the public collection system or by returning them to HP, your service partner, or their agents. WARNING! To reduce the risk of fire or burns, do not disassemble, crush, or puncture a battery pack; short the - HP Presario V5100 | Notebook PC User Guide - Page 161
TouchPad and keyboard Dirt and grease on the TouchPad can cause the pointer to jump around on the screen. To avoid this, clean the TouchPad with a damp cloth, and wash your hands frequently when using the computer. WARNING! To reduce the risk of electric shock or damage to internal components, do - HP Presario V5100 | Notebook PC User Guide - Page 162
disk space and help the computer to run more efficiently. To run Disk Cleanup: 1. Select Start > All Programs > Accessories > System Tools > Disk Cleanup. 2. Follow the instructions on the screen. 152 Chapter 14 Routine Care ENWW - HP Presario V5100 | Notebook PC User Guide - Page 163
system by outside parties. ● Enable service reminders. Subscriber's Choice is a free service that allows you to receive instant e- . In the event of a computer problem, these benchmarks allow you to go back in time to a point before the computer encountered a problem. ● Create a PC tune-up schedule - HP Presario V5100 | Notebook PC User Guide - Page 164
wireless device or a cell phone device installed, such as an 802.11 b/g, a Global System for Mobile Communications (GSM), or a General Packet Radio Service (GPRS) device, the use of these devices may be restricted in some environments. Such restrictions may apply aboard airplanes, in hospitals, near - HP Presario V5100 | Notebook PC User Guide - Page 165
Quick checklist If you experience computer problems, follow the troubleshooting steps below: 1. Refer to the information in this section. 2. Access additional information about the computer and Web site links through the Help and Support Center. NOTE Although many checkup and repair tools - HP Presario V5100 | Notebook PC User Guide - Page 166
off the display. Standby and hibernation can be initiated by the system while the computer is in Microsoft® Windows® but is not in use or has reached a critical low-battery condition. To change these and other sure that the mouse battery has an adequate charge. 156 Chapter 15 Troubleshooting ENWW - HP Presario V5100 | Notebook PC User Guide - Page 167
by selecting Start > Turn Off Computer > Turn Off. (In Windows XP Professional, the Turn Off Computer button may be called the Shut device does not function as expected: ● Turn on the device as instructed in the device user guide. Some devices, such as monitors and printers, may not be powered - HP Presario V5100 | Notebook PC User Guide - Page 168
on. ● Verify that the computer wireless antennae are free from obstructions. ● Verify that the wireless router and broadband modem are working correctly. 158 Chapter 15 Troubleshooting ENWW - HP Presario V5100 | Notebook PC User Guide - Page 169
is on the bottom of the computer. ● To display the service tag information on the computer screen, click My Computer in the Help and Support Center. ● Date the computer was purchased. ● Conditions under which the problem occurred. ● Error messages that have been displayed. ● The manufacturer and - HP Presario V5100 | Notebook PC User Guide - Page 170
160 Chapter 15 Troubleshooting ENWW - HP Presario V5100 | Notebook PC User Guide - Page 171
16 Electrostatic Discharge Preventing electrostatic discharge Electrostatic discharge is the release of static electricity when two objects come into contact-for example, the shock you receive when you walk across the carpet and touch a metal door knob. A discharge of static electricity from - HP Presario V5100 | Notebook PC User Guide - Page 172
Grounding methods If removal or installation instructions direct you to unplug the computer, unplug it after being properly grounded and before removing a cover. Use one or both of the following grounding methods: ● - HP Presario V5100 | Notebook PC User Guide - Page 173
12 administrator password 125 altitude specifications 14 antennae 11 antivirus software 128 applications key, Windows 2 audio features 64 audio- Certificate of Authenticity label 13 charging battery packs 41 checklist, troubleshooting 155 compartments, memory module 10 components bottom 10 display 6 - HP Presario V5100 | Notebook PC User Guide - Page 174
20, 22 media activity 63 opening Help and Support Center 20, 21 opening Print Options window 20, 21 opening Web browser 20, 21 quick reference 20 switching screen image 20, 22 using 20 HP Software Update 137 hubs 99 humidity specifications 14 G grounding methods 162 H hard drive displaying amount - HP Presario V5100 | Notebook PC User Guide - Page 175
-in) jack 7 microphones, supported 65 Microsoft Certificate of Authenticity label 13 modem approval label 13 modem cable connecting 116 country-specific cable adapter 117 noise suppression circuitry 115 modem software setting/adding location 117 travel connection problems 119 monitor port, external - HP Presario V5100 | Notebook PC User Guide - Page 176
Windows passwords 125 wireless 113 security cable 129 security cable slot 9 security passwords 38 serial number, computer 13 service 95 firewall 128 HP Software Update 137 HP Web site 138 modem , 147 USB devices 100 speakers 6, 64 specifications operating environment 14 rated input power 14 standby - HP Presario V5100 | Notebook PC User Guide - Page 177
user password 125 T temperature specifications specifications 14 modem approval label 13 tips 154 wireless certification labels 13 troubleshooting support 95 Windows applications key 2 Windows logo key 2 Windows operating system information backup 145 reinstallation 145, 146 repairing 144 Windows - HP Presario V5100 | Notebook PC User Guide - Page 178
168 Index ENWW - HP Presario V5100 | Notebook PC User Guide - Page 179
- HP Presario V5100 | Notebook PC User Guide - Page 180
-
 1
1 -
 2
2 -
 3
3 -
 4
4 -
 5
5 -
 6
6 -
 7
7 -
8
-
9
-
10
-
11
-
12
-
13
-
14
-
15
-
16
-
17
-
18
-
19
-
20
-
21
-
22
-
23
-
24
-
25
-
26
-
27
-
28
-
29
-
30
-
31
-
32
-
33
-
34
-
35
-
36
-
37
-
38
-
39
-
40
-
41
-
42
-
43
-
44
-
45
-
46
-
47
-
48
-
49
-
50
-
51
-
52
-
53
-
54
-
55
-
56
-
57
-
58
-
59
-
60
-
61
-
62
-
63
-
64
-
65
-
66
-
67
-
68
-
69
-
70
-
71
-
72
-
73
-
74
-
75
-
76
-
77
-
78
-
79
-
80
-
81
-
82
-
83
-
84
-
85
-
86
-
87
-
88
-
89
-
90
-
91
-
92
-
93
-
94
-
95
-
96
-
97
-
98
-
99
-
100
-
101
-
102
-
103
-
104
-
105
-
106
-
107
-
108
-
109
-
110
-
111
-
112
-
113
-
114
-
115
-
116
-
117
-
118
-
119
-
120
-
121
-
122
-
123
-
124
-
125
-
126
-
127
-
128
-
129
-
130
-
131
-
132
-
133
-
134
-
135
-
136
-
137
-
138
-
139
-
140
-
141
-
142
-
143
-
144
-
145
-
146
-
147
-
148
-
149
-
150
-
151
-
152
-
153
-
154
-
155
-
156
-
157
-
158
-
159
-
160
-
161
-
162
-
163
-
164
-
165
-
166
-
167
-
168
-
169
-
170
-
171
-
172
-
173
-
174
-
175
-
176
-
177
-
178
-
179
-
180
 |
 |

Notebook PC User Guide