HP ProBook 4416s Drives - Windows 7
HP ProBook 4416s - Notebook PC Manual
 |
View all HP ProBook 4416s manuals
Add to My Manuals
Save this manual to your list of manuals |
HP ProBook 4416s manual content summary:
- HP ProBook 4416s | Drives - Windows 7 - Page 1
Drives User Guide - HP ProBook 4416s | Drives - Windows 7 - Page 2
© Copyright 2009 Hewlett-Packard Development Company, L.P. Windows is a U.S. registered trademark of Microsoft Corporation. The information contained herein is subject to change without notice. The only warranties for HP products and services are set forth in the express warranty statements - HP ProBook 4416s | Drives - Windows 7 - Page 3
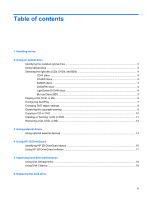
or DVD ...11 Removing a CD, DVD, or BD ...12 3 Using external drives Using optional external devices ...14 4 Using HP 3D DriveGuard Identifying HP 3D DriveGuard status 16 Using HP 3D DriveGuard software ...17 5 Improving hard drive performance Using Disk Defragmenter ...18 Using Disk Cleanup ...18 - HP ProBook 4416s | Drives - Windows 7 - Page 4
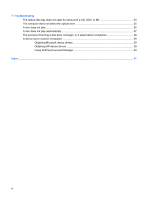
7 Troubleshooting The optical disc tray does not open for removal of a CD, DVD a disc does not begin, or it stops before completion 38 A device driver must be reinstalled ...39 Obtaining Microsoft device drivers 39 Obtaining HP device drivers 39 Using SoftPaq Download Manager 40 Index ...41 iv - HP ProBook 4416s | Drives - Windows 7 - Page 5
to an external hard drive, initiate Sleep and allow the screen to clear, or properly disconnect the external hard drive. on the keyboard or move the computer while the optical drive (select models only) is writing to a disc. The write process is sensitive to vibration. When the battery is the - HP ProBook 4416s | Drives - Windows 7 - Page 6
SuperMulti Double-Layer LightScribe Drive ● Blu-ray ROM DVD+/-RW SuperMulti Double-Layer LightScribe Drive NOTE: Some of the drives listed above may not be supported by your computer. 2 Chapter 2 Using an optical drive - HP ProBook 4416s | Drives - Windows 7 - Page 7
may not be supported by your computer. The listed drives are not necessarily all of the supported optical drives. drivers and players. †LightScribe discs must be purchased separately. LightScribe creates a grayscale image similar to black-and-white photography. CAUTION: To prevent possible audio - HP ProBook 4416s | Drives - Windows 7 - Page 8
Selecting the right disc (CDs, DVDs, and BDs) An optical drive supports optical discs (CDs, DVDs, and BDs). CDs, used to store digital data, are also used for commercial audio recordings and are convenient for your personal storage needs. DVDs and BDs are used primarily for movies, software, and - HP ProBook 4416s | Drives - Windows 7 - Page 9
Blu-ray Discs (BD) BD is a high-density optical disc format for the storage of digital information, including high-definition video. A single-layer Blu-ray Disc can store 25 GB, over 5 times the storage capacity of a single-layer DVD at 4.7 GB. A dual-layer Blu-ray Disc can store 50 GB, almost 6 - HP ProBook 4416s | Drives - Windows 7 - Page 10
dialog box opens. It prompts you to select how you want to use the media content. NOTE: For best results, be sure that your AC adapter is plugged into an external power source while playing a BD. 6 Chapter 2 Using an optical drive - HP ProBook 4416s | Drives - Windows 7 - Page 11
available options for each media type listed. NOTE: Choose WinDVD to play DVDs. 4. Click Save. NOTE: For more information about AutoPlay, select Start > Help and Support. Configuring AutoPlay 7 - HP ProBook 4416s | Drives - Windows 7 - Page 12
Manager. NOTE: Windows® includes the User Account Control feature to improve the security of your computer. You may be prompted for your permission or password for tasks such as installing software, running utilities, or changing Windows settings. Refer to Help and Support for more information - HP ProBook 4416s | Drives - Windows 7 - Page 13
, and sound recordings. disc while the computer is running on battery power. Before writing to a disc to a destination disc or from a network drive to a destination disc. Save the Do not use the computer keyboard or move the computer while the the software manufacturer's instructions, which may be - HP ProBook 4416s | Drives - Windows 7 - Page 14
pane, click Copy Disc. 3. Insert the disc you want to copy into the optical drive. 4. Click Copy Disc at the bottom right of the screen. Creator Business reads the source disc and copies the data to a temporary folder on your hard drive. 5. When prompted, remove the source disc from the optical - HP ProBook 4416s | Drives - Windows 7 - Page 15
Windows Media Player or Roxio Creator Business to burn data and audio sound support all DVD formats. Refer to the user guide that came with your DVD player for a list of supported follow these steps: 1. Download or copy the source specific instructions, refer to the software manufacturer's instructions - HP ProBook 4416s | Drives - Windows 7 - Page 16
Removing a CD, DVD, or BD 1. Press the release button (1) on the drive bezel to release the disc tray, and then gently pull out the tray (2) until it stops. 2. Remove the disc (3) from the tray by gently pressing down on the spindle while lifting the outer edges of the disc. Hold the disc by the - HP ProBook 4416s | Drives - Windows 7 - Page 17
drive to a USB port on the computer or on an optional docking device (select models only). USB drives include the following types: ● 1.44-megabyte diskette drive ● Hard drive module (a hard drive with an adapter attached) ● DVD-ROM Drive ● DVD+/-RW SuperMulti Double-Layer LightScribe Drive ● Blu-ray - HP ProBook 4416s | Drives - Windows 7 - Page 18
Using optional external devices NOTE: For more information about required software and drivers, or to learn which computer port to use, refer to the manufacturer's instructions. To connect an external device to the computer: CAUTION: To reduce the risk of damage to the equipment when connecting a - HP ProBook 4416s | Drives - Windows 7 - Page 19
: ● You drop the computer. ● You move the computer with the display closed while the computer is running on battery power. A short time after the end of one of these events, HP 3D DriveGuard returns the hard drive to normal operation. NOTE: Hard drives that are in an optional docking device or - HP ProBook 4416s | Drives - Windows 7 - Page 20
Identifying HP 3D DriveGuard status The drive light on the computer changes to an amber color to show that the drive is parked. To determine whether drives are currently protected or whether a drive is parked, select Start > Control Panel > Hardware and Sound > Windows Mobility Center: ● If the - HP ProBook 4416s | Drives - Windows 7 - Page 21
the system is supported. ● Hide or show the icon in the notification area. To open the software and change settings, follow these steps: 1. In Mobility Center, click the hard drive icon to open the HP 3D DriveGuard window. - or - Select Start > Control Panel > Hardware and Sound > HP 3D DriveGuard - HP ProBook 4416s | Drives - Windows 7 - Page 22
computer. HP recommends manually at any time. To run Disk Defragmenter: 1. Select Start > All Programs > Accessories > System Tools > Disk Defragmenter. 2. Click Defragment disk. NOTE: Windows includes the User Account Control screen instructions. 18 Chapter 5 Improving hard drive performance - HP ProBook 4416s | Drives - Windows 7 - Page 23
the operating system. 3. Disconnect all external devices connected to the computer. 4. Unplug the power cord. 5. Turn the computer upside down on a flat surface, with the battery bay toward you. 6. Remove the battery from the computer. 19 - HP ProBook 4416s | Drives - Windows 7 - Page 24
7. Remove the screws from the battery area. Your computer has 4, 5, or 7 screws that need to be removed. NOTE: Refer to the illustration that most closely matches your computer. 8. Turn the computer - HP ProBook 4416s | Drives - Windows 7 - Page 25
to the display. 10. Slide the switch cover straight back towards the display, and then remove the switch cover. 11. Remove the screws from the keyboard. Your computer has either 2 or 3 screws that need to be removed. NOTE: Refer to the illustration that most closely matches your computer. 21 - HP ProBook 4416s | Drives - Windows 7 - Page 26
then rotate it to the right-side (2) to gain access to the keyboard connector. CAUTION: Do not rip the keyboard cable. 13. Release the ZIF connector (1) to which the keyboard cable is attached, and then disconnect the keyboard cable (2) from the system board by pulling upward. 22 Chapter 6 Replacing - HP ProBook 4416s | Drives - Windows 7 - Page 27
14. Remove the keyboard from the computer (3). For 15- and 17-inch computers. For 14-inch computers. 23 - HP ProBook 4416s | Drives - Windows 7 - Page 28
15. Remove the screws from the top cover. Your computer has either 2 or 3 screws that need to be removed. NOTE: Refer to the illustration that most closely matches your computer. 24 Chapter 6 Replacing the hard drive - HP ProBook 4416s | Drives - Windows 7 - Page 29
16. Slide the top cover back until it disengages from the base enclosure, and then rest the top cover on the computer so that the TouchPad cable is accessible. 17. Release the ZIF connector (1) to which the TouchPad cable is connected, and then disconnect the TouchPad cable from the system board (2) - HP ProBook 4416s | Drives - Windows 7 - Page 30
21. Lift the hard drive (4) out of the hard drive bay. To install a hard drive: 1. Insert the hard drive into the hard drive bay (1). 2. Use the Mylar tab (2) on the hard drive to slide the hard drive to the left to connect it to the system board. 3. Replace the 2 hard drive screws (3) and tighten - HP ProBook 4416s | Drives - Windows 7 - Page 31
4. Place the top cover (1) on the computer, and then insert the TouchPad cable (2) into the ZIF connector (3) on the system board. 5. Slide the top cover into place. 27 - HP ProBook 4416s | Drives - Windows 7 - Page 32
3 screws that need to be installed. NOTE: Refer to the illustration that most closely matches your computer. 7. For 15- and 17-inch computers, place the keyboard upside down on the top cover of the computer (1). 28 Chapter 6 Replacing the hard drive - HP ProBook 4416s | Drives - Windows 7 - Page 33
8. Insert the keyboard cable (2) into the ZIF connector (3) on the system board and secure the connector. 9. For 14-inch computers, place the keyboard upside down on the right-side of the computer (1). 10. Insert the keyboard cable (2) into the ZIF connector (3) on the system board and secure the - HP ProBook 4416s | Drives - Windows 7 - Page 34
11. Turn over the keyboard (1) into the keyboard tray, and then slide the keyboard (2) into place. NOTE: Refer to the illustration that most closely matches your computer. 30 Chapter 6 Replacing the hard drive - HP ProBook 4416s | Drives - Windows 7 - Page 35
12. Replace the screws on the keyboard. Your computer has either 2 or 3 screws that need to be replaced. NOTE: Refer to the illustration that most closely matches your computer. 13. Slide the switch cover into place. 14. Close the computer display. 31 - HP ProBook 4416s | Drives - Windows 7 - Page 36
15. Replace the 2 screws and their covers on the back edge of the computer. 16. Replace the screws in the battery area. Your computer has 4, 5, or 7 screws that need to be replaced. NOTE: Refer to the illustration that most closely matches your computer. 17. Turn the - HP ProBook 4416s | Drives - Windows 7 - Page 37
18. Reconnect external power and external devices. 19. Turn on the computer. 33 - HP ProBook 4416s | Drives - Windows 7 - Page 38
7 Troubleshooting The following sections describe several common issues and resolutions. The optical disc tray does not open for removal of a CD, DVD, or BD , tilt the disc carefully as you remove it. 4. Close the disc tray and place the disc in a protective case. 34 Chapter 7 Troubleshooting - HP ProBook 4416s | Drives - Windows 7 - Page 39
the device and then update, uninstall, or disable the device driver: 1. Remove any discs from the optical drive. 2. Select Start > Control Panel > System and Security. Then in the System area, click Device Manager. 3. In the Device Manager window, click the arrow next to DVD/CD-ROM drives to expand - HP ProBook 4416s | Drives - Windows 7 - Page 40
the following ways: ◦ Playback may resume. - or - ◦ The playback window in the multimedia program may close. To return to playing the disc, click 1. Right-click anywhere on the desktop except an icon, and then select Screen resolution. 2. Select Advanced settings > Monitor tab. 3. Select High Color - HP ProBook 4416s | Drives - Windows 7 - Page 41
A disc does not play automatically 1. Select Start > Default Programs > Change AutoPlay settings. 2. Confirm that the Use AutoPlay for all media and devices check box is selected. 3. Click Save. A CD, DVD, or BD should now start automatically when it is inserted into the optical drive. A disc does - HP ProBook 4416s | Drives - Windows 7 - Page 42
Be sure that you are using the right kind of disc for your drive. See your user guides for more information about disc types. ● Be sure that the disc is inserted properly. ● the disc-burning device driver located in the DVD/CD-ROM drives category in Device Manager. 38 Chapter 7 Troubleshooting - HP ProBook 4416s | Drives - Windows 7 - Page 43
-screen instructions. Obtaining HP device drivers To use the HP Web site to obtain HP device drivers: 1. Open your Internet browser, and go to http://www.hp.com/support. 2. Select your country or region. 3. Click the option for software and driver downloads, and then type your computer model number - HP ProBook 4416s | Drives - Windows 7 - Page 44
or to show the software for all supported models. Select Show software for all supported models. If you have used HP SoftPaq Download Manager previously, go to Step 3. a. Select your operating system and language filters in the Configuration Options window. The filters limit the number of options - HP ProBook 4416s | Drives - Windows 7 - Page 45
19 hard drive external 13 HP 3D DriveGuard 15 installing 26 replacing 19 HP 3D DriveGuard 15 K keyboard removing 22 S SoftPaqs, downloading 40 software Disk Cleanup 18 Disk Defragmenter 18 switch cover removing 21 T troubleshooting AutoPlay 37 burning discs 38 device drivers 39 disc does not play - HP ProBook 4416s | Drives - Windows 7 - Page 46
-
 1
1 -
 2
2 -
 3
3 -
 4
4 -
 5
5 -
 6
6 -
 7
7 -
8
-
9
-
10
-
11
-
12
-
13
-
14
-
15
-
16
-
17
-
18
-
19
-
20
-
21
-
22
-
23
-
24
-
25
-
26
-
27
-
28
-
29
-
30
-
31
-
32
-
33
-
34
-
35
-
36
-
37
-
38
-
39
-
40
-
41
-
42
-
43
-
44
-
45
-
46
 |
 |

Drives
User Guide