HP ProLiant ML10 HP SATA DVD RW Optical Drive Installation Instructions for HP
HP ProLiant ML10 Manual
 |
View all HP ProLiant ML10 manuals
Add to My Manuals
Save this manual to your list of manuals |
HP ProLiant ML10 manual content summary:
- HP ProLiant ML10 | HP SATA DVD RW Optical Drive Installation Instructions for HP - Page 1
Optical Drive Installation Instructions for HP ProLiant servers Overview This document provides installation and software support information for the HP SATA DVD RW optical drive. The SATA DVD RW drive enables you to provide a read and write solution to CD and DVD media for HP ProLiant servers. The - HP ProLiant ML10 | HP SATA DVD RW Optical Drive Installation Instructions for HP - Page 2
installation guide may result in hazardous radiation exposure. To reduce the risk of exposure to hazardous radiation: • Do not try to open the module enclosure. There are no user-serviceable components inside. • Do not operate controls AC adapter provided by HP. Compliance with these directives
-
 1
1 -
 2
2
 |
 |
HP SATA DVD RW Optical Drive
Installation Instructions
for HP ProLiant servers
Overview
This document provides installation and software support information
for the HP SATA DVD RW optical drive. The SATA DVD RW drive
enables you to provide a read and write solution to CD and DVD
media for HP ProLiant servers.
The primary purpose of the SATA DVD RW drive is data storage.
For more information about this product, see the HP website
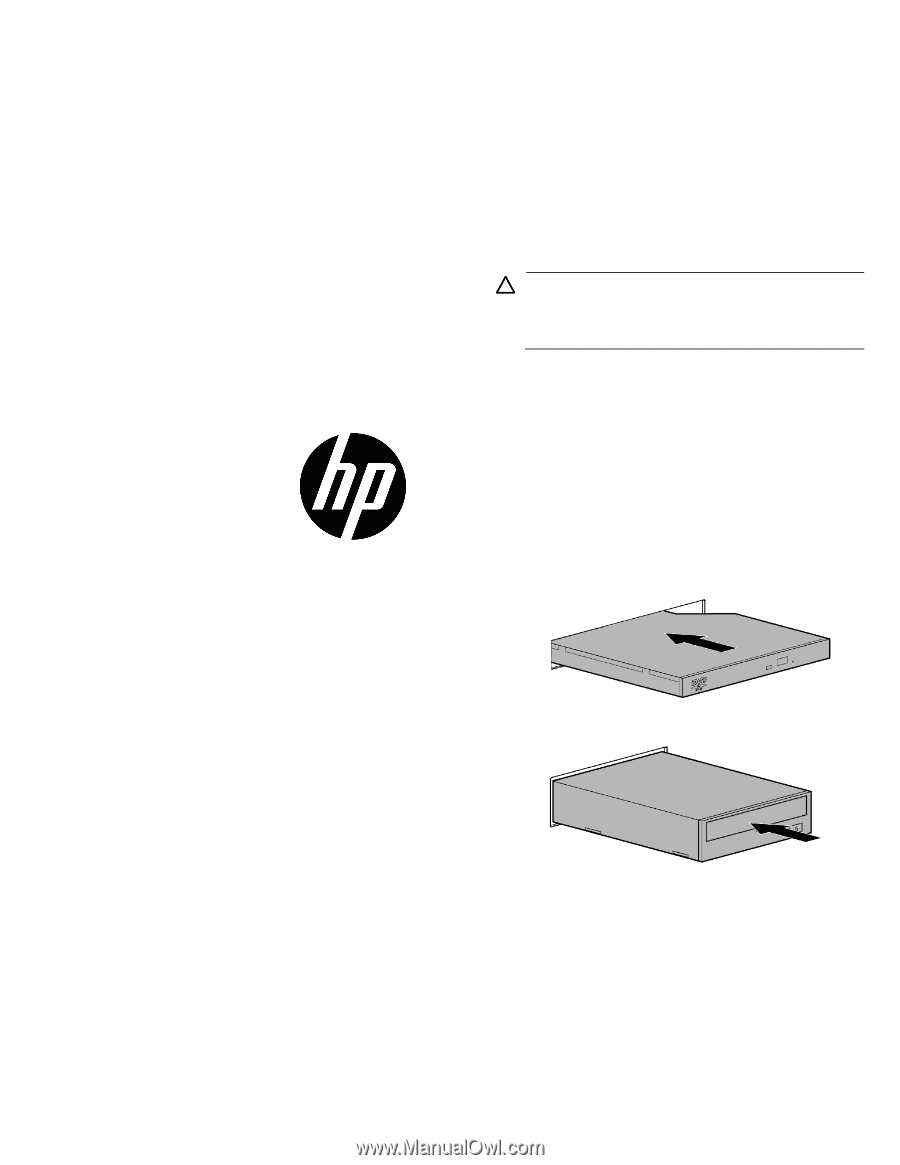
Installing the drive
CAUTION:
To prevent damage to electrical components,
properly ground the server before beginning any
installation procedure. Improper grounding can cause
electrostatic discharge.
For more information on installing the drive in a specific server, see the
documentation provided with the server.
To install the component:
1.
Power down the server as indicated in the server-specific user
documentation.
2.
Disconnect the power cord from the power supply to remove
power from the server and all peripheral devices.
3.
Remove components that prevent access to the removable-media
drive bays.
4.
Install the drive.
5.
If needed, secure with the appropriate fasteners.
6.
Install all components removed from the server.
7.
Connect the power cord to the server, and then connect it to a
properly grounded electrical outlet.
8.
Power up the server.
© Copyright 2007, 2011 Hewlett-Packard Development Company, L.P.
The information contained herein is subject to change without notice. The only
warranties for HP products and services are set forth in the express warranty
statements accompanying such products and services. Nothing herein should
be construed as constituting an additional warranty. HP shall not be liable for
technical or editorial errors or omissions contained herein.
Microsoft and Windows are U.S. registered trademarks of Microsoft
Corporation. Bluetooth is a trademark owned by its proprietor and used by
Hewlett-Packard Company under license.
Part Number: 453282-003
June 2011
Edition: 3
*453282-003*
453282-003