HP Q3943A HP LaserJet MPF Products - Configuring Security for Multiple MFP Pro
HP Q3943A - LaserJet 4345x Mfp B/W Laser Manual
 |
UPC - 829160500232
View all HP Q3943A manuals
Add to My Manuals
Save this manual to your list of manuals |
HP Q3943A manual content summary:
- HP Q3943A | HP LaserJet MPF Products - Configuring Security for Multiple MFP Pro - Page 1
HP Imaging and Printing Security Best Practices Configuring Security for Multiple LaserJet MFPs, Color LaserJet MFPs, and Color MFPs with Edgeline Technology Version 3.0 - HP Q3943A | HP LaserJet MPF Products - Configuring Security for Multiple MFP Pro - Page 2
...9 Information Disclosure ...9 Denial of Service...9 Elevation of Privilege ...10 Network Security ...10 Overall Network Settings ...10 Notes on the Process of Configuration 11 Notes on Passwords ...11 Configuring MFP Security Settings...12 Setting up HP Web Jetadmin ...12 Configuring Initial - HP Q3943A | HP LaserJet MPF Products - Configuring Security for Multiple MFP Pro - Page 3
File System Page Options ...76 Network Page Options...77 Security Page Options...80 Settings Only for Edgeline MFPs ...81 Device Page Options ...81 Digital Sending Page Options ...82 Security Page Options...82 Final Configurations ...83 Overall Limitations...84 Physical Security ...84 Appendix 1: - HP Q3943A | HP LaserJet MPF Products - Configuring Security for Multiple MFP Pro - Page 4
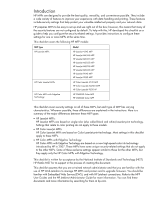
default. To help with this, HP developed this checklist as a guide to help you configure the security-related settings. It provides instructions to configure these settings for one or more MFPs at the same time. This checklist covers the following HP MFP models: MFP Type HP LaserJet MFPs Model HP - HP Q3943A | HP LaserJet MPF Products - Configuring Security for Multiple MFP Pro - Page 5
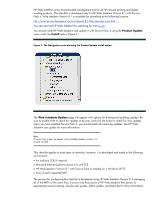
of each supported MFP The process for configuring this checklist is developed using HP Web Jetadmin Version 8.1 managing all of the MFPs at the same time. It covers only those parts of HP Web Jetadmin that pertain to appropriate security settings. See the user guides, admin guides, and help files - HP Q3943A | HP LaserJet MPF Products - Configuring Security for Multiple MFP Pro - Page 6
is familiar with common networking practices, including configuring HP Jetdirect connections, and using HP Web Jetadmin. You should have read the MFP user guide, the MFP administrator guide, the Jetdirect administrator guide, Web Jetadmin user guides, and help files. This checklist relies on these - HP Q3943A | HP LaserJet MPF Products - Configuring Security for Multiple MFP Pro - Page 7
and other standard tools such as updated virus protection applications. Solutions covered This checklist covers MFP security settings found in HP Web Jetadmin Version 8.1 and on MFP control panels. This checklist covers no other solutions or applications. Organization This checklist includes the - HP Q3943A | HP LaserJet MPF Products - Configuring Security for Multiple MFP Pro - Page 8
person's email credentials to have free use of an email service • Using another person's email credentials to view that person's email MFP, altering it, and sending it on to the MFP. • Intercepting remote configuration data, such as communications between Web Jetadmin and the MFP, to get passwords - HP Q3943A | HP LaserJet MPF Products - Configuring Security for Multiple MFP Pro - Page 9
for information on configuring it at hp.com. • Close unused ports and protocols. • Configure all possible password settings. • Configure authentication. • Configure SNMPv3. Denial of Service Denial of service is any type of interference with normal use of an MFP. Examples: • Canceling or pausing the - HP Q3943A | HP LaserJet MPF Products - Configuring Security for Multiple MFP Pro - Page 10
ways: • Configure the administrator (device) password. • Configure SNMPv3 and HTTPS. • Lock the control panel. Network Security This chapter explains how to configure security settings for one or more MFPs. You should use HP Web Jetadmin Version 8.1 with Service Pack 4 to configure as many of these - HP Q3943A | HP LaserJet MPF Products - Configuring Security for Multiple MFP Pro - Page 11
HP Web Jetadmin does not provide support for them, and because they require advanced network configurations. Look for information on these settings in the Edgeline MFP user guides and at hp to follow the instructions in order, password cracking tools. • Use complicated passwords. Some of the passwords - HP Q3943A | HP LaserJet MPF Products - Configuring Security for Multiple MFP Pro - Page 12
a permanent setting that can never be changed or reset without the correct password. Configuring MFP Security Settings This section provides instructions for configuring the MFPs for best-practice security. Most all of these settings are found in HP Web Jetadmin Version 8.1. The exceptions are noted - HP Q3943A | HP LaserJet MPF Products - Configuring Security for Multiple MFP Pro - Page 13
not in the list, use the Discovery options to find the MFPs on your network. Note: This checklist does not cover Device Discovery. See Web Jetadmin user guidance for more information. In most cases, the MFPs already appear in the default view. Note: It is possible for Web Jetadmin to lose contact - HP Q3943A | HP LaserJet MPF Products - Configuring Security for Multiple MFP Pro - Page 14
are configuring. This is because some settings may not apply to that specific model. Ignore instructions for settings that do not appear in Web Jetadmin. Remember that the steps in this checklist are for the specified HP MFPs. Other devices may appear in the Device Model list. It may be possible to - HP Q3943A | HP LaserJet MPF Products - Configuring Security for Multiple MFP Pro - Page 15
outlined in green. The Configure Devices tab contains most all of the settings recommended in this checklist. Tip: Sometimes Web Jetadmin can lose track of MFP credentials. If this happens, some settings might fail. Clear the Web Jetadmin Device Cache (see Web Jetadmin Help) and re-enter the - HP Q3943A | HP LaserJet MPF Products - Configuring Security for Multiple MFP Pro - Page 16
first. The following instructions explain how to configure MFPs. It helps to ensure that only authorized and authenticated administrators have access to the configuration settings. It also helps to ensure that no one can gather sensitive information, such as passwords, usernames, and other codes - HP Q3943A | HP LaserJet MPF Products - Configuring Security for Multiple MFP Pro - Page 17
Figure 7: The SNMPv3 settings enabled and the fields filled out. The New User Name field can be any name you choose. The New Authentication Passphrase field to authorized users. If these credentials are forgotten, the only way to restore communication between HP Web Jetadmin and the MFPs is to restore - HP Q3943A | HP LaserJet MPF Products - Configuring Security for Multiple MFP Pro - Page 18
MFPs to factory default settings. These instructions are for the initial configuration of SNMPv3. Once you finish this configuration, the MFPs will require these credentials whenever anyone attempts to access settings over the network. Note: Web Jetadmin retains the SNMPv3 credentials for each MFP, - HP Q3943A | HP LaserJet MPF Products - Configuring Security for Multiple MFP Pro - Page 19
Figure 9: The Device Model list. Click Configure Devices (Figure 10) to execute the configuration. Figure 10: The Configure Devices button. After you click Configure Devices, a View Log page (Figure 11) will appear. 19 - HP Q3943A | HP LaserJet MPF Products - Configuring Security for Multiple MFP Pro - Page 20
check for the SNMPv3 credentials. Note: Web Jetadmin stores the credentials for each MFP for convenience, but it may prompt for them on occasion. Web Jetadmin stores these credentials encrypted. 10.Click Go Back to view Multiple Device Configuration Tool, and continue with the instructions below: 20 - HP Q3943A | HP LaserJet MPF Products - Configuring Security for Multiple MFP Pro - Page 21
Configuring the Device Password The Device password restricts access to many of the configuration settings. The MFPs require it to be configured before they allow configuration of some of the other settings. Follow these instructions: 1. Click the Security option in the Configuration Categories menu - HP Q3943A | HP LaserJet MPF Products - Configuring Security for Multiple MFP Pro - Page 22
the Access Control List: HP LaserJet M3035 MFP HP LaserJet M4345 MFP HP LaserJet M5025 MFP HP LaserJet M5035 MFP HP CM 8050 Color MFP HP CM 8060 Color MFP HP Web Jetadmin does not provide options to configure the Jetdirect Firewall settings. Look for them in each MFP EWS. Follow these instructions - HP Q3943A | HP LaserJet MPF Products - Configuring Security for Multiple MFP Pro - Page 23
Control List option. 3. Add an IP address or a subnet mask by filling in the fields (Figure 17). Figure 17: The ACL IP address field. CAUTION: Be sure to include the IP address of the computer that Web Jetadmin is using to connect to the MFPs make sure all of the MFPs are configured only with your new - HP Q3943A | HP LaserJet MPF Products - Configuring Security for Multiple MFP Pro - Page 24
click Go Back to view the Multiple Device Configuration Tool, and continue with this checklist. Configuring Fax Send Setup (Edgeline MFPs) If you are configuring Edgeline MFPs, follow these instructions to enable fax functions (if you plan to use the fax functions): Tip: This setting applies only to - HP Q3943A | HP LaserJet MPF Products - Configuring Security for Multiple MFP Pro - Page 25
does not cover alternative fax configurations because they require other network solutions or support. 4. Select the MFPs you wish to configure in the device list (Note that this setting is only for Edgeline MFPs. All other MFPs will ignore this setting). 5. Click Configure at the bottom of the page - HP Q3943A | HP LaserJet MPF Products - Configuring Security for Multiple MFP Pro - Page 26
to Folder Setup before they allow configurations for related settings. Follow these instructions: Tip: This setting applies only to Edgeline MFPs. To save time, you should apply this setting only to the Edgeline MFPs you are configuring. 1. Click Digital Sending in the Configuration Categories menu - HP Q3943A | HP LaserJet MPF Products - Configuring Security for Multiple MFP Pro - Page 27
Figure 22: The Enable Send to Email option. 3. Click to select Enable Send to Email to the right. Note: You might have to configure the SMTP Gateways Settings as well. 4. Scroll down, and click to select Enable Send to Folder (CM8060) (Figure 23). Figure 23: The Enable Send to Folder options. - HP Q3943A | HP LaserJet MPF Products - Configuring Security for Multiple MFP Pro - Page 28
either the Bootloader password for LaserJet MFPs or the Startup Menu Administrator Password for Edgeline MFPs. The Bootloader password can be configured using HP Web Jetadmin, but the Startup Menu Administrator Password can be configured using only the MFP control panel. See instructions for each - HP Q3943A | HP LaserJet MPF Products - Configuring Security for Multiple MFP Pro - Page 29
Tools menu will appear. 13. Press STOP to exit the menu. The Startup Menu will appear. 14. Press STOP to exit. The MFP will resume its startup process. Optional Setting: Hiding the MFP IP address Some of the MFPs provide their IP addresses on the control panel by default: • HP LaserJet M4345 MFP 29 - HP Q3943A | HP LaserJet MPF Products - Configuring Security for Multiple MFP Pro - Page 30
• HP LaserJet M3027 MFP • HP LaserJet M3035 MFP • HP LaserJet M5025 MFP • HP LaserJet M5035 MFP • HP Color LaserJet M4730 MFP • HP CM8050 Color MFP with Edgeline • HP CM8060 Color MFP with Edgeline Hiding the IP address can be done only using the MFP Control panel. Follow these instructions: 1. - HP Q3943A | HP LaserJet MPF Products - Configuring Security for Multiple MFP Pro - Page 31
menu. Note: If you are configuring color MFPs, the Device page will display settings to restrict color printing for users and for applications. These settings are not covered in these instructions, but you should consider configuring them to help control the costs of color printing. 2. Scroll down - HP Q3943A | HP LaserJet MPF Products - Configuring Security for Multiple MFP Pro - Page 32
The Fax configuration page provides a few security options for the analog fax functions. Follow these instructions: Note: Be sure to configure the MFPs for fax capabilities before continuing with the instructions below. At the minimum, configure the modem settings for the country, the company, and - HP Q3943A | HP LaserJet MPF Products - Configuring Security for Multiple MFP Pro - Page 33
in the Confirm PIN Number field. This setting requires users to provide the PIN number at the MFP control panel to print fax jobs. Note: This setting also enables for email and for send to network folder. Follow these instructions: 1. Click Digital Sending in the Configuration categories menu. 2. - HP Q3943A | HP LaserJet MPF Products - Configuring Security for Multiple MFP Pro - Page 34
Editable by User drop down list (just below the Use a Custom Message field). This ensures that no one can send improper email messages from the MFPs. 5. Scroll down, and click to select Default 'From:' Address (Figure 29). Figure 29: The Default From Address options. Note: HP recommends configuring - HP Q3943A | HP LaserJet MPF Products - Configuring Security for Multiple MFP Pro - Page 35
and failures. 8. Fill in the Display Name and the Default Subject fields as desired. 9. If your network includes LDAP, options. These options enable the MFPs to provide the LDAP address book to users. 10. Select Kerberos in the addresses, passwords, and all other data will be sent over the LDAP - HP Q3943A | HP LaserJet MPF Products - Configuring Security for Multiple MFP Pro - Page 36
time. If you choose Delay before resetting the default settings, users will be able to send multiple jobs to a location without having to retype all of the information in the control panel. Choose a reasonable time to allow them to send a new job. 14. Select the MFPs to configure in the Device List - HP Q3943A | HP LaserJet MPF Products - Configuring Security for Multiple MFP Pro - Page 37
instructions: 1. Click Embedded Web Server in the Configuration Categories menu (Figure 32). Figure 32: The Embedded Web Server page. Note: The first option in the Embedded Web Server Configuration Categories page is Embedded Web Server Password. This setting should already be configured. The MFPs - HP Q3943A | HP LaserJet MPF Products - Configuring Security for Multiple MFP Pro - Page 38
the jobs of others. Go Button (enabled by default) Leave blank to disable Disabling Go Button prevents users from delaying or stopping the jobs of others. It is the Pause/Resume button in the MFP EWS. Command Invoke (enabled by default) Leave blank to disable Command Invoke does not apply - HP Q3943A | HP LaserJet MPF Products - Configuring Security for Multiple MFP Pro - Page 39
MFPs. Continue Button allows the MFPs to resume after they are set to pause. Print Service enables users to send print-ready files directly to an MFP without having the MFP instructions: user (non-system) data stored on the MFP. It is useful for cleaning out all traces of print jobs, fax jobs, copy - HP Q3943A | HP LaserJet MPF Products - Configuring Security for Multiple MFP Pro - Page 40
needed to clean MFPs for resale, for reuse, or for conforming to high-level security requirements such as Department of Defense regulations. The instructions continue with the File System password: 2. Click to select Set Filesystem Password (Figure 35). Figure 35: The Set Filesystem Password option. - HP Q3943A | HP LaserJet MPF Products - Configuring Security for Multiple MFP Pro - Page 41
Erase is recommended for this setting because it ensures that data is completely unrecoverable by overwriting files with three passes. It slows the MFP slightly but is not noticeably slower than the Secure Fast Erase mode, which overwrites files with one pass. 6. Click to select File System - HP Q3943A | HP LaserJet MPF Products - Configuring Security for Multiple MFP Pro - Page 42
this protocol NOTE: Disabling the NFS option disables the entire protocol for the MFPs. The PostScript protocol is not as sensitive, and it is more likely to options that relate to the Jetdirect Print Servers. Follow these instructions: 1. Click Network in the Configuration Categories menu (Figure - HP Q3943A | HP LaserJet MPF Products - Configuring Security for Multiple MFP Pro - Page 43
dropdown menu, and select the highest setting that your browser supports. The Encryption Strength setting allows you to choose the strength of the encryption algorithm that will be used for communication between the MFP EWS and the web browsers connecting to it (this is related to the - HP Q3943A | HP LaserJet MPF Products - Configuring Security for Multiple MFP Pro - Page 44
and it eliminates the configuration settings that are controlled by the EWS. It also removes the affected and fax. You should disable EWS Config while the MFPs are in use, and enable it only to make point for normal printing through standard HP print drivers. IPP Printing Disabled Disabling IPP - HP Q3943A | HP LaserJet MPF Products - Configuring Security for Multiple MFP Pro - Page 45
enabled • Network management interfaces enabled • Device discovery protocols enabled • Printing protocols enabled • TCP/IP configuration methods enabled • SNMP control methods enabled • Wireless configuration methods enabled HP can collect this information only when the MFPs have internet access. 45 - HP Q3943A | HP LaserJet MPF Products - Configuring Security for Multiple MFP Pro - Page 46
(Figure 44), and select Encrypt all web communication. Figure 44: The HTTPS Setting option. This setting requires web browsers to use HTTPS when contacting the MFPs. This ensures secure communications with the MFP EWS. This setting is related to the Encryption Strength setting covered earlier. 46 - HP Q3943A | HP LaserJet MPF Products - Configuring Security for Multiple MFP Pro - Page 47
Note: The Access Control List options appear next on the Network page, but you should have already configured this. The ACL instructions appear in the Initial Settings section of this chapter to help ensure security during the time you are configuring the MFPs. 9. Click to select Protocol Stacks ( - HP Q3943A | HP LaserJet MPF Products - Configuring Security for Multiple MFP Pro - Page 48
: If you are configuring color MFPs, options for restricting the use of color will appear on the Security page. You should configure these options if you wish to control the costs of color printing. These options are not covered in this checklist. Follow these instructions: 1. Click Security in the - HP Q3943A | HP LaserJet MPF Products - Configuring Security for Multiple MFP Pro - Page 49
for each device function, the MFP will require authentication as needed. The MFP automatically allows authenticated users to continue wherever they are allowed. Note: The DSS Secondary E-mail function and the DSS Workflow function require HP Digital Send Service to be installed on the Network - HP Q3943A | HP LaserJet MPF Products - Configuring Security for Multiple MFP Pro - Page 50
MFPs to require a user's NT logon credentials for use of the MFPs. This is related to the LDAP access options in the Digital Sending page, which enable the MFP for the bind method (without using SSL), usernames, email addresses, passwords, and other data will be sent over the LDAP protocol in clear - HP Q3943A | HP LaserJet MPF Products - Configuring Security for Multiple MFP Pro - Page 51
restrict use of the MFPs. For instance, you can require all users to login at walk up using the LDAP system and then require Group 1 PIN for access to the copy function and Group 2 PIN for access to the fax function. Note: Configure NTLM if your network includes NTLM service. This option enables the - HP Q3943A | HP LaserJet MPF Products - Configuring Security for Multiple MFP Pro - Page 52
. Note: The Device Password option appears next on the Security page. You should have already configured this option at the beginning of this chapter. See the Initial Settings Section for more information. 12. Click to select Control Panel Access (Figure 52), and click to select Maximum Lock. 52 - HP Q3943A | HP LaserJet MPF Products - Configuring Security for Multiple MFP Pro - Page 53
panel, unlock access using Web Jetadmin, make the changes, and then lock access again. See the Ramifications chapter for more information. 13. Click to select Allow Use of Digital Send Service (Figure 53), and click Disabled (unless your network is using HP Digital Send Service). Figure 53: The - HP Q3943A | HP LaserJet MPF Products - Configuring Security for Multiple MFP Pro - Page 54
5 numbers or up to 2147483647, and repeat it in the Repeat PJL Password field. The PJL password protects the default features on the MFP. PJL commands are allowed only when the correct PJL password is included. This also affects PCL and PostScript commands. 17. Once you have made your choices, click - HP Q3943A | HP LaserJet MPF Products - Configuring Security for Multiple MFP Pro - Page 55
LaserJet and Color LaserJet-based MFPs. This saves time, and it saves complications that can arise from configuring MFPs that reject these settings. Follow these instructions, but select only Edgeline MFPs Use Fax Printing Schedule. This enables users to control when faxes are printed so they can - HP Q3943A | HP LaserJet MPF Products - Configuring Security for Multiple MFP Pro - Page 56
Figure 57: LDAP Server Settings. These settings enable the Edgeline MFPs to access the LDAP server to provide addresses and contacts. It is 7. Configure the remaining Server Connection Settings as desired. You may wish to select Use MFP user credentials to connect after Sign In, and then configure - HP Q3943A | HP LaserJet MPF Products - Configuring Security for Multiple MFP Pro - Page 57
who can receive responses or error reports for messages sent by the MFPs. This setting may be superseded if you choose to use the user's authenticated email address from the LDAP server. 11. Fill in the Default Display Name, the Default Subject, and the Default Messages fields as desired. 12 - HP Q3943A | HP LaserJet MPF Products - Configuring Security for Multiple MFP Pro - Page 58
level. Maximum requires all users to log in for all functions of the MFP. Custom allows you to choose the level of access for each function. b. If you chose Custom for the access control level in Step a, choose a default sign in method for each device function in the list. Be sure that the sign - HP Q3943A | HP LaserJet MPF Products - Configuring Security for Multiple MFP Pro - Page 59
). d. After you have added a name, click Permission set. A list of Device Functions with Access Control (Figure 63) will appear. Figure 63: The Device Functions with Access Control list (Edgeline MFPs). e. Click to select the device functions for which to allow access for that role. f. Click Apply - HP Q3943A | HP LaserJet MPF Products - Configuring Security for Multiple MFP Pro - Page 60
MFPs). This feature is for setting up LDAP sign in. It is required if you chose LDAP sign in for the Authentication Manager settings earlier in this section or for the Access Control of your network. 8. If your network supports Novell, configure the NOVELL Sign in Setup options (Figure 66). 60 - HP Q3943A | HP LaserJet MPF Products - Configuring Security for Multiple MFP Pro - Page 61
Users and Groups settings: a. Select a permission level in the Default Permission Set for LDAP Users drop down list. b. If you wish to add a user, type a name for the user in the User Name above (only if your network supports it), click to select Windows Users and Groups (Figure 68). 61 - HP Q3943A | HP LaserJet MPF Products - Configuring Security for Multiple MFP Pro - Page 62
and choose a Default Permission Set for Windows Users in the dropdown menu. Note: Setup for Device User Accounts is available only in the Edgeline MFP Embedded Web Server. If you wish to use Device User Accounts, go to the EWS of each MFP, and configure them. See MFP User Guide for more information - HP Q3943A | HP LaserJet MPF Products - Configuring Security for Multiple MFP Pro - Page 63
Config. EWS Config was required for configuring this checklist, but it should be disabled during normal use of the MFPs. Note: This setting removes all configuration settings from the MFP EWSs. It also removes all EWS-related settings from Web Jetadmin (they will disappear from Web Jetadmin menus - HP Q3943A | HP LaserJet MPF Products - Configuring Security for Multiple MFP Pro - Page 64
See user guides and EWS Help for more information. You can also find helpful information by searching for it at hp.com. Using Web Jetadmin and MFP Passwords Web Jetadmin is a powerful tool that allows you to manage any number of MFPs and printers. It provides a wide variety of features and services - HP Q3943A | HP LaserJet MPF Products - Configuring Security for Multiple MFP Pro - Page 65
important to remember the Bootloader password. With it, it is possible to restore the MFPs to factory default settings. Without it, the only way to restore the MFPs is to involve an HPauthorized service technician to reset the entire MFP. You may wish to use a password vault program to organize and - HP Q3943A | HP LaserJet MPF Products - Configuring Security for Multiple MFP Pro - Page 66
Sending page for Edgeline MFPs). † Configure Bootloader password (Security page for LaserJet and Color LaserJet MFPs) or Startup Administrator Password (control panel for Edgeline MFPs). † Hide the MFP IP Address (Control Panel on all MFPs). Settings for All MFPs Device Page Settings † Enable - HP Q3943A | HP LaserJet MPF Products - Configuring Security for Multiple MFP Pro - Page 67
† Disable Printer Firmware Update. † Configure Control Panel Access to Maximum Lock. † Disable Allow Use of Digital Send Service. † Disable Allow Transfer to New Digital Send Service. † Configure PJL Password. † Configure color restriction settings as desired. Settings only for Edgeline MFPs Device - HP Q3943A | HP LaserJet MPF Products - Configuring Security for Multiple MFP Pro - Page 68
† If you selected Windows Sign in for Access Control Levels, configure Windows Users and Groups. Final settings † Disable EWS Config. † Disable Direct Ports (wait for MFPs to restart). Default Settings This chapter lists the default setting for each configuration in the checklist: Setting Initial - HP Q3943A | HP LaserJet MPF Products - Configuring Security for Multiple MFP Pro - Page 69
Password Hide MFP IP Address. Settings for all MFPs Enable Job Retention. Configure Job Hold Timeout. Configure Fax Printing. Establish PIN Number. Configure Enable Mode to Store All Received Faxes. Configure Default From Address. Select Prevent user Print Service. Configure File System Password. - HP Q3943A | HP LaserJet MPF Products - Configuring Security for Multiple MFP Pro - Page 70
2 PIN). Disable Printer Firmware Update. Configure Control Panel Access to Maximum Lock. Disable Allow Use of Digital Send Service. Disable Allow Transfer to New Digital Send Service. Configure the PJL Password. Configure color restriction settings. Settings only for Edgeline MFPs Configure Fax - HP Q3943A | HP LaserJet MPF Products - Configuring Security for Multiple MFP Pro - Page 71
Configure LDAP Users and Groups. Configure Windows Users and Groups. Disable EWS Config. Disable Direct Ports. None configured None configured Enabled Enabled 71 - HP Q3943A | HP LaserJet MPF Products - Configuring Security for Multiple MFP Pro - Page 72
appears on the Embedded Web Server Configuration Category page. Whenever a change is made to either password, the MFP will change the other one to be the same. • Fill in the Access Control List. The Access Control List is a table that lists the IP addresses of PCs that are allowed to access the - HP Q3943A | HP LaserJet MPF Products - Configuring Security for Multiple MFP Pro - Page 73
to the BIOS settings on a PC. They affect the services that are loaded when the MFP is turned on. With this password configured, the MFP will prompt for it whenever anyone tries to access the startup settings. If the user enters the wrong password, the MFP will continue to prompt or it. Note: This - HP Q3943A | HP LaserJet MPF Products - Configuring Security for Multiple MFP Pro - Page 74
the printed documents as they exit the MFPs. For printing, a user sets the PIN at the time of sending the print job to the MFP. For fax printing, one PIN is configured for access to all incoming jobs. The MFP will require the PIN number at the control panel before it will print the job. Configuring - HP Q3943A | HP LaserJet MPF Products - Configuring Security for Multiple MFP Pro - Page 75
of seconds to delay. This setting enables the MFPs to remove email addresses or fax information from the control panel if a user forgets to reset it. With the timeouts configured, an MFP control panel will revert to the default screen, and a user will have to retype addresses and other destination - HP Q3943A | HP LaserJet MPF Products - Configuring Security for Multiple MFP Pro - Page 76
it ensures that only users with the MFP Print driver installed can send print jobs to the MFPs. With Print Service disabled, the print options password in its encrypted device cache. It automatically provides the password when the MFPs request it. Tip: You should apply the File System Password - HP Q3943A | HP LaserJet MPF Products - Configuring Security for Multiple MFP Pro - Page 77
will ignore PJL commands that attempt to access the file system. o Disable PML. PML (Printer Management Language) is an HP proprietary protocol that manages MFPs and printers. Web Jetadmin uses PML for many of its configuration settings. Disabling this PML access eliminates the PML commands that - HP Q3943A | HP LaserJet MPF Products - Configuring Security for Multiple MFP Pro - Page 78
legacy) printer management tools. Jetdirect also supports some Telnet commands. Telnet Config transmits data in clear text, and it should not be used. With it disabled, MFPs will deny access to Telnet sessions. Note that Web Jetadmin is the only solution recommended for managing HP MFPs - HP Q3943A | HP LaserJet MPF Products - Configuring Security for Multiple MFP Pro - Page 79
EWS. It prevents sensitive data such as usernames and passwords from passing over the network in clear text. This setting is related to the EWS Encryption Strength setting explained earlier. Web browsers that do not support SSL and high encryption strength will not be able to access the MFP EWSs. 79 - HP Q3943A | HP LaserJet MPF Products - Configuring Security for Multiple MFP Pro - Page 80
Service is a separate solution available at hp.com. It is a valuable tool that provides security and other features for managing MFPs. Select Digital Send Service is an authentication method that uses a network database to retrieve user credentials. It is secure when SSL is configured and trusted - HP Q3943A | HP LaserJet MPF Products - Configuring Security for Multiple MFP Pro - Page 81
firmware. • Configure Control Panel Access Lock to Maximum. Control Panel Access Lock denies access to configuration settings from the MFP control panel. This setting places a lock icon on the affected settings on the control panel. If a user selects a locked setting, the control panel states that - HP Q3943A | HP LaserJet MPF Products - Configuring Security for Multiple MFP Pro - Page 82
Access Control Level for Device Functions feature is similar to the Authentication Manager for LaserJet and Color LaserJet MFPs. This feature allows you to choose the authentication method used for access to each feature of the MFPs. It also provides options for creating roles for users to enable - HP Q3943A | HP LaserJet MPF Products - Configuring Security for Multiple MFP Pro - Page 83
you choose Custom for the Access Control Level, each MFP will require users to sign in when they choose specific functions at the control panel. Once a user signs in, the MFP will provide all applicable access to that user. • Configure sign in methods. The MFPs require configuration of the sign in - HP Q3943A | HP LaserJet MPF Products - Configuring Security for Multiple MFP Pro - Page 84
fax cancelling by configuring Control Panel Access Lock to Intermediate Lock. • Extra steps for printing faxes: A user will be required to provide a fax PIN before printing a fax (LaserJet and Color LaserJet MFPs only. Edgeline MFPs will require sign in credentials for a user trying to print a fax - HP Q3943A | HP LaserJet MPF Products - Configuring Security for Multiple MFP Pro - Page 85
includes settings, such as cold resetting, that are accessible via special codes (not covered in this checklist). These settings are protected by the bootloader password. Control Panel The control panel is the display and the buttons on the front of an MFP. Digital sending Digital sending - HP Q3943A | HP LaserJet MPF Products - Configuring Security for Multiple MFP Pro - Page 86
to network folder). Personal Identification Number. A PIN in a numeric password. MFPs use PINs for authentication, secure printing and secure fax printing. The top of the MFP is a scanner that converts paper documents into digital images for copying, fax, or digital sending. The scanner can scan
-
 1
1 -
 2
2 -
 3
3 -
 4
4 -
 5
5 -
 6
6 -
 7
7 -
8
-
9
-
10
-
11
-
12
-
13
-
14
-
15
-
16
-
17
-
18
-
19
-
20
-
21
-
22
-
23
-
24
-
25
-
26
-
27
-
28
-
29
-
30
-
31
-
32
-
33
-
34
-
35
-
36
-
37
-
38
-
39
-
40
-
41
-
42
-
43
-
44
-
45
-
46
-
47
-
48
-
49
-
50
-
51
-
52
-
53
-
54
-
55
-
56
-
57
-
58
-
59
-
60
-
61
-
62
-
63
-
64
-
65
-
66
-
67
-
68
-
69
-
70
-
71
-
72
-
73
-
74
-
75
-
76
-
77
-
78
-
79
-
80
-
81
-
82
-
83
-
84
-
85
-
86
 |
 |
HP Imaging and Printing Security Best Practices
Configuring Security for Multiple LaserJet MFPs, Color LaserJet MFPs,
and Color MFPs with Edgeline Technology
Version 3.0