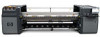
HP Scitex LX800 HP Scitex LX Printer Family - Site preparation guide
HP Scitex LX800 Manual
 |
View all HP Scitex LX800 manuals
Add to My Manuals
Save this manual to your list of manuals |
HP Scitex LX800 manual content summary:
- HP Scitex LX800 | HP Scitex LX Printer Family - Site preparation guide - Page 1
SCITEX LX printer family Site preparation guide - HP Scitex LX800 | HP Scitex LX Printer Family - Site preparation guide - Page 2
to change without notice. The only warranties for HP Products and services are set forth in the express warranty statement accompanying such products and services. Nothing herein should be construed as constituting an additional warranty. HP shall not be liable for technical or editorial errors - HP Scitex LX800 | HP Scitex LX Printer Family - Site preparation guide - Page 3
...1 System configuration ...1 Documentation ...1 Site preparation overview ...1 Customer responsibility ...2 2 Site preparation ...4 Planning for printer installation 4 Installation time schedule ...4 System operation requirements 5 Air supply requirements (pneumatic spindle 9 Room and spacial - HP Scitex LX800 | HP Scitex LX Printer Family - Site preparation guide - Page 4
iv ENWW - HP Scitex LX800 | HP Scitex LX Printer Family - Site preparation guide - Page 5
The following manuals are provided with your printer, and can also be downloaded from http://www.hp.com/go/LX600/manuals/ or http://www.hp.com/go/LX800/manuals/. ● Site preparation guide ● Site preparation checklist ● User's guide ● Maintenance and troubleshooting guide ● Legal information - HP Scitex LX800 | HP Scitex LX Printer Family - Site preparation guide - Page 6
to ensure that the computer is connected to the Internet. ● You must ensure that the HP RIP software has arrived by the agreed date of printer installation. If you have bought non-HP RIP software for your printer: NOTE: This guide does not provide information about your RIP solution. ● You must - HP Scitex LX800 | HP Scitex LX Printer Family - Site preparation guide - Page 7
and easy installation. Recycle the disposable ink bag and maintenance kit (printhead cleaning roller and aerosol filters) These items require disposal according to local regulations. For further information, please refer to the MSDS document about your printer's ink, available from http://www.hp.com - HP Scitex LX800 | HP Scitex LX Printer Family - Site preparation guide - Page 8
provided in this guide. The installation process is divided into two phases: Table 2-1 Installation time schedule Installation and System Configuration Operation and Maintenance Training Time to completion (LX600) 1 full working day 2 full working days Time to completion (LX800) 1.5 full working - HP Scitex LX800 | HP Scitex LX Printer Family - Site preparation guide - Page 9
Site preparation HP Scitex Caldera RIP ● Server Administration (Server, Configure, connection) ● installation of your printer. NOTE: The LX600 printer is supplied with a 5-m (16-ft) three-phase cable, already connected within the electrical cabinet, but without connectors at the other end. The LX800 - HP Scitex LX800 | HP Scitex LX Printer Family - Site preparation guide - Page 10
to adapt your building's single-phase power to three-phase power and have it installed by a qualified electrician prior to the printer's installation date. Ensure that converter's output specifications meets the printer's three-phase line requirements as shown in the table above (three-phase line - HP Scitex LX800 | HP Scitex LX Printer Family - Site preparation guide - Page 11
is installed. The LX600 printer requires two branch circuit breakers: one for the single-phase line and one for the three-phase line. Table 2-5 LX600 circuit breaker specifications Branch circuit breaker Three-phase 3 poles, 40 A Single-phase 2 poles, 16/20 A The LX800 printer requires - HP Scitex LX800 | HP Scitex LX Printer Family - Site preparation guide - Page 12
LX600 printer, and each is 5 m (16 ft) long. If those cables do not reach your PDU and/or UPS, a certified electrician must install suitable extension cables on the day of installation 4 mm² Power cables (LX800) A three-phase power cable is not provided with the LX800 printer. The cables that you - HP Scitex LX800 | HP Scitex LX Printer Family - Site preparation guide - Page 13
installation site is a public low voltage line shared with other users, the power line impedance at 50 Hz must be less than 52 mΩ for the LX600, or less than 34 mΩ for the LX800, to comply with European regulations. If other users line). Grounding The printer must be connected building service panel. - HP Scitex LX800 | HP Scitex LX Printer Family - Site preparation guide - Page 14
quality problems or damage sensitive electronic components. Table 2-11 Printer environmental install the printer where it will be exposed to direct sunlight or a strong light source. ● Do not install the printer in a dusty environment. Remove any accumulated dust before moving the printer - HP Scitex LX800 | HP Scitex LX Printer Family - Site preparation guide - Page 15
installations, to maintain ambient comfort levels, air conditioning or ventilation in the work area should take into account that the printer produces heat. Specifically, the LX600 printer's power dissipation is 12 KW (41 KBTU/h), and the LX800 printer with water-based HP Latex inks, especially when - HP Scitex LX800 | HP Scitex LX Printer Family - Site preparation guide - Page 16
LX600 1 Wheels 2 Feet A 5.159 m (203.11 in) B 3.091 m (121.69 in) C 1.485 m (58.46 in) D 762 mm (30 in) E 451 mm (17.75 in) F 782 mm (30.79 in) LX800 clean ● Durable ● Free from strong vibrations Lighting Whenever your printer is in operation, the print production area should be well - HP Scitex LX800 | HP Scitex LX Printer Family - Site preparation guide - Page 17
the following tasks: ● Print ● Use the HP Internal Print Server ● Replace a substrate roll ● Service the printer or replace printer components ● Ensure the printer is well ventilated Your printer has the following dimensions: Table 2-12 LX600 physical specifications Doors closed1 Width 5.18 - HP Scitex LX800 | HP Scitex LX Printer Family - Site preparation guide - Page 18
table below, the number in the left column corresponds to the room layout illustration above. Measurement A LX600: 7 m (23 ft) LX800: 8 m (26 ft 3 in) B 1.5 m (5 ft) C 0.6 m (2 ft) the printer, thought should not only be given to safety and convenience, but also to the fact that if inks and - HP Scitex LX800 | HP Scitex LX Printer Family - Site preparation guide - Page 19
and networking requirements LAN and switch requirements To use CallMe@HP for remote support, you need one of the following: ● A CAT-6 LAN cable long enough to connect the printer to the network NOTE: The port of the hub or switch to which the printer is connected must be configured as autosense. - HP Scitex LX800 | HP Scitex LX Printer Family - Site preparation guide - Page 20
the latest service pack HP Scitex Onyx 7.3 RIP (optimal configuration) ● Processor: Intel Core i7 3.2GHz processor ● Memory: 6GB DDR3 (3 × 2GB) 1066MHz fully-buffered ECC RAM ● Hard disk drives: Four 74GB, 10,000 RPM SATA drives NOTE: One for OS and application, one for temporary data processing - HP Scitex LX800 | HP Scitex LX Printer Family - Site preparation guide - Page 21
Site preparation HP Scitex Caldera 8 RIP (minimum configuration) ● Processor: Single- or dual-core 2GHz ● Memory: .eu/en/support.php?page=operating_system ● http://www.caldera.eu/docs/Datasheet_GrandRIP+_UK.pdf External color profiling In order to build color profiles for your printer, an external - HP Scitex LX800 | HP Scitex LX Printer Family - Site preparation guide - Page 22
) Minimum corridor width for a 90° turn (LX600) 3 m (119 in) Minimum corridor width for a 90° turn (LX800) 3.2 m (126 in) Crate 2 m (78.8 in) 2.5 m (98.5 in) 2 m (78.8 in) 3.5 m (138 in) 3.65 m (144 in) WARNING! After being removed from the crate, the printer cannot be moved up or down a ramp - HP Scitex LX800 | HP Scitex LX Printer Family - Site preparation guide - Page 23
. The use of specialist moving and lifting equipment is required during the unloading, unpacking and installation of your printer. Advanced booking for the services of a machinery moving contractor/rigger must be made. It is important to confirm that the hired moving specialist and moving - HP Scitex LX800 | HP Scitex LX Printer Family - Site preparation guide - Page 24
Arrival preparation ● Two skates to move the crate (optional) ● Electric pallet jack (optional) 20 Chapter 3 Shipment arrival preparation ENWW - HP Scitex LX800 | HP Scitex LX Printer Family - Site preparation guide - Page 25
● Manual pallet jack (optional) Arrival preparation Above ground floor installation CAUTION: Unloading and moving the printer and all system components is the responsibility of the customer and not HP. Failure to provide the required moving and lifting equipment could result in personal injury or - HP Scitex LX800 | HP Scitex LX Printer Family - Site preparation guide - Page 26
bars and spreader beam must be long enough so that the lift cables do not touch the printer. The following graphic illustrates how to lift the printer with a spreader beam. CAUTION: When lifting the printer with a crane, extra caution should be taken to ensure that the cables do not apply pressure - HP Scitex LX800 | HP Scitex LX Printer Family - Site preparation guide - Page 27
Arrival preparation Waste disposal You must dispose of the crate and packaging material that comes with the printer. Most of the waste will be wood materials. ENWW Waste disposal 23
-
 1
1 -
 2
2 -
 3
3 -
 4
4 -
 5
5 -
 6
6 -
 7
7 -
8
-
9
-
10
-
11
-
12
-
13
-
14
-
15
-
16
-
17
-
18
-
19
-
20
-
21
-
22
-
23
-
24
-
25
-
26
-
27
 |
 |

SCITEX LX printer family
Site preparation guide