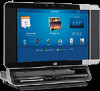
HP TouchSmart IQ700 HP TouchSmart Desktop PCs - Part Replacement Instructions
HP TouchSmart IQ700 - Desktop PC Manual
 |
View all HP TouchSmart IQ700 manuals
Add to My Manuals
Save this manual to your list of manuals |
HP TouchSmart IQ700 manual content summary:
- HP TouchSmart IQ700 | HP TouchSmart Desktop PCs - Part Replacement Instructions - Page 1
computer. Part Replacement Instructions 2 Ground yourself. Note: Before doing any work inside your computer, ground yourself by touching a metal part of the computer , like the metal frame of the PC. HARD DISK DRIVE (For DVD, see page 2) 1 Raise the display (monitor) to see release lever (A). 2 - HP TouchSmart IQ700 | HP TouchSmart Desktop PCs - Part Replacement Instructions - Page 2
here 6 Insert the two screws and tighten them. + - Copyright © 2007 Hewlett-Packard Development Company, L.P. The information contained herein is subject to change without notice. The only warranties for HP products and services are set forth in the express warranty statements accompanying such
-
 1
1 -
 2
2
 |
 |

2
1
2
1
Part Replacement Instructions
5
6
D
E
F
C
B
A
Connect the power cable (
±
) and the data cable
(
f
), place the hard disk drive cage over the two
bottom screws (
²
) in
the chassis, insert the two
top screws (
d
), and then
tighten all the screws.
Align and insert the hooks on the vertical cover
(
B
) into the holes on the back of the chassis, and
reaching beneath
the display, hold down
the lever (
A
) while sliding
the vertical cover down
and into place. Release
the lever.
3
4
On the hard disk drive cage, loosen the two bottom
screws (
²
) three turns, remove the two top screws
(
d
), lift the cage up off the bottom screws, and then
disconnect the power
cable (
±
) and the data
cable (squeeze the
connector) (
f
).
Remove the four screws (
G
) from the cage, and lift
the hard disk drive from the cage. Place the new
hard disk drive into the cage and insert the four
screws.
D
E
F
C
G
G
BEFORE YOU BEGIN
Raise the display (monitor) to see release lever (
A
).
Unplug the computer.
Ground yourself.
Holding down the lever (
A
), pull up the vertical
cover (
B
), and remove it from the chassis.
A
B
A
Note:
Before doing any work inside
your computer, ground yourself by
touching a metal part of the computer
frame.
CAUTION:
This product contains
components that are easily damaged
by Electrostatic Discharge (ESD). To
reduce the chance of ESD damage,
work over a non-carpeted floor, use
a static dissipative work surface (like
a conductive foam pad), and wear
an ESD wrist strap that is connected
to a grounded surface, like the metal
frame of the PC.
HARD DISK DRIVE
(For DVD, see page 2)
1