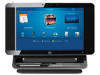
HP TouchSmart IQ770 HP TouchSmart Desktop PCs - Part Replacement Instructions
HP TouchSmart IQ770 Manual
 |
View all HP TouchSmart IQ770 manuals
Add to My Manuals
Save this manual to your list of manuals |
HP TouchSmart IQ770 manual content summary:
- HP TouchSmart IQ770 | HP TouchSmart Desktop PCs - Part Replacement Instructions - Page 1
, like the metal frame of the PC. HARD DISK DRIVE (For DVD, see page 2) 1 Raise the display (monitor) to see release lever (A). 2 Holding down the lever (A), pull up the vertical cover (B), and remove it from the chassis. B A A 3 On the hard disk drive cage, loosen the two bottom screws - HP TouchSmart IQ770 | HP TouchSmart Desktop PCs - Part Replacement Instructions - Page 2
in until the tab (K) catches, and then reconnect the DVD drive cable (J). L K J 5 Place the horizontal cover (I) in position on the chassis with about 1/2 inch (1.27 cm) gap, and then slide the horizontal cover (H) toward the front of the computer chassis to close the gap; the cover
-
 1
1 -
 2
2
 |
 |

2
1
2
1
Part Replacement Instructions
5
6
D
E
F
C
B
A
Connect the power cable (
±
) and the data cable
(
f
), place the hard disk drive cage over the two
bottom screws (
²
) in
the chassis, insert the two
top screws (
d
), and then
tighten all the screws.
Align and insert the hooks on the vertical cover
(
B
) into the holes on the back of the chassis, and
reaching beneath
the display, hold down
the lever (
A
) while sliding
the vertical cover down
and into place. Release
the lever.
3
4
On the hard disk drive cage, loosen the two bottom
screws (
²
) three turns, remove the two top screws
(
d
), lift the cage up off the bottom screws, and then
disconnect the power
cable (
±
) and the data
cable (squeeze the
connector) (
f
).
Remove the four screws (
G
) from the cage, and lift
the hard disk drive from the cage. Place the new
hard disk drive into the cage and insert the four
screws.
D
E
F
C
G
G
BEFORE YOU BEGIN
Raise the display (monitor) to see release lever (
A
).
Unplug the computer.
Ground yourself.
Holding down the lever (
A
), pull up the vertical
cover (
B
), and remove it from the chassis.
A
B
A
Note:
Before doing any work inside
your computer, ground yourself by
touching a metal part of the computer
frame.
CAUTION:
This product contains
components that are easily damaged
by Electrostatic Discharge (ESD). To
reduce the chance of ESD damage,
work over a non-carpeted floor, use
a static dissipative work surface (like
a conductive foam pad), and wear
an ESD wrist strap that is connected
to a grounded surface, like the metal
frame of the PC.
HARD DISK DRIVE
(For DVD, see page 2)
1