HP W17q User’s Guide vf15/vf17, FP15/FP17, L1502/L1702, f15
HP W17q - Compaq - 17" LCD Monitor Manual
 |
UPC - 883585001200
View all HP W17q manuals
Add to My Manuals
Save this manual to your list of manuals |
HP W17q manual content summary:
- HP W17q | User’s Guide vf15/vf17, FP15/FP17, L1502/L1702, f15 - Page 1
User's Guide vf15/vf17, FP15/FP17, L1502/L1702, f1523/f1723, FP5315/FP7317 Flat Panel Monitors Document Part Number: 322638-003 April 2003 This guide provides information on setting up the monitor, installing drivers, using the on-screen display menu, troubleshooting and technical specifications. - HP W17q | User’s Guide vf15/vf17, FP15/FP17, L1502/L1702, f15 - Page 2
harm or loss of life. Ä CAUTION: Text set off in this manner indicates that failure to follow directions could result in damage to equipment or loss of information. User's Guide vf15/vf17, FP15/FP17, L1502/L1702, f1523/f1723, FP5315/FP7317 Flat Panel Monitors Third Edition (April 2003) Document Part - HP W17q | User’s Guide vf15/vf17, FP15/FP17, L1502/L1702, f15 - Page 3
2-1 Maintenance Guidelines 2-2 Cleaning the Monitor 2-4 Shipping the Monitor 2-4 3 Setting Up the Monitor Installing the Monitor Pedestal 3-1 Connecting the Monitor 3-3 Removing the Monitor Base 3-6 Mounting the Monitor 3-8 4 Operating the Monitor Installing the Information Files 4-1 Front - HP W17q | User’s Guide vf15/vf17, FP15/FP17, L1502/L1702, f15 - Page 4
Troubleshooting Solving Common Problems A-1 Using the Worldwide Web A-2 Preparing to call Technical Support A-3 B Technical Specifications Entering C-3 Korean Notice C-4 EPA Energy Star Compliance C-4 Power Cord Set Requirements C-4 D LCD Monitor Quality and Pixel Policy User's Guide iv - HP W17q | User’s Guide vf15/vf17, FP15/FP17, L1502/L1702, f15 - Page 5
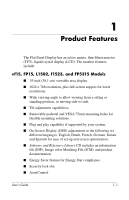
thin-film transistor (TFT), liquid crystal display (LCD). The monitor features include: vf15, FP15, L1502, f1523, and FP5315 Models ■ 15-inch (38.1 cm) viewable area display. ■ 1024 x 768 resolution, plus full-screen support for lower resolutions. ■ Wide viewing angle to allow viewing from a sitting - HP W17q | User’s Guide vf15/vf17, FP15/FP17, L1502/L1702, f15 - Page 6
specifications: ❏ EPA ENERGY STAR ❏ European Union CE Directives ❏ Swedish MPR II 1990 ❏ Swedish TCO Display Requirements vf17, FP17, L1702, f1723, and FP7317 Models ■ 17-inch (43.18 cm) viewable area display. ■ 1280 × 1024 native resolution, plus full-screen support for lower resolutions. ■ Wide - HP W17q | User’s Guide vf15/vf17, FP15/FP17, L1502/L1702, f15 - Page 7
Product Features ■ Compliant with the following regulated specifications: ❏ EPA ENERGY STAR ❏ European Union CE Directives ❏ Swedish MPR II 1990 ❏ Swedish TCO Display Requirements User's Guide 1-3 - HP W17q | User’s Guide vf15/vf17, FP15/FP17, L1502/L1702, f15 - Page 8
use only a power source and connection appropriate for this monitor. For information on the correct power cord set to use with your monitor, refer to the "Power Cord Set Requirements" section in Appendix C. ŠWARNING: To reduce by grasping the plug firmly. Never pull on the cord. User's Guide 2-1 - HP W17q | User’s Guide vf15/vf17, FP15/FP17, L1502/L1702, f15 - Page 9
this product yourself. Adjust only those controls that are covered in the operating instructions. If your monitor is not operating properly or has been dropped or damaged, contact your HP authorized dealer, reseller, or service provider. ■ Use only a power source and connection appropriate for this - HP W17q | User’s Guide vf15/vf17, FP15/FP17, L1502/L1702, f15 - Page 10
your monitor from the wall outlet into cabinet slots or other openings. ■ Do not drop your monitor or place it on an unstable surface. ■ Do not allow your monitor in a well-ventilated area, away from excessive light, heat or moisture. ■ When removing the monitor base, you must lay the monitor face - HP W17q | User’s Guide vf15/vf17, FP15/FP17, L1502/L1702, f15 - Page 11
the Monitor To clean the monitor, follow these steps: 1. Turn off the monitor and the computer. 2. Dust the monitor by wiping substance to clean the monitor screen or cabinet. These chemicals may damage the monitor. Never use water to clean an LCD screen. Shipping the Monitor Keep the original - HP W17q | User’s Guide vf15/vf17, FP15/FP17, L1502/L1702, f15 - Page 12
Up the Monitor To set up the monitor, ensure that the power is turned off to the monitor, computer system, and other attached devices, then follow the steps below. Installing the Monitor Pedestal To install the monitor pedestal: 1. Place the pedestal plate on your desktop or table and check to - HP W17q | User’s Guide vf15/vf17, FP15/FP17, L1502/L1702, f15 - Page 13
Setting Up the Monitor 2. Using both hands, position the monitor over the pedestal base and press down firmly to lock the pedestal base in place. When the base locks, it will make a clicking sound. Make sure the pedestal base is securely locked before continuing with the setup. Inserting the Monitor - HP W17q | User’s Guide vf15/vf17, FP15/FP17, L1502/L1702, f15 - Page 14
computer. 2. Connect the monitor signal cable on the back of the monitor to the video connector on the rear panel of the computer. 3. Connect one end of the power cable to the back of the monitor, and the other end to an electrical wall outlet. Connecting the VGA and Power Cables User's Guide 3-3 - HP W17q | User’s Guide vf15/vf17, FP15/FP17, L1502/L1702, f15 - Page 15
Setting Up the Monitor 4. If your monitor is a multimedia model, connect one end of the audio cable to the back of the monitor, and the other end to the audio connector on the back of the computer. Connecting the Audio Cable 3-4 User's Guide - HP W17q | User’s Guide vf15/vf17, FP15/FP17, L1502/L1702, f15 - Page 16
Setting Up the Monitor 5. Adjust the monitor as needed for your comfort using the monitor's tilt adjustment capability. Tilting the Monitor Ä CAUTION: Burn-in image damage may occur on monitors your monitor screen, you should always activate a screen saver application or turn off the monitor when - HP W17q | User’s Guide vf15/vf17, FP15/FP17, L1502/L1702, f15 - Page 17
all times. ■ Disconnect power from the monitor by unplugging the power cord from the electrical the Monitor Base You can remove the monitor base to mount the monitor on a wall, a monitor from the base, ensure that the base is set to the maximum base extension. Attempting to remove the monitor - HP W17q | User’s Guide vf15/vf17, FP15/FP17, L1502/L1702, f15 - Page 18
the monitor. 2. Remove the two screws 1 as shown in the following illustration. Removing the Monitor Base Ä CAUTION: Ensure that the bottom of the monitor base is positioned over a table or desktop before removing the base from the monitor. 3. Remove the monitor base from the monitor. User's Guide - HP W17q | User’s Guide vf15/vf17, FP15/FP17, L1502/L1702, f15 - Page 19
mounting flat panel displays. The 75mm VESA hole pattern supports the 15" monitors only, and the 100mm hole pattern supports the 17" monitors only. 2. Mount the monitor to a swing arm or other mounting fixture by following the instructions included with the mounting fixture to be used. 3-8 User - HP W17q | User’s Guide vf15/vf17, FP15/FP17, L1502/L1702, f15 - Page 20
and provides specifications used by most operating systems to install support software for certain hardware devices. The .INF file ensures monitor compatibility and optimization with your computer's graphics adapter. INF files are also downloadable by clicking on: http://www.hp.com/go/support and - HP W17q | User’s Guide vf15/vf17, FP15/FP17, L1502/L1702, f15 - Page 21
Audio feature for music, alarms, etc. (multimedia models only) 2 Connects a headphone set to the monitor. (Headphone jack) 3 Menu button 4 - (Minus button) 5 + (Plus button) Launches the On-Screen Display (OSD) menu and selects functions. • When OSD is inactive, auto-adjusts the screen image - HP W17q | User’s Guide vf15/vf17, FP15/FP17, L1502/L1702, f15 - Page 22
vf17 Monitors No. Control Function 1 Menu button Launches the On-Screen Display (OSD) menu and selects functions. 2 - (Minus button) • When OSD is inactive, auto-adjusts the screen image. • When OSD is active, navigates in reverse through the OSD and adjusts OSD scale settings. User's Guide - HP W17q | User’s Guide vf15/vf17, FP15/FP17, L1502/L1702, f15 - Page 23
Power Switch Function When the OSD is active, navigates through the OSD and adjusts OSD scale settings. Fully powered = Green. Sleep mode = Amber. Sleep Timer mode = Flashing Amber. Powers the monitor on and off. Adjusting Monitor Settings Use the On-Screen Display (OSD) to adjust the screen image - HP W17q | User’s Guide vf15/vf17, FP15/FP17, L1502/L1702, f15 - Page 24
revert to previous settings and exit the menu. Using the On-Screen Display There are two On-Screen Display menus available; one for basic adjustments, and one for advanced adjustments. To access the Basic OSD Menu, press the menu button on the monitor's front panel. Basic OSD Menu Levels Menu - HP W17q | User’s Guide vf15/vf17, FP15/FP17, L1502/L1702, f15 - Page 25
, the Advanced Menu remains the default OSD on subsequent power-ups of the monitor until the Basic Menu is selected or Factory Reset is applied. The Advanced OSD Menu has up to three sublevels and Adjustment Scale Adjustment Scale Adjustment Scale Factory Reset Y Y Y Y Y Y Y Y 4-6 User's Guide - HP W17q | User’s Guide vf15/vf17, FP15/FP17, L1502/L1702, f15 - Page 26
Operating the Monitor Advanced OSD Menu Levels (Continued) Level 1 Level 2 Level 3 Factory Reset Custom Menu Basic Menu Cancel Save and Return OSD Control Horizontal Position Adjustment Scale Y Vertical Position Adjustment Scale Y OSD Timeout Adjustment Scale Y Cancel Save and - HP W17q | User’s Guide vf15/vf17, FP15/FP17, L1502/L1702, f15 - Page 27
the CD and press the - (Minus) button on the monitor front panel to manually activate the Auto-Adjustment function. For more precise adjustments, run The Clock must first be set correctly since the Clock Phase settings are dependent on the main Clock setting. ■ Clock-Increase/decrease User's Guide - HP W17q | User’s Guide vf15/vf17, FP15/FP17, L1502/L1702, f15 - Page 28
monitors, set the resolution and refresh rate fo 1280 x 1024 at 60 Hz. Restart your computer for the new settings take effect. ■ Going to Sleep- Indicates the screen display is entering a sleep mode. ■ Check Video Cable- Indicates the video cable is not properly connected to the computer. ■ OSD Lock - HP W17q | User’s Guide vf15/vf17, FP15/FP17, L1502/L1702, f15 - Page 29
backlight bulbs in the monitor. The Sleep Timer has five settings: ■ Set Current Time ■ Set Sleep Time ■ Set On Time ■ Timer: On/Off ■ Sleep Now To set the timer: 1. Press the Menu button on the monitor front panel to Press the - (Minus) or + (Plus) buttons to adjust the minutes. 4-10 User's Guide - HP W17q | User’s Guide vf15/vf17, FP15/FP17, L1502/L1702, f15 - Page 30
Operating the Monitor 9. Press the Menu button to lock in the time chosen. 10. After setting the current time, the highlight automatically skips to Set Sleep Time hours. Repeat steps 6 through 9 to set Sleep Time. 11. If you do not want to set Sleep Time, press the Menu button twice, then select - HP W17q | User’s Guide vf15/vf17, FP15/FP17, L1502/L1702, f15 - Page 31
Problem Screen is blank. Possible Cause Power cord is disconnected. Power switch is turned off. Video cable is improperly connected. Screen blanking utility is active. Solution Connect the power cord. Turn on the power. Connect the video cable properly. Refer to Chapter 3, Setting Up the Monitor - HP W17q | User’s Guide vf15/vf17, FP15/FP17, L1502/L1702, f15 - Page 32
video cable is disconnected. Video resolution and/or refresh rate are set higher than what your monitor supports. Solution Press the Minus button on the monitor front panel to auto-adjust the screen. If that doesn't work, press the Menu button to open the Basic OSD Menu, and adjust the brightness - HP W17q | User’s Guide vf15/vf17, FP15/FP17, L1502/L1702, f15 - Page 33
If you cannot solve a problem using the troubleshooting tips in this section, you may need to call technical support. Have the following information available when you call: ■ The monitor ■ Monitor model number (on front and back panel) ■ Serial number for the monitor (on back panel) ■ Purchase - HP W17q | User’s Guide vf15/vf17, FP15/FP17, L1502/L1702, f15 - Page 34
B Technical Specifications vf15, FP15, L1502, f1523, and FP5315 Models 15-inch Flat Panel Monitors Display Type 15.0 inches TFT LCD 38.1 cm Viewable Image Size Tilt 15.0-inch diagonal --5 to 30o 38.1 cm Maximum Weight (Unpacked) 9.15 lbs. 4.15 kg (unpacked) Dimensions (includes pedestal) - HP W17q | User’s Guide vf15/vf17, FP15/FP17, L1502/L1702, f15 - Page 35
Technical Specifications vf15, FP15, L1502, f1523, and FP5315 Models 15-inch Flat Panel Monitors (Continued) Environmental Requirements Temperature: Operating Temperature Non-operating Temperature 41to 95o F typical Input Terminals 15-pin D-type connector with cable included. B-2 User's Guide - HP W17q | User’s Guide vf15/vf17, FP15/FP17, L1502/L1702, f15 - Page 36
Specifications vf17, FP17, L1702, f1723, and FP7317 Models 17-inch Flat Panel Monitors Display Type 17.0 inches TFT LCD 43.18 cm Viewable Image Size Tilt 17.0-inch diagonal --5 to 30o 43.18 cm Maximum Weight (Unpacked) 13.2 lbs. 6.0 kg (unpacked) Dimensions (include pedestal 's Guide B-3 - HP W17q | User’s Guide vf15/vf17, FP15/FP17, L1502/L1702, f15 - Page 37
Technical Specifications vf17, FP17, L1702, f1723, and FP7317 Models 17-inch Flat Panel Monitors (Continued) Altitude: Operating Non-operating 0 to 12,000 feet 0 to 40,000 feet 0 to 3657.6 m 0 to12192 m Power Consumption - HP W17q | User’s Guide vf15/vf17, FP15/FP17, L1502/L1702, f15 - Page 38
Technical Specifications When the monitor is in the reduced power state, the monitor utilizes less than 2 watts of power. There is a brief warm up period before the monitor returns to its normal operating mode. Refer to your computer manual for instructions on setting energy saver features ( - HP W17q | User’s Guide vf15/vf17, FP15/FP17, L1502/L1702, f15 - Page 39
can radiate radio frequency energy and, if not installed and used in accordance with the instructions, may cause harmful interference to radio communications. However, there is no guarantee that interference Packard Company may void the user's authority to operate the equipment. User's Guide C-1 - HP W17q | User’s Guide vf15/vf17, FP15/FP17, L1502/L1702, f15 - Page 40
Company P. O. Box 692000, Mail Stop 510101 Houston, Texas 77269-2000 Or, call (281) 514-3333 To identify this product, refer to the Part, Series, or Model number found on the product. C-2 User's Guide - HP W17q | User’s Guide vf15/vf17, FP15/FP17, L1502/L1702, f15 - Page 41
22) - Electromagnetic Interference ■ EN55024 (IEC61000-4-2,3,4,5,6,8,11) - Electromagnetic Immunity ■ EN61000-3-2 (IEC61000-3-2) - Power Line Harmonics ■ EN61000-3-3 (IEC61000-3-3) - Power Line Flicker ■ EN60950 (IEC950) - Product Safety Japanese Notice User's Guide C-3 - HP W17q | User’s Guide vf15/vf17, FP15/FP17, L1502/L1702, f15 - Page 42
meets the Energy Star guidelines for energy efficiency. Specific details on using the Energy Saving features can be found in the energy saver or power management section of the computer manual. Power Cord Set Requirements The monitor power supply is provided with Automatic Line Switching (ALS - HP W17q | User’s Guide vf15/vf17, FP15/FP17, L1502/L1702, f15 - Page 43
of the cord must be between 6 feet (1.8 m) and 12 feet (3.6 m). If you have questions about the type of power cord to use, contact your HP authorized service provider. A power cord should be routed so that it is not likely to be walked on or pinched by items placed upon it or against - HP W17q | User’s Guide vf15/vf17, FP15/FP17, L1502/L1702, f15 - Page 44
according to HP standards, to guarantee trouble-free performance. Nevertheless, the display may have cosmetic imperfections that appear as small bright or dark spots. This is common to all LCD displays used in products supplied by all vendors and is not specific to the HP LCD. These imperfections - HP W17q | User’s Guide vf15/vf17, FP15/FP17, L1502/L1702, f15 - Page 45
pixels, the monitor should be viewed under normal operating conditions, in normal operating mode at a supported resolution and refresh rate, from a distance of approximately 50 cm (16 in.). HP expects that, over time, the industry will continue to improve its ability to produce LCDs with fewer
-
 1
1 -
 2
2 -
 3
3 -
 4
4 -
 5
5 -
 6
6 -
 7
7 -
8
-
9
-
10
-
11
-
12
-
13
-
14
-
15
-
16
-
17
-
18
-
19
-
20
-
21
-
22
-
23
-
24
-
25
-
26
-
27
-
28
-
29
-
30
-
31
-
32
-
33
-
34
-
35
-
36
-
37
-
38
-
39
-
40
-
41
-
42
-
43
-
44
-
45
 |
 |

User’s Guide
vf15/vf17, FP15/FP17, L1502/L1702,
f1523/f1723, FP5315/FP7317 Flat
Panel Monitors
Document Part Number: 322638-003
April 2003
This guide provides information on setting up the monitor,
installing drivers, using the on-screen display menu,
troubleshooting and technical specifications.