HP Workstation c3650 HP Workstation c-class - Owner's Guide and Warranty State
HP Workstation c3650 Manual
 |
View all HP Workstation c3650 manuals
Add to My Manuals
Save this manual to your list of manuals |
HP Workstation c3650 manual content summary:
- HP Workstation c3650 | HP Workstation c-class - Owner's Guide and Warranty State - Page 1
owner's guide hp workstation c-class Printed in USA Manufacturing Part Number: A7814-90000 Edition E1001 - HP Workstation c3650 | HP Workstation c-class - Owner's Guide and Warranty State - Page 2
WARRANTY STATEMENT HP PRODUCT DURATION OF WARRANTY HP VISUALIZE C Class Computers 1 Year 1. HP warrants HP hardware, accessories and supplies against be either new or like-new. 2. HP warrants that HP software will not fail to execute its programming instructions, for the period specified above, - HP Workstation c3650 | HP Workstation c-class - Owner's Guide and Warranty State - Page 3
of the purchase price upon prompt return of the product. 4. HP products may contain interfacing, parts or supplies not supplied by HP, (c) unauthorized HP SPECIFICALLY DISCLAIMS ANY IMPLIED WARRANTIES OR CONDITIONS OF MERCHANTABILITY, SATISFACTORY QUALITY, AND FITNESS FOR A PARTICULAR PURPOSE. 8. HP - HP Workstation c3650 | HP Workstation c-class - Owner's Guide and Warranty State - Page 4
FOR CONSUMER TRANSACTIONS IN AUSTRALIA AND NEW ZEALAND: THE WARRANTY TERMS CONTAINED IN THIS STATEMENT, EXCEPT TO THE EXTENT LAWFULLY PERMITTED, DO NOT EXCLUDE, RESTRICT OR MODIFY AND ARE IN ADDITION TO THE MANDATORY STATUTORY RIGHTS APPLICABLE TO THE SALE OF THIS PRODUCT TO YOU. RESTRICTED RIGHTS - HP Workstation c3650 | HP Workstation c-class - Owner's Guide and Warranty State - Page 5
connectors 31 hp parallel i/o connector 32 802.3 network connectors 32 RS-232C serial input/output connector 33 SCSI connectors 34 power cord connector 34 security loop 35 locking your system unit's left-side panel 36 memory 37 monitors 38 operating - HP Workstation c3650 | HP Workstation c-class - Owner's Guide and Warranty State - Page 6
diskette 70 using device files 71 formatting a new diskette 74 transferring data to and from a floppy diskette 75 listing the files on a floppy diskette 76 troubleshooting 76 verifying the floppy drive configuration 77 additional floppy drive information 78 configuring the floppy driver 78 6 - HP Workstation c3650 | HP Workstation c-class - Owner's Guide and Warranty State - Page 7
system unit 99 opening the left side panel of the system unit 99 closing the left side panel of the system unit 101 system unit power supply 102 propping up the power supply 102 i/o cards 105 7 - HP Workstation c3650 | HP Workstation c-class - Owner's Guide and Warranty State - Page 8
additional memory 152 removing memory 156 changing your monitor type 158 setting the monitor type at power on 158 setting the monitor type from the boot console interface 158 setting the monitor type using SAM 159 troubleshooting monitor problems 162 6. the boot console interface boot console - HP Workstation c3650 | HP Workstation c-class - Owner's Guide and Warranty State - Page 9
setting the monitor type with SAM 183 setting the monitor type at power on 186 troubleshooting monitor problems 187 changing the console to an external terminal 188 displaying the current memory configuration 189 memory information sample 190 displaying the status of the system i/o 191 setting - HP Workstation c3650 | HP Workstation c-class - Owner's Guide and Warranty State - Page 10
Contents running system verification tests 212 A. safety and regulatory statements declaration of conformity 215 emissions regulations 216 for FCC B applications 216 EMI Class A RRL (Korea 217 VCCI Class B ITE (Japan 217 EMI Class A (Taiwan 218 special video configuration statement 218 third - HP Workstation c3650 | HP Workstation c-class - Owner's Guide and Warranty State - Page 11
Panel 97 Figure 5-2. Opening the Left Side Panel of the System Unit 100 Figure 5-3. Unscrewing the Power Supply Captive Screws 102 Figure 5-4. Propping Up the Power Supply 103 Figure 5-5. PCI Card Slot Numbering and Capabilities 105 Figure 5-6. I/O Slot Numbering 106 Figure 5-7. Removing the - HP Workstation c3650 | HP Workstation c-class - Owner's Guide and Warranty State - Page 12
Figure 5-13. Removing the CD Drive Bracket and Blank 115 Figure 5-14. Installing the CD Drive 116 Figure 5-15. Plugging in the Audio, ATAPI and Power Cables 117 Figure 5-16. Tightening the Bracket Screws 117 Figure 5-17. Replacing the CD Drive Bay's Rear Cover 118 Figure 5-18. Removing the CD - HP Workstation c3650 | HP Workstation c-class - Owner's Guide and Warranty State - Page 13
Drive Bracket 146 Figure 5-44. Propping Up the Power Supply 153 Figure 5-45. Memory Card Slot Numbers and Loading Sequence . . . .154 Figure 5-46. Installing Memory Cards 155 Figure 5-47. Propping Up the Power Supply 156 Figure 5-48. Removing Memory Cards 157 Figure 7-1. Fan Locations 210 13 - HP Workstation c3650 | HP Workstation c-class - Owner's Guide and Warranty State - Page 14
Figures 14 - HP Workstation c3650 | HP Workstation c-class - Owner's Guide and Warranty State - Page 15
Table 1-1. HP Workstation C-Class Features Boot Paths 177 Table 7-1. Problems Powering Up the System 201 Table 7-2. Problems Loading and Booting the Operating System . . . .202 Table 7-3. Problems with the 802.3 Network 202 Table 7-4. Problems Using a Hard Disk Drive 203 Table 7-5. Problems - HP Workstation c3650 | HP Workstation c-class - Owner's Guide and Warranty State - Page 16
Tables 16 - HP Workstation c3650 | HP Workstation c-class - Owner's Guide and Warranty State - Page 17
preface This owner's guide describes how to use your HP workstation c-class product. This manual assumes that you have installed your computer as described in the HP Workstation C-Class Installation Card. audience This guide is intended for HP workstation c-class users. safety and regulatory - HP Workstation c3650 | HP Workstation c-class - Owner's Guide and Warranty State - Page 18
sales representative. related manuals For more information, refer to the following documents: • Configuring HP-UX for Peripherals • HP-UX System Administration Tasks • HP CDE Getting Started Guide • Managing Systems and Workstations • Using HP-UX. • Using Your HP Workstation Note that the documents - HP Workstation c3650 | HP Workstation c-class - Owner's Guide and Warranty State - Page 19
edition of the manual is listed below: Edition Revision History E1001 First Printing problems, questions, and suggestions If you have any problems or questions with our hardware, software, or documentation, please contact either your HP Response Center or your local HP representative. If you - HP Workstation c3650 | HP Workstation c-class - Owner's Guide and Warranty State - Page 20
conventions Unless otherwise noted in the text, this guide uses the following symbolic conventions. user-supplied values screen display Enter Italic words or characters in syntax and command descriptions represent values that you must supply. Italics are also used in text for emphasis - HP Workstation c3650 | HP Workstation c-class - Owner's Guide and Warranty State - Page 21
1 system overview This chapter introduces the HP workstation c-class product. Its purpose is to familiarize you with your computer and its controls and indicators. 21 - HP Workstation c3650 | HP Workstation c-class - Owner's Guide and Warranty State - Page 22
system overview The topics included in this chapter are: • Product Description • System Unit Front Panel and Removable Devices • System Unit Rear Panel Connectors • Monitors • Operating System Overview • Information You Need to Record • Powering Up Your System. 22 Chapter 1 - HP Workstation c3650 | HP Workstation c-class - Owner's Guide and Warranty State - Page 23
the computer's key features. HP Workstation C-Class Features Computer Feature Processor Operating System User Interface Compatibility Monitors Optional Graphics Main Memory Internal Storage Devices Description PA RISC architecture HP-UX operating system HP CDE graphical user interface Source - HP Workstation c3650 | HP Workstation c-class - Owner's Guide and Warranty State - Page 24
system overview product description Table 1-1 HP Workstation C-Class Features Computer Feature Standard Network Standard I/O PCI slots Keyboard Mouse Description RJ45, Twisted Pair 10 BaseT/100 BaseT Standard computer I/O ports: • Ultra2 Wide Low- - HP Workstation c3650 | HP Workstation c-class - Owner's Guide and Warranty State - Page 25
system overview system unit front panel and removable devices Figure 1-1 system unit front panel and removable devices Before powering on your system, you should become familiar with the system unit controls. Figure 1-1 shows the system unit front panel controls. System Unit Front Panel Controls - HP Workstation c3650 | HP Workstation c-class - Owner's Guide and Warranty State - Page 26
programs and data on your system disk. Turning the power switch back on again automatically boots up the operating system if your system has been configured to auto boot. For information on setting auto boot, read the section "setting the auto boot and auto search flags" in Chapter 6 of this document - HP Workstation c3650 | HP Workstation c-class - Owner's Guide and Warranty State - Page 27
NOTE system overview system unit front panel and removable devices removable media devices Depending on your configuration, you can have one or both of the following removable device drives in your system unit: • CD drive • Floppy disk drive You cannot have two devices of the same type. For example, - HP Workstation c3650 | HP Workstation c-class - Owner's Guide and Warranty State - Page 28
connectors (including headphones and microphone) • USB keyboard and mouse connectors • HP parallel IEEE 1284 I/O connector • 802.3 TP (Twisted Pair) LAN Ultra Narrow Single-Ended SCSI • TOC (transfer of control) button • Power cord connector To maintain FCC/EMI compliance, verify that all cables are - HP Workstation c3650 | HP Workstation c-class - Owner's Guide and Warranty State - Page 29
Six I/O Card Slots Two Serial Inputs Two USB Inputs TOC Button LAN Connector Parallel Connector Line Input Jack Line Output Jack Microphone Headphones Power Input Ultra2 Wide LVD SCSI Connector (Connect Terminator) Ultra Narrow Single-Ended SCSI Connector (Connect Terminator) Chapter 1 29 - HP Workstation c3650 | HP Workstation c-class - Owner's Guide and Warranty State - Page 30
Figure 1-4 system overview system unit rear panel connectors audio connectors Your computer has audio input and output capability through external input and output connectors on the rear panel and through an internal speaker. The rear panel contains the Line IN, Line OUT, Mic IN, and Headphone OUT - HP Workstation c3650 | HP Workstation c-class - Owner's Guide and Warranty State - Page 31
There are two Universal Serial Bus (USB) connectors located on the rear panel of the computer. These USB connectors support only the HP keyboard, scroll mouse and hub. You can connect the HP keyboard, scroll mouse and hub in either of the USB connectors. The mouse and keyboard were shipped with your - HP Workstation c3650 | HP Workstation c-class - Owner's Guide and Warranty State - Page 32
three-button mouse. For general information on the various cursor shapes associated with different areas of HP CDE while using a mouse, see the Using Your HP Workstation document. hp hub for USB devices The HP USB hub provides you with the ability to connect more than one USB device to your computer - HP Workstation c3650 | HP Workstation c-class - Owner's Guide and Warranty State - Page 33
RS-232C serial input/output connector You can attach a variety of pointing devices (such as a mouse or trackball), or peripheral devices (such as printers, plotters, modems, and scanners) to the RS-232C Serial Input/Output (SIO) ports on this computer. Consult the documentation that accompanies each - HP Workstation c3650 | HP Workstation c-class - Owner's Guide and Warranty State - Page 34
bus with a terminator appropriate for that bus. Note that terminators for the LVD SCSI bus and the NSE SCSI bus are shipped with your product. power cord connector Plug the workstation's power cord into the power cord connector to provide AC power to the system. 34 Chapter 1 - HP Workstation c3650 | HP Workstation c-class - Owner's Guide and Warranty State - Page 35
system overview security loop Figure 1-5 security loop On the back panel of your HP workstation c-class product, you will find a device called a security loop. This device allows you to secure the internal parts of your computer by providing a means for - HP Workstation c3650 | HP Workstation c-class - Owner's Guide and Warranty State - Page 36
Figure 1-6 system overview security loop locking your system unit's left-side panel To lock your system unit's left side panel, follow these steps: 1. Make sure the system unit's left side panel is closed. See Figure 1-6. Closed Left-Side Panel System Unit's Front Panel Left Side Panel (using the - HP Workstation c3650 | HP Workstation c-class - Owner's Guide and Warranty State - Page 37
system overview memory memory The main memory for an HP VISUALIZE B Class and C Class computer can vary from a minimum of 128 MBytes to a maximum of 2 GBytes. This computer has eight memory card slots. Note that you can install only 128 MByte and 256 MByte DIMM cards in these slots. To install DIMM - HP Workstation c3650 | HP Workstation c-class - Owner's Guide and Warranty State - Page 38
For information on these controls and indicators and on using your monitor, see the documentation that came with the monitor. Note that connection to earlier HP monitors with 15-pin mini-DSub cables can be made using the A4168A adapter cable shipped with your system miscellaneous kit. 38 Chapter 1 - HP Workstation c3650 | HP Workstation c-class - Owner's Guide and Warranty State - Page 39
system overview operating system overview The c-class workstation uses the HP-UX operating system. Please refer to the " refer to the manual Managing Systems and Workgroups to configure your kernel. If you have any questions about Instant Ignition, refer to Using Your HP Workstation for more - HP Workstation c3650 | HP Workstation c-class - Owner's Guide and Warranty State - Page 40
system overview information you need to record information you need to record Before you begin using your computer, take a moment to gather the following important information and record it in the appropriate subsection for future use: • LAN Station ID • Internet Protocol (IP) address • Subnetwork - HP Workstation c3650 | HP Workstation c-class - Owner's Guide and Warranty State - Page 41
from the HP-UX CDs For details password. When you have logged in, you will be able to create other users' accounts and do whatever other configuration and installations you require to get the machine into its desired state. See the HP CDE Getting Started Guide and the User's Guide for instructions - HP Workstation c3650 | HP Workstation c-class - Owner's Guide and Warranty State - Page 42
zone where the workstation is located. • Optional networking parameters Ask your system administrator if you need to configure these parameters. Subnetwork mask Network gateway IP address Local domain name DNS server host name DNS server IP address Network Information Service domain name 42 - HP Workstation c3650 | HP Workstation c-class - Owner's Guide and Warranty State - Page 43
system overview powering up your system • Optional font server parameters You need to supply these parameters if you want the workstation to obtain its fonts on a network server. Ask your system administrator if you need to configure these parameters. Font server name Font server IP address - HP Workstation c3650 | HP Workstation c-class - Owner's Guide and Warranty State - Page 44
power 1. Turn on the monitor and any external peripherals (for example, printers) connected to the workstation. 2. Turn on the workstation. The workstation , press Enter to use the default value. You can provide missing password. Specify the root password now. The root password is the password - HP Workstation c3650 | HP Workstation c-class - Owner's Guide and Warranty State - Page 45
NOTE system overview powering up your system 7. Log into your first CDE session as root. For information on logging into CDE, see the Common Desktop Environment User's Guide. You must log into the first view this CD, you need to read the special mounting instruction that come with it. Chapter 1 45 - HP Workstation c3650 | HP Workstation c-class - Owner's Guide and Warranty State - Page 46
system overview powering up your system 46 Chapter 1 - HP Workstation c3650 | HP Workstation c-class - Owner's Guide and Warranty State - Page 47
2 using your CD drive This chapter provides an overview of the optional CD drive and media as well as an explanation of how to use the CD drive. 47 - HP Workstation c3650 | HP Workstation c-class - Owner's Guide and Warranty State - Page 48
chapter, the terms "CD" and "CD drive" are used rather than "CD-ROM" and "CD-ROM drive" because the CD drives used in the c-class workstation can read the original CD-ROM disks, plus CD-R disks and the newer CD-RW disks (also call "CD-RAM" because they are rewritable). Thus - HP Workstation c3650 | HP Workstation c-class - Owner's Guide and Warranty State - Page 49
CAUTION using your CD drive CD media description CD media description CDs, which can be CD-ROMs, CD-Rs, or CD-RWs, are 120mm (4.7 inches) in diameter, and use one data surface with a capacity of 600 megabytes. The data surface contains pits and flat spots arranged in a continuous spiral track, which - HP Workstation c3650 | HP Workstation c-class - Owner's Guide and Warranty State - Page 50
your CD drive. CD drive The CD drive is a mass storage device that can read removable CD-ROM, CD-R, and CD-WR media. The drive supports the ISO 9660 and High Sierra format standards. You can access information from the drive like any other disk drive, except you cannot write to - HP Workstation c3650 | HP Workstation c-class - Owner's Guide and Warranty State - Page 51
exact positioning of CD Drive controls/features may vary depending on the model of the device. CD Drive Controls and Features Disk Tray Table 2-1 Disk Tray. You can open the Disk Tray when the computer does not have power by inserting the end of a paper clip into this opening. The Disk Tray holds - HP Workstation c3650 | HP Workstation c-class - Owner's Guide and Warranty State - Page 52
using your CD drive operating the CD drive loading and unloading a CD This section explains how to load or unload a CD. NOTE To use the file system on a CD, you must be superuser (root) and mount the disk as discussed in the section "mounting a CD using SAM." Once the CD has been mounted, you must - HP Workstation c3650 | HP Workstation c-class - Owner's Guide and Warranty State - Page 53
Figure 2-3 using your CD drive operating the CD drive 2. Hold the disk by the edges with the label side up and place it in the disk tray as shown in Figure 2-3. Placing the CD in the Disk Tray Figure 2-4 3. Press the eject button to close the tray as shown in Figure 2-4. Closed Disk Tray Chapter - HP Workstation c3650 | HP Workstation c-class - Owner's Guide and Warranty State - Page 54
by the edges and lift it out of the disk tray. 3. Press the Eject Button to close the disk tray. locating help If you have trouble with any of the procedures for using your CD drive, see the chapter "solving - HP Workstation c3650 | HP Workstation c-class - Owner's Guide and Warranty State - Page 55
name that allows your computer to communicate with it. You must unmount the CD before removing it from the drive. To mount a CD on your HP-UX operating system, perform the steps covered in this section. 1. Log in as root. 2. Move the mouse pointer to the Application Manager control for tools and - HP Workstation c3650 | HP Workstation c-class - Owner's Guide and Warranty State - Page 56
using your CD drive mounting and unmounting a CD 3. Double click on the System_Admin icon in the Application Manager window. 4. Double click on the Sam icon in the Application Manager -System_Admin window. If you are root, the System Application Manager (SAM) will appear on your screen. 5. Double - HP Workstation c3650 | HP Workstation c-class - Owner's Guide and Warranty State - Page 57
, select the Read Only item from the Access button menu. Next, unselect the Create New File System item by clicking on it. Exit the Modify Defaults window by clicking on the OK button. 10. Click on the OK button in the Add Disk without LVM window. You will need to wait - HP Workstation c3650 | HP Workstation c-class - Owner's Guide and Warranty State - Page 58
, make sure that your working directory is set to a directory other than the one under which the disk was mounted. To unmount a CD on your HP-UX operating system, perform the steps covered in this section. 1. Log in as root. 2. Move the mouse pointer to the Application Manager control for tools and - HP Workstation c3650 | HP Workstation c-class - Owner's Guide and Warranty State - Page 59
using your CD drive mounting and unmounting a CD 4. Double click on the Sam icon in the Application Manager -System_Admin window. If you are root, the System Application Manager (SAM) will appear on your screen. 5. Double click on the Disk and File System icon. 6. Double click on the Disk Devices - HP Workstation c3650 | HP Workstation c-class - Owner's Guide and Warranty State - Page 60
using your CD drive mounting and unmounting a CD 7. Click on Remove in the Actions menu. In the window that next appears, click on the Yes button. This will unmount the CD. You will need to wait for a short time before the CD is unmounted. The CD is successfully unmounted when you see Unused in the - HP Workstation c3650 | HP Workstation c-class - Owner's Guide and Warranty State - Page 61
using your CD drive verifying the CD drive operation verifying the CD drive operation To verify that your workstation can communicate with the CD drive, follow the steps covered in this section. Note that to perform the steps required in this section, you must - HP Workstation c3650 | HP Workstation c-class - Owner's Guide and Warranty State - Page 62
or rebuild the Instant Ignition system on your computer, you may need to reconfigure the HP-UX kernel to add the CD driver. Use the SAM utility to add the CD driver and build a new HP-UX kernel. For more information about how to reconfigure the kernel using SAM, see the following - HP Workstation c3650 | HP Workstation c-class - Owner's Guide and Warranty State - Page 63
HP workstations is xmcd. This is a third-party "CD player" utility that runs on an X window system using the Motif graphical user interface. The xmcd utility is not supported by Hewlett-Packard. Since the xmcd utility is not a part of HP-UX Follow the instructions in the section "Instructions to - HP Workstation c3650 | HP Workstation c-class - Owner's Guide and Warranty State - Page 64
using your CD drive audio control for the CD drive using the xmcd utility The instructions in the section assume that you are using the HP-UX operating system with the HP CDE interface. The xmcd utility must also be installed on your system. See the section "installing the xmcd utility." To load and - HP Workstation c3650 | HP Workstation c-class - Owner's Guide and Warranty State - Page 65
using your CD drive audio control for the CD drive 4. Click on the Monitoring checkbox in the Audio window to select it. Then select the Output menu and click on the Headphones item in the menu list. In the File menu select the item Close, this will close the Audio window and save your settings. - HP Workstation c3650 | HP Workstation c-class - Owner's Guide and Warranty State - Page 66
using your CD drive audio control for the CD drive 66 Chapter 2 - HP Workstation c3650 | HP Workstation c-class - Owner's Guide and Warranty State - Page 67
3 using your 3.5-inch floppy disk drive This chapter describes how to perform tasks that allow you to archive to or transfer data from the 3.5-inch floppy disk drive. 67 - HP Workstation c3650 | HP Workstation c-class - Owner's Guide and Warranty State - Page 68
drive, see Chapter 5 of this document. When examples of user input are given in this chapter, enter them at the command-line prompt in an HP CDE terminal window. Some procedures in this chapter require you to log in as superuser (root). If you cannot log in as root, contact your - HP Workstation c3650 | HP Workstation c-class - Owner's Guide and Warranty State - Page 69
disk drive. floppy disk drive The floppy disk drive is a random access read/write mass storage device that uses removable floppy diskettes. The drive supports the 1.44 Mbyte High Density standard. You can access information from the drive like any other disk drive, that is you can write information to - HP Workstation c3650 | HP Workstation c-class - Owner's Guide and Warranty State - Page 70
Figure 3-2 using your 3.5-inch floppy disk drive operating the floppy drive using the floppy diskette This section describes basic information needed to use your floppy diskettes. setting the write-protect tab on a diskette You can only store or change information on a diskette when the write-protect - HP Workstation c3650 | HP Workstation c-class - Owner's Guide and Warranty State - Page 71
Figure 3-3 using your 3.5-inch floppy disk drive operating the floppy drive inserting and removing a diskette Follow these steps to insert and remove a diskette from the floppy disk drive. 1. Insert the diskette into the drive, as shown in Figure 3-3. Inserting and Removing a Floppy Diskette NOTE 2. - HP Workstation c3650 | HP Workstation c-class - Owner's Guide and Warranty State - Page 72
using your 3.5-inch floppy disk drive operating the floppy drive To determine what device files are available for use with your floppy drive, use the following procedure: 1. Log in as root. 2. Move the mouse pointer to the Application Manager control for tools and click the left mouse button. - HP Workstation c3650 | HP Workstation c-class - Owner's Guide and Warranty State - Page 73
using your 3.5-inch floppy disk drive operating the floppy drive 4. Double click on the Sam icon in the Application Manager -System_Admin window. If you are root, the System Application Manager (SAM) will appear on your screen. 5. Double click on the Disk and File System icon. 6. Double click on the - HP Workstation c3650 | HP Workstation c-class - Owner's Guide and Warranty State - Page 74
is the device file as listed by SAM. See the section "using device files" in this chapter. For a listing of format options, see the floppy manual page. To view this manual page, type the following at the prompt and press Enter: man floppy 74 Chapter 3 - HP Workstation c3650 | HP Workstation c-class - Owner's Guide and Warranty State - Page 75
data (reading and writing) to and from your floppy diskette using the HP-UX tar command with your floppy drive's device file. You need to set the files on a diskette. saving files to a floppy diskette Use the following instructions to save files to a floppy diskette: 1. Check the write-protect tab on the - HP Workstation c3650 | HP Workstation c-class - Owner's Guide and Warranty State - Page 76
a floppy diskette to your system Use the following instructions to restore files from a floppy diskette to the files on a floppy diskette Use the following instructions to list the files on a floppy diskette: the floppy diskette. troubleshooting If you have trouble with any of the procedures for using your fl - HP Workstation c3650 | HP Workstation c-class - Owner's Guide and Warranty State - Page 77
verifying the floppy drive configuration To verify that your workstation can communicate with the floppy drive, use the ioscan command prompt. If this is the case, refer to Chapter 7, "solving problems." If the floppy disk driver is not configured, ioscan returns HP-UX kernel configuration. Chapter 3 77 - HP Workstation c3650 | HP Workstation c-class - Owner's Guide and Warranty State - Page 78
to unmount the drive before removing it as a file system. For more information about how to mount and unmount the floppy drive, see the manual Using HP-UX. For more information on copying data to or from your system to other media, including your floppy diskette, refer to the cpio man page by - HP Workstation c3650 | HP Workstation c-class - Owner's Guide and Warranty State - Page 79
using your 3.5-inch floppy disk drive additional floppy drive information For more information on copying to or from DOS files, refer to the doscp man page by typing the following command in a terminal window at the prompt and pressing Enter: man doscp For more information on listing DOS directories, - HP Workstation c3650 | HP Workstation c-class - Owner's Guide and Warranty State - Page 80
using your 3.5-inch floppy disk drive additional floppy drive information 80 Chapter 3 - HP Workstation c3650 | HP Workstation c-class - Owner's Guide and Warranty State - Page 81
4 SCSI connections This chapter provides information about connecting Small Computer System Interface (SCSI) devices to an HP workstation c-class product. 81 - HP Workstation c3650 | HP Workstation c-class - Owner's Guide and Warranty State - Page 82
NOTE SCSI connections Here are the topics covered in this section: • SCSI bus differences • SCSI Restrictions • Determining SCSI Bus Length • Assigning SCSI Device IDs • Connecting to the SCSI Ports When attaching external SCSI devices, be sure to terminate the last device on the external SCSI bus. - HP Workstation c3650 | HP Workstation c-class - Owner's Guide and Warranty State - Page 83
differences between these SCSI buses. CAUTION Currently Hewlett-Packard does not support mixing Ultra Narrow Single-Ended and Ultra2 Wide Low-Voltage Differential devices all buses. 2. This information is specific to the HP workstation c-class product. External Internal and external Chapter 4 83 - HP Workstation c3650 | HP Workstation c-class - Owner's Guide and Warranty State - Page 84
the system. The Ultra2 Wide Low-Voltage Differential SCSI bus supports only 15 devices because address 7 is reserved by the system. cables Only SCSI cables approved by HP can be used to connect your workstation to any SCSI devices. HP offers the following SCSI cables for Ultra Narrow Single-Ended - HP Workstation c3650 | HP Workstation c-class - Owner's Guide and Warranty State - Page 85
4-3 CAUTION NOTE SCSI connections SCSI restrictions HP offers the following SCSI cables for connecting externally ) SCSI cables approved by HP are designed to function within the SCSI tolerances for HP devices. Use of other cables can result in significant problems with system operation. Always - HP Workstation c3650 | HP Workstation c-class - Owner's Guide and Warranty State - Page 86
another SCSI device, determine if the system can support the additional device. This workstation offers the following types of SCSI buses, each and LVD specifications. Contact your local HP sales representative for a current list of SCSI devices supported by HP for use on the Ultra Narrow Single- - HP Workstation c3650 | HP Workstation c-class - Owner's Guide and Warranty State - Page 87
choosing Ultra2 Wide Low-Voltage Differential SCSI devices other than those supported by Hewlett-Packard Company to connect to the Ultra2 Wide Low way such that the device has considerable crosstalk on critical signals, such as Reset, Select and Busy. Failure to strictly adhere to the Ultra2 Wide Low - HP Workstation c3650 | HP Workstation c-class - Owner's Guide and Warranty State - Page 88
SCSI bus. ultra narrow single-ended SCSI bus length The maximum cable length for an Ultra Narrow Single-Ended SCSI bus is 3 meters. The HP workstation c-class system uses a small portion of this maximum cable length. When calculating the total Ultra Narrow Single-Ended SCSI cable/bus/trace length - HP Workstation c3650 | HP Workstation c-class - Owner's Guide and Warranty State - Page 89
Ultra2 wide low-voltage differential SCSI bus length The maximum cable length for an Ultra2 Wide Low-Voltage Differential SCSI bus is 12 meters. The HP workstation c-class system uses 1 meter of this maximum cable length internally. This means that up to 11 meters of cable can be used for connecting - HP Workstation c3650 | HP Workstation c-class - Owner's Guide and Warranty State - Page 90
SCSI connections assigning SCSI device IDs assigning SCSI device IDs Before assigning a SCSI device ID to a new SCSI device, you need to determine which SCSI device IDs are available. To view the SCSI IDs already in use, type the following command at the prompt and press Enter: /usr/sbin/ioscan -f - HP Workstation c3650 | HP Workstation c-class - Owner's Guide and Warranty State - Page 91
49 SCSI connections assigning SCSI device IDs ROPEtoPCI CLAIMED processor CLAIMED processor CLAIMED memory CLAIMED BUS_NEXUS PROCESSOR PROCESSOR MEMORY PCI Bus Bridge - ROPEtoPCI Processor Processor Memory assigning Ultra narrow single-ended SCSI device IDs You can determine which Ultra Narrow - HP Workstation c3650 | HP Workstation c-class - Owner's Guide and Warranty State - Page 92
CAUTION SCSI connections assigning SCSI device IDs assigning Ultra2 wide low-voltage differential SCSI device IDs You can determine which Ultra2 Wide Low-Voltage Differential SCSI (LVD SCSI) devices are currently in use by reviewing the output from the ioscan command discussed above and looking - HP Workstation c3650 | HP Workstation c-class - Owner's Guide and Warranty State - Page 93
SCSI connections connecting to the SCSI ports connecting to the SCSI ports This section describes how to connect to the system SCSI ports (Ultra Narrow Single-Ended and Ultra2 Wide Low-Voltage Differential). system SCSI port connection The system contains two SCSI connectors: • Ultra Narrow Single- - HP Workstation c3650 | HP Workstation c-class - Owner's Guide and Warranty State - Page 94
SCSI connections connecting to the SCSI ports 94 Chapter 4 - HP Workstation c3650 | HP Workstation c-class - Owner's Guide and Warranty State - Page 95
5 changing your computer hardware configuration This chapter describes the procedures to change your computer's hardware configuration. 95 - HP Workstation c3650 | HP Workstation c-class - Owner's Guide and Warranty State - Page 96
System Unit • System Unit Power Supply • I/O Cards • System Unit Fans • Removable Media Devices • Hard Disk Drives • Memory Cards • Changing Your for use by flat-bladed screwdrivers. • Needle-nose pliers Many of the HP-UX commands in this chapter will require that you become superuser (root). If you - HP Workstation c3650 | HP Workstation c-class - Owner's Guide and Warranty State - Page 97
cord from the electrical outlet. Note that when you press the system power switch, the system automatically performs a shutdown -q. 2. Attach the static-grounding wrist strap by following the instructions on the package. Attach the sticky end of the wrist strap to bare metal on the back panel of - HP Workstation c3650 | HP Workstation c-class - Owner's Guide and Warranty State - Page 98
with your system to lock the panel. These keys are located inside the front bezel below the floppy disk drive. 3. Plug in the system unit power cord, and power on the system. 98 Chapter 5 - HP Workstation c3650 | HP Workstation c-class - Owner's Guide and Warranty State - Page 99
panel of your computer. Either of these actions will gracefully power down the system. 1. Power off the system, and unplug the system unit power cord from the electrical outlet. 2. Attach the static-grounding wrist strap by following the instructions on the package. Attach the sticky end of the - HP Workstation c3650 | HP Workstation c-class - Owner's Guide and Warranty State - Page 100
Figure 5-2 changing your computer hardware configuration left side panel of the system unit 4. Grasp the back edge of the left side panel and rotate it outward approximately 30 degrees to the computer. Next, pull the panel toward you as shown in Figure 5-2. This releases the panel's top and bottom - HP Workstation c3650 | HP Workstation c-class - Owner's Guide and Warranty State - Page 101
changing your computer hardware configuration left side panel of the system unit closing the left side panel of the system unit Perform these steps to close the left side panel. 1. Hold the left side panel so that the top and bottom hinge hooks can be inserted into their hinge slots. See Figure 5-2. - HP Workstation c3650 | HP Workstation c-class - Owner's Guide and Warranty State - Page 102
unit. To do this, you need to position the power supply so you can get to the memory slots. This section will help you accomplish this task. To prevent injury, you need to unplug the system unit's power cord from the electrical outlet before servicing any components within the system unit. Figure - HP Workstation c3650 | HP Workstation c-class - Owner's Guide and Warranty State - Page 103
Figure 5-4 changing your computer hardware configuration system unit power supply 4. Lift up on the power supply. The bail will automatically engage to hold up the power supply at approximately 90 degrees. See Figure 5-4. Propping Up the Power Supply Bail Lock Bail Power Supply Chapter 5 103 - HP Workstation c3650 | HP Workstation c-class - Owner's Guide and Warranty State - Page 104
the system unit. To close the system unit follow these steps: 1. Pull slightly back on the power supply until you are able to remove the bail from the bail lock. Using the power supply handle lower it downward into its original operating position. See Figure 5-3. 2. Tighten both captive screws in - HP Workstation c3650 | HP Workstation c-class - Owner's Guide and Warranty State - Page 105
C3000 computer's PCI assembly has six slots. Slots 1 through 4 are full-size PCI slots. Slots 5 and 6 are half-size Peripheral Connect Interface (PCI) slots. See Figure 5-5 for a brief description of and setting the monitor type" in the chapter "the boot console interface." Chapter 5 105 - HP Workstation c3650 | HP Workstation c-class - Owner's Guide and Warranty State - Page 106
Here are the steps required for remove an I/O card from the system unit. 1. Power off the system, and unplug the system unit power cord from the electrical outlet. Note that when you press the system power switch, the system automatically performs a shutdown -q. 2. Open the side panel of the system - HP Workstation c3650 | HP Workstation c-class - Owner's Guide and Warranty State - Page 107
Figure 5-7 changing your computer hardware configuration i/o cards 3. Pull evenly in the direction of the arrow on both PULL tabs of the I/O card retainer to remove it. See Figure 5-7. Removing the I/O Card Retainer I/O Card Figure 5-8 I/O Card Retainer Air Divider 4. Locate the I/O card you - HP Workstation c3650 | HP Workstation c-class - Owner's Guide and Warranty State - Page 108
the bulkhead appropriately positioned. See Figure 5-8. If the card is full length, the non-bulkhead end of the card should be placed in the I/O card guide. Press firmly and evenly on the I/O card until it is in the connector. Screw the T-15 Torx screw into the I/O card's bulkhead using 6 inch-pounds - HP Workstation c3650 | HP Workstation c-class - Owner's Guide and Warranty State - Page 109
in the fan areas shown in Figure 5-9 is not working as indicated by an LCD error message, you need to call your local Hewlett-Packard support representative. Continuing to operate your system unit with a bad fan will cause damage to the system unit. To determine the fan that needs to be - HP Workstation c3650 | HP Workstation c-class - Owner's Guide and Warranty State - Page 110
for removing the cooling fan from the back of the hard disk drive chassis. To remove memory cards, you will need to remove this fan. To remove the fan from the hard unit" in this chapter. 3. Prop up the power supply. See the section "propping up the power supply" in this chapter. 110 Chapter 5 - HP Workstation c3650 | HP Workstation c-class - Owner's Guide and Warranty State - Page 111
be taken out of the system unit. If you are removing the hard disk drive fan to get access to the memory cards, you do not need to unplug the fan's power cable. Once the hard disk drive fan is removed, place it on top of the hard disk drive chassis. Removing - HP Workstation c3650 | HP Workstation c-class - Owner's Guide and Warranty State - Page 112
in Figure 5-10. Once the tabs are properly aligned, slide them into place. 2. Close the system unit as explained in the section "propping up the power supply" in this chapter. 112 Chapter 5 - HP Workstation c3650 | HP Workstation c-class - Owner's Guide and Warranty State - Page 113
media devices. installing a CD drive Install the CD drive by following the procedure covered in this section. Turn the system unit off and unplug the power cord before installing the CD drive. Note that if you ordered your system unit with a CD drive from the factory, you will not need to - HP Workstation c3650 | HP Workstation c-class - Owner's Guide and Warranty State - Page 114
cover handle away from the rear of the removable media chassis approximately one inch. Next pull the cover handle toward you. The audio, ATAPI and power cables are now accessible to you. Removing the CD Drive Bay's Rear Cover Rear Cover Handle Rear Cover Audio Cable T-15 Torx/Slotted Screw Ferrite - HP Workstation c3650 | HP Workstation c-class - Owner's Guide and Warranty State - Page 115
changing your computer hardware configuration removable media devices Figure 5-13 4. Remove both CD drive bracket screws (T-15 Torx/slotted screws) and pull the CD drive bracket out of the chassis assembly as shown in Figure 5-13. Next remove the four CD drive blank filler screws (T-10 Torx/slotted - HP Workstation c3650 | HP Workstation c-class - Owner's Guide and Warranty State - Page 116
that the CD drive should extend approximately one inch out from the front of the CD drive bracket. Installing the CD Drive CD Drive Bracket Guide CD Drive Blank Filler Screws Bracket Screws 6. Slide the CD drive and its bracket into the system unit chassis as shown in Figure 5-14. There - HP Workstation c3650 | HP Workstation c-class - Owner's Guide and Warranty State - Page 117
CD drive chassis and connect it. Note that you should connect the audio cable first. Plugging in the Audio, ATAPI and Power Cables Audio Cable Ferrite Bead ATAPI Cable Power Cable Figure 5-16 8. Tighten the two CD drive bracket screws as shown in Figure 5-16. The screws should be tightened using - HP Workstation c3650 | HP Workstation c-class - Owner's Guide and Warranty State - Page 118
changing your computer hardware configuration removable media devices Figure 5-17 9. Make sure that the audio, ATAPI and power cables are positioned so that they come out of the bottom edge of the CD drive bay's rear cover. This edge is rounded to prevent - HP Workstation c3650 | HP Workstation c-class - Owner's Guide and Warranty State - Page 119
devices removing a CD drive This section explains how to remove a CD drive from your system unit. Turn the system unit off and unplug the power cord before removing the CD drive. CD drives are susceptible to mechanical and electronic shock. When handling the drive, always wear the static-grounding - HP Workstation c3650 | HP Workstation c-class - Owner's Guide and Warranty State - Page 120
cover handle away from the back of the removable media chassis approximately one inch. Next pull the cover handle toward you. The audio, ATAPI and power cables are now accessible to you. Disconnect these cables from the CD drive. Removing the CD Drive Bay's Rear Cover Rear Cover Rear Cover Handle - HP Workstation c3650 | HP Workstation c-class - Owner's Guide and Warranty State - Page 121
you see the front of the unit as shown in Figure 5-19. Front of the System Unit with the Front Panel Removed LCD System Unit Power Switch Bracket Screw Bracket Screw (hidden) Chapter 5 121 - HP Workstation c3650 | HP Workstation c-class - Owner's Guide and Warranty State - Page 122
CD drive from the bracket. You are now ready to attach the CD drive blank to the CD drive bracket. Removing the CD Drive Bracket Guide CD Drive Bracket Runner CD Drive Mounting Screws (T-10 Torx Screws) CD Drive Bracket Bracket Screws (T-15 Torx Screws) 122 Chapter 5 - HP Workstation c3650 | HP Workstation c-class - Owner's Guide and Warranty State - Page 123
screws (T-10 Torx/slotted screws) using 6 inch-pounds of torque. This will secure the CD drive blank in place. Align the bracket runners and bracket guides and slide the CD drive blank and bracket into place. See Figure 5-21. Installing the CD Drive Blank Bracket - HP Workstation c3650 | HP Workstation c-class - Owner's Guide and Warranty State - Page 124
5-22. These should be tightened using 6 inch-pounds of torque. Tightening the Bracket Screws Bracket Screw Bracket Screw Figure 5-23 7. Place the audio, ATAPI and power cables inside the CD drive bay, and position the cables so that they go under the bottom edge of the CD drive bay's rear cover - HP Workstation c3650 | HP Workstation c-class - Owner's Guide and Warranty State - Page 125
. Note that there are no jumper settings required for the installation of the floppy disk drive. Turn the system unit off and unplug the power cord before installing the floppy disk drive. Floppy disk drives are susceptible to mechanical and electronic shock. When handling the drive, always wear the - HP Workstation c3650 | HP Workstation c-class - Owner's Guide and Warranty State - Page 126
handle away from the rear of the removable media chassis approximately one inch. Next pull the cover handle toward you. The floppy data cable and power cable are now accessible to you. Removing the Floppy Disk Drive Bay's Rear Cover Rear Cover Handle - HP Workstation c3650 | HP Workstation c-class - Owner's Guide and Warranty State - Page 127
until you see the front of the unit as shown in Figure 5-25. Front of System Unit with the Front Panel Removed LCD System Unit Power Switch CD Drive Blank Floppy Drive Blank Chapter 5 127 - HP Workstation c3650 | HP Workstation c-class - Owner's Guide and Warranty State - Page 128
changing your computer hardware configuration removable media devices Figure 5-26 4. Remove both floppy disk bracket screws (T-15 Torx/slotted screws) and pull the floppy disk bracket out of the chassis assembly as shown in Figure 5-26. Next remove the four floppy disk blank filler screws (T-10 Torx/ - HP Workstation c3650 | HP Workstation c-class - Owner's Guide and Warranty State - Page 129
changing your computer hardware configuration removable media devices Figure 5-27 5. Remove the floppy disk drive from its shipping container. Using the four T-10 Torx/slotted blank filler screws, mount the disk drive to the bracket as shown in Figure 5-27. These filler screws require 6 inch-pounds of - HP Workstation c3650 | HP Workstation c-class - Owner's Guide and Warranty State - Page 130
data cable into its connector. Note that the connectors are keyed for proper insertion. See Figure 5-28. Plugging In the Floppy Data and Power Cables Figure 5-29 Power Cable Ferrite Bead Data Cable 8. Tighten the two floppy disk drive bracket screws as shown in Figure 5-29. You will need to use - HP Workstation c3650 | HP Workstation c-class - Owner's Guide and Warranty State - Page 131
ferrite bead on the data cable must remain inside of the floppy disk drive bay's rear cover. Replacing the Floppy Disk Drive Bay's Rear Cover Power Cable Rear Cover Data Cable T-15 Torx/Slotted Screw 10. Remove the plastic floppy disk drive blank from the computer's front panel. 11. Complete the - HP Workstation c3650 | HP Workstation c-class - Owner's Guide and Warranty State - Page 132
a floppy disk drive This section explains how to remove a floppy disk drive from your system unit. Turn the system unit off and unplug the power cord before removing the floppy disk drive. Floppy disk drives are susceptible to mechanical and electronic shock. When handling the drive, always wear the - HP Workstation c3650 | HP Workstation c-class - Owner's Guide and Warranty State - Page 133
handle away from the rear of the removable media chassis approximately one inch. Next pull the cover handle toward you. Remove the floppy data and power cables from their connectors. Removing the Floppy Disk Drive Bay's Rear Cover Rear Cover Handle - HP Workstation c3650 | HP Workstation c-class - Owner's Guide and Warranty State - Page 134
you can see the front of the unit as shown in Figure 5-32. Front of System Unit with the Front Panel Removed LCD System Unit Power Switch Floppy Disk Drive Bracket Screw (hidden) Bracket Screw 134 Chapter 5 - HP Workstation c3650 | HP Workstation c-class - Owner's Guide and Warranty State - Page 135
changing your computer hardware configuration removable media devices Figure 5-33 4. Remove both floppy disk bracket screws (T-15 Torx/slotted screws) and pull the floppy disk drive out of the chassis assembly as shown in Figure 5-33. Next remove the four floppy disk drive mounting screws (T-10 Torx/ - HP Workstation c3650 | HP Workstation c-class - Owner's Guide and Warranty State - Page 136
changing your computer hardware configuration removable media devices Figure 5-34 5. Place the floppy disk blank in the floppy disk bracket and insert the four floppy disk mounting screws (T-10 Torx/slotted screws) into the bracket and tighten them using 6 inch-pounds of torque. See Figure 5-34. - HP Workstation c3650 | HP Workstation c-class - Owner's Guide and Warranty State - Page 137
to tighten them using 6 inch-pounds of torque. Tightening the Bracket Screws Bracket Screw Bracket Screw Figure 5-36 8. Make sure that the floppy data and power cables are positioned so that they come out of the top edge of the rear floppy disk drive bay's cover. This edge is rounded to - HP Workstation c3650 | HP Workstation c-class - Owner's Guide and Warranty State - Page 138
changing your computer hardware configuration removable media devices 9. Replace the plastic floppy disk drive blank in the computer's front panel. 10. Complete the removal of the floppy disk drive by replacing the front and side panels of the system unit as explained in the sections "closing the left - HP Workstation c3650 | HP Workstation c-class - Owner's Guide and Warranty State - Page 139
CAUTION changing your computer hardware configuration hard disk drives hard disk drives This section describes how to install a hard drive in your computer and how to remove it from your computer. The first section details how to install a hard disk drive. The second section details how to remove a - HP Workstation c3650 | HP Workstation c-class - Owner's Guide and Warranty State - Page 140
"adding a hard disk drive as a file system using sam" found in this chapter. Figure 5-37 1. Open the front panel of your system unit using the instructions found in the section "opening the system unit front panel." In the lower-right corner of the system unit as you face it, there are - HP Workstation c3650 | HP Workstation c-class - Owner's Guide and Warranty State - Page 141
changing your computer hardware configuration hard disk drives Figure 5-38 2. Open the hard drive slot by lifting the plastic release hook upward and pulling outward on the release lever as shown in Figure 5-38. As you pull outward on the release lever, the hard drive bracket will come out of its - HP Workstation c3650 | HP Workstation c-class - Owner's Guide and Warranty State - Page 142
changing your computer hardware configuration hard disk drives Figure 5-39 4. Insert the T-15 Torx Hard Disk Mounting Screws through the rubber mounting grommets and into the screw holes located on the sides of the hard disk drive. See Figure 5-39. You should tighten these screws using 6 inch- - HP Workstation c3650 | HP Workstation c-class - Owner's Guide and Warranty State - Page 143
"removing a hard disk drive as a file system using sam" found in this chapter. Figure 5-40 1. Open the front panel of you system unit using the instructions found in the section "opening the system unit front panel." In the lower-right corner of the system unit as you face it, there are - HP Workstation c3650 | HP Workstation c-class - Owner's Guide and Warranty State - Page 144
changing your computer hardware configuration hard disk drives Figure 5-41 2. Open the hard disk drive slot by lifting the plastic release hook upward and pulling outward on the release lever as shown in Figure 5-41. As you pull outward on the release lever, the hard disk drive bracket will come - HP Workstation c3650 | HP Workstation c-class - Owner's Guide and Warranty State - Page 145
changing your computer hardware configuration hard disk drives Figure 5-42 3. Remove the four T-15 Torx shoulder screws from the hard disk drive and bracket. See Figure 5-42. You should be careful when removing the hard disk drive from its mounting bracket to avoid damaging it. Note that in order - HP Workstation c3650 | HP Workstation c-class - Owner's Guide and Warranty State - Page 146
changing your computer hardware configuration hard disk drives Figure 5-43 4. Replace the four mounting screws on the hard disk drive bracket to store them for future use. Slide the mounting bracket into its hard drive slot, and push inward on the release lever until the front of the hard dive - HP Workstation c3650 | HP Workstation c-class - Owner's Guide and Warranty State - Page 147
using SAM and how to remove the hard disk drive from your system. For more information about configuring a hard disk drive, refer to the manual Managing Systems and Workgroups. The procedures in this section require you to log in as root. If you cannot log in as root, contact your - HP Workstation c3650 | HP Workstation c-class - Owner's Guide and Warranty State - Page 148
changing your computer hardware configuration hard disk drives 4. Double click on the Sam icon in the Application Manager -System_Admin window. If you are root, the System Application Manager (SAM) will appear on your screen. 5. Double click on the Disk and File System icon. 6. Double click on the - HP Workstation c3650 | HP Workstation c-class - Owner's Guide and Warranty State - Page 149
changing your computer hardware configuration hard disk drives 8. Enter the mount directory name (for example, /disk1) in the Mount Directory field of the Add Disk without LVM window. 9. Click on the OK button in the Add Disk without LVM window. You will need to wait for a short time before the new fi - HP Workstation c3650 | HP Workstation c-class - Owner's Guide and Warranty State - Page 150
changing your computer hardware configuration hard disk drives 4. Double click on the Sam icon in the Application Manager -System_Admin window. If you are root, the System Application Manager (SAM) will appear on your screen. 5. Double click on the Disk and File System icon. 6. Double click on the - HP Workstation c3650 | HP Workstation c-class - Owner's Guide and Warranty State - Page 151
changing your computer hardware configuration hard disk drives 7. Click on Remove in the Actions menu. In the window that next appears, click on the Yes button. This will unmount the file system located on the hard disk drive you are removing from the system unit. You will need to wait for a short - HP Workstation c3650 | HP Workstation c-class - Owner's Guide and Warranty State - Page 152
However, before continuing with this section, please take time to read the following list of considerations: • Use the procedure described in "the boot console interface" chapter to determine the current memory configuration for this computer. This should be done before trying to install additional - HP Workstation c3650 | HP Workstation c-class - Owner's Guide and Warranty State - Page 153
changing your computer hardware configuration memory cards Figure 5-44 2. Prop up the system unit power supply as explained in the section "propping up the system unit power supply" in this chapter. Propping Up the Power Supply Power Supply Fan DIMM Card DIMM Connector Chapter 5 153 - HP Workstation c3650 | HP Workstation c-class - Owner's Guide and Warranty State - Page 154
hardware configuration memory cards Figure 5-45 3. Position the memory slots so they face you as shown in Figure 5-45. Note that Figure 5-45 also provides the loading sequence for the DIMM cards. This loading sequence must be maintained when you install the DIMM cards, but the size of the DIMM - HP Workstation c3650 | HP Workstation c-class - Owner's Guide and Warranty State - Page 155
, lining it up with the guides. Make sure you align the power supply" in this chapter. Plug the power cord back in to the electrical outlet. 9. Verify that this installation was successful by following the steps in the section "displaying the current memory configuration" in the chapter "the boot - HP Workstation c3650 | HP Workstation c-class - Owner's Guide and Warranty State - Page 156
your computer hardware configuration memory cards removing memory Perform the following steps to remove memory (DIMM cards) from your system unit power supply as explained in the section "propping up the system unit power supply" in this chapter. Propping Up the Power Supply Power Supply Hard Disk - HP Workstation c3650 | HP Workstation c-class - Owner's Guide and Warranty State - Page 157
. This raises the DIMM card for easy extraction. Removing Memory Cards Notches Ejector Tab 5. Lift up evenly on the supply" in this chapter. Plug the power cord back in to the electrical outlet. 9. Verify that this removal was successful by following the steps in Chapter 6 of this book, "the boot - HP Workstation c3650 | HP Workstation c-class - Owner's Guide and Warranty State - Page 158
comes on during the boot process to initiate the automatic monitor selection process. Your system will query you for a new monitor type. Note that if you have waited more than 15 minutes for a monitor type to appear, go to the section "troubleshooting monitor problems" in this chapter. 2. Select - HP Workstation c3650 | HP Workstation c-class - Owner's Guide and Warranty State - Page 159
This method for setting the monitor type requires the use of the HP CDE interface. This means that you should have already set your monitor in a previous section, or you have an Instant Ignition system that boots up using the HP CDE interface. To use the System Administration Manager (SAM) to set - HP Workstation c3650 | HP Workstation c-class - Owner's Guide and Warranty State - Page 160
changing your computer hardware configuration changing your monitor type 4. Double click on the Sam icon in the Application Manager -System_Admin window. If you are root, the System Application Manager (SAM) will appear on your screen. 5. Double click on the Display icon. 6. Double click on the - HP Workstation c3650 | HP Workstation c-class - Owner's Guide and Warranty State - Page 161
. In that same window, select the check box labeled Make monitor type 'n' the default where n is the number of the entry you selected. To finish your monitor Yes button in that pop-up window. This causes the monitor to reset, possibly hiding existing windows. You will then be given 15 seconds after - HP Workstation c3650 | HP Workstation c-class - Owner's Guide and Warranty State - Page 162
panel. 4. Power on the system. The system will now display the console to the terminal connected to Serial 1 port. Note that you can use a 9-pin to 9-pin serial cable (HP F1044-80002) to connect an HP OminiBook serial port to the workstation. 5. Set the monitor type and path using the Boot Console - HP Workstation c3650 | HP Workstation c-class - Owner's Guide and Warranty State - Page 163
6 the boot console interface This chapter describes the different features of the boot console interface and how to use them. 163 - HP Workstation c3650 | HP Workstation c-class - Owner's Guide and Warranty State - Page 164
• Accessing the Boot Console Interface • Booting Your Computer • Searching for Bootable Media • Resetting Your Computer • Displaying and Setting Paths • Displaying and Setting the Monitor Type • Changing the Console to an External Terminal • Displaying the Current Memory Configuration • Displaying - HP Workstation c3650 | HP Workstation c-class - Owner's Guide and Warranty State - Page 165
operating system is unavailable. Here are some of the things you can do: • Boot your computer • Search for bootable media • Reset your computer • Display and set boot paths • Display and set your monitor type • Display memory configuration information • Display the status of the PCI slots • Set Auto - HP Workstation c3650 | HP Workstation c-class - Owner's Guide and Warranty State - Page 166
[DIsplay|IPL] [] Search for boot devices COnfiguration [] INformation [] SERvice [] Access Configuration menu/commands Access Information menu/commands Access Service menu/commands DIsplay HElp [|] RESET Redisplay the current menu Display help for - HP Workstation c3650 | HP Workstation c-class - Owner's Guide and Warranty State - Page 167
[ON|OFF] Set previous power state BOot [|] Boot from specified path DIsplay Redisplay the current menu HElp [|] Display help for menu or command RESET Restart the system MAin Return to Main Menu ----- Configuration Menu: Enter command > Chapter - HP Workstation c3650 | HP Workstation c-class - Owner's Guide and Warranty State - Page 168
BootINfo CAche ChipRevisions COprocessor FwrVersion IO LanAddress MEmory PRocessor WArnings Display all system information Display boot-related information Display cache information Display revisions of VLSI and firmware Display coprocessor information Display firmware version Display I/O interface - HP Workstation c3650 | HP Workstation c-class - Owner's Guide and Warranty State - Page 169
EEPROM locations Read memory locations Display or set PCI delay value Display or clear the Page Deallocation Table Display PIM information Display or change scrolling ability BOot [PRI|ALT|] DIsplay HElp [|] RESET MAin ----Service Menu: Enter command > Boot from specified path - HP Workstation c3650 | HP Workstation c-class - Owner's Guide and Warranty State - Page 170
down the HP-UX operating system on your computer before powering it off. When you turn off the power switch, your boot is turned off, the boot sequence automatically stops at the boot console Main Menu. If auto boot is turned on, you will see the following message: Processor is starting auto boot - HP Workstation c3650 | HP Workstation c-class - Owner's Guide and Warranty State - Page 171
and auto search are both turned on, you will see the following message: Processor is booting from first available device. To discontinue, press any key within 10 seconds. If you are using a power-saving monitor, you will have less than 10 seconds from the time this message appears to press a key - HP Workstation c3650 | HP Workstation c-class - Owner's Guide and Warranty State - Page 172
your computer You usually start your computer by turning it on and waiting for HP-UX to boot automatically. However, you may not always want the usual sequence to occur. For example, you may want to start your computer from an operating system - HP Workstation c3650 | HP Workstation c-class - Owner's Guide and Warranty State - Page 173
you wish to interact with the Initial System Loader (ISL) before booting you computer, follow the directions in "accessing the boot console interface" earlier in this chapter, and to load an alternate version of the HP-UX operating system. If you do not want to interact with ISL, you must enter no - HP Workstation c3650 | HP Workstation c-class - Owner's Guide and Warranty State - Page 174
your computer For example, if the usual kernel (/stand/vmunix) on your root disk (fwscsi.6.0) has become corrupted, and you wish to boot your computer from the backup kernel (/stand/vmunix.prev), type the following at the ISL> prompt and press Enter: ISL> hpux /stand/vmunix.prev • If - HP Workstation c3650 | HP Workstation c-class - Owner's Guide and Warranty State - Page 175
contain bootable media, follow the directions in "accessing the boot console interface" earlier in this chapter, and then type the that actually contain bootable media, follow the directions in "accessing the boot console interface" earlier in this chapter, and then type the following at the - HP Workstation c3650 | HP Workstation c-class - Owner's Guide and Warranty State - Page 176
: Enter command> co When the Configuration Menu appears, type the following at the prompt and press Enter: Configuration Menu: Enter command> default When the Configuration Menu appears again, type the following at the prompt and press Enter: Configuration Menu: Enter command> reset 176 Chapter 6 - HP Workstation c3650 | HP Workstation c-class - Owner's Guide and Warranty State - Page 177
Path Type Device primary or pri alternate or alt console or con keyboard or key Your computer's default boot device (usually the root disk) Your computer's alternate boot device (usually a DDS-format tape device) Your computer's primary display device Your computer's primary input ASCII device - HP Workstation c3650 | HP Workstation c-class - Owner's Guide and Warranty State - Page 178
at the prompt and press Enter: Main Menu: Enter command> path primary To set a system path to a new value, follow the directions in "accessing the boot console interface" earlier in this chapter, and then type the following at the prompt and press Enter: Main Menu: Enter command> path path_type path - HP Workstation c3650 | HP Workstation c-class - Owner's Guide and Warranty State - Page 179
monitor, you may have to reconfigure your computer to support the new monitor. the monitor command The monitor command lets is available in the Configuration Menu of the boot console interface. The monitor command lets you change configuration Configuration Menu: Enter command> monitor Chapter 6 179 - HP Workstation c3650 | HP Workstation c-class - Owner's Guide and Warranty State - Page 180
the boot console interface displaying and setting the monitor type The correct usage . See "setting the monitor type" in a subsequent section for a list of types. For example, an HP VISUALIZE-EG graphics card (A4977A) installed in option slot 2 would be graphics(2). Note that you can have graphics - HP Workstation c3650 | HP Workstation c-class - Owner's Guide and Warranty State - Page 181
console interface, follow the directions in "accessing the boot console interface" earlier in this chapter. Once you are in the Boot Console Interface Main Menu, type the following command and press Enter: Main Menu: Enter command> configuration This places you in the Configuration Menu. From here - HP Workstation c3650 | HP Workstation c-class - Owner's Guide and Warranty State - Page 182
list of supported monitors that are used by your graphics card, type the following command at the prompt and press Enter: Configuration Menu: 12 GRAPHICS(2) 2 1 13 GRAPHICS(2) 2 1 14 GRAPHICS(2) 2 1 15 Size Freq Class 1280x1024 75Hz PCI 1280x1024 75Hz PCI, Double buffered 1280x1024 75Hz PCI, - HP Workstation c3650 | HP Workstation c-class - Owner's Guide and Warranty State - Page 183
reset of the system. MONITOR INFORMATION Path Slot Head HPA Resolution Freq Type Class GRAPHICS(2) 2 1 fffa000000 1280x1024 75Hz 1 PCI Configuration Menu: Enter command> The boot allows you to change the monitor type after the HP-UX operating system release have been installed and running on - HP Workstation c3650 | HP Workstation c-class - Owner's Guide and Warranty State - Page 184
the boot console interface displaying and setting the monitor type 2. Move the mouse pointer to the Application Manager control for tools and click the left mouse button. - HP Workstation c3650 | HP Workstation c-class - Owner's Guide and Warranty State - Page 185
boot In that same window, select the check box labeled Make monitor type 'n' the default where n is the number of the entry you selected. To finish your monitor Yes button in that pop-up window. This causes the monitor to reset, possibly hiding existing windows. You will then be given 15 seconds - HP Workstation c3650 | HP Workstation c-class - Owner's Guide and Warranty State - Page 186
time (approximately 40 seconds) after powering on the computer before the Num boot sequence, then press Tab to initiate the automatic monitor selection process. If your screen remains blank after two minutes of waiting for something to be displayed, see the section "Troubleshooting Monitor Problems - HP Workstation c3650 | HP Workstation c-class - Owner's Guide and Warranty State - Page 187
, 8 Bits. 4. Power on the system. The system will now display the console to the terminal connected to Serial 1 port. Note that you can use a 9-pin to 9-pin serial cable (HP F1044-80002) to connect an HP OmniBook serial port to the workstation. 5. Set the monitor type and path using the Boot Console - HP Workstation c3650 | HP Workstation c-class - Owner's Guide and Warranty State - Page 188
the boot console interface changing the console to an external terminal changing the to an external serial terminal so that you can configure the graphics console: 1. Turn the system's power off. 2. Disconnect the USB keyboard connector from the system rear panel. 3. Connect a serial terminal to the - HP Workstation c3650 | HP Workstation c-class - Owner's Guide and Warranty State - Page 189
The following sample screen output uses the memory command to show a memory configuration table with properly-installed and configured memory. To display the current memory configuration for your system, from the Information Menu of the boot console interface, follow the directions in "accessing - HP Workstation c3650 | HP Workstation c-class - Owner's Guide and Warranty State - Page 190
the boot console interface displaying the current memory configuration memory information sample The following example shows the memory information when memory modules are properly installed and configured: MEMORY INFORMATION MEMORY STATUS TABLE Slot ---- 0 1 2 Size ------ 256MB 256MB 128MB - HP Workstation c3650 | HP Workstation c-class - Owner's Guide and Warranty State - Page 191
lets you identify all built-in I/O devices and optional I/O devices installed in the option slots. It is available in the Information Menu. To use the IO command from the Information Menu of the boot console, type the following command at the prompt and press Enter: Information Menu: Enter command - HP Workstation c3650 | HP Workstation c-class - Owner's Guide and Warranty State - Page 192
and auto search flags setting the auto boot and auto search flags The auto boot and auto search flags are variables stored in your computer's nonvolatile memory. (Nonvolatile memory retains its contents even after power is turned off.) If you reset these flags to new values, the change takes effect the - HP Workstation c3650 | HP Workstation c-class - Owner's Guide and Warranty State - Page 193
and auto search flags The auto search command searches for devices in the following order: Primary boot path (can be set by the user) Alternate boot path (can be set by the user) Low-voltage differential SCSI (built-in) PCI 1 through PCI 6 (plug-in interface cards) Narrow single-ended SCSI (built - HP Workstation c3650 | HP Workstation c-class - Owner's Guide and Warranty State - Page 194
memory retains its contents even after power is turned off.) If you reset this flag to a new value, the change takes effect the next time you reboot the computer. When the secure flag is set to on, auto boot and auto search are enabled and cannot be stopped. The system boots from the default boot - HP Workstation c3650 | HP Workstation c-class - Owner's Guide and Warranty State - Page 195
the memory and skips I/O interface testing during its power-on self tests. This enables you computer to complete its boot process quicker. The default factory Enter: Configuration Menu: Enter command> fastboot To disable fastboot, type the following at the prompt and press Enter: Configuration Menu: - HP Workstation c3650 | HP Workstation c-class - Owner's Guide and Warranty State - Page 196
the boot console interface displaying the lan station address displaying the lan station address It is sometimes necessary to supply the LAN station computer at the link level (the hardware level). To display your workstation's LAN station addresses, type the following at the prompt and press - HP Workstation c3650 | HP Workstation c-class - Owner's Guide and Warranty State - Page 197
, memory size, flag settings, and the boot and console paths. To display system information for the Information Menu, type the following at the prompt and press Enter: Information Menu: Enter command> all This information is paged to allow you to view it as necessary unless the service ScRoll command - HP Workstation c3650 | HP Workstation c-class - Owner's Guide and Warranty State - Page 198
the boot console interface displaying system information 198 Chapter 6 - HP Workstation c3650 | HP Workstation c-class - Owner's Guide and Warranty State - Page 199
7 solving problems This chapter contains information to help you determine what is wrong with your system when you have problems. If you have a problem that is not listed in this chapter, or if your problem persists, contact your designated service representative. 199 - HP Workstation c3650 | HP Workstation c-class - Owner's Guide and Warranty State - Page 200
speed up your service request, have your system's model number and serial number available. Your service representative will always ask for these numbers. Here are the topics covered in this chapter: • Common Problems and Solutions • Dealing with a Boot Failure • Memory Failures • LCD Information - HP Workstation c3650 | HP Workstation c-class - Owner's Guide and Warranty State - Page 201
power is turned ON. The LCD screen lights up , but the screen is blank Make sure the LCD control cable is properly connected inside the system unit. LCD messages See "LCD information" later in this chapter. If problems persist, contact your system administrator or call your designated service - HP Workstation c3650 | HP Workstation c-class - Owner's Guide and Warranty State - Page 202
while booting. Follow the instructions in "dealing with a boot failure" later in this chapter. If the LCD displays a DIMM error, follow the instructions in "memory failures" later in this chapter. If problems persist, contact your system administrator or call your designated service representative - HP Workstation c3650 | HP Workstation c-class - Owner's Guide and Warranty State - Page 203
it. Follow the instructions in "dealing with a boot failure" later in this chapter. If the disk drive is external to the system unit, make sure that its power is turned ON. If problems persist, contact your system administrator or call your designated service representative. Problems Using the CD - HP Workstation c3650 | HP Workstation c-class - Owner's Guide and Warranty State - Page 204
if you are trying to copy data to a floppy diskette. Follow the instructions in the section "Running System Verification Tests" later in this chapter to cables (power, data, etc.) are connected. If problems persist, contact your system administrator or call your designated service representative. - HP Workstation c3650 | HP Workstation c-class - Owner's Guide and Warranty State - Page 205
NOTE NOTE solving problems dealing with a boot failure dealing with a boot failure If your usual boot device (typically a disk) is not responding as it should, you must try to boot from the disk (or another boot device) by selecting it manually. Note that you must be superuser (root) to perform - HP Workstation c3650 | HP Workstation c-class - Owner's Guide and Warranty State - Page 206
boot, there is either something wrong with the file system or with the hardware. If you suspect a file system failure, see the manual Using HP-UX for help on dealing with file system failures. If you think that something is wrong with the hardware, continue reading this chapter for more troubleshooting - HP Workstation c3650 | HP Workstation c-class - Owner's Guide and Warranty State - Page 207
on your system unit's front panel as a DIMM error. Your system's Boot Console Interface will never appear. A possible solution to the memory failure problem is to perform the procedure in the section "installing additional memory" in the chapter "changing your computer hardware configuration." If the - HP Workstation c3650 | HP Workstation c-class - Owner's Guide and Warranty State - Page 208
solving problems LCD information LCD information Your computer uses an LCD panel to display firmware/OS progress codes. The codes, referred to as chassis codes, consist of - HP Workstation c3650 | HP Workstation c-class - Owner's Guide and Warranty State - Page 209
Table 7-7 solving problems LCD information If the system encounters a FLT code while the system is booting, the FLT code is interpreted failure and warning messages you will see in your computer's LCD if there is a problem with a fan in your system unit. Table 7-7 lists the fan numbers and their - HP Workstation c3650 | HP Workstation c-class - Owner's Guide and Warranty State - Page 210
you should receive a failure or warning in you LCD, you should record the information on a piece of paper and call in the problem to your local HP Support Representative. The representative will want the LCD failure or warning message you record for determining the course of action to take regarding - HP Workstation c3650 | HP Workstation c-class - Owner's Guide and Warranty State - Page 211
8 Bits. 4. Power on the system. The system will now display the console to the terminal connected to Serial 1 port. Note that you can use a 9-pin to 9-pin serial cable (HP F1044-80002) to connect an HP OminiBook serial port to the workstation. 5. Set the monitor type and path using the Boot Console - HP Workstation c3650 | HP Workstation c-class - Owner's Guide and Warranty State - Page 212
solving problems running system verification tests running system verification tests HP-UX uses a diagnostics product called MESA that includes the Support Tools Manager (STM), which allows system operation verification. To use STM, you need to have the HP-UX Diagnostic/IPR Media on your workstation. - HP Workstation c3650 | HP Workstation c-class - Owner's Guide and Warranty State - Page 213
A safety and regulatory statements This appendix contains safety and regulatory statements pertaining to your HP workstation c-class product. 213 - HP Workstation c3650 | HP Workstation c-class - Owner's Guide and Warranty State - Page 214
safety and regulatory statements Here are the topics covered in this appendix: • Declaration of Conformity • Emissions Regulations • Third Party Emissions Regulations Compliance • Special Regulatory and Safety Information • Warnings and Cautions 214 Appendix A - HP Workstation c3650 | HP Workstation c-class - Owner's Guide and Warranty State - Page 215
safety and regulatory statements declaration of conformity declaration of conformity HP Workstations CB-CCllaassss and C Class Appendix A 215 - HP Workstation c3650 | HP Workstation c-class - Owner's Guide and Warranty State - Page 216
safety and regulatory statements emissions regulations emissions regulations The HP workstation c-class is FCC Class B compliant. Note that frequency energy and, if not installed and used in accordance with the instructions, may cause harmful interference to radio communications. However, there is no - HP Workstation c3650 | HP Workstation c-class - Owner's Guide and Warranty State - Page 217
safety and regulatory statements emissions regulations Operation of this device is subject to the following conditions: • This device may not cause harmful interference. • This device must accept interference received, including interference that may cause undesired operation. • Cables used with - HP Workstation c3650 | HP Workstation c-class - Owner's Guide and Warranty State - Page 218
EMI Class A (Taiwan) special video configuration statement When a Video Out card has a cable connected to its video out connector, the HP workstation c-class product no longer meets FCC Class B regulations. The computer now becomes FCC Class A compliant. This statement applies only to those - HP Workstation c3650 | HP Workstation c-class - Owner's Guide and Warranty State - Page 219
safety and regulatory statements third party emissions regulations compliance third party emissions regulations compliance Any third-party I/O device installed in HP system(s) must be in accordance with the requirements set forth in the preceding Emissions Regulations statements. In the event that a - HP Workstation c3650 | HP Workstation c-class - Owner's Guide and Warranty State - Page 220
statement (U.S.A. only) The CD-ROM mass-storage system is certified as a Class 1 laser product under the U.S. Department of Health and Human Services (DHHS) Radiation Performance Standard according to the Radiation Control for Health and Safety Act of 1968. This means that the mass-storage system - HP Workstation c3650 | HP Workstation c-class - Owner's Guide and Warranty State - Page 221
. Pour éviter des blessures, faire très attention lors de l´installation de modules supplémentaires par le client. warning: Disconnect power plug from wall outlet or source power before moving or removing the device, or installing add-on components. warnung: Entfernen Sie die Stromzuführung von der - HP Workstation c3650 | HP Workstation c-class - Owner's Guide and Warranty State - Page 222
safety and regulatory statements warnings and cautions 222 Appendix A - HP Workstation c3650 | HP Workstation c-class - Owner's Guide and Warranty State - Page 223
the phrase "pulling oneself up by one's bootstraps." Indicates the beginning of a process from the lowest possible level. A boot service is provided by a short program, stored in the boot ROM (read-only memory) of your workstation, that loads the operating system (or any complex program) into main - HP Workstation c3650 | HP Workstation c-class - Owner's Guide and Warranty State - Page 224
, and set certain system parameters. Boot ROM A read-only memory that is incorporated into a workstation for the purpose of loading and starting the operating system, and modifying the configuration or changing the booting behavior. Bootstrap service See boot. Byte A fundamental character-code unit - HP Workstation c3650 | HP Workstation c-class - Owner's Guide and Warranty State - Page 225
not have a local HP-UX file system. Its file system resides on the cluster server. See also cluster, cluster node, cluster server. Cluster node A member of a group of workstations connected via a Local Area Network (LAN). One workstation, the cluster server, acts as a file server to the other machines - HP Workstation c3650 | HP Workstation c-class - Owner's Guide and Warranty State - Page 226
) and interprets them as requests to execute commands or programs. An HP-UX command interpreter is called a shell. See also shell. Command option Information take, or mode in which to operate. See also default. Configuration The arrangement of a workstation or network as defined by the nature, number, - HP Workstation c3650 | HP Workstation c-class - Owner's Guide and Warranty State - Page 227
Module A memory board whose connectors on each side of the board are connected to different chips. This allows for a wider data path as more modules can be accessed at the same time. Directory A special type of "container" object that contains information about the objects beneath it in the HP-UX - HP Workstation c3650 | HP Workstation c-class - Owner's Guide and Warranty State - Page 228
that will be "remembered" after a reboot and AC power loss. Environment The conditions in which your commands or programs are executed. These conditions include your workstation characteristics, home directory, and default search paths See also environment variables. Environment variables The set - HP Workstation c3650 | HP Workstation c-class - Owner's Guide and Warranty State - Page 229
of data from hard disks. Any number of other workstations can be linked to the file server via a LAN in order to use the file server to access data. File system The hierarchically organized set of files and directories on a hard disk. Firmware The control software that is embedded in ROM and is - HP Workstation c3650 | HP Workstation c-class - Owner's Guide and Warranty State - Page 230
-Packard's version of the UNIX® operating system. HP-UX cluster See cluster node, cluster server. i Home directory A shorthand way of referring to a frequently used directory, almost always the login directory. Host A computer that offers one or more services; may be local or remote (accessible via - HP Workstation c3650 | HP Workstation c-class - Owner's Guide and Warranty State - Page 231
is turned on and it automatically boots up and is ready for use. being preloaded at the factory. Install server. This is a networked computer from .nnn.nnn.nnn, that uniquely identifies a workstation in a network. The nnn in the format address. ISL See Initial System Loader. k-l Kernel The part of - HP Workstation c3650 | HP Workstation c-class - Owner's Guide and Warranty State - Page 232
Services software. Local area network system address The label that uniquely identifies the local area network (LAN) connection for your workstation at the hardware level. This 48-bit number is preassigned by HP startup of HP CDE and accepts the user's username and password Login script - HP Workstation c3650 | HP Workstation c-class - Owner's Guide and Warranty State - Page 233
main memory of the workstation. Coupled with the network transceiver, the controller also handles signal processing, encoding, and network media access. Operating system The program that supervises the execution of other programs on your workstation. For example, the entire HP-UX system, including - HP Workstation c3650 | HP Workstation c-class - Owner's Guide and Warranty State - Page 234
to the mouse's location. The pointer's shape often depends on the object its hot-spot covers (this is used as a visual feedback mechanism from a program to the user). In the HP CDE Workspace, the default pointer is an X; on a window frame, it is either a simple arrow, or an arrow with one or more - HP Workstation c3650 | HP Workstation c-class - Owner's Guide and Warranty State - Page 235
boot or TOC, and is composed of the architected state save error parameters, and hardware version-dependent regions. Program. A unit of executable code, in source-code or binary form. Most HP-UX RAM Random-access memory. ROM Read-only memory. root See a SCSI bus. Server. A program that controls - HP Workstation c3650 | HP Workstation c-class - Owner's Guide and Warranty State - Page 236
invoke programs. Some examples of HP-UX shells are the Bourne, Korn also soft physical address. Shell command An instruction you give the system to execute a utility memory associated with the DIMM cards. Standalone A workstation that is not part of a cluster See also cluster. Style manager The HP - HP Workstation c3650 | HP Workstation c-class - Owner's Guide and Warranty State - Page 237
a command-line prompt. You must know the root password to become root. favorite terminal. When not running display the command-line prompt See also HP Common Desktop Environment. Title bar The rectangular the state of the processor in Processor Internal Memory (PIM) and pending I/O operations are - HP Workstation c3650 | HP Workstation c-class - Owner's Guide and Warranty State - Page 238
-bit-wide bus with low-power receivers and drivers, which allows each person or organization is authorized use See also user ID, password. User ID The name the computer uses to identify you. Workspace Manager. Window manager The HP CDE program that controls the size, placement, and operation of - HP Workstation c3650 | HP Workstation c-class - Owner's Guide and Warranty State - Page 239
that controls the size, placement, and operation of windows on the HP CDE Workspace. The Workspace Manager is a special Window Manager See also Window Manager. Workstation A compact, graphics-oriented computer having high speed and high memory capacity. A workstation usually includes a keyboard - HP Workstation c3650 | HP Workstation c-class - Owner's Guide and Warranty State - Page 240
240 - HP Workstation c3650 | HP Workstation c-class - Owner's Guide and Warranty State - Page 241
ROM media, 49 CD-ROM, care, 49 CD-ROM, loading and unloading, 52 CD-ROM, mounting and unmounting, 55 Common Problems, 201 Solutions, 201 Computer, booting, 172 Computer, resetting, 176 Configuring, floppy driver, 62, 78 Conformity, declaration of, 215 Connector 802.3 twisted pair LAN, 32 Audio, 28, 30 - HP Workstation c3650 | HP Workstation c-class - Owner's Guide and Warranty State - Page 242
power supply, 102 Headphones jack, 29 Host name, 42 HP hub, USB, 32 HP scroll mouse, USB, 32 HP workstation c-class features, 23 Hub, HP IP) address, 40 Internet protocol address, 42 io, 191 ioscan, 61, 77, 90 IP diskette, 76 Loading and booting the operating system Problem, 202 Solution, 202 Loading - HP Workstation c3650 | HP Workstation c-class - Owner's Guide and Warranty State - Page 243
Memory failures, 207 Memory information sample, 190 Memory, main, 23, 37 Microphone jack, 29 monitor, 179 Monitor configuration, displaying, 181 Monitor problems, troubleshooting, 162 Monitor type Changing, 158 Displaying and setting, 179 Setting, 182 Setting at power on, 158, 186 Setting from boot - HP Workstation c3650 | HP Workstation c-class - Owner's Guide and Warranty State - Page 244
booting the operating system, 202 Powering up the system, 201 Specifications, audio electrical, 30 Subnetwork mask, 40 Switch, power power supply, 102 System unit rear panel connectors, 29 System verification tests, running, 212 System, powering , CD-ROM, 58 USB HP Hub, 32 HP scroll mouse, 32 Keyboard,
-
 1
1 -
 2
2 -
 3
3 -
 4
4 -
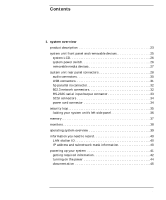 5
5 -
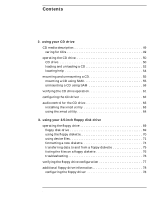 6
6 -
 7
7 -
8
-
9
-
10
-
11
-
12
-
13
-
14
-
15
-
16
-
17
-
18
-
19
-
20
-
21
-
22
-
23
-
24
-
25
-
26
-
27
-
28
-
29
-
30
-
31
-
32
-
33
-
34
-
35
-
36
-
37
-
38
-
39
-
40
-
41
-
42
-
43
-
44
-
45
-
46
-
47
-
48
-
49
-
50
-
51
-
52
-
53
-
54
-
55
-
56
-
57
-
58
-
59
-
60
-
61
-
62
-
63
-
64
-
65
-
66
-
67
-
68
-
69
-
70
-
71
-
72
-
73
-
74
-
75
-
76
-
77
-
78
-
79
-
80
-
81
-
82
-
83
-
84
-
85
-
86
-
87
-
88
-
89
-
90
-
91
-
92
-
93
-
94
-
95
-
96
-
97
-
98
-
99
-
100
-
101
-
102
-
103
-
104
-
105
-
106
-
107
-
108
-
109
-
110
-
111
-
112
-
113
-
114
-
115
-
116
-
117
-
118
-
119
-
120
-
121
-
122
-
123
-
124
-
125
-
126
-
127
-
128
-
129
-
130
-
131
-
132
-
133
-
134
-
135
-
136
-
137
-
138
-
139
-
140
-
141
-
142
-
143
-
144
-
145
-
146
-
147
-
148
-
149
-
150
-
151
-
152
-
153
-
154
-
155
-
156
-
157
-
158
-
159
-
160
-
161
-
162
-
163
-
164
-
165
-
166
-
167
-
168
-
169
-
170
-
171
-
172
-
173
-
174
-
175
-
176
-
177
-
178
-
179
-
180
-
181
-
182
-
183
-
184
-
185
-
186
-
187
-
188
-
189
-
190
-
191
-
192
-
193
-
194
-
195
-
196
-
197
-
198
-
199
-
200
-
201
-
202
-
203
-
204
-
205
-
206
-
207
-
208
-
209
-
210
-
211
-
212
-
213
-
214
-
215
-
216
-
217
-
218
-
219
-
220
-
221
-
222
-
223
-
224
-
225
-
226
-
227
-
228
-
229
-
230
-
231
-
232
-
233
-
234
-
235
-
236
-
237
-
238
-
239
-
240
-
241
-
242
-
243
-
244
 |
 |

owner’s guide
hp workstation c-class
Printed in USA
Manufacturing Part Number: A7814-90000
Edition E1001