HP d230 Hardware Reference Guide
HP d230 - Microtower Desktop PC Manual
 |
View all HP d230 manuals
Add to My Manuals
Save this manual to your list of manuals |
HP d230 manual content summary:
- HP d230 | Hardware Reference Guide - Page 1
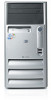
Hardware Reference Guide HP Compaq d220 and d230 Microtower Document Part Number: 326324-002 June 2003 This guide provides basic information about upgrading this series of computers. - HP d230 | Hardware Reference Guide - Page 2
. Ä CAUTION: Text set off in this manner indicates that failure to follow directions could result in damage to equipment or loss of information. Hardware Reference Guide HP Compaq d220 and d230 Microtower Second Edition (June 2003) First Edition (April 2003) Document Part Number: 326324-002 - HP d230 | Hardware Reference Guide - Page 3
Memory 1-6 Installing Memory Modules 1-7 Installing an Expansion Card 1-9 Replacing or Upgrading a Drive 1-10 Drive Positions 1-11 Removing a 5.25" Drive 1-12 Removing a Diskette Drive 1-13 Removing the Lower Drive Cage 1-14 Removing a 3.5" Hard Drive 1-16 2 Battery Replacement Replacing - HP d230 | Hardware Reference Guide - Page 4
Contents Grounding Methods 4-2 Index iv Hardware Reference Guide - HP d230 | Hardware Reference Guide - Page 5
1 Hardware Upgrades HP Compaq d220 and d230 Microtower Serviceability Features The Microtower computer includes features that make it easy to upgrade and service. No tools are needed for most of the installation procedures described in this chapter. Hardware Reference Guide 1-1 - HP d230 | Hardware Reference Guide - Page 6
any external devices. 3. Remove the two screws that secure the access panel to the computer chassis. Some access panels use captive thumbscrews. ✎ Remove the right access panel to upgrade memory or an expansion card. Remove the left access panel to upgrade a drive. 1-2 Hardware Reference Guide - HP d230 | Hardware Reference Guide - Page 7
Hardware Upgrades 4. Slide the access panel back about 1 inch (2.5 cm), then lift it away from and off the unit. Removing the Access Panels To replace the access panel, reverse the removal steps. ✎ The two access panels are physically identical. One access panel has captive thumbscrews that may be - HP d230 | Hardware Reference Guide - Page 8
pull the panel out and up to release it from the chassis. Removing the Front Bezel To install the front bezel, insert the top two latches into their respective holes in the chassis and push the bezel in until it is fully seated. ✎ When replacing the front bezel, ensure that the top - HP d230 | Hardware Reference Guide - Page 9
Hardware Upgrades Removing Front Drive Bezels 1. Turn off the computer properly through the operating system and turn off any external devices. 2. Disconnect the power cord from the power outlet and the computer, and disconnect any external devices. 3. Remove the access panel. 4. Remove the front - HP d230 | Hardware Reference Guide - Page 10
. Removing the Bezel Blank To install a diskette drive bezel, reverse the removal procedure. Installing Additional Memory The computer comes with Double Data Rate-Synchronous Dynamic Random Access Memory (DDR-SDRAM) Dual Inline Memory Modules (DIMMs). The memory sockets on the system board can be - HP d230 | Hardware Reference Guide - Page 11
devices. 2. Disconnect the power cord from the power outlet and the computer, and disconnect any external devices. ✎ If there is a hard drive in bay 5 it will be necessary to remove the lower drive cage before removing the memory modules. 3. Remove the right access panel. Å WARNING: To reduce risk - HP d230 | Hardware Reference Guide - Page 12
Upgrades 5. Open both latches of the memory module socket 1, and insert the memory module into the socket 2. Begin by installing a module into the socket nearest the preinstalled module, and install the modules following the numerical order of the sockets. Installing a Memory Module ✎ A memory - HP d230 | Hardware Reference Guide - Page 13
devices. 3. Remove the right access panel. 4. Lay the computer down on its side to make it easier to work on. If installing an expansion card in an empty slot, skip to step 10. 5. To remove an expansion card, disconnect any cables attached to the expansion card. 6. Remove the screw at the top of the - HP d230 | Hardware Reference Guide - Page 14
. Replacing or Upgrading a Drive The computer supports up to five drives that may be installed in various configurations. This Section describes the procedure for replacing or upgrading the storage drives. A Torx T-15 screwdriver is needed to remove and install the guide screws on a drive. 1-10 - HP d230 | Hardware Reference Guide - Page 15
Ä CAUTION: Make sure personal files on the hard drive are backed up to an external storage device before removing the hard drive. Failure to do so will result in data loss. After replacing the primary hard drive, you will need to run the Restore Plus! CD to load the Compaq factory-installed files - HP d230 | Hardware Reference Guide - Page 16
the power cord from the power outlet and the computer, and disconnect any external devices. 3. Remove both the right and left access panels. 4. Remove the front bezel. 5. Disconnect the power, data, and audio cables, as necessary, from the back of the drive. ✎ In some cases it may be easier to slide - HP d230 | Hardware Reference Guide - Page 17
Upgrades To install a drive, reverse the removal procedure. ✎ If you are installing a 5.25" drive for the first time into bay 2 you must first remove the drive Removing a Diskette Drive 1. Turn off the computer properly through the operating power outlet and the computer, and disconnect any external - HP d230 | Hardware Reference Guide - Page 18
Upgrades 6. Remove the four screws, two from each side, that secure the drive in the drive cage 1. 7. Slide the drive out of the front of the chassis 2. Removing a Diskette Drive To replace the diskette drive, reverse removal procedure. Removing the Lower Drive Cage 1. Turn off the computer - HP d230 | Hardware Reference Guide - Page 19
Hardware Upgrades 7. Remove the four screws that secure the drive cage to the front of the chassis 1 and then remove the single screw that attaches the lower drive cage to the fixed upper drive cage on the right side of the chassis 2. 8. Slide the lower drive cage back about 1/2 inch to release it - HP d230 | Hardware Reference Guide - Page 20
3.5" drives. 7. Remove the lower drive cage. 8. Remove the four screws, two from each side, that secure the drive in the drive cage. 9. Slide the drive out of the drive cage. 1-16 Removing a 3.5" Hard Drive To replace the drive cage, reverse the removal procedure. Hardware Reference Guide - HP d230 | Hardware Reference Guide - Page 21
battery only with the HP/Compaq spare designated for this product. Ä CAUTION: Before replacing the battery, it is important to back up the computer CMOS settings. When the battery is removed or replaced, the CMOS settings will be cleared. Refer to the Troubleshooting Guide for information on backing - HP d230 | Hardware Reference Guide - Page 22
be necessary to remove an expansion card to gain access to the battery. 3. Locate the battery and battery holder on the system board. 4. Depending on the type of battery holder on your system board, complete the following instructions to replace the battery: 5. To release the battery from its holder - HP d230 | Hardware Reference Guide - Page 23
6. When the battery pops up, lift it out. Battery Replacement Removing the Battery Hardware Reference Guide 2-3 - HP d230 | Hardware Reference Guide - Page 24
complete this procedure. 8. Replace the computer cover or access panel. 9. Plug in the computer and turn on power to the computer. Reset the date and time, your passwords, and any special system setups, using Computer Setup. Refer to the Computer Setup (F10) Utility Guide. 2-4 Hardware Reference - HP d230 | Hardware Reference Guide - Page 25
these suggestions to take care of your personal computer and monitor: ■ Operate the personal computer on a sturdy, level surface. Leave a the personal computer and keyboard. ■ Never cover the ventilation slots on the monitor with any type of material. ■ Turn off the personal computer before you - HP d230 | Hardware Reference Guide - Page 26
directly on the unit. ■ Avoid using any type of solvent, such as alcohol or benzene, which may damage the finish. Safety If any object or liquid falls into the drive, immediately unplug the personal computer and have it checked by an authorized HP service provider. 3-2 Hardware Reference Guide - HP d230 | Hardware Reference Guide - Page 27
computer: 1. Back up the hard drive files onto the network or hard drive locks automatically when the system power is turned off. 2. Remove and store separately any removable media and MultiBay drives. 3. Turn off the personal computer computer. 5. Pack the system components, MultiBay drives, - HP d230 | Hardware Reference Guide - Page 28
Routine Care & Shipping Information 3-4 Hardware Reference Guide - HP d230 | Hardware Reference Guide - Page 29
may damage system boards or other static-sensitive devices. This type of damage may reduce the life expectancy of the device. ■ Keep electrostatic-sensitive parts in their containers until they arrive at static-free workstations. ■ Place parts on a grounded surface before removing them from their - HP d230 | Hardware Reference Guide - Page 30
or computer chassis. Wrist straps are flexible straps with a minimum of 1 Megaohm +/- 10 percent HP authorized dealer, reseller, or service provider. ✎ For more information on static electricity, contact your HP authorized dealer, reseller, or service provider. 4-2 Hardware Reference Guide - HP d230 | Hardware Reference Guide - Page 31
equipment 3-1 CD-ROM drive cleaning and safety 3-2 D drive microtower type 2 removal and replacement 1-12 microtower type 2, 3.5" drive removal 1-16 drive positions microtower type 2 1-11 E electrostatic discharge grounding methods 4-2 preventing damage 4-1 Index M memory microtower type 2 removal - HP d230 | Hardware Reference Guide - Page 32
Index Index-2 Hardware Reference Guide
-
 1
1 -
 2
2 -
 3
3 -
 4
4 -
 5
5 -
 6
6 -
 7
7 -
8
-
9
-
10
-
11
-
12
-
13
-
14
-
15
-
16
-
17
-
18
-
19
-
20
-
21
-
22
-
23
-
24
-
25
-
26
-
27
-
28
-
29
-
30
-
31
-
32
 |
 |

Hardware Reference Guide
HP Compaq d220 and d230 Microtower
Document Part Number: 326324-002
June 2003
This guide provides basic information about upgrading this series of
computers.