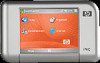
HP iPAQ rx4500 HP iPAQ Additional Product Information
HP iPAQ rx4500 - Mobile Media Companion Manual
 |
View all HP iPAQ rx4500 manuals
Add to My Manuals
Save this manual to your list of manuals |
HP iPAQ rx4500 manual content summary:
- HP iPAQ rx4500 | HP iPAQ Additional Product Information - Page 1
English Additional Product Information User Guide - HP iPAQ rx4500 | HP iPAQ Additional Product Information - Page 2
, the Windows logo, Outlook, and ActiveSync are trademarks of Microsoft Corporation in the U.S. and other countries. HP iPAQ products are powered by Microsoft® Windows Mobile® Version 5.0 for Pocket PC. SD Logo is a trademark of its proprietor. Bluetooth® is a trademark owned by its proprietor and - HP iPAQ rx4500 | HP iPAQ Additional Product Information - Page 3
Table of contents English 1 Registering the iPAQ Registering your HP iPAQ ...2 2 Connections Connections ...4 Connecting to Intranet URLs ...5 WLAN ...14 WLAN Terms ...14 Automatically Connecting to a WLAN Network 15 Manually Connecting to a WLAN Network 15 Finding an IP Address ...15 Deleting - HP iPAQ rx4500 | HP iPAQ Additional Product Information - Page 4
Items in a List 47 6 Calendar Changing the Display of the Work Week 49 Setting a Default Reminder for All New Appointments 50 Updating an Appointment ...51 Canceling an Appointment ...52 7 Contacts Deleting a Contact ...54 Changing Contact Information ...55 Copying a Contact ...56 Sending an - HP iPAQ rx4500 | HP iPAQ Additional Product Information - Page 5
Task as Completed ...76 12 Product Specifications System Specifications ...78 Physical Specifications ...79 Operating Environment ...80 13 Regulatory LAN Devices 85 France ...85 Italy ...85 Battery Warning ...85 Battery Recycling ...85 Battery Disposal ...85 Equipment Warning ...87 Airline Travel - HP iPAQ rx4500 | HP iPAQ Additional Product Information - Page 6
French Acoustics Warning ...93 Index ...94 English vi ENWW - HP iPAQ rx4500 | HP iPAQ Additional Product Information - Page 7
1 Registering the iPAQ English ENWW 1 - HP iPAQ rx4500 | HP iPAQ Additional Product Information - Page 8
offers and promotions. Take time now to register your HP iPAQ online at http://www.register.hp.com. NOTE Registration is not supported in all countries. If your mailing or e-mail address needs to be updated after registering, enter your user ID and registration password to edit your online profile - HP iPAQ rx4500 | HP iPAQ Additional Product Information - Page 9
2 Connections English ENWW 3 - HP iPAQ rx4500 | HP iPAQ Additional Product Information - Page 10
English Connections Use your HP iPAQ to connect to and exchange information with other handheld devices, a personal computer, various network types, or the Internet. There are several ways to get connected, - HP iPAQ rx4500 | HP iPAQ Additional Product Information - Page 11
English Connecting to Intranet URLs To connect to intranet sites that have periods in their URLs (for example, intranet.companyname.com), add them to the Work URL Exceptions list. 1. Tap Start > Settings > Connections tab. 2. Tap Connections > Advanced tab > Exceptions. 3. Tap Add new URL. 4. In - HP iPAQ rx4500 | HP iPAQ Additional Product Information - Page 12
English Changing an Intranet URL 1. Tap Start > Settings > Connections tab > Connections > Advanced tab > Exceptions. 2. Tap the intranet URL exception you want to change, then make the desired changes. NOTE To delete a work URL exception, tap and hold it in the list, then tap Delete. 6 Chapter 2 - HP iPAQ rx4500 | HP iPAQ Additional Product Information - Page 13
English Setting Up an Automatic Choice for Connections If you have already created more than one connection, you can set up your HP iPAQ to connect to the best available connection automatically. 1. Tap Start > Settings > Connections tab > Connections. 2. Under My ISP or My Work Network, tap Manage - HP iPAQ rx4500 | HP iPAQ Additional Product Information - Page 14
synchronization, your HP iPAQ should download proper proxy settings during synchronization from your computer. If these settings are not on your computer or need to be changed, you can change them manually. Before you begin, obtain the following information from your Internet Service Provider (ISP - HP iPAQ rx4500 | HP iPAQ Additional Product Information - Page 15
English Configuring Advanced Proxy Settings 1. For the appropriate server type, enter the proxy server name and port. 2. If necessary, enter the credentials for connecting with your proxy server. 3. If you are configuring a Socks proxy, select Socks 4 or Socks 5. If using Socks 5, enter the - HP iPAQ rx4500 | HP iPAQ Additional Product Information - Page 16
Settings 1. Tap Start > Today > iPAQ Wireless. 2. Tap the WLAN icon to turn on WLAN. 3. Connect to a network by tapping the WLAN tab > VPN & Proxy Settings > Advanced tab > Select Networks button. 4. Select My ISP to connect to the Internet through an Internet Service Provider (ISP) or select My - HP iPAQ rx4500 | HP iPAQ Additional Product Information - Page 17
Before you begin, obtain the following information from your network administrator: ● User name ● Password ● Domain name ● TCP/IP settings ● Host name the desired VPN connection, tap Edit, then follow the instructions on the screen. To manually start a connection, tap and hold the connection, then - HP iPAQ rx4500 | HP iPAQ Additional Product Information - Page 18
English Changing a Connection Group Name Your HP iPAQ is already set up with two groups of connection settings: My ISP and My Work Network. You can change the name of these groups to - HP iPAQ rx4500 | HP iPAQ Additional Product Information - Page 19
and hold the connection name, and then tap Delete. ● When connected via a network (Ethernet) card, remove the card from your HP iPAQ. NOTE A modem is not included with your HP iPAQ but may be purchased separately. Visit www.hp.com/accessories/ipaq for more information. ENWW Ending a Connection 13 - HP iPAQ rx4500 | HP iPAQ Additional Product Information - Page 20
of additional software. WLAN Terms You should become familiar with the following terms as you begin to use WLAN technology. Term 802.11 standard Device-to-computer or ad-hoc Domain Name System (DNS) Encryption Hotspots Infrastructure Definition An approved standard specification of radio - HP iPAQ rx4500 | HP iPAQ Additional Product Information - Page 21
the WLAN icon to turn WLAN on. 3. Once your HP iPAQ detects a WLAN network, you may be asked to choose if you want to connect. Select the desired network and tap Connect. Manually Connecting to a WLAN Network A wireless network can be added manually by entering the settings information to add the - HP iPAQ rx4500 | HP iPAQ Additional Product Information - Page 22
about your current WLAN connection. Deleting Wireless Network Settings You can delete network settings you manually entered. However, if a network was automatically detected, your HP iPAQ may continue to automatically detect the network. To delete existing or available wireless network settings - HP iPAQ rx4500 | HP iPAQ Additional Product Information - Page 23
ID Encryption Passkey Personal Information Manager (PIM) Profiles Service discovery Definition Verification of a numeric passkey before a or activity before it can be completed. Creating a trusted connection between your HP iPAQ and another device. After a bond is created, the two devices become - HP iPAQ rx4500 | HP iPAQ Additional Product Information - Page 24
computer for configuring Bluetooth to support ActiveSync. 2. On your HP iPAQ, tap Start > Today > iPAQ Wireless > Bluetooth tab > Bluetooth Connections > New > ActiveSync via Bluetooth. 3. Follow the instructions on your HP iPAQ to complete the connection wizard. Your HP iPAQ will attempt to connect - HP iPAQ rx4500 | HP iPAQ Additional Product Information - Page 25
New. 4. Follow the instructions on the screen. To end a Bluetooth Partnership: 1. Tap Start > Today > iPAQ Wireless > Bluetooth tab > Bluetooth Connections. 2. Tap and hold the desired partnership. 3. Tap Delete. To accept a Bluetooth Partnership: 1. Be sure your HP iPAQ is turned on, discoverable - HP iPAQ rx4500 | HP iPAQ Additional Product Information - Page 26
discoverable, other devices with Bluetooth capabilities can detect, or discover, your HP iPAQ and attempt to beam information to it, establish a partnership, or use a Bluetooth service. 1. Tap Start > Today > iPAQ Wireless > Bluetooth tab > Bluetooth Settings > Accessibility tab. 2. Select the Allow - HP iPAQ rx4500 | HP iPAQ Additional Product Information - Page 27
3 HP Photosmart Premier English ENWW 21 - HP iPAQ rx4500 | HP iPAQ Additional Product Information - Page 28
. Use the Getting Started CD to install this imaging software on a personal computer. With HP Photosmart Premier: ● View, organize, and manage pictures the most popular size pictures ● Set correct driver properties for photo printing on "older" HP printers ● Adjust printing with active preview - HP iPAQ rx4500 | HP iPAQ Additional Product Information - Page 29
English ● Set reminders to archive photos ● Digital negatives For detailed instructions on each HP Photosmart Premier feature, refer to Help inside the application. ENWW HP Photosmart Premier 23 - HP iPAQ rx4500 | HP iPAQ Additional Product Information - Page 30
4 Messaging English 24 Chapter 4 Messaging ENWW - HP iPAQ rx4500 | HP iPAQ Additional Product Information - Page 31
3 (POP3) or Internet Message Access Protocol 4 (IMAP4) e-mail server. When connecting to a POP3 or IMAP4 server, you use a modem to connect to an Internet Service Provider (ISP). You can also use a modem or Ethernet card to connect to the local area network that your e-mail server is connected to - HP iPAQ rx4500 | HP iPAQ Additional Product Information - Page 32
by type: ● If you use an Outlook e-mail account, e-mail messages in the Inbox folder in Outlook are synchronized automatically with your HP iPAQ. You can select to synchronize additional folders by designating them for synchronization. The folders you create and the messages you move are mirrored on - HP iPAQ rx4500 | HP iPAQ Additional Product Information - Page 33
copied to the Inbox folder of the Outlook e-mail account on your HP iPAQ. ● Messages in the Outbox folder on your HP iPAQ are transferred to Exchange Server or Outlook and then sent from those . Instead, they are sent to your HP iPAQ via your service provider. ENWW Synchronizing E-mail 27 - HP iPAQ rx4500 | HP iPAQ Additional Product Information - Page 34
select Include file attachments. If you have an IMAP4 e-mail account with an Internet Service Provider (ISP) or an account that you access using a VPN server connection Text Format (RTF) and Transport Neutral Encapsulation Format (TNEF) support for your account. With TNEF enabled, messages that are - HP iPAQ rx4500 | HP iPAQ Additional Product Information - Page 35
. The response is sent the next time that you synchronize or connect to your email server and the calendar on your HP iPAQ is updated. Creating or Changing a Signature 1. Tap Start > Messaging. 2. Tap Menu > Tools > Options. 3. Tap the Accounts tab > Signatures. 4. Select the account for which - HP iPAQ rx4500 | HP iPAQ Additional Product Information - Page 36
3. Tap New. 4. Enter the e-mail address or text message address of one or more recipients, separating them with a semicolon. To access addresses and phone numbers from Contacts, tap To. 5. Enter a message. To quickly add common messages, tap Menu > My Text and tap a desired message. 6. To check the - HP iPAQ rx4500 | HP iPAQ Additional Product Information - Page 37
through ActiveSync. Tip By default, messages you send are not saved on your HP iPAQ to help conserve memory. If you want to keep copies of sent messages, is already listed, select the server's directory service check box to enable it and tap OK. 6. If your e-mail service is not listed, tap Add. 7. - HP iPAQ rx4500 | HP iPAQ Additional Product Information - Page 38
is necessary on this server check box, and enter your user name and password. 9. To have Messaging check this service, select the Check name against this server check box. Tip To delete a service, tap and hold the service, and tap Delete. While synchronizing your Outlook E-mail account, disable - HP iPAQ rx4500 | HP iPAQ Additional Product Information - Page 39
5 Learning The Basics English ENWW 33 - HP iPAQ rx4500 | HP iPAQ Additional Product Information - Page 40
English Entering Owner Information Enter your owner information so your HP iPAQ can be returned to you if it is lost. 1. Tap Start > Settings > Personal tab > Owner Information. 2. On the Identification tab, enter your personal information. Tip - HP iPAQ rx4500 | HP iPAQ Additional Product Information - Page 41
Change the TodayPanel Lite options or the Today screen settings. View the amount of battery power remaining. Set the time duration for turning off your HP iPAQ. View the amount of main memory available on your HP iPAQ. View, activate, and stop all running programs from this screen. View the amount - HP iPAQ rx4500 | HP iPAQ Additional Product Information - Page 42
English Viewing the Operating System Information ▲ Tap Start > Settings > System tab > About. The operating system version displays near the top of the screen. 36 Chapter 5 Learning The Basics ENWW - HP iPAQ rx4500 | HP iPAQ Additional Product Information - Page 43
English Changing the Regional Settings The style in which numbers, currency, dates, and times are displayed is specified in regional settings. To change the regional settings: 1. Tap Start > Settings > System tab > Regional Settings > Region tab. 2. Select a region. The region you select determines - HP iPAQ rx4500 | HP iPAQ Additional Product Information - Page 44
screen. 2. Move the system volume slider on the screen, or roll the scroll wheel on your HP iPAQ to the desired volume level. 3. To mute system sounds, tap Off. You can also specify the Turning off sounds and the LED notification helps conserve battery power. 38 Chapter 5 Learning The Basics ENWW - HP iPAQ rx4500 | HP iPAQ Additional Product Information - Page 45
English Changing Power Management Settings 1. Tap Start > Settings > System tab > Power. 2. Tap the Advanced tab to select the length of time your HP iPAQ stays on when using battery power or external power. ENWW Changing Power Management Settings 39 - HP iPAQ rx4500 | HP iPAQ Additional Product Information - Page 46
1. Tap Start > Settings > System tab > Backlight > Brightness tab. 2. Move the sliders up to increase and down to decrease the brightness. NOTE To conserve battery power on your HP iPAQ, keep the backlight only as bright as required to view the screen easily. 40 Chapter 5 Learning The Basics ENWW - HP iPAQ rx4500 | HP iPAQ Additional Product Information - Page 47
Programs To install programs on your HP iPAQ: 1. Use the mini-USB synchronization cable to connect your HP iPAQ to a personal computer. 2. Follow the instructions in the Installation Wizard provided with the program you want to install. 3. Check the screen on your HP iPAQ to see if any further steps - HP iPAQ rx4500 | HP iPAQ Additional Product Information - Page 48
the list. If you don't see the desired program, tap Start > Programs. In most cases, the system closes programs that are no longer in use to free needed memory. However, you can close programs manually if you prefer. 1. Tap Start > Settings > System tab > Memory > Running Programs tab. 2. In the - HP iPAQ rx4500 | HP iPAQ Additional Product Information - Page 49
device information, including the type of processor and the amount of memory installed. The device name is used to identify your HP iPAQ in the following situations: ● Synchronizing with a computer ● Connecting to a network NOTE If you synchronize multiple devices with the same computer, each - HP iPAQ rx4500 | HP iPAQ Additional Product Information - Page 50
English Setting Alarms 1. Tap Start > Settings > System tab > Clock & Alarms > Alarms tab. 2. Tap and enter a name for the alarm. 3. Tap the day of the week for the alarm. You can select multiple days by tapping each desired day. 4. Tap the time to open a clock and set the time for - HP iPAQ rx4500 | HP iPAQ Additional Product Information - Page 51
English Shortcut Menus A shortcut menu appears when you tap and hold an item. The menu displays the most common commands for the specific item. For example, you can delete an appointment or send an e-mail message to a contact by using commands on a shortcut menu. To use a shortcut menu, - HP iPAQ rx4500 | HP iPAQ Additional Product Information - Page 52
English Creating and Assigning a Category In the Calendar, Contacts, and Tasks programs, you can use categories to help you organize and group appointments, contacts, and tasks. 1. From the program, tap an existing item or create a new one. 2. Do one of the following: ● For an existing item in - HP iPAQ rx4500 | HP iPAQ Additional Product Information - Page 53
in a List You can scroll through items in a list by rolling the scroll wheel or by using the soft keys on the screen of your HP iPAQ. To change the speed at which scrolling with the soft keys occurs: 1. Tap Start > Settings > Personal tab > Buttons > Up/Down Control tab. 2. Under Delay before - HP iPAQ rx4500 | HP iPAQ Additional Product Information - Page 54
6 Calendar English 48 Chapter 6 Calendar ENWW - HP iPAQ rx4500 | HP iPAQ Additional Product Information - Page 55
English Changing the Display of the Work Week You can customize the calendar so a work week starts on Sunday or Monday and continues from five to seven days. To change the display of the work week: 1. Tap Start > Calendar. 2. Tap Menu > Options > General tab and do one or both of the following: ● - HP iPAQ rx4500 | HP iPAQ Additional Product Information - Page 56
English Setting a Default Reminder for All New Appointments To automatically turn on a reminder for all new appointments: 1. Tap Start > Calendar. 2. Tap Menu > Options > Appointments tab. 3. Select the Set reminders for new items check box. 4. Set the time for the reminder to alert you. 5. Tap OK. - HP iPAQ rx4500 | HP iPAQ Additional Product Information - Page 57
English Updating an Appointment To update an appointment on the calendar: 1. Tap Start > Calendar. 2. Tap the appointment, then tap Edit to make the changes. 3. Tap OK. ENWW Updating an Appointment 51 - HP iPAQ rx4500 | HP iPAQ Additional Product Information - Page 58
computer the next time you synchronize. If the appointment has not been synchronized with a personal computer, it is deleted only from your HP iPAQ. 1. Tap Start > Calendar. 2. In Agenda view, select the appointment to delete. 3. Tap Menu > Delete. 4. Tap Yes to delete the appointment, or tap - HP iPAQ rx4500 | HP iPAQ Additional Product Information - Page 59
7 Contacts English ENWW 53 - HP iPAQ rx4500 | HP iPAQ Additional Product Information - Page 60
English Deleting a Contact 1. Tap Start > Contacts. 2. Tap and hold the contact to delete. 3. Tap Delete Contact. 4. Tap OK. 54 Chapter 7 Contacts ENWW - HP iPAQ rx4500 | HP iPAQ Additional Product Information - Page 61
English Changing Contact Information 1. Tap Start > Contacts. 2. Tap the contact. 3. Tap Menu > Edit and enter the changes. 4. When finished, tap OK. To include a nickname, title, and more, for an existing contact in the contact list, tap the name of the contact, then tap Menu > Edit and the Name - HP iPAQ rx4500 | HP iPAQ Additional Product Information - Page 62
English Copying a Contact 1. Tap Start > Contacts. 2. Tap and hold the desired contact. 3. Tap Copy Contact. 4. Tap the copy of the contact. 5. Tap Menu > Edit. 6. Change the contact information as needed and tap OK. NOTE The displayed category is automatically assigned to the new contact. 56 - HP iPAQ rx4500 | HP iPAQ Additional Product Information - Page 63
English Sending an E-mail Message to a Contact 1. Tap Start > Contacts. 2. Tap the contact you want to send a message to. 3. Tap the address you want to send a message to. 4. Tap the account you want to send the message from. NOTE To quickly add a contact's address to a new message, tap the To, Cc, - HP iPAQ rx4500 | HP iPAQ Additional Product Information - Page 64
English Adding and Removing a Picture To add a picture to contact information: 1. Tap Start > Contacts. 2. Tap the contact. 3. Tap Menu > Edit. 4. Tap Picture. 5. Tap the picture you want to add. To remove a picture from contact information: 1. Tap Start > Contacts. 2. Tap the contact. 3. Tap Menu - HP iPAQ rx4500 | HP iPAQ Additional Product Information - Page 65
a name or number, or by using the alphabetical index, enter the name or number into the Name view. ● To see a list of contacts employed by a specific name or company, tap Menu > View By > Name or Company. ● To see a summary of information about a contact, tap the contact. From there you can also - HP iPAQ rx4500 | HP iPAQ Additional Product Information - Page 66
8 Notes English 60 Chapter 8 Notes ENWW - HP iPAQ rx4500 | HP iPAQ Additional Product Information - Page 67
English Writing a Note 1. Tap Start > Programs > Notes. NOTE Writing must be selected as the default input mode. 2. In the note list, tap New. 3. Write the text on the screen. 4. When finished, tap OK to return to the note list. To select handwritten text, tap and hold next to the writing. As soon - HP iPAQ rx4500 | HP iPAQ Additional Product Information - Page 68
English Converting a Handwritten Note to Typed Text NOTE Some text entry methods are not supported in all languages. In addition, some languages may support alternate text entry methods. There may be times when you want to convert a handwritten note to typed text for easier readability. To do this: - HP iPAQ rx4500 | HP iPAQ Additional Product Information - Page 69
English Creating a Copy of a Note To create a copy of a note: 1. Tap Start > Programs > Notes. 2. Use the scroll wheel to select the note you want to copy. 3. Tap Menu > Create Copy. A copy of the note appears in the note list. For more details, refer to the on-screen Help, tap Start > Help > - HP iPAQ rx4500 | HP iPAQ Additional Product Information - Page 70
9 Secure Digital (SD) Cards English 64 Chapter 9 Secure Digital (SD) Cards ENWW - HP iPAQ rx4500 | HP iPAQ Additional Product Information - Page 71
) Cards Use optional SD cards for: ● Expanding the memory of your HP iPAQ ● Adding functionality to your HP iPAQ-for example, with an SD input/output (SDIO) card NOTE SD cards must be purchased separately and are not included with your HP iPAQ. To locate information about SD cards, visit http://www - HP iPAQ rx4500 | HP iPAQ Additional Product Information - Page 72
SD slot. NOTE If the SD card is not recognized, follow the card manufacturer's instructions to install it. If you have trouble installing an SD card, try the following: ● Have the label face the front of the HP iPAQ. ● Insert the connection area (the metal area) first. ● Do not insert the card at - HP iPAQ rx4500 | HP iPAQ Additional Product Information - Page 73
Card To remove an SD card from the SD slot on your HP iPAQ: 1. Close all programs that are using the SD card. 2. disengages and pops up, pull it from the SD slot. NOTE HP recommends inserting the protective plastic card that came with your HP iPAQ into the SD slot when not in use. ENWW Removing a - HP iPAQ rx4500 | HP iPAQ Additional Product Information - Page 74
a list of files and folders. If your HP iPAQ does not recognize the SD card, try to: ● Firmly pushed the card down into the SD slot. ● Install any drivers that came with the SD card. ● Reset your HP iPAQ by using the stylus to lightly press the Reset button. 68 Chapter 9 Secure Digital (SD) Cards - HP iPAQ rx4500 | HP iPAQ Additional Product Information - Page 75
10 Synchronizing English ENWW 69 - HP iPAQ rx4500 | HP iPAQ Additional Product Information - Page 76
and the personal computer. ActiveSync converts the files so that they can be used by the Office Mobile programs, if necessary. Move the files directly into My Documents on your HP iPAQ (or into a folder inside My Documents), so the programs on the device can locate them. 70 Chapter 10 Synchronizing - HP iPAQ rx4500 | HP iPAQ Additional Product Information - Page 77
Synchronization Cost Saving Tips How you manage the cost of synchronizing wirelessly from your HP iPAQ depends on your priorities. To Reduce network connection or data transfer costs Extend battery life Keep information up to date Do this Increase the time between scheduled synchronizations - HP iPAQ rx4500 | HP iPAQ Additional Product Information - Page 78
11 Tasks English 72 Chapter 11 Tasks ENWW - HP iPAQ rx4500 | HP iPAQ Additional Product Information - Page 79
English Setting the Start and Due Dates for a Task 1. Tap Start > Programs > Tasks. 2. Tap the task you want to set start and due dates for. 3. Tap Edit and do one or both of the following: ● Tap Starts to enter a start date for the task. ● Tap Due to enter a due date for the task. 4. Tap OK. ENWW - HP iPAQ rx4500 | HP iPAQ Additional Product Information - Page 80
English Showing Start and Due Dates in the Task List 1. Tap Start > Programs > Tasks. 2. Tap Menu > Options. 3. Select the Show start and due dates check box. 4. Tap OK. 74 Chapter 11 Tasks ENWW - HP iPAQ rx4500 | HP iPAQ Additional Product Information - Page 81
, select the type of tasks you want to appear on the Today screen. 5. In the Category list, select whether to display only tasks assigned to a specific category or to display all tasks. ENWW Setting Options for Displaying Tasks on the Today Screen 75 - HP iPAQ rx4500 | HP iPAQ Additional Product Information - Page 82
English Marking a Task as Completed To mark a task as completed: 1. Tap Start > Programs > Tasks. 2. In the task list, select the check box next to the task you want to mark as completed. To mark an open task as completed: 1. Tap Edit. 2. In the Status box, tap Completed. 76 Chapter 11 Tasks ENWW - HP iPAQ rx4500 | HP iPAQ Additional Product Information - Page 83
12 Product Specifications English ENWW 77 - HP iPAQ rx4500 | HP iPAQ Additional Product Information - Page 84
all regions. For more information on specifications for your particular model, on your HP iPAQ, tap Start > Settings > System Battery Bluetooth LED Indicators Description Samsung SC32442 Processor 400 MHz Microsoft® Windows Mobile® Version 5.0 for Pocket PC 128 MB ROM or 128 MB ROM and 1 GB iPAQ - HP iPAQ rx4500 | HP iPAQ Additional Product Information - Page 85
English Physical Specifications Length Width Depth Weight US 4.02 in. 2.5 in. 0.689 in. 4.48 oz Metric 102.0 mm 63.5 mm 17.5 mm 127 g ENWW Physical Specifications 79 - HP iPAQ rx4500 | HP iPAQ Additional Product Information - Page 86
% 15,000 ft 40,000 ft Metric 0° to 40° C -20° to 60° C up to 90% up to 90% 4,572 m 12,192 m 80 Chapter 12 Product Specifications ENWW - HP iPAQ rx4500 | HP iPAQ Additional Product Information - Page 87
13 Regulatory Notices English ENWW 81 - HP iPAQ rx4500 | HP iPAQ Additional Product Information - Page 88
digital device, pursuant to Part 15 of the FCC in accordance with the instructions, may cause harmful interference PDA has been tested and demonstrated compliance when Bluetooth and WLAN are transmitting simultaneously. This PDA not expressly approved by HP may void the user's authority to operate - HP iPAQ rx4500 | HP iPAQ Additional Product Information - Page 89
declaration, write to Hewlett-Packard Company P. O. Box 692000, Mail Stop 510101 Houston, TX 77269-2000 or call HP at 281-514-3333 To identify your product, refer to the part, series, or model number located on the product. Canadian Notice This Class B digital apparatus meets all requirements of the - HP iPAQ rx4500 | HP iPAQ Additional Product Information - Page 90
with these directives implies conformity to harmonized European standards (European Norms) that are listed in the EU Declaration of Conformity issued by HP for this product or product family. This compliance is indicated by one of the following conformity markings placed on the product. ● This - HP iPAQ rx4500 | HP iPAQ Additional Product Information - Page 91
or water. Replace only with the HP spare. CAUTION Risk of explosion if battery is replaced by an incorrect type. Dispose of used batteries according to the instructions. Battery Recycling HP encourages customers to recycle used electronic hardware, HP original print cartridges, and rechargeable - HP iPAQ rx4500 | HP iPAQ Additional Product Information - Page 92
English 86 Chapter 13 Regulatory Notices ENWW - HP iPAQ rx4500 | HP iPAQ Additional Product Information - Page 93
pull on a cord or cable. When unplugging from the electrical outlet, grasp the cord by the plug or, in the case of the AC adapter, grasp the AC adapter and pull out from the electrical outlet. Do not use converter kits sold for appliances to power your iPAQ Pocket PC. ENWW Equipment Warning 87 - HP iPAQ rx4500 | HP iPAQ Additional Product Information - Page 94
Airline Travel Notice Use of electronic equipment aboard commercial aircraft is at the discretion of the airline. English 88 Chapter 13 Regulatory Notices ENWW - HP iPAQ rx4500 | HP iPAQ Additional Product Information - Page 95
of medical electronic equipment, consult the manufacturer of the equipment to determine if the medical equipment is shielded from RF energy. Turn off your HP iPAQ in health care facilities or hospitals when there are posted restrictions requiring you to do so. ENWW Medical Electronic Equipment 89 - HP iPAQ rx4500 | HP iPAQ Additional Product Information - Page 96
No metallic body accessories are allowed and 1.5cm spacing between PDA and the body must be maintained to satisfy RF Exposure. This PDA has been tested demonstrated compliance when Bluetooth and WLAN are transmitting simultaneously. This PDA must not be co-located or operating in conjunction with - HP iPAQ rx4500 | HP iPAQ Additional Product Information - Page 97
English Japanese Notice Wireless LAN 802.11b Devices Wireless LAN 802.11g Devices Bluetooth Devices ENWW Japanese Notice 91 - HP iPAQ rx4500 | HP iPAQ Additional Product Information - Page 98
Taiwan DGT Notice English 92 Chapter 13 Regulatory Notices ENWW - HP iPAQ rx4500 | HP iPAQ Additional Product Information - Page 99
damage your hearing. In order to reduce the risk of hearing loss, decrease the amount of time listening to personal stereo equipment at full volume. HP recommends that you use the headset, part number 430219, manufactured by Plantronics, included with your HP iPAQ. ENWW Korean Notice 93 - HP iPAQ rx4500 | HP iPAQ Additional Product Information - Page 100
52 display of work week 49 setting default reminders 50 updating appointments 51 Canadian notice 90 Canadian notices 83 categories assigning 46 tips 71 customizing your HP iPAQ 43 D Declaration of Conformity 83 device information 43 name 43 version 43 disposal notices battery 85 E European - HP iPAQ rx4500 | HP iPAQ Additional Product Information - Page 101
37 registering the iPAQ 2 registration 2 removing programs 41 S scrolling speed 47 Secure Digital (SD) cards installing 66 removing 67 using 65 viewing content 68 shortcut menus 45 specifications operating environment 80 physical 79 system 78 synchronizing copying files 70 extending battery life 71
-
 1
1 -
 2
2 -
 3
3 -
 4
4 -
 5
5 -
 6
6 -
 7
7 -
8
-
9
-
10
-
11
-
12
-
13
-
14
-
15
-
16
-
17
-
18
-
19
-
20
-
21
-
22
-
23
-
24
-
25
-
26
-
27
-
28
-
29
-
30
-
31
-
32
-
33
-
34
-
35
-
36
-
37
-
38
-
39
-
40
-
41
-
42
-
43
-
44
-
45
-
46
-
47
-
48
-
49
-
50
-
51
-
52
-
53
-
54
-
55
-
56
-
57
-
58
-
59
-
60
-
61
-
62
-
63
-
64
-
65
-
66
-
67
-
68
-
69
-
70
-
71
-
72
-
73
-
74
-
75
-
76
-
77
-
78
-
79
-
80
-
81
-
82
-
83
-
84
-
85
-
86
-
87
-
88
-
89
-
90
-
91
-
92
-
93
-
94
-
95
-
96
-
97
-
98
-
99
-
100
-
101
 |
 |

Additional Product Information
User Guide
English