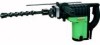
Hitachi DH40FA Instruction Manual
Hitachi DH40FA - 1-9/16" Spline Shank Rotary Hammer Manual
 |
UPC - 717709004054
View all Hitachi DH40FA manuals
Add to My Manuals
Save this manual to your list of manuals |
Hitachi DH40FA manual content summary:
- Hitachi DH40FA | Instruction Manual - Page 1
HITACHI MODEL MODELE MODELO DH 40FA ROTARY HAMMER MARTEAU ROTATIF MARTILLO GIRATORIO OO OO INSTRUCTION MANUAL AND SAFETY INSTRUCTIONS A WARNING Improper and unsafe use of this power tool can result in death or serious bodily injury! This manual contains important information about product - Hitachi DH40FA | Instruction Manual - Page 2
SYMBOLS 7 MAINTENANCE AND INSPECTION DOUBLE INSULATION FOR SAFER OPERATION 8 ACCESSORIES STANDARD ACCESSORIES FUNCTIONAL DESCRIPTION 9 OPTIONAL ACCESSORIES MANE OF PARTS SPECIFICATIONS 9 9 PARTS LIST Page 10 10 10 11 13 15 17 17 17 52 Francais TABLE DES MATIERES Page Page INFORMATIONS - Hitachi DH40FA | Instruction Manual - Page 3
must be avoided to prevent bodily injury or machine damage are identified by WARNINGS on the power tool and in this Instruction Manual. Never use this power tool in a manner that has not been specifically recommended by HITACHI, unless you first confirm that the planned use will be safe for you and - Hitachi DH40FA | Instruction Manual - Page 4
all instructions. Failure to follow all instructions listed below, may result in electric shock, fire and/or serious personal injury. SAVE THESE INSTRUCTIONS 1. Work Area (1) Keep your work area clean and well lit. Cluttered benches and dark areas invite accidents. (2) Do not operate power tools in - Hitachi DH40FA | Instruction Manual - Page 5
conditions. 4. Tool Use and Care (1) Use clamps or other practical way to secure and support the workpiece to servicing a tool, use only identical replacement parts. Follow instructions in the Maintenance section of this manual. Use of unauthorized parts or failure to follow Maintenance Instruction - Hitachi DH40FA | Instruction Manual - Page 6
tree limbs or logs. 9. Never use a power tool for applications other than those specified. Never use a power tool for applications other than those specified in the Instruction Manual. 10. Handle tool correctly. Operate the tool according to the instructions provided herein. Do not drop or throw the - Hitachi DH40FA | Instruction Manual - Page 7
or string, etc. 5. ALWAYS attach the side handle and securely grip the Rotary Hammer. 6. ALWAYS be careful with buried object such as an underground wiring. Touching these active wiring or electric cable with this tool, you may receive an electric shock. Comfirm if there are any buried object - Hitachi DH40FA | Instruction Manual - Page 8
in this Instruction Manual, including not using the power tool in wet environments. To keep the double insulation system effective, follow these precautions: O Only HITACHI AUTHORIZED SERVICE CENTER should disassemble or assemble this power tool, and only genuine HITACHI replacement parts should - Hitachi DH40FA | Instruction Manual - Page 9
you in the safe operation and maintenance of the power tool. Some illustrations in this Instruction Manual may show details or attachments that differ from those on your own power tool. NAME OF PARTS Stopper Side Handle Switch Trigger Tool Holder OO ED Selector Lever Housing Tail Cover Set - Hitachi DH40FA | Instruction Manual - Page 10
APPLICATIONS Rotation and hammering function O Drilling anchor holes O Drilling holes in concrete Hammering function only O Crushing concrete, chipping, digging, and squaring (by applying optional accessories) PRIOR TO OPERATION 1. Power source Ensure that the power source to be - Hitachi DH40FA | Instruction Manual - Page 11
English 7. How to install tool &CAUTION: For tools such as a drill bit and a bull point, use only Hitachi genuine parts. (1) Clean, then smear the tool shank with the grease provided in the green tube. (2) Pull the tool holder in the direction of arrow 0) and rotate it in the direction of arrow - Hitachi DH40FA | Instruction Manual - Page 12
on the side of the T mark on the under cover. (2) Hammering (Fig. 7) Rotate the selector lever counterclockwise so that the A mark the selector lever during motor rotation will rotate the tool accidentally. The selector lever should only be turned when drill bit. 12 Fig. 7 Side Handle Fig. 8 Fig. 9 - Hitachi DH40FA | Instruction Manual - Page 13
power on and drill a base hole. (3) After cleaning out dust with a syringe, attach the plug to the anchor tip and drive in the anchor with a manual hammer. (4) To remove the drill bit with taper shank, insert a cotter into the slot of the taper shank adaptor, place supports under the rotary hammer - Hitachi DH40FA | Instruction Manual - Page 14
force will not only expedite the work, but will deteriorate the tip edge of the drill bit, resulting in reduced service life of the rotary hammer. CAUTION: When removing the center pin and the guide plate, turn OFF the switch and disconnect the plug from the receptacle. 3. Dismounting (Fig. 16 - Hitachi DH40FA | Instruction Manual - Page 15
the power tool. Exercise due care to ensure the winding does not become damaged and/or wet with oil or water. 4. Inspecting the carbon brushes: (Fig. 17) The motor employs carbon brushes which are consumable parts. When they become worn to or near "wear limit", it could result in motor trouble. When - Hitachi DH40FA | Instruction Manual - Page 16
NOTE: The HITACHI Electric Hammer Grease A is of the lower viscosity type. When the supplied grease tube is consumed, purchase from a HITACHI Autorized Service Center. Fig. 18 6. Service and repairs All quality power tools will eventually require servicing or replacement of parts because of wear - Hitachi DH40FA | Instruction Manual - Page 17
: Accessories for this power tool are mentioned in this Instruction Manual. The use of any other attachment or accessory can be dangerous and could cause injury or mechanical damage. NOTE: Accessories are subject to change without any obligation on the part of the HITACHI. STANDARD ACCESSORIES - Hitachi DH40FA | Instruction Manual - Page 18
shank adaptor formed A-taper or B-taper is provided as optional accessory, but drill bit for it is not provided Code No. 985377 Code No. 985378 3. Large-dia. hole boring (Rotation + Hammering) 1=to 029) ca=c3= (Guide plate) Code No. 985388 955169 (1) Center pin Code No. 955165 4. Crushing - Hitachi DH40FA | Instruction Manual - Page 19
5 3 2 1 43 44 7 10 45 46 0 47 49 48 50 C1 52 0 59 502 503 504 71 62 72 61 73 60 63 74 64 65 66 0 0 75 76 0 77 78 70 28 38 81 80 79 83 84 85 O 27 28 14 29 15 ere 16 17 30 18 31 19 20 21 22 26 33 23 34 24 35 36 25 'O 38 39 55 56 •-. .,.,5,7,,,, 58 87 88 91 - Hitachi DH40FA | Instruction Manual - Page 20
26 27 28 29 30 31 32 33 34 35 36 37 38 39 Part Name Stop Washer Stopper Spring Knob (A) Needle Roller D4 x 20 Stop Bolt M7 x 25 Front Cover O-Ring (1AS-60) O-Ring Second Hammer Damper Washer Damper Washer Bevel Pinion Feather Key 3 x 3 x ) 77 Housing Ass'y 78 HITACHI Label 53 - Hitachi DH40FA | Instruction Manual - Page 21
Item No. Part Name 79 Brush Cap 80 Carbon Brush 81 Brush Holder 82 Nylock Bolt (W/Flange) M5 x 501 Case (Plastic) 502 Grease (A) 503 Allen Wrench 4MM 504 Allen Wrench 5MM 505 Dust Cover Parts are subject to change without any obligation on the part of the HITACHI due to improvement. 54
-
 1
1 -
 2
2 -
 3
3 -
 4
4 -
 5
5 -
 6
6 -
 7
7 -
8
-
9
-
10
-
11
-
12
-
13
-
14
-
15
-
16
-
17
-
18
-
19
-
20
-
21
 |
 |
