Hoover SH30050 Product Manual
Hoover SH30050 Manual
 |
View all Hoover SH30050 manuals
Add to My Manuals
Save this manual to your list of manuals |
Hoover SH30050 manual content summary:
- Hoover SH30050 | Product Manual - Page 1
. All Rights Reserved. #961151069 ID106422-R1 Guide d'utilisation Instructions d'utilisation et d'entretien www.hoover.com www.hoover.com Owner's Manual Operating and Servicing Instructions Español - página E1 IMPORTANT : LIRE CES INSTRUCTIONS ATTENTIVEMENT AVANT D'UTILISER L'ASPIRATEUR. Vous - Hoover SH30050 | Product Manual - Page 2
) or to speak with a customer service representative; Mon- Fri 8am- 7pm EST. Please do not return this product to the store. 2 Important Safety Instructions 3-4 Vacuum Assembly...5 Carton Contents...5 Connect Hose, Wand, Nozzle 5 How To Use...6-7 Cleaner Description...6 On-Off Switch, Variable - Hoover SH30050 | Product Manual - Page 3
INSTRUCTIONS BEFORE USING THIS APPLIANCE. WARNING: TO REDUCE THE RISK OF FIRE, ELECTRIC SHOCK OR INJURY: • Fully assemble before operating. • Operate cleaner manual. hose, take to an authorized service center for repair. • Always turn off this appliance before connecting or disconnecting either hose - Hoover SH30050 | Product Manual - Page 4
. • Do not use sharp objects to clean out hose as they can cause damage. • Do not allow parer le tuyau endommagé; l'apporter à un centre de service autorisé pour le faire réparer. • Toujours éteindre entraîner des malformations congénitales ou d'autres troubles de la reproduction. SE LAVER LES MAINS - Hoover SH30050 | Product Manual - Page 5
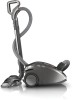
Hoover.com ou composer le 800 9449200. 1. Vacuum ASSEMBLY Carton contents A. Canister Cleaner 1.1 B. Telescoping Extension Wand C. Hose Handle Assembly A D. Power Nozzle E. 3 in 1 Tool F. Hard Floor Brush Remove all parts disconnect from nozzle. 5 Actual model may vary from images shown. - Hoover SH30050 | Product Manual - Page 6
support Hose Connector 1 2 3 4 12 13 9 10 11 21 10. Filter Bag Door Latch 9. Carry Handle 8. Power Nozzle 7. Power Nozzle Release Button 6. Telescoping Wand Release Button 5. Extension Wand 4. Extension Wand Release Buttons 2. Power Nozzle On/Off Switch 3. Suction Regulator 20 CLEANER - Hoover SH30050 | Product Manual - Page 7
cleaner from falling, always place cleaner at bottom of stairs or on floor. Do not place cleaner on stairs or furniture, as it may result in injury or damage. 7 Actual model located on the top of the canister to move the vacuum cleaner from room to room. COMMUTATEUR MARCHE/ARRÊT 2.2 Brancher la - Hoover SH30050 | Product Manual - Page 8
8 Actual model may vary from images shown. Cord Rewind/ Storage 3.3 To return cord rewinding. 3.4 For convenience there is a parking slot located at the rear of the vacuum cleaner where the floor tool and hose can be parked for carrying and storage. IMPORTANT When pulling on the cord, yellow tape - Hoover SH30050 | Product Manual - Page 9
9 Actual model may vary from images shown. 4.1 Disconnect hose from the cleaner, pressing the button (A) on the hose connector and pulling straight out. 4.2 Open the filter bag door by lifting up on latch (B). 4.3 Pull up on the filter bag collar (C) and remove bag. 4.4 Slide new bag collar firmly - Hoover SH30050 | Product Manual - Page 10
Hoover® Part No. 440004496. How to clean: FINAL HEPA FILTER ! WARNING ! To reduce the risk of personal injury - Unplug before cleaning or servicing. Do not use cleaner servicing. Do not use cleaner without filters in place. 4.6 The Secondary filter, located at the rear of the filter bag compartment - Hoover SH30050 | Product Manual - Page 11
model hose can be disconnected from the vacuum cleaner by pressing the release button on hose hose securely. 4.10 Plug cleaner in, turn on, and check hose end for suction. Remove any obstructions. 4.11 Remove power nozzle from wand and attach wand to hose objects to clean out hose as they can cause damage - Hoover SH30050 | Product Manual - Page 12
To obtain approved Hoover® service and genuine Hoover® parts, locate the nearest Authorized Hoover® Warranty Service Dealer (Depot) by: • Checking the Yellow Pages under "Vacuum Cleaners" or "Household". • Visit our website at hoover.com (U.S. Customers) or hoover.ca (Canadian customers). Follow - Hoover SH30050 | Product Manual - Page 13
Manual, your HOOVER services), belts, filter made with HEPA media, improper maintenance of the product, damage due to misuse, acts of God, nature, vandalism or other acts beyond the control of Hoover stipulé dans le Guide de l'utilisateur, contre acte ou négligence de la part du propriétaire du produit - Hoover SH30050 | Product Manual - Page 14
MANUAL DEL PROPIETARIO Instrucciones de Funcionamiento y Servicio www.hoover.com IMPORTANTE: LEA ATENTAMENTE ANTES DE ENSAMBLAR Y USAR. ¿Tiene alguna pregunta o inquietud? Para obtener asistencia, llame al Servicio de atención al cliente al 1-800 944 - Hoover SH30050 | Product Manual - Page 15
y el mantenimiento de su producto HOOVER® se realicen en condiciones de uso doméstico normales y según el Manual del usuario, el producto estará en que el producto fue com- prado inicialmente y reventa del producto por parte del propietario original. Esta garantía no cubre el retiro del producto, - Hoover SH30050 | Product Manual - Page 16
placa de datos, que se encuentra en la parte inferior de la aspiradora. • No deje el . • Use el producto sólo como se describe en este manual. Use sólo los accesorios y productos recomendados por el fabricante. 944-9200. No envíe su aspiradora a Hoover®, Inc., Company en Glenwillow para realizar el - Hoover SH30050 | Product Manual - Page 17
Eliminación de 4.9 obstrucciones ! Advertencia ! Para reducir el riesgo de lesiones a personas, desenchufe la aspiradora antes de limpiarla o de quitar la manguera, los tubos y accesorios para buscar o despejar obstrucciones. La succión o aspiración baja se puede deber a una obstrucción en el - Hoover SH30050 | Product Manual - Page 18
. 1.1 A D B C E F Se pueden solicitar piezas adicionales en Hoover.com o llamando al 1-800-944-9200. Conecte la manguera ! Advertencia ! la lengüeta. Golpee suavemente el filtro y el cartucho del filtro en la parte interior de un recipiente para basira para quitar el polvo y la suciedad. 4.9 - Hoover SH30050 | Product Manual - Page 19
original y las cualidades de filtrado superior de su aspiradora, utilice solamente bolsas de filtro descartables HEPA Filtration Type S de Hoover® C (número de paquete 4010808S). Cómo reemplazarlo ! ADVERTENCIA ! Para reducir el riesgo de lesiones a personas, desenchufe antes de limpiar - Hoover SH30050 | Product Manual - Page 20
. No permita que el enchufe se azote mientras se rebobina. 3.4 Para mayor comodidad, una ranura para el almacenamiento está ubicada en la parte posterior de la aspiradora, donde se pueden colocar la manguera y el accesorio para piso para su traslado y almacenamiento. IMPORTANT Lorsque le cordon
-
 1
1 -
 2
2 -
 3
3 -
 4
4 -
 5
5 -
 6
6 -
 7
7 -
8
-
9
-
10
-
11
-
12
-
13
-
14
-
15
-
16
-
17
-
18
-
19
-
20
 |
 |

GUIDE D’UTILISATION
Instructions d’utilisation et d’entretien
©2011 Techtronic Floor Care Technology Limited. Tous droits réservés. #961151069 ID106422-R1
L’UTILISATION DE CE PRODUIT À DES FINS COMMERCIALES INVALIDE
LA PRÉSENTE GARANTIE.
IMPORTANT : LIRE CES INSTRUCTIONS ATTENTIVEMENT AVANT
D’UTILISER L’ASPIRATEUR.
Vous avez des questions ou des inquiétudes? Veuillez appeler le service à la clientèle au
1 800 9449200 du lundi au vendredi, de 8 h à 19 h (HNE).
VEUILLEZ NE PAS RETOURNER CE PRODUIT AU MAGASIN.
OWNER’S MANUAL
Operating and Servicing Instructions
©2013 Techtronic Floor Care Technology Limited. All Rights Reserved. #961151069 ID106422-R1
THIS PRODUCT IS INTENDED FOR HOUSEHOLD USE ONLY.
IF USED COMMERCIALLY WARRANTY IS VOID.
Español - página E1
IMPORTANT: READ CAREFULLY BEFORE ASSEMBLY AND USE.
Questions or concerns? For assistance, please call Customer Service at 1-800-944-9200
Mon-Fri 8am-7pm EST.
PLEASE DO NOT RETURN THIS PRODUCT TO THE STORE.
www.hoover.com
www.hoover.com