Hotpoint HTS16BBS Owners Manual
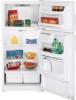
Hotpoint HTS16BBS - 15.7 cu. Ft. Top-Freezer Refrigerator Manual
 |
View all Hotpoint HTS16BBS manuals
Add to My Manuals
Save this manual to your list of manuals |
Hotpoint HTS16BBS manual content summary:
- Hotpoint HTS16BBS | Owners Manual - Page 1
Controls 4 Installation Instructions Preparing to Install the Refrigerator 11 Reversing the Door Swing . . . 16-22 Water Line Installation 12-16 Troubleshooting Tips Before You Call For Service 24, 25 Normal Operating Sounds . . . . . .23 Consumer Support Consumer Support . . . . Back Cover - Hotpoint HTS16BBS | Owners Manual - Page 2
Troubleshooting Tips Installation Instructions Operating Instructions Safety Instructions IMPORTANT SAFETY INFORMATION. READ ALL INSTRUCTIONS BEFORE USING. WARNING! Use this appliance only for its intended purpose as described in this Owner's Manual. SAFETY PRECAUTIONS When using electrical - Hotpoint HTS16BBS | Owners Manual - Page 3
Safety Instructions Operating Instructions Installation Instructions Troubleshooting Tips Consumer Support www.Hotpoint.com WARNING! HOW TO CONNECT ELECTRICITY Do not, under any circumstances, cut or remove the third (ground) prong from the power cord. For personal safety, this appliance must be - Hotpoint HTS16BBS | Owners Manual - Page 4
Troubleshooting Tips Installation Instructions Operating Instructions Safety Instructions About the temperature control dial. Turning the dial to 0 stops cooling in both compartments-fresh food and freezer. It does not shut off power to the refrigerator After using the refrigerator, adjust the dial - Hotpoint HTS16BBS | Owners Manual - Page 5
Instructions Operating Instructions Installation Instructions Troubleshooting Tips Consumer Support About the fresh food compartment shelves. www.Hotpoint.com Shelf supports correctly on the shelf supports, the shelf will stop before coming completely out of the refrigerator and will not tilt - Hotpoint HTS16BBS | Owners Manual - Page 6
Troubleshooting Tips Installation Instructions Operating Instructions Safety Instructions About the freezer compartment shelves. Some models have an ice-tray shelf and some have a full-width step shelf. Plug Supports Ice-Tray Shelf To remove the ice-tray shelf, lift the left side of the shelf off - Hotpoint HTS16BBS | Owners Manual - Page 7
Safety Instructions Operating Instructions Installation Instructions Troubleshooting Tips Consumer Support About storage drawer and cover removal. Not all features are on all models. www.Hotpoint.com Adjustable Humidity Drawer (on some models) Slide the control all the way to the HIGH setting to - Hotpoint HTS16BBS | Owners Manual - Page 8
Troubleshooting Tips Installation Instructions Operating Instructions Safety Instructions About the automatic icemaker. A newly-installed refrigerator . If the refrigerator is operated before position. When the refrigerator has been connected to newly-installed refrigerator may take refrigerator - Hotpoint HTS16BBS | Owners Manual - Page 9
Instructions Operating Instructions Installation Instructions Troubleshooting Tips Consumer Support Care and cleaning of the refrigerator. www.Hotpoint use appliance wax or polish on the stainless steel. Do not wipe the refrigerator with any plastic refrigerator parts in the dishwasher. Cleaning - Hotpoint HTS16BBS | Owners Manual - Page 10
Troubleshooting Tips Installation Instructions Operating Instructions Safety Instructions Care and cleaning of the refrigerator. Behind the Refrigerator Be careful when moving the refrigerator to the refrigerator. If the temperature can drop below freezing, have a qualified servicer drain the - Hotpoint HTS16BBS | Owners Manual - Page 11
to Installer - Be sure to leave these instructions with the Consumer. • Note to Consumer - Keep these instructions for future reference. • Skill level - Installation of this appliance requires basic mechanical skills. • Completion time - Refrigerator Installation 15 minutes Reversing the Door Swing - Hotpoint HTS16BBS | Owners Manual - Page 12
or icemaker manufacturer. Follow these instructions carefully to minimize the risk of expensive water damage. Water hammer (water banging in the pipes) in house plumbing can cause damage to refrigerator parts and lead to water leakage or flooding. Call a qualified plumber to correct water - Hotpoint HTS16BBS | Owners Manual - Page 13
Instructions WHAT YOU WILL NEED (CONT.) • A water supply kit (containing tubing, shutoff valve and fittings listed below) is available at extra cost from your dealer or from Parts fitting. Do not cut formed end from approved plastic refrigerator tubing. 3 DRILL THE HOLE FOR THE VALVE Drill - Hotpoint HTS16BBS | Owners Manual - Page 14
Installation Instructions 1 INSTALLING THE WATER LINE (CONT.) 4 FASTEN THE SHUTOFF VALVE 8 feet [244 cm] coiled into 3 turns of about 10 ″ [25 cm] diameter) to allow the refrigerator to move out from the wall after installation. 7 CONNECT THE TUBING TO THE VALVE Place the compression nut and - Hotpoint HTS16BBS | Owners Manual - Page 15
Installation Instructions 9 CONNECT THE TUBING TO THE REFRIGERATOR NOTES: • Before making the connection to the refrigerator, be sure the refrigerator power cord is not plugged into the wall outlet. • We recommend installing a water filter if your water supply has sand or particles that could clog - Hotpoint HTS16BBS | Owners Manual - Page 16
REVERSING THE DOOR SWING IMPORTANT NOTES When reversing the door swing: • Read the instructions all the way through before starting. • Handle parts carefully to avoid scratching paint. • Set screws down by their related parts to avoid using them in the wrong places. • Provide a non-scratching work - Hotpoint HTS16BBS | Owners Manual - Page 17
Installation Instructions 1 BEFORE YOU START 1.1 Unplug the refrigerator from its electrical outlet. 2 REMOVE THE FREEZER DOOR (CONT.) 2.2 With a 5/16″ hex-head socket driver, remove the screws that hold the top hinge to the - Hotpoint HTS16BBS | Owners Manual - Page 18
Installation Instructions 2 REVERSING THE DOOR SWING (CONT.) 2 REMOVE THE FREEZER DOOR (CONT.) 2.6 Transfer the 2 screws from the opposite side of the cabinet to the screw holes vacated - Hotpoint HTS16BBS | Owners Manual - Page 19
Installation Instructions 4 REVERSING THE HARDWARE 4.1 Remove the base grille (if your refrigerator has one) by pulling it straight out. 5 REVERSING THE DOOR HANDLES 5.1 Transfer fresh food door handle 5.1.1 Remove the bottom cap by pushing it toward the - Hotpoint HTS16BBS | Owners Manual - Page 20
Installation Instructions 2 REVERSING THE DOOR SWING (CONT.) 5 REVERSING THE DOOR HANDLES (CONT.) 5.1 Transfer fresh food door handle (cont.) 5.1.4 With tape-tipped putty knife or thinblade screwdriver, pry - Hotpoint HTS16BBS | Owners Manual - Page 21
Installation Instructions 5.4 Transfer Freezer Door Handle 5.4.1 Remove the screw holding the handle to the top of the door and the two screws holding the handle to the - Hotpoint HTS16BBS | Owners Manual - Page 22
Installation Instructions 2 REVERSING THE DOOR SWING (CONT.) 6 REHANGING THE DOORS 6.1 is brought into position, slide the hinge under the head of the screw which earlier had been partly driven into the outermost hole. Insert the remaining screw, then tighten both screws securely. 6.2.3 Make - Hotpoint HTS16BBS | Owners Manual - Page 23
Safety Instructions Operating Instructions Installation Instructions Troubleshooting Tips Consumer Support Normal operating sounds. Newer refrigerators sound different from older refrigerators. Modern refrigerators have more features and use newer technology. www.Hotpoint.com Do you hear what I - Hotpoint HTS16BBS | Owners Manual - Page 24
Instructions Operating Instructions Safety Instructions Before you call for service... Troubleshooting Tips Save time and money! Review the charts on the following pages first and you may not need to call for service. Problem Refrigerator see if package is holding door open. Consumer Support 24 - Hotpoint HTS16BBS | Owners Manual - Page 25
Safety Instructions Operating Instructions Installation Instructions Troubleshooting Tips Consumer Support www.Hotpoint.com Problem valve. Water shutoff valve connecting •Call the plumber to clear the valve. refrigerator to water line may be clogged. Door left open. Temperature control dial not - Hotpoint HTS16BBS | Owners Manual - Page 26
Notes. 26 Consumer Support Troubleshooting Tips Installation Instructions Operating Instructions Safety Instructions - Hotpoint HTS16BBS | Owners Manual - Page 27
Safety Instructions Operating Instructions Installation Instructions Troubleshooting Tips Consumer Support Notes. 27 - Hotpoint HTS16BBS | Owners Manual - Page 28
Notes. 28 Consumer Support Troubleshooting Tips Installation Instructions Operating Instructions Safety Instructions - Hotpoint HTS16BBS | Owners Manual - Page 29
We'll Cover Any Appliance. Anywhere. Anytime.* You will be completely satisfied with our service protection or you may request your money back on the remaining value of your contract. No questions asked. It's that simple. Protect your refrigerator, dishwasher, washer and dryer, range, TV, VCR and - Hotpoint HTS16BBS | Owners Manual - Page 30
in a safe place. It contains information you will need should you require service. Our service number in the USA is: 800 GE CARES (800.432.2737). 3 Read your Owner's Manual carefully. It will help you operate your new appliance properly. Model Number Serial Number Important: If you did not get - Hotpoint HTS16BBS | Owners Manual - Page 31
Instructions Troubleshooting Tips Consumer Support Refrigerator Warranty. (For customers in the United States) All warranty service provided by our Factory Service Center, or an authorized Customer Care® technician. To schedule service, on-line, 24 hours a day, visit us at www.Hotpoint - Hotpoint HTS16BBS | Owners Manual - Page 32
www.Hotpoint.com Individuals qualified to service their own appliances can have parts or accessories sent directly to their homes (VISA, MasterCard and Discover cards are accepted). Order on-line today, 24 hours every day or by phone at 800.626.2002 during normal business hours. Instructions
-
 1
1 -
 2
2 -
 3
3 -
 4
4 -
 5
5 -
 6
6 -
 7
7 -
8
-
9
-
10
-
11
-
12
-
13
-
14
-
15
-
16
-
17
-
18
-
19
-
20
-
21
-
22
-
23
-
24
-
25
-
26
-
27
-
28
-
29
-
30
-
31
-
32
 |
 |

Refrigerators
Top-Freezer
162D6736P010
39-60454
01-06 JR
Safety Information
Connecting Electricity . . . . . . . . . . 3
Extension Cords . . . . . . . . . . . . . . . 2
Safety Precautions . . . . . . . . . . . . . . 2
Operating Instructions
Automatic Icemaker
. . . . . . . . . . . .8
Care and Cleaning . . . . . . . . . . 9, 10
Shelves
. . . . . . . . . . . . . . . . . . . . .5, 6
Storage Drawers . . . . . . . . . . . . . .6, 7
Temperature Controls . . . . . . . . . . .4
Installation Instructions
Preparing to Install
the Refrigerator
. . . . . . . . . . . . . . 11
Reversing the Door Swing . . . 16–22
Water Line Installation . . . . . . 12–16
Troubleshooting Tips
Before You Call
For Service . . . . . . . . . . . . . . . .24, 25
Normal Operating Sounds . . . . . .23
Consumer Support
Consumer Support . . . . Back Cover
Product Registration . . . . . . . . 29, 30
Warranty . . . . . . . . . . . . . . . . . . . . 31
www.Hotpoint.com
Write the model and serial numbers here:
Model #__________________________
Serial # __________________________
You can find them on a label on the upper
left side of the fresh food compartment.
Models
16, 17, 18
Owner’s Manual and
Installation Instructions