IBM 8852 Service Guide
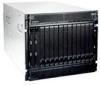
IBM 8852 - BladeCenter H Rack-mountable Manual
 |
UPC - 883436027069
View all IBM 8852 manuals
Add to My Manuals
Save this manual to your list of manuals |
IBM 8852 manual content summary:
- IBM 8852 | Service Guide - Page 1
BladeCenter H Type 8852, 7989, and 1886 Problem Determination and Service Guide - IBM 8852 | Service Guide - Page 2
- IBM 8852 | Service Guide - Page 3
BladeCenter H Type 8852, 7989, and 1886 Problem Determination and Service Guide - IBM 8852 | Service Guide - Page 4
this information and the product it supports, read: the general information in Appendix B, "Notices," on page 63; the IBM Warranty Information document; and the IBM Safety Information and IBM Systems and Environmental Notices and User Guide documents on the IBM Documentation CD. Seventh Edition - IBM 8852 | Service Guide - Page 5
14 Management module problems 14 Media tray problems 15 Monitor or video problems 16 Power problems 16 Light path diagnostic LEDs 17 BladeCenter system LED panel 17 Module LEDs 18 Event log messages 19 Solving undetermined problems 20 Calling IBM for service 21 Chapter 3. Parts listing 23 - IBM 8852 | Service Guide - Page 6
Russia Electromagnetic Interference (EMI) Class A statement 69 People's Republic of China Class A electronic emission statement 69 Taiwan Class A compliance statement . . . . 69 Index 71 iv BladeCenter H Type 8852, 7989, and 1886: Problem Determination and Service Guide - IBM 8852 | Service Guide - Page 7
este produto, leia as Informações sobre Segurança. Antes de instalar este producto, lea la información de seguridad. Läs säkerhetsinformationen innan du installerar den här produkten. © Copyright IBM Corp. 2010 v - IBM 8852 | Service Guide - Page 8
live electrical current. v Regularly inspect and maintain your electrical hand tools for safe operational condition. Do not use worn or broken tools or testers. vi BladeCenter H Type 8852, 7989, and 1886: Problem Determination and Service Guide - IBM 8852 | Service Guide - Page 9
To ensure proper grounding of components such as power supplies, pumps, blowers, fans, and motor generators, do not service these components outside of their normal operating locations. information that comes with the server or optional device before you install the device. Statement 1: Safety vii - IBM 8852 | Service Guide - Page 10
. 4. Attach power cords to outlet. 5. Turn device ON. To Disconnect: 1. Turn everything OFF. 2. First, remove power cords from outlet. 3. Remove signal cables from connectors. 4. Remove all cables from devices. viii BladeCenter H Type 8852, 7989, and 1886: Problem Determination and Service Guide - IBM 8852 | Service Guide - Page 11
IBM Part Number 33F8354 or an equivalent type battery recommended by the manufacturer. If your system has a module containing a lithium battery, replace it only with the same module in exposure to hazardous laser radiation. There are no serviceable parts inside the device. v Use of controls or - IBM 8852 | Service Guide - Page 12
current supplied to the device. The device also might have more than one power cord. To remove all electrical current from the device, ensure that all power cords are disconnected from the power source. 2 / 3 1 / 4 x BladeCenter H Type 8852, 7989, and 1886: Problem Determination and Service Guide - IBM 8852 | Service Guide - Page 13
Never remove the cover on a power supply or any part that has the following label attached. Hazardous voltage, current, and energy levels are present inside any component that has this label attached. There are no serviceable parts inside these components. If you suspect a problem with one of these - IBM 8852 | Service Guide - Page 14
installing the blade. United Kingdom - Notice to Customers: This apparatus is approved under approval number NS/G/1234/J/100003 for indirect connection to public telecommunication systems in the United Kingdom. xii BladeCenter H Type 8852, 7989, and 1886: Problem Determination and Service Guide - IBM 8852 | Service Guide - Page 15
This Problem Determination and Service Guide contains information to help you solve problems that might occur in your IBM® BladeCenter® Type 8852, 7989, and 1886 unit. It describes the diagnostic tools that come with the BladeCenter unit, error codes and suggested actions, and instructions for - IBM 8852 | Service Guide - Page 16
information that is not included in the BladeCenter unit documentation. These updates are available from the IBM Web site. To check for updated documentation and technical updates, go to http://www.ibm.com/support/. 2 BladeCenter H Type 8852, 7989, and 1886: Problem Determination and Service Guide - IBM 8852 | Service Guide - Page 17
in the multilingual Safety Information document, which is on the IBM Documentation CD. Each statement is numbered for reference to the problem situations. v Attention: These notices indicate potential damage to programs, devices, or data. An attention notice is placed just before the instruction - IBM 8852 | Service Guide - Page 18
Weight: - Full configured weight with blade servers: Approximately 158.8 kg (350 lbs) - Empty chassis without modules or blade servers: Approximately 40.82 kg (90 lbs) Environment: v Air temperature: - BladeCenter . 4 BladeCenter H Type 8852, 7989, and 1886: Problem Determination and Service Guide - IBM 8852 | Service Guide - Page 19
on the front of the BladeCenter unit. Power module 1 Power module bay 3 Blade server control panel Media tray Front system LED panel System service cards Optical drive activity LED Optical drive eject button USB connectors Power module 2 Power modules The following illustration shows the - IBM 8852 | Service Guide - Page 20
must disconnect all power cords from all power modules. - Location: When this blue LED is lit or flashing, it has been turned on by the system administrator, to aid in visually locating the BladeCenter unit. If a blade server requires attention, the location LED on the blade server usually will also - IBM 8852 | Service Guide - Page 21
these connectors to attach external USB devices. System service cards These cards contain system service instructions and a writable area. They slide in and out of the storage location on the left side of the BladeCenter unit. Blade server control panel This panel contains indicators and controls - IBM 8852 | Service Guide - Page 22
supports this cable. Rear system LED panel The LEDs on this panel provide status information. These LEDs duplicate the LEDs in the front system LED panel (see "Front system LED panel" on page 6 for more information). 8 BladeCenter H Type 8852, 7989, and 1886: Problem Determination and Service Guide - IBM 8852 | Service Guide - Page 23
blade servers and disconnecting the BladeCenter unit from the power source. To disconnect power from the BladeCenter unit, complete the following steps: 1. Shut down the operating systems and turn off any blade servers. See the documentation that comes with the blade server for detailed instructions - IBM 8852 | Service Guide - Page 24
10 BladeCenter H Type 8852, 7989, and 1886: Problem Determination and Service Guide - IBM 8852 | Service Guide - Page 25
tables These tables list problem symptoms and actions to correct the problems. See "Troubleshooting tables" on page 12 for more information. v Light path diagnostic LEDs Use the light path diagnostic LEDs on the BladeCenter unit and the BladeCenter components to identify system errors quickly. See - IBM 8852 | Service Guide - Page 26
unit to determine whether the BladeCenter unit is working correctly. 3. Reinstall the new device. Blade server problems v Follow the suggested actions in the order in which they are listed in the Action column until the problem is solved. v See Chapter 3, "Parts listing," on page 23 to determine - IBM 8852 | Service Guide - Page 27
If the unit is equipped with 2980W power modules, reseat or replace the power module. I/O module problems v Follow the suggested actions in the order in which they are listed in the Action column until the problem is solved. v See Chapter 3, "Parts listing," on page 23 to determine which components - IBM 8852 | Service Guide - Page 28
the media tray. v The KVM is owned by a blade server that supports KVM. Management module problems v Follow the suggested actions in the order in which they are listed in the Action column until the problem is solved. v See Chapter 3, "Parts listing," on page 23 to determine which components are - IBM 8852 | Service Guide - Page 29
see the BladeCenter Advanced Management Module Installation Guide for more information). 4. Replace the management module. Media tray problems v Follow the suggested actions in the order in which they are listed in the Action column until the problem is solved. v See Chapter 3, "Parts listing," on - IBM 8852 | Service Guide - Page 30
might have installed more options than the power modules support. You might have to install power modules in power-module bays 3 and 4. 3. If the problem remains, go to "Solving undetermined problems" on page 20. 16 BladeCenter H Type 8852, 7989, and 1886: Problem Determination and Service Guide - IBM 8852 | Service Guide - Page 31
for such as nonredundancy on the messages. power modules or a system error in a blade server. 2. Check the LEDs on the BladeCenter unit and the blade servers to isolate the component. v If the error LED is on a module, follow the instructions for that LED in "Module LEDs" on page 18. v If the - IBM 8852 | Service Guide - Page 32
pack has failed. Replace the fan pack Power module: Error LED lit The power module has failed. Replace the power module. Blower module: Error LED lit The blower module has failed. Replace the blower module. 18 BladeCenter H Type 8852, 7989, and 1886: Problem Determination and Service Guide - IBM 8852 | Service Guide - Page 33
the management module is monitoring the BladeCenter unit or by the BIST program during startup are displayed in the management module event log. Each message includes a severity level (error [E], warning [W], or information [I]), a source (such as, management module [SERVPROC] or blade server number - IBM 8852 | Service Guide - Page 34
contains more than one blade server and only one of the blade servers has the problem, troubleshoot the blade server that has the problem. v If all of the blade servers have the same symptom, it is probably a BladeCenter unit or module problem. Check the LEDs on all the power modules. If the LEDs - IBM 8852 | Service Guide - Page 35
(print the screen with the system summary information) v BIOS code level v Operating-system type and version level You can solve some problems by comparing the configuration and software setups between working and nonworking systems. When you compare systems to each other for diagnostic purposes - IBM 8852 | Service Guide - Page 36
22 BladeCenter H Type 8852, 7989, and 1886: Problem Determination and Service Guide - IBM 8852 | Service Guide - Page 37
of warranty service that is designated for your server. v Field replaceable unit (FRU): FRUs must be installed only by trained service technicians. For information about the terms of the warranty and getting service and assistance, see the Warranty and Support Information document. © Copyright IBM - IBM 8852 | Service Guide - Page 38
model 4Yx) Ultrabay Slim CD-RW/DVD-ROM combo drive CRU part number (Tier 1) 31R3300 31R3304 43V7099 39M3545 39M3501 43W4619 43W4607 43W4609 42C0967 CRU part number (Tier 2) 39Y7364 39Y7415 FRU part number 31R3308 24 BladeCenter H Type 8852, 7989, and 1886: Problem Determination and Service Guide - IBM 8852 | Service Guide - Page 39
by logging on to the Advanced Management Module and checking the chassis hardware data. See the Advanced Management Module User's Guide or the Advanced Management Module Command-Line Interface Reference Guide for more information about viewing BladeCenter hardware data. Chapter 3. Parts listing 25 - IBM 8852 | Service Guide - Page 40
Nexus 4001i switch module CRU part number (Tier 1) 60Y0621 25R9934 44E5083 68Y8205 31R3307 31R3311 40K9608 CRU part number (Tier 2) 43X0510 44R8302 49Y9976 46M6072 FRU part number 31R3308 25R5780 44X2302 31R3331 26 BladeCenter H Type 8852, 7989, and 1886: Problem Determination and Service Guide - IBM 8852 | Service Guide - Page 41
Management Module Command-Line Interface Reference Guide for more information about viewing BladeCenter hardware data. 2 For a list of supported options for the BladeCenter, see the ServerProven® list at http://www.ibm.com/servers/eserver/serverproven/compat/us/. Chapter 3. Parts listing 27 - IBM 8852 | Service Guide - Page 42
C20 Used in these countries Worldwide Canada, Japan, Mexico, United States of America Korea Worldwide except: Australia, Canada, Japan, Korea, Mexico, New Zealand, United States of America Australia, New Zealand 28 BladeCenter H Type 8852, 7989, and 1886: Problem Determination and Service Guide - IBM 8852 | Service Guide - Page 43
and other parts in a safe place. v You do not have to disconnect the BladeCenter unit from power to install or replace any of the hot-swap modules in the BladeCenter unit. You must to shut down the operating system and turn off a hot-swap blade server before you remove the blade server, but you - IBM 8852 | Service Guide - Page 44
on. v For a list of supported options for the BladeCenter unit, see http://www.ibm.com/servers/eserver/serverproven/compat/us/. System reliability guidelines To help ensure proper system cooling and system reliability, make sure that the following requirements are met: v Each of the module bays on - IBM 8852 | Service Guide - Page 45
tray and power modules, you must first remove the top or bottom bezels to access the devices. To remove either bezel, complete the following steps. Release buttons Release buttons 1. Press the blue release button on each end of the bezel. 2. Pull the bezel away from the BladeCenter unit. Chapter - IBM 8852 | Service Guide - Page 46
buttons 1. Align the blue tabs on the ends of the bezel with the corresponding holes in the front of the BladeCenter unit. 2. Firmly press the bezel into the BladeCenter unit until the tabs lock it into place. 32 BladeCenter H Type 8852, 7989, and 1886: Problem Determination and Service Guide - IBM 8852 | Service Guide - Page 47
Advanced Management Module User's Guide or the Advanced Management Module Command-Line Interface Reference Guide for more information about viewing BladeCenter hardware data. Notes: 1. If your BladeCenter Media Module information is version v4 or later, it is compatible only with chassis hardware - IBM 8852 | Service Guide - Page 48
: These instructions assume that the BladeCenter unit is connected to power. 1. BladeCenter unit until the release tabs lock it into place. 5. Install the top and bottom bezels (see "Installing a bezel" on page 32). 34 BladeCenter H Type 8852, 7989, and 1886: Problem Determination and Service Guide - IBM 8852 | Service Guide - Page 49
within the same power domain of the chassis. A power module configuration is supported only if the two power modules are matched within the same power domain: v Power modules 1 and 2 provide power for domain A (blade slots 1 to 7) v Power modules 3 and 4 provide power for domain B (blade slots 8 to - IBM 8852 | Service Guide - Page 50
one of these parts, contact a service technician. To remove a power module or power-module filler, complete the following steps. 3rd power module Handle (open) Handle (open) 4th power module 36 BladeCenter H Type 8852, 7989, and 1886: Problem Determination and Service Guide Power-module filler - IBM 8852 | Service Guide - Page 51
power module or power-module filler, complete the following steps. 3rd power module Handle (open) Power-module filler Handle (open) 4th power module Attention: Failed power modules should only be replaced with the same type of power module. Note: These instructions assume that the BladeCenter - IBM 8852 | Service Guide - Page 52
be facing up. 4. Slide the module into the bay until it stops; then, push the handle to the closed position. 5. Install the bezel that was removed during the removal procedure (see "Installing a bezel" on page 32). 38 BladeCenter H Type 8852, 7989, and 1886: Problem Determination and Service Guide - IBM 8852 | Service Guide - Page 53
The procedures in this section apply only to BladeCenter units equipped with 2900W power modules that have a removable fan pack (part number 39Y7408). If your BladeCenter is equipped with 2980W high-efficiency power modules with integrated fan pack (part number 39Y7415), you must replace the entire - IBM 8852 | Service Guide - Page 54
the fan pack into position on the power module until it stops and locks into place. 3. Rotate the power module handle to the open position. 4. Install the power module (see "Installing a power module" on page 37). 40 BladeCenter H Type 8852, 7989, and 1886: Problem Determination and Service Guide - IBM 8852 | Service Guide - Page 55
have unintended consequences. Some configuration information and update options are established according to bay number. To remove a blade server, complete the following steps. Release handles (open) Note: These instructions assume that the BladeCenter unit is connected to power. 1. Read the safety - IBM 8852 | Service Guide - Page 56
filler installed in each blade bay. 3. Make sure that the two release handles are in the open position. 4. Slide the blade server into the bay until it stops. 5. Push the two release handles to the closed position. 42 BladeCenter H Type 8852, 7989, and 1886: Problem Determination and Service Guide - IBM 8852 | Service Guide - Page 57
6. Make sure that the blade server is receiving power. See the documentation that comes with the blade server for more instructions. 7. (Optional) Write identifying information on one of the labels that come with the blade server; then, place the label on the BladeCenter unit top bezel, just above - IBM 8852 | Service Guide - Page 58
either another module or a filler into the module bay. 5. If you are instructed to return the I/O module, follow all packaging instructions, and use any packaging materials for shipping that are supplied to you. 44 BladeCenter H Type 8852, 7989, and 1886: Problem Determination and Service Guide - IBM 8852 | Service Guide - Page 59
or filler, complete the following steps. Single module filler Double module filler I/O module I/O module Release handle (open) Module filler Release handles (open) Note: These instructions assume that the BladeCenter unit is connected to power. 1. Make sure that the release handle or handles - IBM 8852 | Service Guide - Page 60
another management module or a filler into the bay. 5. If you are instructed to return the management module, follow all packaging instructions, and use any packaging materials for shipping that are supplied to you. 46 BladeCenter H Type 8852, 7989, and 1886: Problem Determination and Service Guide - IBM 8852 | Service Guide - Page 61
file that you saved when you removed the old management module. See the BladeCenter Management Module User's Guide and the BladeCenter Management Module Command-Line Interface Reference Guide for detailed information about restoring a saved configuration file. 6. Make sure that the OK LED on the - IBM 8852 | Service Guide - Page 62
1 minute, install another blower module into the bay. 4. If you are instructed to return the blower module, follow all packaging instructions, and use any packaging materials for shipping that are supplied to you. 48 BladeCenter H Type 8852, 7989, and 1886: Problem Determination and Service Guide - IBM 8852 | Service Guide - Page 63
steps. Handle (open) Release button Note: These instructions assume that the BladeCenter unit is connected to power. 1. Make sure that the handle on the blower module is in the open position. 2. Orient the blower module to the selected blower-module bay: v For the upper bay, the handle must - IBM 8852 | Service Guide - Page 64
modules (see "Removing a management module" on page 46). v Blower modules (see "Removing a blower module" on page 48). 6. Remove the two shipping screws from each side of the chassis, if they are installed. 50 BladeCenter H Type 8852, 7989, and 1886: Problem Determination and Service Guide - IBM 8852 | Service Guide - Page 65
the following components from the BladeCenter midplane using the procedure indicated: v Blade servers: Pull the two release handles on each blade server to the open position (see "Removing a blade server" on page 41). v Power modules: Pull the handle on each power module to the open position (see - IBM 8852 | Service Guide - Page 66
the BladeCenter unit: v I/O modules (see "Removing an I/O module" on page 44). v Management modules (see "Installing a management module" on page 47). v Blower modules (see "Installing a blower module" on page 49). 52 BladeCenter H Type 8852, 7989, and 1886: Problem Determination and Service Guide - IBM 8852 | Service Guide - Page 67
unit. 13. Reconnect the power to the BladeCenter unit (see "Supplying power to the BladeCenter unit" on page 9). 14. Restart any blade servers that were shut down in the BladeCenter unit. See the documentation that comes with each blade server for detailed instructions. Chapter 4. Removing and - IBM 8852 | Service Guide - Page 68
. 2. Shut down the operating systems and turn off any blade servers in the BladeCenter unit. See the documentation that comes with the blade server for detailed instructions. 3. Disconnect the power from the BladeCenter unit (see "Disconnecting power from the BladeCenter unit" on page 9). 4. Remove - IBM 8852 | Service Guide - Page 69
page 52). 6. Reconnect the power to the BladeCenter unit (see "Supplying power to the BladeCenter unit" on page 9). 7. Restart any blade servers that were shut down in the BladeCenter unit. See the documentation that comes with the blade server for detailed instructions. Removing and replacing the - IBM 8852 | Service Guide - Page 70
. 2. Shut down the operating systems and turn off any blade servers in the BladeCenter unit. See the documentation that comes with the blade server for detailed instructions. 3. Disconnect the power from the BladeCenter unit (see "Disconnecting power from the BladeCenter unit" on page 9). 4. Remove - IBM 8852 | Service Guide - Page 71
instructed to return the midplane, follow all packaging instructions , and use any packaging materials for shipping that are supplied to you. Installing the midplane To install the midplane, complete the following steps. Upper AC cable bracket Guide pins Screws (15) Guide guide guide - IBM 8852 | Service Guide - Page 72
(see "Supplying power to the BladeCenter unit" on page 9). 10. Restart any blade servers that were shut down in the BladeCenter unit. See the documentation that comes with the blade server for detailed instructions. 58 BladeCenter H Type 8852, 7989, and 1886: Problem Determination and Service Guide - IBM 8852 | Service Guide - Page 73
module. See the BladeCenter Management Module User's Guide and the BladeCenter Management Module Command-Line Interface Reference Guide for information and instructions. Some devices in the BladeCenter unit, such as I/O modules and blade servers, might also require additional configuration - IBM 8852 | Service Guide - Page 74
link to each switch. These links are for internal management and control only. No data packets are allowed to flow from application programs on the blade servers to the management module over this path. 60 BladeCenter H Type 8852, 7989, and 1886: Problem Determination and Service Guide - IBM 8852 | Service Guide - Page 75
v Use the troubleshooting information in your system documentation, and use the diagnostic tools that come with your system. Information about diagnostic tools is in the Problem Determination and Service Guide on the IBM Documentation CD that comes with your system. v Go to the IBM support Web site - IBM 8852 | Service Guide - Page 76
find service information for IBM systems and optional devices at http://www.ibm.com/systems/support/. Software service and support Through IBM Support Line, you can get telephone assistance, for a fee, with usage, configuration, and software problems with System x and xSeries servers, BladeCenter - IBM 8852 | Service Guide - Page 77
verify the operation of any non-IBM product, program, or service. IBM may have patents or pending patent disclaimer of express or implied warranties in certain transactions, therefore, this not part of the materials for this IBM product, and use of those websites is at your own risk. IBM may use - IBM 8852 | Service Guide - Page 78
and services that are ServerProven®, including but not limited to the implied warranties of merchantability and fitness for a particular purpose. These products are offered and warranted solely by third parties. 64 BladeCenter H Type 8852, 7989, and 1886: Problem Determination and Service Guide - IBM 8852 | Service Guide - Page 79
makes no representations or warranties with respect to non-IBM products. Support (if any) for the non-IBM products is provided by the third party, not IBM. Some software might differ from its retail version (if available) and might not include user manuals or all program functionality. Particulate - IBM 8852 | Service Guide - Page 80
publication part number and title. When you send information to IBM, you grant IBM in accordance with the instruction manual, may cause harmful interference undesired operation. Industry Canada Class A emission compliance BladeCenter H Type 8852, 7989, and 1886: Problem Determination and Service Guide - IBM 8852 | Service Guide - Page 81
responsibility for any failure to satisfy the protection requirements resulting from a nonrecommended modification of the product, including the fitting of non-IBM option cards. Attention: This is an EN 55022 Class A product. In a domestic environment this product may cause radio interference in - IBM 8852 | Service Guide - Page 82
EU ist: IBM Deutschland Technical Regulations, Department M456 IBM-Allee 1, 71137 Ehningen, Germany Telephone: +49 7032 15-2937 E-mail: [email protected] Generelle Informationen for equipment certified for home use. 68 BladeCenter H Type 8852, 7989, and 1886: Problem Determination and Service Guide - IBM 8852 | Service Guide - Page 83
Russia Electromagnetic Interference (EMI) Class A statement People's Republic of China Class A electronic emission statement Taiwan Class A compliance statement Appendix B. Notices 69 - IBM 8852 | Service Guide - Page 84
70 BladeCenter H Type 8852, 7989, and 1886: Problem Determination and Service Guide - IBM 8852 | Service Guide - Page 85
66 features and specifications 4 firmware, updating 59 front system panel LEDs 6 G gaseous contamination 65 getting help 61 H hardware problems 11 hardware service and support 62 heat output 4 help, getting 61 I I/O module configuring 59 installing 45 problems 13 removing 44 IBM Support Line 62 - IBM 8852 | Service Guide - Page 86
65 parts listing 23 replaceable components 23 parts listing 23 pointing device problems 14 power problems 16 power module error LEDs 18 installing 37 LEDs 5 removing 36 Removing and replacing 35 power-on LED system LED panel 6 problem determination tips 21 problems blade server 12 blower module 12 - IBM 8852 | Service Guide - Page 87
- IBM 8852 | Service Guide - Page 88
Part Number: 81Y1107 Printed in USA (1P) P/N: 81Y1107
-
 1
1 -
 2
2 -
 3
3 -
 4
4 -
 5
5 -
 6
6 -
 7
7 -
8
-
9
-
10
-
11
-
12
-
13
-
14
-
15
-
16
-
17
-
18
-
19
-
20
-
21
-
22
-
23
-
24
-
25
-
26
-
27
-
28
-
29
-
30
-
31
-
32
-
33
-
34
-
35
-
36
-
37
-
38
-
39
-
40
-
41
-
42
-
43
-
44
-
45
-
46
-
47
-
48
-
49
-
50
-
51
-
52
-
53
-
54
-
55
-
56
-
57
-
58
-
59
-
60
-
61
-
62
-
63
-
64
-
65
-
66
-
67
-
68
-
69
-
70
-
71
-
72
-
73
-
74
-
75
-
76
-
77
-
78
-
79
-
80
-
81
-
82
-
83
-
84
-
85
-
86
-
87
-
88
 |
 |

BladeCenter H Type 8852, 7989, and 1886
Problem Determination and Service Guide
±²³