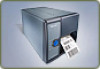
Intermec PD41 EasyCoder PD41/PD42 Internal Rewinder Installation Instructions
Intermec PD41 Manual
 |
View all Intermec PD41 manuals
Add to My Manuals
Save this manual to your list of manuals |
Intermec PD41 manual content summary:
- Intermec PD41 | EasyCoder PD41/PD42 Internal Rewinder Installation Instructions - Page 1
Installation Instructions These instructions tell you how to install the Internal Rewinder in an EasyCoder PD41/PD42 printer. Use the internal rewinder to operate the printer in peel-off mode or batch takeup mode. The kit includes the following: Rewinder module with liner Liner retention guide - Intermec PD41 | EasyCoder PD41/PD42 Internal Rewinder Installation Instructions - Page 2
To install the internal rewinder 1 Open the side door of the printer. 2 Remove the two screws that hold the rewinder option cover plate in place. Keep the screws. Cover plate 3 Remove the liner retention clip from the rewinder unit. 4 Attach the rewinder unit to the printer using two of the screws - Intermec PD41 | EasyCoder PD41/PD42 Internal Rewinder Installation Instructions - Page 3
Operation In batch takeup operation, labels are wound up on the internal rewinder instead of being peeled off at the tear bar. To be able to use the internal rewinder for batch takeup, you need to also install the liner retention guide. To install the liner retention guide 1 Remove the thumbscrew to - Intermec PD41 | EasyCoder PD41/PD42 Internal Rewinder Installation Instructions - Page 4
PD42 Printer User's Guide (P/N 934-009xxx). Worldwide Headquarters 6001 36th Avenue West Everett, Washington 98203 U.S.A. tel 425.348.2600 fax 425.355.9551 www.intermec.com © 2007 Intermec Technologies Corporation. All rights reserved. EasyCoder PD41/PD42 Internal Rewinder Installation Instructions
-
 1
1 -
 2
2 -
 3
3 -
 4
4
 |
 |

EasyCoder
®
PD41/PD42
Internal Rewinder Installation Instructions
These instructions tell you how to install the Internal Rewinder in an
EasyCoder PD41/PD42 printer. Use the internal rewinder to operate the
printer in peel-off mode or batch takeup mode. The kit includes the
following:
Required Tools
To install the interface board in your printer, you need:
•
Screwdriver, Phillips
Installing the Internal Rewinder
Before you begin installation, please acknowledge the following important
safety note:
Take precautions against electrostatic discharge, for
example, by wearing grounded wrist straps.
Rewinder module with liner
retention clip
Liner retention guide
Four screws (M3x4.5)