JVC GZMG40US Instructions
JVC GZMG40US - Everio Camcorder - 1.33 MP Manual
 |
UPC - 046838021794
View all JVC GZMG40US manuals
Add to My Manuals
Save this manual to your list of manuals |
JVC GZMG40US manual content summary:
- JVC GZMG40US | Instructions - Page 1
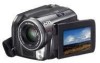
HARD DISK CAMCORDER GZ-MG50U GZ-MG40U GZ-MG30U GZ-MG20U GETTING STARTED ENGLISH 7 VIDEO RECORDING & PLAYBACK 22 28 STILL IMAGE RECORDING & PLAYBACK 31 ADVANCED OPERATIONS MENU SETTINGS 48 REFERENCES 52 INSTRUCTIONS To deactivate the demonstration, set "DEMO MODE" to "OFF". (੬ pg. 48) For - JVC GZMG40US | Instructions - Page 2
transfer of video and still images to a computer. With the bundled image editing software, you can easily edit video and create your own DVDs. (Refer to "Read this first!" and the software installation and USB connection guide.) Direct Printing If your printer is compatible with PictBridge, still - JVC GZMG40US | Instructions - Page 3
Exposure Control 31 LED Light 31 Manual Settings in MSET Menu 32 How to Select a Menu Item 32 Manual Exposure 32 Manual Focus 33 White Balance 34 Shutter 51 Still Image Playback Menus 51 REFERENCES 52 Troubleshooting 52 Warning Indications 54 Cleaning the Camera 56 Cautions 57 Specifications 60 - JVC GZMG40US | Instructions - Page 4
SERVICEABLE PARTS INSIDE. REFER SERVICING TO QUALIFIED SERVICE servicing) instructions Use the JVC BN-VF707U battery pack and on the battery pack mount. ● The rating information batteries, environmental problems must be considered and the local rules or laws governing the disposal of these batteries - JVC GZMG40US | Instructions - Page 5
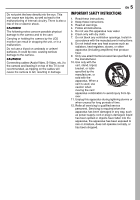
EN 5 IMPORTANT SAFETY INSTRUCTIONS 1. Read these instructions. 2. Keep these instructions. 3. Heed all warnings. 4. Follow all instructions. 5. Do not use for long periods of time. 12. Refer all servicing to qualified service personnel. Servicing is required when the apparatus has been damaged in - JVC GZMG40US | Instructions - Page 6
other digital video formats Refer to the software installation and USB connection guide. Important notes problem occurs with the SD Memory Card, bring the card together with the camera. When requesting repairs for breakdowns by your dealer or JVC service instruction manual are trademarks and - JVC GZMG40US | Instructions - Page 7
BN-VF707U c Audio/Video Cable d USB Cable (Refer to the software installation and USB connection guide.) e Shoulder Strap (See page 8 for attachment) f Lens Cap (See page 8 for attachment) g CD-ROM h Remote Control Unit RM-V730U i Lithium Battery CR 2025* (for remote control unit) j Core Filter for - JVC GZMG40US | Instructions - Page 8
strap through the eyelet. 3 Fold it back and thread it through the strap guide and the buckle. ● To adjust the length of the strap, loosen and then tighten the strap in the buckle. 4 Slide the strap guide fully towards the eyelet. 5 Close the velcro strip. Attaching the Lens Cap - JVC GZMG40US | Instructions - Page 9
GETTING STARTED Attaching the Core Filter Attach the core filters to the cables. The core filter reduces interference. 1 Release the stoppers on both ends of the core filter. GETTING STARTED EN 9 LCD Monitor Pull on the end of the LCD monitor and open the LCD monitor fully. It can rotate 270°. - JVC GZMG40US | Instructions - Page 10
10 EN GETTING STARTED Index ATTENTION: ● Be careful not to cover b, c, d, and e during shooting. ● Be careful not to cover Y during playback. - JVC GZMG40US | Instructions - Page 11
USB (Universal Serial Bus) Connector (Refer to the software installation and USB connection guide.) T DC Input Connector [DC] (੬ pg. battery pack/AC adapter while accessing to files during recording or playback.) Other Parts W Reset Hole [RESET] (੬ pg. 52) X LCD Monitor Y Speaker (੬ pg. 24) a Battery - JVC GZMG40US | Instructions - Page 12
pg. 22) h Digital Image Stabilizer (DIS) Indicator (੬ pg. 50) During Still Image Recording only FINE PHOTO a Mode Indicator (੬ pg. 17) b Focus Icon (੬ pg. 28) c Image Size: 1152 (1152 x 864)*, 1024 (1024 x 768)*, 640 (640 x 480) (੬ pg. 51) * Not available for GZ-MG30U/GZ-MG20U. d Picture Quality - JVC GZMG40US | Instructions - Page 13
Search 9U : Forward Slow-Motion Y9 : Reverse Slow-Motion (The number on the left shows speed.) e Counter (੬ pg. 49) f Volume Level Indicator g Battery Indicator (੬ pg. 54) h Date (੬ pg. 49) i Selected Medium Indicator (੬ pg. 21, 49) j Effect Mode Indicator (੬ pg. 37) k Wipe/Fader Effect Indicator - JVC GZMG40US | Instructions - Page 14
2-way power supply system lets you choose the most appropriate source of power. Do not use provided power supply units with other equipment. Charging the Battery Pack Power/Charge Lamp Power Switch Lock Button To DC connector Open the cover. AC Adapter To AC outlet 1 Set the power switch to OFF - JVC GZMG40US | Instructions - Page 15
operate only with JVC Data Battery. Use the JVC BNVF707U/VF714U/VF733U battery packs. Using generic non-JVC batteries can cause damage -ventilated areas. ● Using the optional AA-VF7 battery charger, you can charge the BN-VF707U/VF714U/VF733U battery pack without the camera. ● After 5 minutes has - JVC GZMG40US | Instructions - Page 16
status even though you tried to press INFO/ several times, there may be a problem with your battery. In such a case, consult your nearest JVC dealer. ● The recordable time display should only be used as a guide. It is displayed in 10 minute units. Using AC Power Perform step 4 in "Charging the - JVC GZMG40US | Instructions - Page 17
mode is selected, the indicator appears on the LCD monitor. Auto mode: You can record using no special effects or manual adjustments. Manual mode: Manual recording is possible by setting various functions. (੬ pg. 31 - 37) Set the appropriate operation mode according to your preference using the - JVC GZMG40US | Instructions - Page 18
. When this occurs, first connect the camera to an AC outlet using the AC adapter for over 24 hours to charge the clock's rechargeable lithium battery. Then perform the date/time setting before using the camera. Note that the camera can be used without setting the date/time. - JVC GZMG40US | Instructions - Page 19
GETTING STARTED EN 19 GETTING STARTED Brightness Adjustment of the Display The brightness of the display can be adjusted. 1 Set the power switch to or while pressing down the lock button located on the switch. 2 Open the LCD monitor fully. (੬ pg. 9) 3 Press MENU. The menu screen appears. 4 Press / - JVC GZMG40US | Instructions - Page 20
as turning off the power) during format. Also, be sure to use the provided AC adapter, as the recording medium may be corrupted if the battery becomes exhausted during format. If the recording medium becomes corrupted, format it again. NOTE: Do not format the recording medium on the PC. Make sure - JVC GZMG40US | Instructions - Page 21
Selecting a Recording Medium Select the recording medium before starting recording or playback. (੬ pg. 48, 49) Example: When recording still images to an SD card 1 Set the power switch to or . 2 Press MENU. The menu screen appears. 3 Press / to select [REC MEDIA SETTING], DIS CAMERA SETTING - JVC GZMG40US | Instructions - Page 22
/stop button again. NOTES: ● If the camera is left without any operation during recording or playback (video or still image) for 5 minutes when using the battery pack, the camera is turned off automatically to conserve power. To turn the camera on again, set the power switch to OFF, then to or - JVC GZMG40US | Instructions - Page 23
use the YTU94146A S-Video cable. Consult the JVC Service Center described on the sheet included in the using the manual focus (੬ pg. 33), then zoom in or out during recording. ● During digital zoom, the (੬ pg. 50) * For GZ-MG30U/GZ-MG20U optical zoom can go up to 25x, digital zoom - up to 800x, and - JVC GZMG40US | Instructions - Page 24
/ 1 Set the power switch to . 2 Set the MODE switch to . ● The index screen for videos appears. The image on the index screen shows the first part of the shooting. ● If the power is turned off while video playback is paused, the camera memorizes the scene where the video was stopped. In - JVC GZMG40US | Instructions - Page 25
How to Use the Scroll Bar You can use the vertical scroll bar on the index screen to find the desired files quickly. The scroll bar is useful when deleting files (੬ pg. 39), creating play list (੬ pg. 42), etc. 1 Slide the zoom lever Scroll bar towards W to select the VIDEO 7/53 scroll bar - JVC GZMG40US | Instructions - Page 26
TV input, referring to your VCR/VDR's instruction manual. 4 Turn on the camera, the Video cable. Consult the JVC Service Center described on the sheet the power supply instead of the battery pack. (੬ pg. 16) ● PC, refer to the software installation and USB connection guide. To choose whether or not - JVC GZMG40US | Instructions - Page 27
pause, fast-forward and rewind) of your VCR. Installing the Battery VIDEO RECORDING & PLAYBACK The remote control uses one lithium battery 2 (CR2025). 1 Pull out the battery 1 holder by pushing the lock 1 tab. Lock tab 2 Insert the battery in the holder, and be sure to have the "+" mark - JVC GZMG40US | Instructions - Page 28
28 EN STILL IMAGE RECORDING & PLAYBACK Still Image Recording Power Switch Zooming Use the zoom function for close-up or wideangle shooting. For details, see page 23. Continuous Shooting Lock Button Zoom Lever MODE Recording Start/Stop Button 1 Set the power switch to . 2 Set the MODE switch to - JVC GZMG40US | Instructions - Page 29
STILL IMAGE RECORDING & PLAYBACK EN 29 Still Image Playback Power Switch Lock Button MODE Zoom Lever 49 INFO/ Slide Show You can playback all the images stored in recording media automatically. 1 Set the power switch to . 2 Set the MODE switch to . ● A still image is displayed. ● To switch the - JVC GZMG40US | Instructions - Page 30
30 EN STILL IMAGE RECORDING & PLAYBACK How to Use the Scroll Bar Playback Zoom You can use the vertical scroll bar on the index screen to find the desired files quickly. The scroll bar is useful when deleting files (੬ pg. 39), setting DPOF (੬ pg. 46), etc. 1 Slide the zoom lever Scroll bar - JVC GZMG40US | Instructions - Page 31
RECORDING FEATURES EN 31 Backlight Compensation / Backlight compensation brightens the subject quickly. With simple operation, dark portions of the subject are brightened by increasing the exposure. 1 Set the power switch to . 2 Press and hold ( / ) so that is displayed. 3 Press ( ) once so that - JVC GZMG40US | Instructions - Page 32
, then press 49. There are 6 items in the AUTO AUTO AUTO AUTO OFF OFF AE AF WB S.SP P.AE EF MSET menu. AE: Manual Exposure (੬ pg. 32) AF: Manual Focus (੬ pg. 33) WB: White Balance (੬ pg. 34) S.SP: Shutter Speed (੬ pg. 35) P.AE: Program AE (੬ pg. 36) EF: Effect (੬ pg. 36) Step - JVC GZMG40US | Instructions - Page 33
ability from close-up to infinity. However, the correct focus may not be obtained depending on the shooting condition. In this case, use the manual focus mode. 1 Select [AF] in the MSET menu. (੬ pg. 32) 2 If [AUTO] is selected, press , then press 49. 3 Press to focus on a nearer subject - JVC GZMG40US | Instructions - Page 34
white balance manually depending on the light source. ੬ "Manual White Balance Adjustment white balance Select [AUTO] in step 2. Manual White Balance Adjustment 1 Select [MWB] in WB such a case, adjust with manual focusing. (੬ pg. 33) manually, the setting is retained even if the power is - JVC GZMG40US | Instructions - Page 35
RECORDING FEATURES EN 35 Shutter Speed You can set the shutter speed manually. A fast shutter speed can freeze the motion of a fastmoving subject and a slow shutter speed can blur the subject to give the impression of motion. 1 Select [S. - JVC GZMG40US | Instructions - Page 36
36 EN RECORDING FEATURES Program AE You can use the program AE settings for specific shooting situations. 1 Select [P.AE] in the MSET menu. (੬ pg. 32) 2 Press / to select the desired mode. TWILIGHT: Makes evening scenes look more natural. SPOTLIGHT: The subject in the front is accentuated by - JVC GZMG40US | Instructions - Page 37
PLAYBACK FEATURES EN 37 ADVANCED OPERATIONS Wipe or Fader Effects Playback Effects / You can view videos with various effects of scene transition. 1 Set the power switch to . 2 Set the MODE switch to . 3 Press MENU. The menu screen appears. 4 Press / to select [WIPE/FADER], then press 49. 5 - JVC GZMG40US | Instructions - Page 38
38 EN MANAGING FILES Viewing File Information / You can view the file information in playback mode. Information on Video Files Press INFO/ while video playback is paused. File information appears. FILE: File name FOLDER: Folder name DATE/TIME: Date and time of the recording PB TIME: Playback - JVC GZMG40US | Instructions - Page 39
off the power) during protection. Also, be sure to use the provided AC adapter, as the recording medium may be corrupted if the battery becomes exhausted during protection. If the recording medium becomes corrupted, format it. (੬ pg. 20) MANAGING FILES EN 39 Deleting Files / You can delete - JVC GZMG40US | Instructions - Page 40
off the power) during deletion. Also, be sure to use the provided AC adapter, as the recording medium may be corrupted if the battery becomes exhausted during deletion. If the recording medium becomes corrupted, format it. (੬ pg. 20) Cleaning Up a Recording Medium / Writing speed of recording - JVC GZMG40US | Instructions - Page 41
Copying/Moving Still Image Files You can copy or move still image files between the built-in hard disk (HDD) and SD card using the on-screen display. Before proceeding to following steps, ● Make sure that SD card is inserted in the SD slot. ● Make sure that enough free space is left in the copy/move - JVC GZMG40US | Instructions - Page 42
42 EN MANAGING FILES Resetting the File Number / By resetting the file number (name), a new folder will be made. The new files you are going to make will be stored in the new folder. It is convenient to separate the new files from previously recorded files. 1 Set the power switch to or . 2 Press - JVC GZMG40US | Instructions - Page 43
To check the play list by playing back the video You can check the play list before saving it. 1 After step 10, press to select a thumbnail image of the play list. 2 Press / to select a scene you want to check. 3 Press 49. The playback of the play list starts from the selected scene. ● The playback - JVC GZMG40US | Instructions - Page 44
44 EN MANAGING FILES Add/Delete Files in Play List Changing Play List Name You can edit existing play lists by adding or deleting files. 1 Set the power switch to . 2 Set the MODE switch to . 3 Press MENU. The menu screen appears. 4 Press / to select [PLAY LIST], then press 49. 5 Press / to - JVC GZMG40US | Instructions - Page 45
, press / to select [CANCEL], then press 49. 11 While the black screen is displayed for 5 seconds, start recording on the VCR. (Refer to your VCR's instruction manual.) 12 To stop dubbing, stop recording on the VCR while the black screen is displayed for 5 seconds. ADVANCED OPERATIONS - JVC GZMG40US | Instructions - Page 46
46 EN MANAGING FILES DPOF Print Setting This camera is compatible with DPOF (Digital Print Order Format). You can set which images to be printed and the number of prints with this camera. This feature is useful to print - JVC GZMG40US | Instructions - Page 47
Direct Printing with a PictBridge Printer If your printer is compatible with PictBridge, still images can be printed easily by connecting the camera with the USB cable directly to the printer. DPOF setting can also be used. (੬ pg. 46) NOTE: After selecting [DIRECT PRINT] in the menu, connect the - JVC GZMG40US | Instructions - Page 48
guide, press INFO/ when the menu screen is displayed. (The operation guide is not displayed depending on the type of the menu.) To remove the operation guide resume. NOTES: ● Demonstration only works with DC cord connected, not with battery. ● If an SD card is in the camera, demonstration will not - JVC GZMG40US | Instructions - Page 49
MENU SETTINGS EN 49 REMOTE OFF: Makes the camera not to receive the signal from the remote control. [ON]: Enables the operation with the remote control. DROP DETECTION OFF: Disables the function. [ON]: Turns off the power automatically to prevent HDD damage when the camera is accidentally dropped. - JVC GZMG40US | Instructions - Page 50
mode, refer to your wide-screen TV's instruction manual. During playback/recording on 4:3 TVs, black bands may be inserted at the top and bottom of the screen. NOTES: ● The 16:9 WIDE mode cannot be used when using ECONOMY mode. ● Use software that supports wide display when playing videos that were - JVC GZMG40US | Instructions - Page 51
STANDARD Select the desired image quality. IMAGE SIZE* [1152 x 864] / 1024 x 768 / 640 x 480 Select the desired image size. * Not available for GZ-MG30U/GZ-MG20U. SELF-TIMER [OFF] / 2SEC / 10SEC By setting the self-timer, a still image is recorded 2 or 10 seconds after pressing recording start/ stop - JVC GZMG40US | Instructions - Page 52
cannot be used together are selected at the same time. Digital zoom does not work. ● [ZOOM] is set to [15X]* (optical zoom). HSet [ZOOM] to [60X] or [700X]*. (੬ pg. 50) ● Digital zoom is not available in the still image recording mode. * For GZ-MG30U/GZ-MG20U optical zoom can go up to 25x, and [ZOOM - JVC GZMG40US | Instructions - Page 53
does not adjust automatically. ● Focus is set to the manual mode. HSet focus to the automatic mode. (੬ pg. conditions. (੬ pg. 28) Other problems The power/charge lamp on the in places subject to extremely high/low temperatures. HTo protect the battery, it is recommended to charge it in places with a - JVC GZMG40US | Instructions - Page 54
fluorescent light reaches the end of its service life, images on the LCD monitor become dark. HConsult your nearest JVC dealer. Colored bright spots appear all over set. (੬ pg. 18) ● Appears when the built-in clock (lithium) battery is discharged and the previously set date/time is erased. (੬ pg. 18) - JVC GZMG40US | Instructions - Page 55
to the SD slot for file copy/move operation. (੬ pg. 41) NO SUPPORTED FILES Appears when there is no JPEG (still image) files to be copied ) FILE SYSTEM MAY HAVE PROBLEM. FORMAT IS RECOMMENDED AFTER COPYING WANTED DATA. The file system of the recording medium may have a problem. It is recommended to - JVC GZMG40US | Instructions - Page 56
) Cleaning the Camera Before cleaning, turn off the camera and remove the battery pack and AC adapter. To clean the exterior Wipe gently with a soft such as benzine or alcohol. ● Cleaning should be done only after the battery pack has been removed or other power units have been disconnected. ● Mold - JVC GZMG40US | Instructions - Page 57
. Extended exposure to high temperatures will increase natural discharge and shorten service life. ... fully charge and then fully discharge the battery every 6 months when storing the battery pack over a long period time. ... remove from charger or powered unit when not in use, as some machines use - JVC GZMG40US | Instructions - Page 58
Do not touch the metal parts. ● Copy the recorded files to your PC. JVC shall not be responsible with LCD monitor on the bottom. ● To prolong service life ... avoid rubbing it with coarse cloth. ● the unit. ... short-circuit the terminals of the battery pack. Keep it away from metallic objects when - JVC GZMG40US | Instructions - Page 59
its power supply unit (battery pack, AC adapter, etc.) and wait a few minutes and then re-connect it and proceed as usual from the beginning. Declaration of Conformity Model Number : GZ-MG50U GZ-MG40U GZ-MG30U GZ-MG20U Trade Name : JVC Responsible party : JVC AMERICAS CORP. Address - JVC GZMG40US | Instructions - Page 60
) Approx. 380 g (0.84 lbs) (incl. battery, lens cap and strap) Operating temperature 0°C to 40°C (32°F to 104°F) Operating humidity 35% to 80% Storage temperature -20°C to 50°C (-4°F to 122°F) Pickup GZ-MG50U/GZ-MG40U: 1/4.5" (1,330,000 pixels) CCD GZ-MG30U/GZ-MG20U: 1/6" (680,000 pixels) CCD Lens - JVC GZMG40US | Instructions - Page 61
Playback format Video: MPEG-2 Audio: Dolby Digital (2 ch) Signal format NTSC standard GZ-MG30U/GZ-MG20U: Only 1 mode (640 x 480) Picture quality 2 modes (FINE/STANDARD) AC Adapter Power requirement AC 110 V to 240 Vd, 50 Hz/60 Hz Output DC 11 V , 1 A Remote Control Power supply DC 3 V Battery - JVC GZMG40US | Instructions - Page 62
been recorded. ● MultiMediaCards are not supported. ● For video recording, use a high-speed SD memory card (at least 10 MB/s). : Approximate recording time (for video) (The numbers indicate "minutes".) ● Built-in hard disk Quality GZ-MG50U GZ-MG40U GZ-MG30U GZ-MG20U ULTRA FINE 430 290 FINE - JVC GZMG40US | Instructions - Page 63
: Approximate number of storable images (for still image) ● Built-in hard disk Image size/ GZ-MG50U GZ-MG40U quality GZ-MG30U GZ-MG20U 640 x 480/ FINE 9999 9999 640 x 480/ STANDARD 9999 9999 1024 x 768/ FINE* 9999 9999 1024 x 768/ STANDARD* 9999 9999 1152 x 864/ FINE* 9999 9999 - JVC GZMG40US | Instructions - Page 64
Battery 16 Date Index Screen 25, 30 Date/Time Settings 18 Deleting Files 39 Demonstration Mode 48 Digital Image Stabilizer (DIS 50 Direct Printing 47 DPOF Print Setting (Digital LED Light 31 M Manual Exposure 32, 33 Manual Focus 33 MSET Menu Tripod Mounting 19 Troubleshooting 52 W Warning
-
 1
1 -
 2
2 -
 3
3 -
 4
4 -
 5
5 -
 6
6 -
 7
7 -
8
-
9
-
10
-
11
-
12
-
13
-
14
-
15
-
16
-
17
-
18
-
19
-
20
-
21
-
22
-
23
-
24
-
25
-
26
-
27
-
28
-
29
-
30
-
31
-
32
-
33
-
34
-
35
-
36
-
37
-
38
-
39
-
40
-
41
-
42
-
43
-
44
-
45
-
46
-
47
-
48
-
49
-
50
-
51
-
52
-
53
-
54
-
55
-
56
-
57
-
58
-
59
-
60
-
61
-
62
-
63
-
64
 |
 |
GZ-MG50U
GZ-MG40U
GZ-MG30U
GZ-MG20U
LYT1468-001C
EN
ENGLISH
HARD DISK CAMCORDER
GETTING STARTED
7
VIDEO RECORDING &
PLAYBACK
22
MENU SETTINGS
48
52
To deactivate the demonstration,
set “DEMO MODE” to “OFF”.
(
±
pg. 48)
For Customer Use:
Enter below the Model No.
(located on the bottom of the
camera) and Serial No. (located
on the battery pack mount of the
camera). Retain this information
for future reference.
Model No.
Serial No.
REFERENCES
INSTRUCTIONS
STILL IMAGE RECORDING
& PLAYBACK
28
ADVANCED OPERATIONS
31