JVC HX-C6 Instructions
JVC HX-C6 - Twin GIGA Tube Audio System Manual
 |
UPC - 046838017148
View all JVC HX-C6 manuals
Add to My Manuals
Save this manual to your list of manuals |
JVC HX-C6 manual content summary:
- JVC HX-C6 | Instructions - Page 1
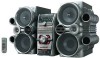
COMPACT COMPONENT SYSTEM HX-C6-Consists of CA-HXC6 and SP-HXC6 SP-HXC6 CA-HXC6 SP-HXC6 INSTRUCTIONS For Customer Use: Enter below the Model No. and Serial No. which are located either on the rear, bottom or side of the cabinet. Retain - JVC HX-C6 | Instructions - Page 2
void the user's authority to operate the equipment. For the main unit: Declaration of Conformity Model Number: HX-C6 Trade Name: JVC Responsible Party: JVC Americas Corp. Address: 1700 Valley Road, Wayne New Jersey 07470 Telephone Number: 973-317-5000 This device complies with Part 15 of - JVC HX-C6 | Instructions - Page 3
to the grounding system of the building, as close to the point of cable entry as practical. IMPORTANT FOR LASER PRODUCTS 1 CLASS 1 LASER PRODUCT 2 CAUTION: Do not open the top cover. There are no user serviceable parts inside the Unit; leave all servicing to qualified service personnel. 3 CAUTION - JVC HX-C6 | Instructions - Page 4
since there are no user serviceable parts inside. • If you are not going to operate the System for an extended period of time, unplug the AC power cord from the wall outlet. If anything goes wrong, unplug the AC power cord and consult your dealer. How to Read This Manual To make the explanations - JVC HX-C6 | Instructions - Page 5
Contents Introduction 1 Precautions 1 How to Read This Manual 1 Getting Started 3 Step 1: Unpack 3 Step 2: Prepare the Remote Control 3 Step 3: Hook Up 4 Before Operating the System 6 Parts Index 6 Daily Operations-Playback 8 Listening to the Radio 9 Playing Back a Disc 10 Playing Back - JVC HX-C6 | Instructions - Page 6
Control Insert the batteries into the remote control by matching the polarity (+ and -) correctly. 1 2 R6(SUM-3)/AA(15F) Step 3: Hook up the components such as AM/FM antennas, the speakers, etc. 3 Finally plug the AC power cord. Now you can operate this System. 3 • DO NOT use an old battery - JVC HX-C6 | Instructions - Page 7
the input/output terminals below are typical examples. When you connect other components, refer also to their manuals since the terminal names actually printed on the rear vary among the components. Turn the power off to all components before connections. To assemble the AM loop antenna FM antenna - JVC HX-C6 | Instructions - Page 8
cords and power cord. Also, keep the antennas away from metallic parts of the System, connecting cords, and the AC power cord. This could cause the audio output on the other equipment is not stereo mini plug type, use a plug adapter to convert the stereo mini plug to the corresponding plug of the - JVC HX-C6 | Instructions - Page 9
Before Operating the System Parts Index Refer to the pages to see how to use the buttons and controls. Remote control 14, 18 18 9, 11, 15 14, 8, 13 9, 14, 19 10, 16 14 8, 13 13 8 - 10, 12 16 14 Main unit Remote sensor 8, 10 8, 19 Standby lamp 10, 14, 16, 17 10 10, 17 10 8, 13 14 9 13, 21 8 7 - JVC HX-C6 | Instructions - Page 10
operating the System. Before operating the System, be Total playing time • Each indicator shows the status of a disc placed mode is activated. e FM reception indicators • ST: lights while an FM stereo station with sufficient signal strength is tuned in. • MONO: lights when monaural reception mode - JVC HX-C6 | Instructions - Page 11
-Playback In this manual, the operation using the remote control is mainly explained; however, you can use the buttons and controls on the main unit if they have the same (or similar) name and marks. 10 keys (1-10,+10) 7 4/1 ¡/¢ 3 REPEAT PROGRAM DISC 1- 5 1 FM MODE/ MP3 3 SET 2 ¥ Turn on the - JVC HX-C6 | Instructions - Page 12
search stops. To stop searching manually, press either button. If the received FM station is hard to listen Remote ONLY The MONO indicator lights on the display. Reception will improve though stereo effect is lost-monaural reception mode. To restore the stereo effect, press the button again - JVC HX-C6 | Instructions - Page 13
System can play back the following discs-regular CD and CD-R/RW (recorded in the audio CD format and in the ISO 9660 format for MP3 files). To pause playback Remote When you load an MP3 disc, you can select playback mode. See "To select MP3 playback mode" on page 11. To start: To stop: REPEAT - JVC HX-C6 | Instructions - Page 14
in the selected group The first track of the selected group starts playing. To select MP3 playback mode Remote ONLY Before playback or while playing an MP3 disc... TRACK ALBUM TRACK mode ALBUM mode The System recognizes only tracks (files). You can play an MP3 disc like an Audio CD. The - JVC HX-C6 | Instructions - Page 15
installed automatically, install the USB drivers following the instructions on the PC's monitor. 5 Check if Turn on the System and select USB for the source. AUX USB * The installed drivers can be shown only when the System is connected to the PC. To play back sounds on the PC Refer to the manuals - JVC HX-C6 | Instructions - Page 16
level can be adjusted in 32 steps (VOL MIN, VOL 1 - VOL 30, and VOL MAX). Remote control: Main unit: CANCEL 4 RHYTHM AX SOUND MODE FADE MUTING Main unit VOLUME +/- SET ¢ DISPLAY SUBWOOFER LEVEL +/- BEEP Remote To drop the volume in a moment ONLY To restore the volume, press the button again, or - JVC HX-C6 | Instructions - Page 17
can select one of the preset Sound Modes. Remote control: ROCK POP OFF CLASSIC (Canceled) Main unit: ROCK POP OFF CLASSIC (Canceled) Turning On or Off the Key-Touch Tone Remote control: BEEP BEEP ON BEEP OFF Main unit: 2 sec. BEEP ON BEEP OFF ROCK POP CLASSIC Boosts low and high frequency - JVC HX-C6 | Instructions - Page 18
REPEAT PROGRAM DISC 1 - 5 Main unit 7 0 SET 7 CD 3/8 RANDOM Programming the Playing Order Remote ONLY -Program Play You can arrange the playing order of the tracks (up to 32 tracks) before you you have programmed. • When all the programmed tracks played, the System exits from Program Play. 15 - JVC HX-C6 | Instructions - Page 19
it, press the button The System exits from again. Program Play. To skip: Playing at Random-Random Play Remote ONLY You can play the contents of the current disc at random. Before playback or while playing... RANDOM RANDOM Canceled RANDOM indicator Remote To check the programmed contents - JVC HX-C6 | Instructions - Page 20
ONLY You can prohibit disc ejection from the System and lock discs. • This operation is possible only when the source is the CD player. While the disc tray is closed... 1 Push up and hold 0 for any disc tray while holding 7. REPEAT * See page 10. Repeat mode indicators Ex.: When One Disc Repeat - JVC HX-C6 | Instructions - Page 21
Control SLEEP CLOCK /TIMER CANCEL 4 Main unit STANDBY/ON Timer Operations STANDBY/ON Turning Off the Power Automatically Remote ONLY With Sleep Timer, you can fall asleep to music. While the System is turned on... SLEEP 10 SLEEP 20 SLEEP 30 SLEEP 60 OFF SLEEP 120 SLEEP 90 SET (Canceled - JVC HX-C6 | Instructions - Page 22
DAILY indicator are lit on the display. Daily Timer is activated at the same time everyday until the timer is turned off manually (see the next column). When the on-time comes The System turns on, tunes in to the specified station or start playing the specified source, and sets the volume level to - JVC HX-C6 | Instructions - Page 23
level is reset to "VOL 15" next time you turn on the System. Adjusting the Sound: • This function also affects the sound through the headphones. • The subwoofer lamp(s) indicates the current subwoofer level-1 or 2. (If the level is "0," the lamp(s) turns off.) Selecting the Sound Modes: • The sound - JVC HX-C6 | Instructions - Page 24
NOT allow any rubber or plastic to remain in contact with it for a long time. Troubleshooting If you are having a problem with your System, check this list for a possible solution before calling for service. General: Adjustments or settings are suddenly canceled before you finish. ] There is a time - JVC HX-C6 | Instructions - Page 25
CA-HXC6 Max. Bit rate: 320 kbps Speaker section-SP-HXC6 Type: 4-Way Front Twin Woofer Speaker Systems: Subwoofer: Woofer: Mid range: Tweeter: (on standby; with power saving off-Normal mode) 1.2 W (on standby; with power saving on-Eco mode) Dimensions (W/H/D) (approx.): Mass (approx.): 175 - JVC HX-C6 | Instructions - Page 26
- JVC HX-C6 | Instructions - Page 27
- JVC HX-C6 | Instructions - Page 28
EN © 2005 Victor Company of Japan, Limited 0305TMMMDWSAM HX-C6 COMPACT COMPONENT SYSTEM
-
 1
1 -
 2
2 -
 3
3 -
 4
4 -
 5
5 -
 6
6 -
 7
7 -
8
-
9
-
10
-
11
-
12
-
13
-
14
-
15
-
16
-
17
-
18
-
19
-
20
-
21
-
22
-
23
-
24
-
25
-
26
-
27
-
28
 |
 |
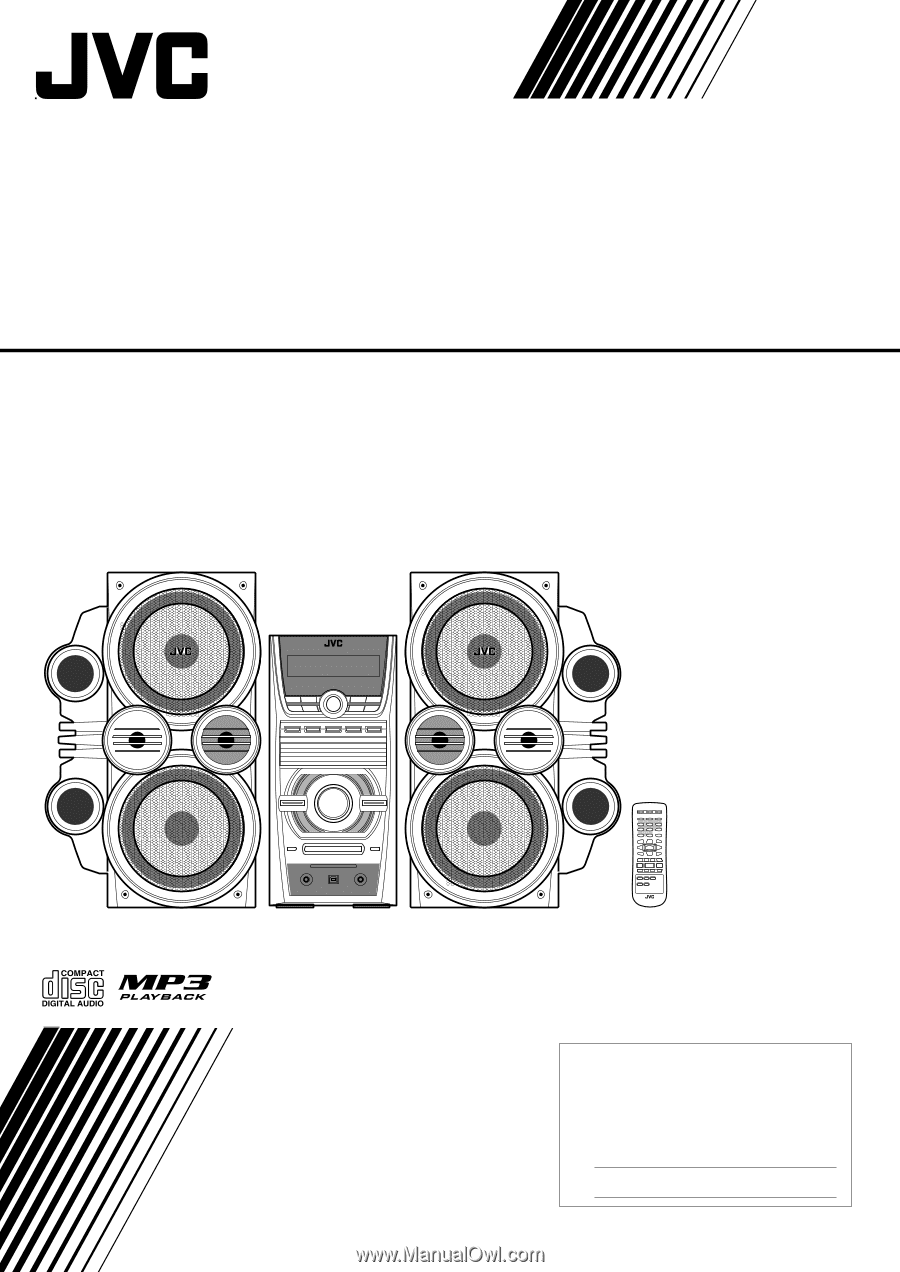
COMPACT COMPONENT SYSTEM
HX-C6
—Consists of CA-HXC6 and SP-HXC6
INSTRUCTIONS
For Customer Use:
Enter below the Model No. and Serial
No. which are located either on the rear,
bottom or side of the cabinet. Retain this
information for future reference.
Model No.
Serial No.
LVT1350-001B
[J]
CA-HXC6
SP-HXC6
SP-HXC6