JVC RX-DP15B Instructions
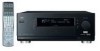
JVC RX-DP15B - AV Receiver Manual
 |
UPC - 046838010927
View all JVC RX-DP15B manuals
Add to My Manuals
Save this manual to your list of manuals |
JVC RX-DP15B manual content summary:
- JVC RX-DP15B | Instructions - Page 1
English Français AUDIO/VIDEO CONTROL RECEIVER RECEPTEUR DE COMMANDE AUDIO/VIDEO RX-DP15B INSTRUCTIONS MANUEL D'INSTRUCTIONS LVT1216-002A [C] - JVC RX-DP15B | Instructions - Page 2
user to the presence of important operating and maintenance (servicing) instructions in the literature accompanying the appliance. WARNING: TO any position does not disconnect the mains line. The power can be remote controlled. Attention--Commutateur (STANDBY/ON)! Déconnecter la fiche de secteur pour - JVC RX-DP15B | Instructions - Page 3
and used in accordance with the instructions, may cause harmful interference to receiver is connected. Consult the dealer or an experienced radio/TV technician for help. For Canada/pour le Canada the point of cable entry as practical. For the remote control: This device complies with Part 15 of the - JVC RX-DP15B | Instructions - Page 4
the RX-DP15B, and use them to listen to different sources in different rooms (Zone 1 and Zone 2) at the same time. COMPU LINK/TEXT COMPU LINK/AV COMPU LINK remote control systems These COMPU LINK remote control systems allow you to operate other JVC audio/video components from this receiver. Power - JVC RX-DP15B | Instructions - Page 5
Setting the Bass Sounds-SUBWOOFER 40 5 Setting the THX Audio-THX AUDIO SETUP 41 6 Setting the Surround Channel Output Speakers -SURR CH OUT 42 7 Setting the the Remote Signals Manually 78 Troubleshooting 81 Specifications 83 Indicates the functions YOU CAN ALSO USE when the receiver is - JVC RX-DP15B | Instructions - Page 6
/ MEMORY EXIT / FM MODE i o ;a s df g STANDBY STANDBY/ ON CC CONVERTER ZONE 1 ON/OFF ZONE 2 ON/OFF RX-DP15 SPEAKERS 1 INPUT MODE / INPUT ATT SPEAKER 2 / ZONE 2 ZONE 2 CONTROL THX EX/ES/7.1 SURROUND DSP SURR/DSP OFF ANALOG DIRECT ADJUST MENU DOWN / TUNING ∞ SETUP MENU LEFT / PRESET - JVC RX-DP15B | Instructions - Page 7
31) h DOOR DOWN button (20) j PHONES jack (25) k Remote sensor l ZONE 2 ON/OFF button and lamp (21, 29, 30) THX/DSP mode indicators • Indicate the current Surround/THX/DSP mode setting. 6 TUNED indicator (33) • Lights up when a station is received Indicate the incoming channel signals. @ - JVC RX-DP15B | Instructions - Page 8
RF REMOTE ANTENNA terminal and BAND 1/2 selector (17) 8 FM/AM ANTENNA terminals (7, 8) 9 COMPU LINK-4 (SYNCHRO) terminals (61, 63) p AV for systematic operation between this receiver and the connected component ( IR IN terminal • This terminal is only for service use. t AC power cord (18) y - JVC RX-DP15B | Instructions - Page 9
CHANNEL MUTING VOLUME SETUP MENU TEXT DISPLAY DVD MENU SET LIGHT ADJUST MENU EXIT RM-SRXDP20J REMOTE CONTROL A/V CONTROL RECEIVER i o ; a s d f g h j k l / Remote , 71) 8 TEST button (39, 71) 9 CC CONVERTER button (27, 71) p THX button (57, 71) q SURROUND button (56, 57, 71) w EX/ES/7.1 button - JVC RX-DP15B | Instructions - Page 10
all components. • Read the manuals supplied with the components you are going to connect. Location • Install the receiver in a location that is items, which are supplied for the receiver. The number in parentheses indicates the quantity of each piece supplied. • Remote Control (1) • Batteries (2) • - JVC RX-DP15B | Instructions - Page 11
and environmental background-effect sounds. • One or one pair of surround back speakers to enjoy 6.1-channel or 7.1-channel sound reproduction. A pair of the speakers is required to use THX Ultra2 Cinema and THX Music modes. • One center speaker to produce a rich sound image by stabilizing the sound - JVC RX-DP15B | Instructions - Page 12
speakers 1 Right / Left Center speaker IMPORTANT: After connecting the speakers, set the speaker setting information properly: • To obtain the best possible Surround/THX/DSP effect in Zone 1, see "Basic Settings" on pages 35 to 44. • To connect the speakers to the FRONT 2/ZONE 2 SPEAKERS terminals - JVC RX-DP15B | Instructions - Page 13
the multi- room operations (see page 19). • To connect the front speakers in Zone 1 and to drive them using two amplifiers built in this receiver. If the speakers connected are of the bi-wiring connection type, you can connect the speakers as illustrated below. (You can use either front speaker - JVC RX-DP15B | Instructions - Page 14
, refer also to the manuals supplied with them. Analog a graphic equalizer between the source components and this receiver, the sound output through this receiver may be distorted. CD player CD player To LINK remote control system. • See page 63 for detailed information about the connection - JVC RX-DP15B | Instructions - Page 15
Å To left/right front channel output ı To LFE channel (subwoofer) output Ç To left/right surround back channel output Î To left/right surround channel output ‰ To center channel output Note: If the external component connected to the EXT 7.1CH IN jacks and this receiver are not connected using video - JVC RX-DP15B | Instructions - Page 16
English Rear view VCR(s) AB D-VHS/S-VHS/VHS VCR CDEF G AUDIO RIGHT R L R L LEFT VIDEO TV SOUND DBS IN OUT (REC) VCR 1 IN (PLAY) OUT (REC) VCR 2 IN (PLAY) FRONT DVD IN VIDEO S-VIDEO Y COMPONENT Y PB PB 1 IN 2 (DVD) IN PR PR Y Green PB 3 IN Blue PR Red 13 AUDIO RIGHT LEFT - JVC RX-DP15B | Instructions - Page 17
English Rear view TV and/or DBS tuner AUDIO RIGHT LEFT VIDEO R TV SOUND DBS IN L OUT (REC) VCR 1 VIDEO S-VIDEO Y COMPONENT Y PB PB 1 IN 2 (DVD) IN When connecting the TV to the AUDIO jacks (TV SOUND/DBS IN), DO NOT connect the TV's video output to these video input jacks. IN ( - JVC RX-DP15B | Instructions - Page 18
English DVD player • When you connect the DVD player with stereo output jacks: Rear view Å To front left/right channel audio output (or to audiomixed output if necessary) ı To composite video output Ç To S-video output Î To component video output VIDEO S-VIDEO Y COMPONENT Y PB PB 1 IN 2 ( - JVC RX-DP15B | Instructions - Page 19
English Digital Connections This receiver is equipped with six DIGITAL IN terminals-three digital see page 11). • When you want to operate the VCR, TV or DVD player using the AV COMPU LINK remote control system, connect the target component also as described in "Analog Connections" (see pages 13 - JVC RX-DP15B | Instructions - Page 20
at the remote sensor on the receiver. To set up the RF rod antenna 1 2 RF RANETMEONNTAE RF RANETMEONNTAE BAND1 BAND2 BAND1 BAND2 If the problem still persists, stop using the RF rod antenna and the remote control, and consult your JVC dealer or the nearest JVC Service Center. Setting - JVC RX-DP15B | Instructions - Page 21
receiver and attach the transmitter. Target component(s) At an angle of approx. 60° Less than 3 m (10 feet) COMPU AV : The preset settings such as preset channels and sound adjustment may be erased in the remote control directly at the remote sensor on the receiver, you can operate the receiver at - JVC RX-DP15B | Instructions - Page 22
, see the respective pages in this manual. Required Connections for Zone 2 1. Turn on and select the correct input for this receiver. Left front speaker Connection Å Connect the input jacks 60) for the Zone 1 source. • When the Surround/THX/DSP modes using the surround back speakers or when "EXT - JVC RX-DP15B | Instructions - Page 23
22. From the remote control: 1. Set ZONE 1/ZONE 2 (LEARN/ TRANSMIT) selector to "ZONE 1." Now the buttons and controls on the remote control work for last Zone 1 source is activated. ANALOG L R SUBWFR The last Surround/THX/DSP mode appears. SPEAKERS 1 VOLUME dB The volume level appears. 2. - JVC RX-DP15B | Instructions - Page 24
MASTER VOLUME control will not work for adjusting the volume level of the sound through the ZONE2 PREOUT jacks. From the remote control: When operating the receiver using the remote control, the display on the unit always shows the Zone 1 source information though you are operating it for the Zone - JVC RX-DP15B | Instructions - Page 25
. To turn the power off completely, unplug the AC power cord. From the remote control: To turn on the power, press AUDIO (ON). The STANDBY lamp on next time you turn on the receiver. The last Zone 1 source is activated. ANALOG L R SUBWFR The last Surround/THX/DSP mode appears. SPEAKERS 1 - JVC RX-DP15B | Instructions - Page 26
analog discrete output mode (5.1- channel reproduction). To use the DVD remote control marked with an asterisk (*), the receiver automatically turns on. If you turn on the receiver SMALL" and when the speaker is required for the Surround/ THX/DSP mode currently selected. • When "SUBWOOFER" is set - JVC RX-DP15B | Instructions - Page 27
THX/DSP modes, check the speaker and signal indicators on the display carefully and set the speakers correctly. L CR SUBWFR LFE LS RS SB Ex. No sound comes out of the center speaker and surround back speakers though center channel and surround back channel signals are coming into this receiver - JVC RX-DP15B | Instructions - Page 28
MULTI" or "EXT 7.1CH" as the source, or - If you select one of the Surround/THX/DSP modes. • The SPEAKERS 2 button will not work if "SPEAKER 2" is set to " 1 VCR 2 TAPE/MD CDR TV/DBS VIDEO FM/AM EXT 7.1CH From the remote control Note: * If "TAPE" has been assigned to the TAPE/MD button, it - JVC RX-DP15B | Instructions - Page 29
or DTS-ES signals come in. No indicator lights up when the receiver cannot recognize the digital signal format of the incoming signals. When valid when Analog Direct is in use. Muting the Zone 1 Sound From the remote control ONLY: Press MUTING to mute the sound MUTING through all speakers in - JVC RX-DP15B | Instructions - Page 30
unit From the remote control Dimmer Much dimmer Canceled (Normal display) Making Sounds Natural JVC's CC (Compression Analog Direct or THX mode while this function is in use, this function will be canceled temporarily. • This function does not work for the surround back channel when the source - JVC RX-DP15B | Instructions - Page 31
off time comes, the receiver turns off automatically. • Sleep Timer works for the Zone 1 source only. From the remote control ONLY: Press ) • Parametric Equalizer setting (see page 48) • Midnight mode (see page 49) • Surround/THX mode (see page 51) • DSP mode (see page 58) Notes: • If the source - JVC RX-DP15B | Instructions - Page 32
• When using the remote control: When operating the receiver using the remote control, the display the TV and select the correct input for this receiver manually. For those who connect the Zone 2 front speakers . ANALOG L R SUBWFR The last Surround/THX/DSP mode appears. SPEAKERS 1 VOLUME dB - JVC RX-DP15B | Instructions - Page 33
be automatically set at level "-35 dB" next time you turn on the receiver. 2. Press ZONE 2 CONTROL (inside the front door). The name of the on the display. ZONE 2 CONTROL SPEAKERS 1 ZONE 2 VOLUME dB From the remote control: To stop Zone 2 operations and sounds through the Zone 2 speakers, press - JVC RX-DP15B | Instructions - Page 34
2 ON/OFF to activate Zone 2 operations. - If you press one of the audio source selecting buttons on the remote control with the ZONE 1/ZONE 2 (LEARN/TRANSMIT) selector set to "ZONE 2" while the receiver is turned on but Zone 2 is turned off, Zone 2 is turned on with the audio source selected. • You - JVC RX-DP15B | Instructions - Page 35
-AMP OUT" (see page 44), or - If you are using 7.1-channel reproduction (including "EXT 7.1 CH") in Zone 1. • While the Zone speakers for the Surround/THX/DSP modes in Zone 1. Muting the Zone 2 Sound From the remote control ONLY: Press receiver (depending on the ZONE2PREOUT setting-see page 43). 32 - JVC RX-DP15B | Instructions - Page 36
, press DOOR UP. • When using the remote control: When operating the receiver using the remote control, the display on the unit always shows /TRANSMIT) selector set to "ZONE 2." Tuning in to Stations Manually 1. Press FM/AM. The last received station of the last selected band is tuned in. • Each - JVC RX-DP15B | Instructions - Page 37
FM or AM station you want to preset (see "Tuning in to Stations Manually" on page 33). • If you want to store the FM reception mode ) until you find the channel you want. LEFT / PRESET RIGHT / PRESET From the remote control: 1. Press FM/AM. FM/AM The last received station of the last selected - JVC RX-DP15B | Instructions - Page 38
will make operations easier. Basic setting operations are only possible while the receiver is ready for Zone 1 operations. Setup Menu Configuration SETUP MENU (1) SETUP MENU 1 SPEAKER SETTING CHANNEL LEVEL SPEAKER DISTANCE SUBWOOFER THX AUDIO SETUP SURR CH OUT AUDIO DELAY NEXT PAGE :ENTER - JVC RX-DP15B | Instructions - Page 39
through On-Screen Display Menus To do the basic settings for this receiver, you can utilize the onscreen display menus in order to finish exit from menu operations or return to the previous menu. From the remote control: SETUP MENU SET Usable buttons EXIT Button To do Usable buttons - JVC RX-DP15B | Instructions - Page 40
to select the desired submenu. • In this example, select "SPEAKER DISTANCE" submenu. On the TV screen SETUP MENU 1 SPEAKER SETTING CHANNEL LEVEL SPEAKER DISTANCE SUBWOOFER THX AUDIO SETUP SURR CH OUT AUDIO DELAY NEXT PAGE :ENTER :EXIT SETUP MENU (1) appears. Move to "SPEAKER DISTANCE." On the main - JVC RX-DP15B | Instructions - Page 41
unit built in the speaker system is about 12 cm. • When using the THX-certified speakers, the crossover frequency should be set to "80 Hz." : Select speaker channel and adjust its output level. Note: You can show this submenu simply by pressing TEST (after pressing SOUND) on the remote control. - JVC RX-DP15B | Instructions - Page 42
meter to C-weighting and slow averaging. Use the MANUAL test tone option and set each channel so that you read a 75 decibel sound pressure level will be applied temporarily to the current Surround/THX/DSP mode, but cannot be stored in memory. From the remote control ONLY: 1. Press SOUND. The 10 - JVC RX-DP15B | Instructions - Page 43
LFE+MAIN : Select to always add the bass elements of the front speaker channels (MAIN) to the above (LFE) , and to transmit them through the the LFE level to eliminate distortion. • This setting is also valid for THX Ultra2 Cinema, THX Music, DVD MULTI, and EXT 7.1CH. Adjust the LFE level within - JVC RX-DP15B | Instructions - Page 44
the following: ON OFF : Select to emit the bass test tone. : Select to stop the bass test tone. 5 Setting the THX Audio-THX AUDIO SETUP THX AUDIO SETUP THX ULTRA2 SUBWOOFER? : YES BOUNDARY GAIN COMPENSATION : OFF SBACK SP POSITION : APART :OPERATE :BACK These settings are required to obtain the - JVC RX-DP15B | Instructions - Page 45
submenu screen, you can preset which surround speakers to use for 5.1 channel reproduction. Note: This submenu is not available in the following cases that it will correspond to the source selecting button on the unit and on the remote control. • Each time you press # or @ (RIGHT or LEFT), the - JVC RX-DP15B | Instructions - Page 46
following: VARIABLE : Select when you want to adjust the Zone 2 volume level using the MASTER VOLUME control on this unit (or VOLUME +/- on this remote control). FIX : Select when you want to adjust the Zone 2 volume level using the amplifier connected to the ZONE 2 PREOUT jacks. • The MASTER - JVC RX-DP15B | Instructions - Page 47
COMPU LINK remote control system (see page 63), you can show text information, such as disc title or track title, on the display of this receiver. 7 FL . NORMAL : Surround/THX/DSP mode appear during play. Note: Though you have selected "TEXT," the source name and Surround/THX/DSP mode will appear - JVC RX-DP15B | Instructions - Page 48
English Sound Adjustments Sound adjustment operations are only possible while the receiver is ready for Zone 1 operations. Adjustment Menu Configuration ADJUST MENU ADJUST MENU PEQ FRONT CENTER SURROUND SURR BACK MIDNIGHT MODE EFFECT ADJUST :ENTER :EXIT 1 PARAMETRIC - JVC RX-DP15B | Instructions - Page 49
through On-Screen Display Menus To make sound adjustments for this receiver, you can utilize the onscreen display menus in order to finish exit from menu operations or return to the previous menu. From the remote control: Usable buttons SET ADJUST MENU EXIT Usable buttons Button To do - JVC RX-DP15B | Instructions - Page 50
English Menu Operating Procedure Ex.When adjusting the DSP effects Operations 1. Press ADJUST MENU. • Make sure one of the DSP modes except "ALL CH STEREO" is selected. 2. Press fi or % (DOWN or UP) repeatedly to select the desired submenu. • In this example, select "EFFECT ADJUST" submenu. On the - JVC RX-DP15B | Instructions - Page 51
1 sources. • If "NO" or "NONE" is selected for a speaker on the SPEAKER SETTING submenu (see page 38), you cannot select the corresponding channel. • If THX is activated, Parametric Equalizer is not available. • If "EXT 7.1CH" is selected as the source, Parametric Equalizer for the surround back - JVC RX-DP15B | Instructions - Page 52
SPEAKER SETTING submenu (see page 38), no adjustments related to the center channel are available-"CENTER EQ," "CENTER ALIGN," "CENTER WIDTH," and "CENTER canceled. • The MIDNIGHT MODE indicator goes off when one of the THX modes is activated. However, this function is still active if the playback - JVC RX-DP15B | Instructions - Page 53
to use this function. CENTER ALIGN: Align the vertical localization of the center channel signals (mainly human voices are recorded) at the same height as for the using the 10 keys You can also use the 10 keys on the remote control to adjust the DSP effect levels ("EFFECT" and "LIVENESS"). Once - JVC RX-DP15B | Instructions - Page 54
• This receiver provides four types of THX modes-THX Ultra2 Cinema (THX U2 CINEMA), THX Music (THX MUSIC), THX Surround EX (THX SURR EX), THX Cinema (THX CINEMA). When any one of the THX modes is activated, the indicator lights up on the display. THX Ultra2 Cinema : Best for playing any 5.1-channel - JVC RX-DP15B | Instructions - Page 55
receiver decodes these 2 channel signals into 4 original channel signals (plus subwoofer)-matrix-based multi-channel reproduction. • When Dolby Pro Logic is activated, the indicator lights up on the display. • THX Surround features natural, solid and clear sound. • When 7.1-channel reproduction mode - JVC RX-DP15B | Instructions - Page 56
THX CINEMA THX U2 CINEMA THX MUSIC THX SURR EX THX U2 CINEMA THX MUSIC THX CINEMA THX CINEMA THX SURR EX THX CINEMA THX CINEMA THX CINEMA THX U2 CINEMA THX MUSIC THX U2 CINEMA THX MUSIC THX CINEMA THX CINEMA THX CINEMA THX CINEMA THX CINEMA THX CINEMA Not available • For Dolby Digital 2-channel - JVC RX-DP15B | Instructions - Page 57
channel)" below. Available THX Mode THX CINEMA THX ES DSCRT THX ES DSCRT THX CINEMA THX CINEMA THX CINEMA THX ES MATRIX *2 THX ES MATRIX *2 THX CINEMA THX CINEMA THX CINEMA THX U2 CINEMA THX MUSIC THX DTS NEO:6 *2 THX U2 CINEMA THX MUSIC THX CINEMA THX CINEMA THX DTS NEO:6 THX CINEMA THX CINEMA THX - JVC RX-DP15B | Instructions - Page 58
7.1-channel reproduction For multi-channel digital software, you can activate the 7.1-channel reproduction mode. • Once you have set 7.1-channel reproduction DIGITAL LS RS From the remote control SPEAKERS 1 VOLUME dB EXES7.1 OFF EXES7.1 AUTO EXES7.1 ON Ex. When you press THX with ZONE 1/ZONE 2 - JVC RX-DP15B | Instructions - Page 59
channels. • Available Surround modes vary depending on the received signal and the current speaker settings. For details, see "Surround and THX speaker output levels without emitting the test tone (see page 39). From the remote control ONLY: 1. Press SOUND. SOUND The 10 keys are activated for - JVC RX-DP15B | Instructions - Page 60
mode, it also changes to this mode. On the unit (inside the front door) From the remote control • For multi-channel digital software (except 2-channel and Dual Mono sources), one of the appropriate THX modes is activated (see the tables on pages 53 and 54). DGTL AUTO L CR SUBWFR LFE DIGITAL - JVC RX-DP15B | Instructions - Page 61
• The following operations are only possible when the receiver is ready for Zone 1 operations, and are Dolby Pro Logic II decoder is activated for 2-channel software. (The indicator lights up.) When using • If the surround speakers are deactivated, JVC's original 3D-PHONIC processing (which has - JVC RX-DP15B | Instructions - Page 62
or monaural sound video software (analog and 2-channel digital signals), you can use these modes. -PHONIC indicator also lights up). • If the Surround/THX mode is in use, it will be canceled when adjust the DSP effects Using the 10 keys on the remote control, you can adjust the level of the overall - JVC RX-DP15B | Instructions - Page 63
the Analog Multi-channel Playback Mode This receiver provides the DVD MULTI and EXT 7.1CH playback modes for reproducing the analog discrete output mode of the DVD player or another component such as a digital decoder. Before using these playback modes, refer also to the manual supplied for those - JVC RX-DP15B | Instructions - Page 64
COMPU AV TEXT LINK-4 COMPU COMPU (SYNCHRO) LINK- LINK IR OUT CTRL OUT +12V IR 10mA MAX IN RX-DP15B CD player manuals supplied for your audio components. This remote control system allows you to use the four functions listed below. Remote Control through the Remote Sensor on the Receiver - JVC RX-DP15B | Instructions - Page 65
the Zone 1 source. • When you turn on the receiver by pressing AUDIO (ON) on the remote control, with ZONE 1/ZONE 2 (LEARN/TRANSMIT) selector set the synchronized recording feature will not operate. 3. Press the play (3) button on the CD player. The Zone 1 source changes on the receiver, and as soon - JVC RX-DP15B | Instructions - Page 66
receiver). CD player RX-DP15B FUNCTIONS This remote receiver). CD player RX-DP15B MD recorder COMPU AV manuals supplied with your CD player or MD recorder. IMPORTANT: If you turn on the receiver before turning on the other components after connecting the components, the TEXT COMPU LINK remote - JVC RX-DP15B | Instructions - Page 67
page 19), and set the TV's input mode to the proper position to which the receiver is connected. Make sure you have connected the CD player or MD recorder equipped with the TEXT COMPU LINK remote control system. If not, you cannot use the following functions. IMPORTANT: Check the following before - JVC RX-DP15B | Instructions - Page 68
English Searching for a Disc (Only for the CD player) Search for a disc by its performer: 1. Press TEXT DISPLAY while "CD" is selected as the source. The Disc Information screen appears on the TV. 2. Press % / fi to move to "SEARCH," then press SET. The DISC SEARCH screen appears. 3. Press % / fi to - JVC RX-DP15B | Instructions - Page 69
disc memory function: You can use the disc memory function through this receiver. The disc information (its performer, disc title, and music genre) built in the CD player. For the disc memory function, refer to the manual supplied with your CD player. • The performer, disc title, and music genre - JVC RX-DP15B | Instructions - Page 70
English 4. Repeat step 3 until you finish entering a performer name (up to 32 characters). To insert a space, press to move to , then press SET. To correct an incorrect character: 1) Press to move to + or =, then press SET until the incorrect character is selected. 2) Press to move to , then - JVC RX-DP15B | Instructions - Page 71
IR 10mA MAX IN RX-DP15B TV AV COMPU LINK EX AV COMPU LINK III CAUTION: When connecting the TV with the AV COMPU LINK remote control system, connect the receiver to the AV COMPU LINK EX or AV COMPU LINK III terminal. DO NOT connect the receiver to the AV COMPU LINK RECEIVER/ AMP terminal. Notes - JVC RX-DP15B | Instructions - Page 72
the component video jacks, connect this receiver to the TV's Video Input 2 terminal (component video input) using component video cables. CASE 3 Source Equipment Component video cable RX-DP15B TV Component video cable To Video Input 2 The AV COMPU LINK remote control system allows you to use - JVC RX-DP15B | Instructions - Page 73
switches manually. When you press PLAY on the remote control supplied for this receiver for operating the DVD player, the receiver automatically TV" as the source on the receiver, you cannot see the menu on the TV screen since the AV COMPU LINK remote control system automatically changes the TV's - JVC RX-DP15B | Instructions - Page 74
/Video Components You can operate JVC's audio and video components with this receiver's remote control, since control signals for JVC components are preset in the remote control. Operating Audio Components IMPORTANT: To operate JVC's audio components using this remote control: • You need to connect - JVC RX-DP15B | Instructions - Page 75
press +10, +10, then 10. When you start recording on the CD recorder, use the buttons on the CD recorder itself or on the remote control supplied for it. Cassette deck After pressing TAPE/MD or selecting "TAPE" by pressing CONTROL repeatedly, you can perform the following operations on a cassette - JVC RX-DP15B | Instructions - Page 76
JVC's video components using this remote control: • You need to connect JVC's video components through the AV COMPU LINK jacks (see page 68) in addition to the connections using cables with RCA pin plugs (see pages 13 to 15). • Some JVC the manual supplied for your DVD player (and the instruction - JVC RX-DP15B | Instructions - Page 77
this receiver. - Place the IR signal transmitter so that it is aimed at the remote sensor channel number. • Refer to the manual supplied for your TV. • All the buttons listed above may not be used for some TVs. • If you cannot change the channels of some TVs by pressing number buttons, press CHANNEL - JVC RX-DP15B | Instructions - Page 78
preset the signals for both the CATV converter and DBS tuner at the same time. Remote's display 3. Enter a manufacturer's code using buttons 1-9, and 0. See page 77 (only for Zone 1 operation). CHANNEL +/- : Changes the TV channels on the VCR. Note: Refer to the manual supplied for your VCR. 5. - JVC RX-DP15B | Instructions - Page 79
for the DVD menu operations. SET DVD MENU Note: Refer also to the manual supplied for your DVD player (and the instructions supplied for the discs). 5. Try to operate your DVD player by pressing 44, 79 45, 46 *This figure is set to the remote control as the initial JVC code. Remote's display 76 - JVC RX-DP15B | Instructions - Page 80
37, 38 RCA 65 Samsung 39, 40 Schwaiger 61, 64 Siemens 41, 42 Sony 66 Technisat 48 *This figure is set to the remote control as the initial JVC code. Manufactures' codes for CATV converter Manufacturer Codes General Instrument 29 Hamlin 01, 02, 03, 04, 05 Jerrold 06, 07, 08, 09 - JVC RX-DP15B | Instructions - Page 81
Remote Signals Manually You can store the signals into the learning buttons by sending the signals you want to store from another remote 9 CC CONVERTER 10 RETURN THX SURROUND EX / ES / CHANNEL MUTING remote's display. RM-SRXDP20J REMOTE CONTROL A/V CONTROL RECEIVER Continued on the next page. 78 - JVC RX-DP15B | Instructions - Page 82
100+ / REW DOWN REC PLAY TUNING STOP FF/ UP PAUSE CHANNEL ZONE 1 ZONE 2 For the Zone 1 operations ZONE 1 ZONE 2 For the Zone 2 operations Notes: • The signals stored into this remote control from the target remote control deviate slightly from the original signals. Since some components - JVC RX-DP15B | Instructions - Page 83
remote sensor on this receiver. When using the remote control: - Set the ZONE 1/ZONE 2 (LEARN/TRANSMIT) selector to "ZONE 1" or "ZONE 2" properly. To erase the stored signals After erasing the stored signals, preset signals are resumed and you can operate JVC TV/VIDEO TV VOL CHANNEL DVD MENU SET - JVC RX-DP15B | Instructions - Page 84
English Troubleshooting Use this chart to help you solve daily operational problems. If there is any problem you cannot solve, contact your JVC service center. Surround/THX Multi-room operations (Zone 1/Zone 2) PROBLEM The buttons and controls on the front panel do not work. No sound from the - JVC RX-DP15B | Instructions - Page 85
on the power, but soon the receiver turns off again (into standby mode). Remote control does not work. Remote control does not work properly. you solved the speaker wiring trouble, consult your dealer. Press (STANDBY/ON) on the front panel to turn off the receiver. After unplugging the AC power - JVC RX-DP15B | Instructions - Page 86
English Specifications Amplifier Output Power At Stereo operation (Analog Direct On): Front channels: At Surround operation (Analog Direct On): Front channels: Center channel: Surround channels: Surround back channels: Audio Audio Input Sensitivity/Impedance (1 kHz): PHONO IN (MM): CD IN, - JVC RX-DP15B | Instructions - Page 87
IHF-A weighted): Total Harmonic Distortion: Stereo Separation at REC OUT: Alternate Channel Selectivity: Frequency Response: Monaural: Monaural: Stereo: Monaural: Stereo: Monaural: (in standby mode) 445 mm x 177 mm x 475 mm 23.5 kg Designs & specifications are subject to change without notice. 84 - JVC RX-DP15B | Instructions - Page 88
supports multicanaux. Dans les modes THX Ultra2 Cinema et THX Music mis au point récemment, tous les supports 96/24 Le RX-DP15B vous permet de AV COMPU LINK Ces systèmes de commande à distance COMPU LINK vous permettent de commander d'autres appareils audio/vidéo JVC JVC ou le centre de service JVC - JVC RX-DP15B | Instructions - Page 89
CHANNEL THX 51 Modes Surround et THX applicables à divers supports 53 Mise en service des modes Surround et THX 55 7 Mise en service de la reproduction à 7,1 canaux 55 7 Mise en service des modes Surround 56 7 Mise en service des modes THX AV COMPU LINK 68 Commande des appareils audio/vidéo JVC - JVC RX-DP15B | Instructions - Page 90
MEMORY EXIT / FM MODE i o ;a s df g STANDBY STANDBY / ON CC CONVERTER ZONE 1 ON/OFF ZONE 2 ON/OFF RX-DP15 SPEAKERS 1 INPUT MODE / INPUT ATT SPEAKER 2 / ZONE 2 ZONE 2 CONTROL THX EX/ES/7.1 SURROUND DSP SURR/DSP OFF ANALOG DIRECT ADJUST MENU DOWN / TUNING ∞ SETUP MENU LEFT / PRESET - JVC RX-DP15B | Instructions - Page 91
30) • Le témoin ZONE 2 ON/OFF est allumé en rouge quand la Zone 2 est en service. / Touches de sélection de source (20, 21, 23-25) • DVD, DVD MULTI, VCR 1, , le mode Surround/THX/DSP, etc. $ Indicateur PARAMETRIC EQ (48) • S'allume quand l'égaliseur paramétrique est en service. % Indicateur de - JVC RX-DP15B | Instructions - Page 92
audio) (12) 7 Prise RF REMOTE ANTENNA et sélecteur BAND 1/2 (17) 8 Prises FM/AM ANTENNA (7, 8) 9 Prises COMPU LINK-4 (SYNCHRO) (61, 63) p Prises AV COMPU LINK-III (68) q Prises la sortie par cette prise est aussi mise en et hors service. Vous pouvez utiliser la sortie de cette prise pour déclencher - JVC RX-DP15B | Instructions - Page 93
/VIDEO TV VOL CHANNEL MUTING VOLUME SETUP MENU TEXT DISPLAY DVD MENU SET LIGHT ADJUST MENU EXIT RM-SRXDP20J REMOTE CONTROL A/V CONTROL RECEIVER i o ; , 59, 71) 8 Touche TEST (39, 71) 9 Touche CC CONVERTER (27, 71) p Touche THX (57, 71) q Touche SURROUND (56, 57, 71) w Touche EX/ES/7.1 (55, 71) - JVC RX-DP15B | Instructions - Page 94
Français Pour commencer Cette section explique comment connecter les appareils audio/vidéo et les enceintes à l'ampli-tuner, ainsi que comment connecter l'alimentation. Avant l'installation Connexion des antennes FM et AM Général • Assurez-vous d'avoir les mains sèches. • Mettez tous les - JVC RX-DP15B | Instructions - Page 95
Ultra2 Cinema et THX Music. • Une enceinte centrale pour produire une image sonore riche en stabilisant la localisation du son (utilisée aussi pour accentuer les voix humaines). • Un caisson de grave pour accentuer les graves et reproduire le canal LFE enregistré sur les supports multicanaux. Pour - JVC RX-DP15B | Instructions - Page 96
/ Gauche Enceinte centrale IMPORTANT: Après avoir connecté les enceintes, réglez l'information des enceintes correctement: • Pour obtenir le meilleur effet Surround/THX/DSP possible dans la Zone 1, référez-vous à "Réglages de base" aux pages 35 à 44. • Pour connectez les enceintes aux prises - JVC RX-DP15B | Instructions - Page 97
À propos des prises FRONT 2/ZONE 2 SPEAKERS Les prises FRONT 2/ZONE 2 SPEAKERS peuvent être utilisées de la façon suivante: • Pour connecter une seconde paire d'enceintes dans la Zone 1. • Pour connecter les enceintes avant de la Zone 2 lors de l'utilisation du fonctionnement multi-pièces (voir page - JVC RX-DP15B | Instructions - Page 98
Français Connexion des appareils audio/vidéo Lors de la connexion d'appareils séparés, référez-vous aussi aux modes d'emploi que les accompagnent. Connexions analogiques Connexions des appareils audio Utilisez des câbles munis de fiches cinch (non fournis). • Connectez la fiche blanche à la prise - JVC RX-DP15B | Instructions - Page 99
Français Appareil extérieur à 7,1 canaux Décodeur A B C (ou lecteur de DVD) D E AUDIO R RIGHT LEFT FRONT L SUB WOOFER SURR R CENTER L R SURR BACK R L L EXT 7.1CH IN IMPORTANT: Cet ampli-tuner est muni des prises vidéo suivantes-prises vidéo composites, S-vidéo et composantes vidéo. Vous - JVC RX-DP15B | Instructions - Page 100
Français Vue arrière Magnétoscope(s) AB Magnétoscope D-VHS/S-VHS/VHS CDEF G AUDIO RIGHT R L R L LEFT VIDEO TV SOUND DBS IN OUT (REC) VCR 1 IN (PLAY) OUT (REC) VCR 2 IN (PLAY) FRONT DVD IN VIDEO S-VIDEO Y COMPONENT Y PB PB 1 IN 2 (DVD) IN PR PR Y Vert PB 3 IN Bleu PR Rouge - JVC RX-DP15B | Instructions - Page 101
Français Vue arrière Téléviseur et/ou tuner DBS AUDIO RIGHT LEFT VIDEO R TV SOUND DBS IN L OUT (REC) VCR 1 VIDEO S-VIDEO Y COMPONENT Y PB PB 1 IN 2 (DVD) IN Lors de la connexion du téléviseur aux prises AUDIO (TV SOUND/DBS IN), NE CONNECTEZ PAS la sortie vidéo du téléviseur à ces - JVC RX-DP15B | Instructions - Page 102
Lecteur de DVD • Lors de la connexion d'un lecteur de DVD avec les prises de sortie stéréo: Français Vue arrière Å À la sortie audio du canal avant gauche/droit (ou à la sortie audio mixée si nécessaire) ı À la sortie vidéo composite Ç À la sortie S-vidéo Î À la sortie en composantes vidéo VIDEO - JVC RX-DP15B | Instructions - Page 103
page 11). • Si vous souhaitez commander le magnétoscope, le téléviseur ou le lecteur de DVD en utilisant le système de commande à distance AV COMPU LINK, connectez aussi l'appareil cible de la façon décrite dans "Connexions analogiques" (voir pages 13 à 15). • Pour utilisez les appareils sources num - JVC RX-DP15B | Instructions - Page 104
sur une autre bande (BAND 1 ou BAND 2). RF REMOTE ANTENNA BAND1 BAND2 12 Vue arrière La télécommande fournie service JVC le plus proche. Installation de l'émetteur de signaux IR L'émetteur de signaux IR peut émettre des signaux IR. Il permet d'utiliser le système de commande à distance AV - JVC RX-DP15B | Instructions - Page 105
Appareil(s) cible À un angle d'environ 60° Moins de 3 m (10 pieds) COMPU AV TEXT LINK-4 COMPU COMPU (SYNCHRO) LINK- LINK IR OUT CTRL OUT +12V IR 10mA touche pendant environ 5 secondes, le rétroéclairage se met hors service. ATTENTION: Suivez ces précautions pour éviter toute fuite ou - JVC RX-DP15B | Instructions - Page 106
Mérites: • Cette connexion NE NÉCESSITE PAS d'amplificateur de puissance. Démérites: • Quand les enceintes de la Zone 2 sont en service, cette connexion NE VOUS PERMET PAS d'utiliser le mode Surround/THX/DSP avec les enceintes Surround arrière (voir pages 51 et 58) et de choisir le mode "EXT 7.1CH - JVC RX-DP15B | Instructions - Page 107
VIDEO CD PHONO TAPE/MD CDR FM/AM EXT 7.1CH La dernière source de la Zone 1 est mise en service. ANALOG L R SUBWFR SPEAKERS 1 VOLUME dB Le dernier mode Surround/ THX/DSP apparaît. Le niveau de volume apparaît. 3. Choisissez et reproduisez une source. Le son sort des enceintes de la Zone - JVC RX-DP15B | Instructions - Page 108
Français Procédure de base pour la Zone 2 Les sources et les fonctions disponibles pour la Zone 2 sont limitées. Pour plus de détails sur le fonctionnement de la Zone 2, référezvous à "Fonctionnement de la Zone 2 (pièce secondaire)" aux pages 29 à 32. Sur l'appareil: 1. Appuyez sur (STANDBY/ON). Le - JVC RX-DP15B | Instructions - Page 109
de façon que les touches de sélection apparaissent). La dernière source de la Zone 1 est mise en service. ANALOG L R SUBWFR Le dernier mode Surround/ THX/DSP apparaît. SPEAKERS 1 VOLUME dB Le niveau de volume apparaît. Les indicateurs des enceintes choisies actuellement 1 et/ou 2 s'allument - JVC RX-DP15B | Instructions - Page 110
réglé automatiquement sur le niveau "-35 dB" la prochaine fois que vous mettez en service la Zone 1. • Si "TURN ON ZONE1 OR ZONE2" apparaît sur l'affichage, lection de source. • Le nom de la source choisie et le mode Surround/THX/DSP apparaissent aussi sur l'affichage. DVD DVD MULTI VCR 1 VCR 2 TV - JVC RX-DP15B | Instructions - Page 111
EXT 7.1CH" est choisi comme source, "L", "C", "R", "LFE", "LS", "RS" et "SB (gauche/droit)" s'allument. Cependant, "SB" ne s'allume pas si le mode THX ou le mode DSP est en service, ou si "SPEAKER 2" est réglé sur "BI-AMP OUT" (voir page 44). Sélection d'une source différente pour l'image et le son - JVC RX-DP15B | Instructions - Page 112
. ("HEADPHONE" apparaît sur l'affichage de l'appareil.) Vous pouvez profiter des effets sonores suivants à travers le casque d'écoute: • Si le mode Surround/THX est en service, vous pouvez profiter des effets Surround. (Pour plus de détails, référez-vous au "Mode 3D HEADPHONE" à la page 57.) • Si le - JVC RX-DP15B | Instructions - Page 113
Français DIGITAL AUTO : Choisissez ce réglage pour le mode d'entrée numérique. L'ampli-tuner détecte automatiquement les signaux d'entrée. L'indicateur DGTL AUTO s'allume sur l'affichage et les indicateurs de format de signal numérique s'allument aussi pour les signaux détectés. ANALOG : - JVC RX-DP15B | Instructions - Page 114
de sons naturels Le convertisseur CC (Compression Compensatrice) de JVC élimine les instabilités et les ondulations, permettant une ré la fonction Analog Direct ou le mode THX est utilisé. Si vous mettez en service la fonction Analog Direct ou le mode THX pendant que cette fonction est utilisée, - JVC RX-DP15B | Instructions - Page 115
. • Quand vous changez la source. • Quand vous mettez en service le fonctionnement monotouche (voir page 44). Quand vous changez la source galiseur paramétrique (voir page 48) • Mode de minuit (voir page 49) • Mode Surround/THX (voir page 51) • Mode DSP (voir page 58) Remarques: • Si la source est - JVC RX-DP15B | Instructions - Page 116
pour la Zone 1. STANDBY STANDBY / ON ZONE 1 ON/OFF La dernière source de la Zone 1 est en service. ANALOG L R SUBWFR Le dernier mode Surround/ THX/DSP apparaît. SPEAKERS 1 VOLUME dB Le niveau de volume apparaît Les indicateurs des enceintes choisies actuellement 1 et/ou 2 s'allument - JVC RX-DP15B | Instructions - Page 117
l'appareil s'éteigne. Pour utiliser cet ampli-tuner de nouveau pour la Zone 2, appuyez de nouveau sur ZONE 2 ON/OFF. Remarques: • Si vous avez mis hors service la Zone 2 avec le niveau de volume réglé sur un niveau supérieur à "-35 dB", le niveau de volume est réglé automatiquement sur le niveau - JVC RX-DP15B | Instructions - Page 118
Si vous mettez sous tension l'ampli-tuner avec le sélecteur ZONE 1/ZONE 2 (LEARN/ TRANSMIT) réglé sur "ZONE 1", appuyez sur ZONE 2 ON/OFF pour mettre en service l'ampli-tuner pour la Zone 2. - Si vous appuyez sur une des touches de sélection de source audio sur la télécommande avec le sélecteur ZONE - JVC RX-DP15B | Instructions - Page 119
(y compris "EXT 7.1 CH") dans la Zone 1. • Pendant que les enceintes avant de la Zone 2 sont en service, vous ne pouvez pas utiliser les enceintes Surround arrière pour les modes Surround/THX/DSP dans la Zone 1. SPEAKERS 1 ZONE 2 L'indicateur de niveau de VOLUME s'éteint. Pour rétablir le son - JVC RX-DP15B | Instructions - Page 120
Français Réception des émissions de radio Vous pouvez parcourir toutes les stations ou utiliser la fonction de préréglage pour aller directement à une station particulière. Indique les fonctions que vous POUVEZ AUSSI UTILISER quand l'ampli-tuner est prêt pour la Zone 2. IMPORTANT: Vérifiez ce qui - JVC RX-DP15B | Instructions - Page 121
Utilisation de l'accord par préréglage Une fois qu'une station a été accordée à un numéro, la station peut être accordée rapidement. Vous pouvez prérégler un maximum de 30 station FM et de 15 stations AM. Pour mémoriser les stations préréglées Avant de commencer, rappelez-vous... • Il y a un temps - JVC RX-DP15B | Instructions - Page 122
quand l'ampli-tuner est prêt pour la Zone 1. Menu de réglage Français SETUP MENU (1) SETUP MENU 1 SPEAKER SETTING CHANNEL LEVEL SPEAKER DISTANCE SUBWOOFER THX AUDIO SETUP SURR CH OUT AUDIO DELAY NEXT PAGE :ENTER :EXIT SETUP MENU (2) 1 SPEAKER SETTING (Voir page 38.) SPEAKER SETTING - JVC RX-DP15B | Instructions - Page 123
Français IMPORTANT: Vérifiez ce qui suit avant ou pendant l'utilisation des touches et des commandes. Pour la Zone 1: Le témoin ZONE 1 ON/OFF sur l'appareil est allumé. • Lors de l'utilisation de l'appareil: - "ZONE 2" n'apparaît pas sur l'affichage. - Appuyez sur DOOR DOWN pour utiliser les - JVC RX-DP15B | Instructions - Page 124
de la distance des enceintes Opérations 1. Appuyez sur SETUP MENU. Sur l'écran du téléviseur SETUP MENU 1 SPEAKER SETTING CHANNEL LEVEL SPEAKER DISTANCE SUBWOOFER THX AUDIO SETUP SURR CH OUT AUDIO DELAY NEXT PAGE :ENTER :EXIT SETUP MENU (1) apparaît. 2. Appuyez répétitivement sur fi ou - JVC RX-DP15B | Instructions - Page 125
est d'environ 12 cm. • Lors de l'utilisation d'enceintes THX certifiées, la fréquence de transition doit être régl niveaux de sortie des canaux d'enceintes-CHANNEL LEVEL CHANNEL LEVEL TEST TONE :OFF FRONT L de test sort dans l'ordre des enceintes en service. 7 Procédure d'ajustement sur ce sous- - JVC RX-DP15B | Instructions - Page 126
mesure lente. Utilisez l'option de tonalité de test MANUAL et réglez chaque canal de façon à lire réalisés sont affectés temporairement au mode Surround/THX/ DSP actuel, mais ne peuvent pas être sort de toutes les enceintes en service dans l'ordre. • Le sous-menu CHANNEL LEVEL (voir page 38) - JVC RX-DP15B | Instructions - Page 127
arrière quand la source est "EXT 7.1CH" (avec la fonction Analog Direct hors service). SUBWFR C L R 30˚ 30˚ 3.6 m (12 ft) 3.3 m (11 (lors de la lecture de supports Dolby Digital et DTS) et me. • Ce réglage est aussi valable pour THX Ultra2 Cinema, THX Music, DVD MULTI et EXT 7.1CH. Ajustez - JVC RX-DP15B | Instructions - Page 128
est sur "ON", la limitation de crête des graves est en service de façon que les sons dépassant le niveau de crête pr dessous). • La tonalité de test des graves peut être sortie quand un des modes Surround/THX/DSP est utilisé. Choisissez un des réglages suivants: ON OFF : Choisissez ce réglage pour - JVC RX-DP15B | Instructions - Page 129
- menu ZONE 2/SPEAKER 2. - Quand les enceintes de la Zone 2 sont en service. 7 SURROUND SP Choisissez les enceintes de sortie du canal Surround à l'aide des le son de lecture (canal) que vous souhaitez pendant la lecture d'un support numérique (ou d'une émission) enregistré en mode Dual Mono, qui - JVC RX-DP15B | Instructions - Page 130
appareil vidéo connecté uniquement par les prises S-vidéo ou vidéo composite (S/C), vous ne pouvez pas voir ni enregistrer l'image de lecture. q Mise en et hors service de la sortie vidéo -VIDEO POWER VIDEO POWER VIDEO POWER : ON :OPERATE :BACK Sur ce sous-menu, vous pouvez mettre en ou hors - JVC RX-DP15B | Instructions - Page 131
de la plage sur l'affichage de cet ampli-tuner. 7 FL DISPLAY Mettez en ou hors service l'affichage des textes d'information. TEXT : Le texte d'information apparaît pendant la lecture. NORMAL : Le mode Surround/THX/DSP apparaît pendant la lecture. Remarque: Bien que vous ayez choisi "TEXT", le nom - JVC RX-DP15B | Instructions - Page 132
PANORAMA CENTER WIDTH DIMENSION : OFF : OFF : 3 : 4 :OPERATE :BACK (Quand le mode DSP est en (Quand le mode Pro Logic II Music service) est en service) EFFECT ADJUST CENTER EQ CENTER GAIN : OFF : 0.2 EFFECT ADJUST CENTER EQ CENTER ALIGN : OFF : OFF :OPERATE :BACK (Quand le mode Neo:6 Music - JVC RX-DP15B | Instructions - Page 133
Français IMPORTANT: Vérifiez ce qui suit avant ou pendant l'utilisation des touches et des commandes. Pour la Zone 1: Le témoin ZONE 1 ON/OFF sur l'appareil est allumé. • Lors de l'utilisation de l'appareil: - "ZONE 2" n'apparaît pas sur l'affichage. - Appuyez sur DOOR DOWN pour utiliser les - JVC RX-DP15B | Instructions - Page 134
Français Procédure d'utilisation du menu Ex. Lors de l'ajustement des effets DSP Opérations 1. Appuyez sur ADJUST MENU. • Assurez-vous qu'un des modes DSP à l'exception de "ALL CH STEREO" est choisi. 2. Appuyez répétitivement sur fi ou % (DOWN ou UP) pour choisir le sousmenu souhaité. • Dans cet - JVC RX-DP15B | Instructions - Page 135
pour une enceinte sur le sous-menu SPEAKER SETTING (voir page 38), vous ne pouvez pas choisir le canal correspondant. • Si le mode THX est en service, l'égaliseur paramétrique n'est pas disponible. • Si "EXT 7.1CH" est choisi comme source, l'égaliseur paramétrique pour le canal Surround arrière - JVC RX-DP15B | Instructions - Page 136
annulé temporairement. • L'indicateur MIDNIGHT MODE s'éteint quand un des modes THX est mis en service. Cependant, cette fonction reste en service si la source de lecture est un support codé avec Dolby Digital ou DTS. (Si la source est un support analogique ou PCM numérique, le mode de minuit est - JVC RX-DP15B | Instructions - Page 137
pour inclure les enceintes Surround et offrir un effet panoramique avec une image des murs latéraux. • Choisissez "ON" pour mettre cette fonction en service. • Choisissez "OFF" pour ne pas utiliser cette fonction. CENTER WIDTH: Ajuste l'image du centre de façon qu'il puisse être entendu uniquement - JVC RX-DP15B | Instructions - Page 138
quatre types de mode THX-THX Ultra2 Cinema (THX U2 CINEMA), THX Music (THX MUSIC), THX Surround EX (THX SURR EX), THX Cinema (THX CINEMA). Quand n'importe lequel des modes THX est en service, l'indicateur s'allume sur l'affichage. THX Ultra2 Cinema : Pour reproduire les supports de film codés sur - JVC RX-DP15B | Instructions - Page 139
de grave)-reproduction multicanaux à base matricielle. • Quand le Dolby Pro Logic est en service, l'indicateur s'allume sur l'affichage. • THX Cinema peut être appliqué en combinaison avec Pro Logic quand un support analogique ou numérique à 2 canaux est reproduit. Dolby Pro Logic II Le Dolby - JVC RX-DP15B | Instructions - Page 140
7,1 canaux). • Si seules les enceintes avant sont en service, vous ne pouvez pas utiliser les modes THX et le mode de reproduction à 7,1 canaux (EX/ES Digital EX ON *1 En fonction des spécifications du OFF support. Avec certains supports, le "DOLBY DIGITAL" est appliqué. Dolby Digital ON - JVC RX-DP15B | Instructions - Page 141
*2 THX ES MATRIX *2 THX CINEMA THX CINEMA THX CINEMA THX U2 CINEMA THX MUSIC THX DTS NEO:6 *2 THX U2 CINEMA THX MUSIC THX CINEMA THX CINEMA THX DTS NEO:6 THX CINEMA THX CINEMA THX CINEMA THX U2 CINEMA THX MUSIC THX U2 CINEMA THX MUSIC THX CINEMA THX CINEMA THX CINEMA THX CINEMA THX CINEMA THX CINEMA - JVC RX-DP15B | Instructions - Page 142
canaux Pour les supports numériques multicanaux, vous pouvez mettre en service le mode de reproduction à 7,1 canaux. • Une fois que vous avez réglé le mode de reproduction à 7,1 canaux, il est mémorisé et est rappelé chaque fois que vous mettez en service un mode Surround ou THX auquel le mode de - JVC RX-DP15B | Instructions - Page 143
aussi effet pour les canaux des enceintes en service. • Les modes Surround disponibles varient en fonction du signal reçu et des réglages actuels des enceintes. Pour les détails, référez-vous à "Modes Surround et THX applicables à divers supports" aux pages 53 et 54. 1. Choisissez et reproduisez - JVC RX-DP15B | Instructions - Page 144
aussi sur ce mode. Sur l'appareil (derrière la porte avant) Sur la télécommande • Pour les supports numériques multicanaux (sauf les sources à 2 canaux et Dual Mono), un des modes THX approprié est mis en service (voir les tableaux des pages 53 et 54). DGTL AUTO L CR SUBWFR LFE DIGITAL LS RS - JVC RX-DP15B | Instructions - Page 145
pour les supports à 2 canaux. (L'indicateur s'allume.) Lors de l'utilisation du mode DAP, les sons sortent de toutes les enceintes connectées et en service. • Si les enceintes Surround sont hors service, le traitement 3D- PHONIC original de JVC (qui a été mis au point pour créer un effet Surround - JVC RX-DP15B | Instructions - Page 146
est appliqué aux modes DSP à l'exception de "ALL CH STEREO" (l'indicateur 3D-PHONIC s'allume aussi). • Si le mode Surround/THX est en service, il est annulé quand vous mettez en service le mode DSP. Pour ajuster les effets DSP En utilisant les touches numériques de la télécommande vous pouvez - JVC RX-DP15B | Instructions - Page 147
1 STANDBY/ON STANDBY/ON ZONE 1 3. Appliquez, si nécessaire, le mode THX ou le mode DSP. • Appuyez sur THX pour appliquer le mode THX. Chaque fois que vous appuyez sur la touche, "THX U2 CINEMA" ou "THX MUSIC" se met en service. THX THX Sur l'appareil (derrière la porte avant) Sur la télécommande - JVC RX-DP15B | Instructions - Page 148
à distance, vous devez connecter les appareils audio JVC aux prises COMPU LINK (SYNCHRO) à l'aide AV TEXT LINK-4 COMPU COMPU (SYNCHRO) LINK- LINK IR OUT CTRL OUT +12V IR 10mA MAX IN RX-DP15B la fonction Analog Direct (voir page 27) est en service, à une source numérique, le temps de - JVC RX-DP15B | Instructions - Page 149
l'ampli-tuner en appuyant sur AUDIO (ON) sur la télécommande, avec le sélecteur ZONE 1/ZONE 2 (LEARN/TRANSMIT) réglé sur "ZONE 2": OU Quand vous mettez en service le son de la Zone 2 en appuyant sur ZONE 2 ON/OFF pendant que l'ampli-tuner est sous tension: \ Le témoin ZONE 2 ON/OFF s'allume et - JVC RX-DP15B | Instructions - Page 150
IN 2) Prises TEXT COMPU LINK: Utilisez des câbles avec des fiches stéréo mini (non fournis avec l'ampli-tuner). Lecteur CD RX-DP15B Enregistreur de MD COMPU AV TEXT LINK-4 COMPU COMPU (SYNCHRO) LINK- LINK IR OUT CTRL OUT +12V IR 10mA MAX IN 3. Connectez le lecteur CD, l'enregistreur - JVC RX-DP15B | Instructions - Page 151
FONCTIONNEMENT Pour utiliser ce système de commande à distance, vous devez connecter le téléviseur de la Zone 1 à la prise MONITOR OUT (voir page 14) et le téléviseur de la Zone 2 sur la prise ZONE 2 MONITOR OUT (voir page 19) et régler le mode d'entrée du téléviseur sur la position correcte sur - JVC RX-DP15B | Instructions - Page 152
Français Recherche de disque (Uniquement pour le lecteur CD) Recherche d'un disque par interprète: 1. Appuyez sur TEXT DISPLAY pendant que "CD" est choisi comme source. L'écran d'information du disque apparaît sur le téléviseur. 2. Appuyez sur % / fi pour amener sur "SEARCH", puis appuyez sur SET. - JVC RX-DP15B | Instructions - Page 153
Français Recherche de disque par genre musical: 1. Appuyez sur TEXT DISPLAY pendant que "CD" est choisi comme source. L'écran d'information du disque apparaît sur le téléviseur. 2. Appuyez sur % / fi pour amener sur "SEARCH", puis appuyez sur SET. L'écran DISC SEARCH apparaît. 3. Appuyer sur % / fi - JVC RX-DP15B | Instructions - Page 154
Français 4. Répétez l'étape 3 jusqu'à ce que l'entrée du nom de l'interprète soit terminée (maximum de 32 caractères). Pour insérer un espace, appuyez sur pour amener sur , puis appuyez sur SET. Pour corriger un caractère incorrect: 1) Appuyez sur pour amener sur + ou =, puis appuyez sur SET - JVC RX-DP15B | Instructions - Page 155
IN RX-DP15B Téléviseur AV COMPU LINK EX AV COMPU LINK III ATTENTION: Pour connecter un téléviseur avec le système de commande à distance AV COMPU LINK, connectez l'ampli-tuner à la prise AV COMPU LINK EX ou AV COMPU LINK III. NE CONNECTEZ PAS l'amplituner à la prise AV COMPU LINK RECEIVER/AMP - JVC RX-DP15B | Instructions - Page 156
éo) en utilisant des câbles en composantes vidéo. Appareil source Câble en composantes vidéo RX-DP15B Câble en composantes vidéo Téléviseur À l'entrée vidéo 2 Le système de commande à distance AV COMPU LINK permet d'utiliser les cinq fonctions de base décrites ci-dessous. Commande à distance - JVC RX-DP15B | Instructions - Page 157
menus sur l'écran du téléviseur car le système de commande à distance AV COMPU LINK change automatiquement le mode d'entrée du téléviseur sur le tuner de sur la télécommande, ou si le son de la Zone 1 est mis hors service en appuyant sur ZONE 1 ON/OFF pendant un enregistrement sur le magnétoscope - JVC RX-DP15B | Instructions - Page 158
: Pour commander les appareils audio JVC en utilisant la télécommande: • Vous devez connecter les appareils audio JVC avec les prises COMPU LINK ( SURR/DSP OFF : Mettre hors service les modes THX/ Surround/DSP. ANALOG DIRECT : Mettre en ou hors service la fonction Analog Direct. ANALOG/DIGITAL - JVC RX-DP15B | Instructions - Page 159
Lecteur CD Après avoir appuyé sur CD, vous pouvez effectuer les opérations suivantes sur le lecteur CD: PLAY 4 ¢ STOP PAUSE 1-10, +10 : Démarrer la lecture. : Retourner au début de la plage actuelle (ou d'une plage précédente). : Sauter au début de la plage suivante. : Arrêter la lecture. : Arrê - JVC RX-DP15B | Instructions - Page 160
JVC en utilisant la télécommande: • Vous devez connecter les appareils vidéo JVC par les prises AV pause à l'enregistrement (uniquement pour la Zone 1). CHANNEL +/- : Changer les canaux de télévision sur avec le lecteur de DVD (et les instructions fournies avec le disque). Téléviseur Vous pouvez - JVC RX-DP15B | Instructions - Page 161
avec certains téléviseurs. • Si vous ne pouvez pas changer les canaux sur certains téléviseurs en appuyant sur les touches numériques, appuyez sur CHANNEL +/- pour changer les canaux. 6. Essayez de commander votre TV/CATV/DBS téléviseur en appuyant sur TV/CATV/ STANDBY/ON DBS (STANDBY/ON). Si - JVC RX-DP15B | Instructions - Page 162
1). Appuyez sur cette touche en même temps que la touche PAUSE pour entrer en mode de pause à l'enregistrement (uniquement pour la Zone 1). CHANNEL +/- : Changer les canaux de téléviseur sur le magnétoscope. Remarque: Référez-vous au mode d'emploi fourni avec le magnétoscope. 5. Essayez de - JVC RX-DP15B | Instructions - Page 163
-vous aussi au mode d'emploi fourni avec le lecteur de DVD (et les instructions fournies avec le disque). 5. Essayez de commander votre lecteur de DVD en appuyant le bon. Code de fabricant pour le téléviseur Fabricant JVC Akai Blaupunkt Fisher Grundig Hitachi Irradio ITT/Nokia Loewe Magnavox - JVC RX-DP15B | Instructions - Page 164
65 Samsung 39, 40 Schwaiger 61, 64 Siemens 41, 42 Sony 66 Technisat 48 *Ce code est réglé pour la télécommande comme code par défaut JVC. Codes de fabricant pour convertisseur CATV Fabricant Codes General Instrument 29 Hamlin 01, 02, 03, 04, 05 Jerrold 06, 07, 08, 09, 10, 11, 12 - JVC RX-DP15B | Instructions - Page 165
4 EFFECT 2 3 LIVENESS 5 6 TEST 7/P 8 9 CC CONVERTER 10 RETURN THX SURROUND EX / ES / 7.1 0 +10 FM MODE 100+ DSP SURR / VIDEO TV VOL CHANNEL MUTING VOLUME SETUP MENU TEXT DISPLAY DVD MENU SET LIGHT ADJUST MENU EXIT RM-SRXDP20J REMOTE CONTROL A/V CONTROL RECEIVER 3. Appuyez - JVC RX-DP15B | Instructions - Page 166
suivantes: VCR 1 STANDBY/ON EFFECT 1 2 3 LIVENESS 4 5 6 7/P 8 9 10 RETURN 0 FM MODE +10 100+ / REW DOWN REC PLAY TUNING STOP FF/ UP PAUSE CHANNEL 79 • Si vous appuyez sur TV/DBS à l'étape 3, vous pouvez mémoriser des signaux sur les touches suivantes: - En réglant le sélecteur - JVC RX-DP15B | Instructions - Page 167
préréglés sont rétablis et vous pouvez commander à nouveau les appareils JVC. 1. Réglez le sélecteur LEARN/ TRANSMIT (ZONE 1/ZONE 2) sur 6 7/P 8 9 10 RETURN 0 FM MODE +10 100+ TV/VIDEO TV VOL CHANNEL DVD MENU SET Remarques: • Pour commander le téléviseur, le convertisseur CATV ou le tuner - JVC RX-DP15B | Instructions - Page 168
Guide de dépannage Utilisez ce tableau pour vous aider à résoudre les problèmes de fonctionnement quotidiens. Si un problème ne peut pas être résolu, contactez votre centre de service JVC 2. "SURR BACK SP" est réglé sur "NONE". Surround/THX Le mode de reproduction à 7,1 canaux ne peut pas être - JVC RX-DP15B | Instructions - Page 169
). Une très haute tension ou une très faible tension est appliquée à l'appareil ou l'amplificateur de puissance intégré est devenu hors service. La télécommande ne fonctionne pas. La télécommande ne fonctionne pas correctement. Le sélecteur ZONE 1/ZONE 2 n'est pas réglé correctement. Le sélecteur - JVC RX-DP15B | Instructions - Page 170
07% de distorsion harmonique totale. Pendant une opération Surround (Fonction Analog Direct en service): Canaux avant: 120 W par canal, min. RMS, entraînés sur 8 Ω, dBm Rapport signal sur bruit ('66 IHF/'78 IHF) (Fonction Analog Direct en service): PHONO IN (MM): 72 dB/80 dB (à REC OUT) CD IN, - JVC RX-DP15B | Instructions - Page 171
Français Vidéo Sensibilité d'entrée vidéo/Impédance: Vidéo composite: DVD IN, VCR 1 IN, VCR 2 IN, TV SOUND/DBS IN, VIDEO: S-vidéo: DVD IN, VCR 1 IN, VCR 2 IN, TV SOUND/DBS IN, VIDEO: Composantes: 1 IN (DVD), 2 IN, 3 IN 1 V(c-c)/75 Ω (Y: luminance): 1 V(c-c)/75 Ω (C: chrominance, en salve): - JVC RX-DP15B | Instructions - Page 172
VICTOR COMPANY OF JAPAN, LIMITED EN, FR © 2004 VICTOR COMPANY OF JAPAN, LIMITED 0404RYMMDWJEIN - JVC RX-DP15B | Instructions - Page 173
Instructions AUDIO/VIDEO CONTROL RECEIVER RX-DP15B
-
 1
1 -
 2
2 -
 3
3 -
 4
4 -
 5
5 -
 6
6 -
 7
7 -
8
-
9
-
10
-
11
-
12
-
13
-
14
-
15
-
16
-
17
-
18
-
19
-
20
-
21
-
22
-
23
-
24
-
25
-
26
-
27
-
28
-
29
-
30
-
31
-
32
-
33
-
34
-
35
-
36
-
37
-
38
-
39
-
40
-
41
-
42
-
43
-
44
-
45
-
46
-
47
-
48
-
49
-
50
-
51
-
52
-
53
-
54
-
55
-
56
-
57
-
58
-
59
-
60
-
61
-
62
-
63
-
64
-
65
-
66
-
67
-
68
-
69
-
70
-
71
-
72
-
73
-
74
-
75
-
76
-
77
-
78
-
79
-
80
-
81
-
82
-
83
-
84
-
85
-
86
-
87
-
88
-
89
-
90
-
91
-
92
-
93
-
94
-
95
-
96
-
97
-
98
-
99
-
100
-
101
-
102
-
103
-
104
-
105
-
106
-
107
-
108
-
109
-
110
-
111
-
112
-
113
-
114
-
115
-
116
-
117
-
118
-
119
-
120
-
121
-
122
-
123
-
124
-
125
-
126
-
127
-
128
-
129
-
130
-
131
-
132
-
133
-
134
-
135
-
136
-
137
-
138
-
139
-
140
-
141
-
142
-
143
-
144
-
145
-
146
-
147
-
148
-
149
-
150
-
151
-
152
-
153
-
154
-
155
-
156
-
157
-
158
-
159
-
160
-
161
-
162
-
163
-
164
-
165
-
166
-
167
-
168
-
169
-
170
-
171
-
172
-
173
 |
 |

English
Français
LVT1216-002A
[C]
RX-DP15B
AUDIO/VIDEO CONTROL RECEIVER
RECEPTEUR DE COMMANDE AUDIO/VIDEO
INSTRUCTIONS
MANUEL D
’
INSTRUCTIONS