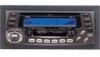
Jensen CM9521 Operation Manual
Jensen CM9521 - CD/Cassette Receiver With Detachable Face Manual
 |
UPC - 043258018601
View all Jensen CM9521 manuals
Add to My Manuals
Save this manual to your list of manuals |
Jensen CM9521 manual content summary:
- Jensen CM9521 | Operation Manual - Page 1
tried to make the instructions in this owner's manual clear and easy to follow. If you take a few minutes to look through it, you'll learn how to use all of the features of your new JENSEN car stereo for maximum enjoyment. Installation 1 Troubleshooting 6 Operation 8 Specifications/Warranty 19 - Jensen CM9521 | Operation Manual - Page 2
CM9521 1. Prepare / Préparation / wiring harness. Desconecte el arnés del cableado. Déconnectez le câblage électrique. 4. Unscrew factory mounting brackets. (Most GM cars only.) Destornille los soportes de montaje hechos en fábrica (Sólo para la mayoría de los carros GM). Dévissez les supports - Jensen CM9521 | Operation Manual - Page 3
blage. Wiring Color Codes Function LF+ Speaker LF- Speaker LR+ Speaker LR- Speaker RF+ Speaker RF- Speaker RR+ Speaker RR- Speaker Power Antenna Ground rojo Batería amarillo Raductor de luz naranja 3 CM9521 Attach wiring adapter to car wiring harness. Una el adaptador de cableado al arn - Jensen CM9521 | Operation Manual - Page 4
CM9521 ® Wiring Diagram / Diagrama de cableado / Schéma de câblage Power Antenna Connect to power antenna or amplifier. If not used, tape bare end of wire. Ground Connect to ground terminal or clean, unpainted part of chassis. Memory/Battery Connect to battery or 12 volt power source that is - Jensen CM9521 | Operation Manual - Page 5
® 3. Final Installation / Instalación final / Installation finale CM9521 5 - Jensen CM9521 | Operation Manual - Page 6
installés, rebranchez la borne négative de la batterie. Troubleshooting / Corrección de Problemas / Dépannage Problem Cause Corrective Action Does not operate (display does not light) No power to yellow wire No power to red wire Black wire 24 / 7 @ www.jensen.com ® Problema Causa Correcci - Jensen CM9521 | Operation Manual - Page 7
® Troubleshooting (continued) / Corrección de Problemas (continuación) / Dépannage (suite) Problème Cause Mesure à prendre L'appareil ne fonctionne pas (l'affichage revienne à la normale Assistance technique : 1 800 323-0221 24 heures par jour, 365 jours par an: www.jensen.com 7 CM9521 - Jensen CM9521 | Operation Manual - Page 8
CM9521 ® you reach a strong signal from an FM station that is broadcasting in stereo. Recepción estéreo / mono Pulse MONO para mejorar la recepción to press the RESET button. Pressing RESET erases memory presets and other control settings. Botón de reset Use la punta de un lápiz (u otro objeto no - Jensen CM9521 | Operation Manual - Page 9
continued) / Operación (continuación) / Fonctionnement (suite) CM9521 Adjust Sound / Ajuste de Sonido / Réglage du radio. Appuyez pour la fixer. 9 Press REL button and pull gently on right side of faceplate. Presione el botón REL y hale suavemente el lado derecho de la placa frontal para retirarla - Jensen CM9521 | Operation Manual - Page 10
CM9521 ® Radio Operation / Operación de la Radio / Fonctionnement de la -le enfoncé pendant plus de deux secondes. Les nouvelles stations remplacent les stations mémorisées pour cette bande. Manual Tuning Press > for less than two seconds to move radio frequency number up or down one step. - Jensen CM9521 | Operation Manual - Page 11
Operacíon de la Casetera / Fonctionnement du lecteur de cassette CM9521 Insert and Eject Tape Push a tape into slot. The continuer la lecture. Change Program (Tape Direction) Press both and (PROG) at the same time to change tape direction and play the other side of the tape. Arrows on the display - Jensen CM9521 | Operation Manual - Page 12
CM9521 ® Fonctionnement du lecteur CD CD Player Operation / Operación del reproductor de la répétition. Random (Play all Tracks) Press RDM to play all tracks on CD in random order one time. RDM appears in the display. Press again to stop random play. Reproducción Aleatoria (Reproducción de Todas - Jensen CM9521 | Operation Manual - Page 13
® CM9521 CD Player Operation (continued) / Operación del reproductor de CD (continuación) / selection of music. Press > to choose the first track of the selection. Press RPT A-B to set this track as the beginning point (A). Press > to choose the last track of the selection. Press - Jensen CM9521 | Operation Manual - Page 14
CM9521 ® du changeur de CD CD Changer Operation / Operación del cambiador de CD / Fonctionnement The CM 9521 is designed to control an optional 6-disc CD changer. / - Jensen CM9521 | Operation Manual - Page 15
Fonctionnement du changeur de CD (suite) CM9521 Scan (Preview all Tracks) Press SCN RDM to play all tracks on CD in random order one time. RDM appears in the display. Press again to stop first track of the selection. Press RPT A-B to set this track as the beginning point (A). Press > - Jensen CM9521 | Operation Manual - Page 16
Wow and flutter (W RMS 0.25% Signal/noise ratio (A weighted 45 dB Stereo separation @ 1 kHz 25 dB CD Player Signal/noise ratio 90 dB Frequency radio/ruido (A ponderado 45 dB Separación estéreo @ 1 kHz 25 dB CM9521 Reproductor de CD Promedio de ruido/señal 90 dB Respuesta en frecuencia 20 Hz - Jensen CM9521 | Operation Manual - Page 17
repair the product, but you must pay any labor costs for the removal and/or installation of the product. If the product is shipped for warranty service, you must prepay the initial shipping charges, but Jensen will pay the return shipping charges if the product is returned to an address inside the
-
 1
1 -
 2
2 -
 3
3 -
 4
4 -
 5
5 -
 6
6 -
 7
7 -
8
-
9
-
10
-
11
-
12
-
13
-
14
-
15
-
16
-
17
 |
 |

Thank you for choosing a JENSEN product. We’ve tried to make the instructions in this owner’s
manual clear and easy to follow. If you take a few minutes to look through it, you’ll learn how to
use all of the features of your new JENSEN car stereo for maximum enjoyment.
Muchas gracias por escoger un producto JENSEN. Hemos hecho lo posible para que las
instrucciones en este manual sean claras y f
á
ciles de seguir. Si se da unos pocos minutos para
leerlo, aprender
á
a usar todos los elementos de su nuevo est
é
reo Jensen para carros para que
pueda disfrutarlo al m
á
ximo.
Nous vous remercions d
’
avoir choisi un produit JENSEN. Nous avons tent
é
de rendre les
instructions de Guide D
’
utilisation claires et faciles
à
suivre. Si vous prenez quelques minutes
pour le parcourir, vous saurez comment utiliser toutes les fonctions de votre nouvel autoradio
st
é
r
é
o Jensen pour en profiter au maximum.
Installation / Instalación
It
’
s a good idea to read all of the instructions before you begin the installation.
Es una buena idea leer todas las instrucciones antes de empezar la instalaci
ó
n
.
Il est recommand
é
de lire toutes les instructions avec de commencer l
’
installation.
•
Torx type, Flat and Phillips screwdrivers
•
Wire cutters and strippers
•
Tools to remove existing radio (screw driver, socket wrench set or other tools.)
•
Electrical tape
•
Crimping tool
•
Volt meter/Test light
•
Crimp connections
•
18 gauge wire for power connections
•
16-18 gauge speaker wire
•
Speaker Requirements: Only connect speakers rated in the load impedance range of 4 to 8 ohms.
Speakers with a load impedance less than 2 ohms could damage the unit.
•
Tipo t
ó
rico, destornilladores de estrella y de cabeza plana
•
Cortadores de alambre y pelacables
•
Herramientas para sacar la radio vieja (destornillador, llaves ajustables u otras herramientas)
•
Cinta aislante
•
Herramienta especial para ajustar conexiones de presi
ó
n
•
Volt
í
metro/Luz de prueba
•
Conectores de presi
ó
n
•
Cable de calibre 18 para conexiones de corriente
•
C
able de calibre 16-18 conector para altoparlantes
•
Requisitos de los altoparlantes: Se debe conectar el componente musical s
ó
lo a altoparlantes que
posean un promedio de carga de impedancia de 4 a 8 ohms. Los altoparlantes con una carga
menor de 2 ohms pueden da
ñ
ar el radio.
•
Tournevis (ordinaire, cruciforme et Torx)
•
Pinces
à
couper et
à
d
é
nuder les fils
•
Outils n
é
cessaires pour enlever la radio existante (tournevis, ensemble de cl
é
s
à
douille ou autres
outils)
•
Ruban isolant
•
Pince
à
sertir
•
Voltm
è
tre / ampoule d
’
essai
•
Connexions serties
•
Fil de calibre 18 pour les connexions d
’
alimentation
•
Fil de calibre 16-18 pour haut-parleur
•
Exigences concernant les haut-parleur: Ne connectez que des haut-parleurs dont l
’
imp
é
dance de
charge varie de 4
à
8 ohms. Des haut-parleurs avec une imp
é
dance inf
é
rieure
à
2 ohms
pourraient endommager le radio.
®
CM9521