Kenmore 6937 Use and Care Guide
Kenmore 6937 - 22.1 cu. Ft. Top Freezer Refrigerator Manual
 |
View all Kenmore 6937 manuals
Add to My Manuals
Save this manual to your list of manuals |
Kenmore 6937 manual content summary:
- Kenmore 6937 | Use and Care Guide - Page 1
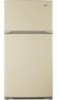
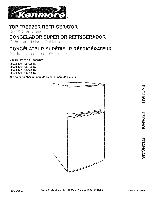
® TOP FREEZER REFRIGERATOR i CONGELADOR SUPERIOR REFRIGERADOR CONGI_LATEUR SUPI_RIEUR REFRIGI_RATEUR Models / Modelos / Mod_les 795.6997_,795.6991_ 795.7997_,795.7991_ 795.6937_,795.6929_ 795.7937_,795.7929_ = - Kenmore 6937 | Use and Care Guide - Page 2
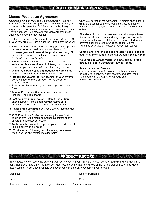
Safety instructions 5-6 Grounding Requirements 6 Parts and Features 7 Refrigerator installation Unpacking Your Refrigerator Plastic Parts Light Bulb Replacement Power Interruptions Vacation and Moving Care About the Automatic Ice Maker Connecting the Water Line Troubleshooting Guide 2O - Kenmore 6937 | Use and Care Guide - Page 3
TOP FREEZER REFRIGERATOR ® Kenrnore Appliance Warranty forte Year Limited Warranty When installed, operated and maintained according to all instructions supplied with the product, if this appliance fails due to a defect in material or workmanship within one year from the date of purchase, call 1-800 - Kenmore 6937 | Use and Care Guide - Page 4
result of mechanical failure of any covered refrigerator or freezer. [] Rental reimbursement if repair of your covered product takes longer than promised. []18% discount off the regular price of any non-covered repair service and related installed parts. Once you purchase the Agreement, a simple - Kenmore 6937 | Use and Care Guide - Page 5
replace immediately all electric service cords that have become frayed instructions before using this appliance. • Use this appliance only for its intended purpose as described in this use and care guide. ° This refrigerator refrigerators with automatic icemakers, avoid contact with the moving parts - Kenmore 6937 | Use and Care Guide - Page 6
not play with the appliance. Child entrapment and suffocation are not problems of the past. Junked or abandoned refrigerators are still dangerous.., even if they will sit for "just a few days". If you are getting rid of your old refrigerator, please follow the instructions at right to help prevent - Kenmore 6937 | Use and Care Guide - Page 7
© Use this section to become more familiar with the parts and features. Page references are included for your convenience. NOTE: This guide covers several different models. The refrigerator you have purchased may have some or all of the items listed below. The locations of the features shown betow - Kenmore 6937 | Use and Care Guide - Page 8
cleaners to remove tape or glue. These products can damage the surface of your refrigerator. For more information, see the Important Safety Instructions section. Refrigerator 4. NEVER install the refrigerator on a platform or a weakly supported structure. 5. Install this appliance in an area where - Kenmore 6937 | Use and Care Guide - Page 9
and the phillips head screw to remove the Middle Hinge Bracket from refrigerator housing (Fig. 4 and 5). Set parts aside. Using 10mm or 13/32-inch socket wrench, remove the 3 bolts and lift off the Top Hinge (see Fig. 2). Set parts aside. Fig. 2 • Lift up door slightly and remove it. Fig. 6 Lift - Kenmore 6937 | Use and Care Guide - Page 10
Fig. 11 REPLACE FREEZER DOOR • Set the freezer door onto the Middle Hinge Pin (Fig. 9). Fig. 9 ELECTRICAL SHOCK HAZARD Before you begin, either unplug the refrigerator or turn off power at the circuit breaker or fuse box. Remove food and any Adjustable Door or Utility Bins from doors Failure to do - Kenmore 6937 | Use and Care Guide - Page 11
3 bolts and lift off the Top Hinge (see Fig. 14). Set parts aside. Fig. 14 Top Hinge Reverse Door Closer/Stop by flipping over off cover on top of refrigerator on left side to uncover screw holes (Fig. 19). • Set freezer door and Top Hinge parts to the side and remove refrigerator door. Fi- 1_' - Kenmore 6937 | Use and Care Guide - Page 12
Fig. 20 and 20a). ° REMOVE base grill. See BASE GRILL INSTRUCTIONS on page 8. • Remove the washer from the Bottom Hinge Pin (Fig. 22). o Using a 1A phillips head screw to remove the Middle Hinge Bracket from refrigerator housing (Fig. 21). Set parts aside. Using 10mm or 13/32-inch socket wrench - Kenmore 6937 | Use and Care Guide - Page 13
bottom with the two screws. Turn door upright. It is now ready for re-attaching. NOTE: The Refrigerator Door Closer/Stop is not used on all models. The model you have may not include this part. Fig. 29 ?? • With flat-head screwdriver, carefully pry off and remove the cover over the screw - Kenmore 6937 | Use and Care Guide - Page 14
(Flange will now be on top) and position on left side of refrigerator and re-attach with two bolts and a Phillips screw. (Fig. 32). • Place refrigerator door down over pin on bottom hinge. (Fig. 32). • Place washer between refrigerator door and middle hinge and re-attach Hinge Pin to Hinge Bracket - Kenmore 6937 | Use and Care Guide - Page 15
right and one on the left. if your refrigerator seems unsteady or you want the doors to close more easily, adjust the refrigerator's tilt using the instructions below: 1. Plug refrigerator power cord into a 3-prong grounded outlet. Move the refrigerator into its final position. 2. Remove the base - Kenmore 6937 | Use and Care Guide - Page 16
are blocked, airflow will be interrupted and temperature and moisture problems may occur. iMPORTANT." Because air circulates between both sections, cover foods tightly. (See the Food Storage Guide section for details.) Note: If you close the refrigerator door forcefully, the freezer door may open - Kenmore 6937 | Use and Care Guide - Page 17
when ice cream is firm. The refrigerator control functions as the thermostat for the entire appliance (refrigerator and freezer sections). The higher the number 24 hours, then re-check FOOD STORAGE GUIDE Wrap or store food in the refrigerator in airtight and moisture-proof material unless otherwise - Kenmore 6937 | Use and Care Guide - Page 18
guide or a reliable cookbook. Packaging Successful freezing depends on correct packaging. Close and seal packages so no air or moisture can pass in or out. If it does, you could have food odor and taste transferred throughout the refrigerator package or container instructions for proper freezing - Kenmore 6937 | Use and Care Guide - Page 19
shelves to fit different heights of items will make finding the exact item you want easier; it will also reduce the amount of time the refrigerator door is open, saving energy. iMPORTANT: Do not clean glass shelves with warm water when they are cold. Shelves may break if exposed to sudden - Kenmore 6937 | Use and Care Guide - Page 20
cover: 1. Remove both crisper drawers. 2. While holding the center crisper cover support in place, pull the cover up and out. To control the humidity racks may be removed for easier cleaning. Door racks are in both the refrigerator and the freezer. The door racks are force-fitted with tabs and - Kenmore 6937 | Use and Care Guide - Page 21
door bins are removable for easy cleaning and adjusting. They have slots in the sides which fit into support slots placed at intervals on refrigerator door. 1. To remove a bin, lift the bin up until it clears the support slots and lift out. 2. To replace a bin, push into door and down onto a set of - Kenmore 6937 | Use and Care Guide - Page 22
cover should only be removed qualified technician. Clean the vents on the back cover. Use a vacuum cleaner with the brush attachment, at least twice a year to keep your refrigerator working efficiently. by a LIGHT BULB REPLACEMENT Electrical Shock Hazard Before replacing a burned-out light bulb - Kenmore 6937 | Use and Care Guide - Page 23
from the defrost pan. 5. Clean, wipe and dry thoroughly. 6. Take out all removable parts, wrap them well and tape them together so they don't shift and rattle during the move. Refer to sections in Using your Refrigerator for removal instructions. 7. Depending on the model, raise the front of the - Kenmore 6937 | Use and Care Guide - Page 24
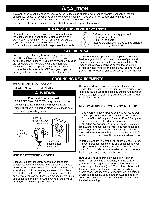
parts of the ejector mechanism, or with the heating element that releases the cubes. DO NOT place fingers or hands on the automatic icemaking mechanism while the refrigerator . Please check your product specifications. OPERATION iNSTRUCTIONS A newly-installed refrigerator may take 12 to 24 hours to - Kenmore 6937 | Use and Care Guide - Page 25
or icemaker manufacturer. Follow these instructions carefully to minimize the risk of expensive water damage. Water hammer (water banging in the pipes) in house plumbing can cause damage to refrigerator parts and lead to water leakage or flooding. Call a qualified plumber to correct water - Kenmore 6937 | Use and Care Guide - Page 26
INSTALLATION INSTRUCTIONS (CONTINUED) 2. CHOOSE THE VALVE LOCATION Choose a location for the L Washer Clamp Screwl_ 6. ROUTE THE TUBING Route the tubing between the cold water line and the refrigerator. Route the tubing through a hole drilled in the wall or floor (behind the refrigerator or - Kenmore 6937 | Use and Care Guide - Page 27
has sand or particles that could clog the screen of the refrigerator's water valve. Install the filter in the water line near the refrigerator. IMPORTANT: Do not use old, worn or used waterlines, only use new for a better use and service. Connect only to the supply of drinking water for your - Kenmore 6937 | Use and Care Guide - Page 28
on the defrost heater during a defrost cycle may cause a sizzling sound. You may hear air being forced over the condenser by the condenser fan. REFRIGERATOR DOES NOT OPERATE Check if... You may hear water running into the drain pan during the defrost cycle. Then... The power supply cord is - Kenmore 6937 | Use and Care Guide - Page 29
box. Gently remove the bulb and reinsert. Then plug in refrigerator and reset the refrigerator control. Either unplug the refrigerator or turn off power at the circuit breaker or fuse box. Replace the old bulb with a new 60 watts appliance bulb with the same size and shape available at your local - Kenmore 6937 | Use and Care Guide - Page 30
. A filter may need to be installed to eliminate taste and odor problems. See CARE AND CLEANING section. Empty and wash bin. Discard old cubes. THERE IS WATER IN THE DEFROST DRAIN PAN Check if... Then... The refrigerator is defrosting. It is more humid than normal. The water will evaporate - Kenmore 6937 | Use and Care Guide - Page 31
cleaning. When you open the door, warmer air enters the refrigerator. As the warm air cools, it can create a vacuum. If the door is hard to open, wait 5 in the refrigerator to avoid moisture accumulation. If necessary, repackage food according to the guidelines in the FOOD STORAGE GUIDE section. - Kenmore 6937 | Use and Care Guide - Page 32
www.sears.com www.sears.ca Our Home For repair of carry-in items like vacuums, lawn equipment, and electronics, call anytime for the location of the nearest Sears Parts & Repair Service Center 1-800-488-1222 (U.S.A.) www.sears.com 1-800-469-4663 (Canada) www.sears.ca To
-
 1
1 -
 2
2 -
 3
3 -
 4
4 -
 5
5 -
 6
6 -
 7
7 -
8
-
9
-
10
-
11
-
12
-
13
-
14
-
15
-
16
-
17
-
18
-
19
-
20
-
21
-
22
-
23
-
24
-
25
-
26
-
27
-
28
-
29
-
30
-
31
-
32
 |
 |
®
TOP
FREEZER
REFRIGERATOR
i
CONGELADOR
SUPERIOR
REFRIGERADOR
CONGI_LATEUR
SUPI_RIEUR
REFRIGI_RATEUR
Models
/
Modelos
/
Mod_les
795.6997_,795.6991_
795.7997_,795.7991_
795.6937_,795.6929_
795.7937_,795.7929_
= color number,
n_mero
de colo_
num_ro
de couleur
tl1
Z
O
t=,
m
cn
z
m
Z_
O
r=,,
"13
Z
m
MFL61920619
Sears, Roebuck
and
Co., Hoffman
Estates, IL 60179 U.S.A.
www.sears.cem
Printed
in Mexico